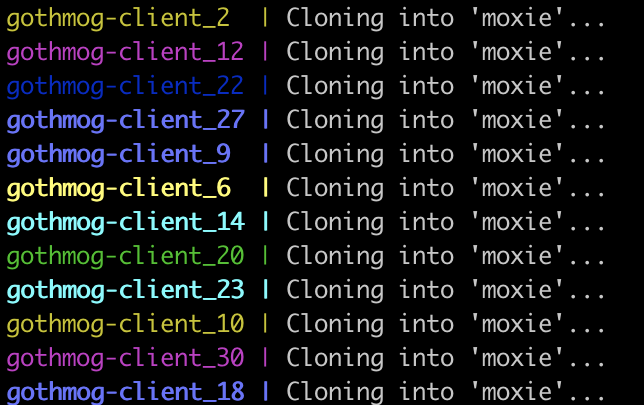
Gothmog is a package consisting of Python and Node.js applications for deploying a simple botnet.
Gothmog consists of three components:
- A Python server that manages the clients through a unified json API.
- A Python client that connects to the server to receive and execute commands.
- A Node.js server that provides a simple interface for interacting with the server.
The Python API and client are built using Python 3, and have distinct requirements.txt files in their respective folders. Each folder has a setup.sh file that can be run to automatically create a virtual environment, and install their required packages. If you don't want a virtual environment, have problems with the installation, or simply want to install the packages yourself, you can navigate to the folder of the component you want to install, then run pip install -r requirements.txt.
The web UI is built with Node.js, and can be installed using npm install in the web folder of the repository. This should take care of installing all necessary dependencies.
After installation, there are some things that may need to be adjusted for your local environment.
In the client folder, you may want to customize the log file used by the client. By default, logs are stored in a file called app.log in the same directory as the client code. This can be changed in the config.py file in the client folder.
In the server folder, you can similarly change where server logs are output. Additionally, the server has some built-in access control for certain functionality, such as issuing new commands to the clients. By default, it allows the following local address ranges:
- 127.0.0.0/8
- 10.0.0.0/8
- 172.16.0.0/12
- 192.168.0.0/16
These values can be removed if necessary by editing the __init__ function in the HostDict class. If you want to add additional allowed ip addresses, you can create a file called allowed_addresses.txt in the server folder, and write additional host subnets for the server to load. These should be in the form of X.X.X.X/X. If you did not run the setup.sh script in the server folder, you will additionally need to make the server/apps/files/uploaded_files directory, as this is where the server saves uploaded files to.
In the web folder, you will need to make some changes to the settings object in settings.js. If the site_url is not changed, the web UI simply will not work correctly. This value should reflect the full address where the web UI is hosted, e.g. http://127.0.0.1. This value is what is used in the template for rendering links on the webpage. You can optionally enable TLS by changing https to true, and changing the value of each ssl_* variable to the appropriate path. The api_url is used for templating the web UI to point to the appropriate address. If api_url is not set, it will default to the same address as the API, but on port 8080.
Before attempting to run each component, please be sure you have at least read through the Initial Setup section to ensure that you do not run into any problems.
Launching the client locally is simple, simply activate your virtual environment as necessary, then run python main.py <api_url> <op_name>. The api_url should include the appropriate protocol and port as necessary, e.g. http://127.0.0.1:8080. The op_name can be any string that contains only alphanumeric characters, dashes, and underscores. This allows a single API server to run multiple concurrent ops for different users.
If the client is launched using Docker, it expects environment variables API_URL and OP_NAME, otherwise it will default to the host machine on port 8080, and default_op respectively for these values. If you are running the client locally, and using the web UI's convenience buttons for downloading, these files will be saved to /app/downloads, so please be sure you have this directory available.
The API server uses waitress to serve the application, and server.sh will launch this for you. Waitress by itself doesn't support HTTPS, so if you want to encrypt the traffic, you will have to set it up behind a reverse proxy. By default, the server.sh script will launch the API on port 8080, but this can be changed by passing it the -p or --port argument, e.g. ./server.sh -p 9090. When run with docker, this runs on port 8080 in the container. If you are using docker-compose, you can use the environment variable API_PORT to choose what port is forwarded to port 8080 on the container. If you are not using docker-compose, you can simply specify which port will be forwarded yourself, just make sure it is being forwarded to port 8080 on the container.
The web UI is also easy to launch, simply enter the web folder and run node app.js to launch. By default, the web server runs on port 80, but this is changed in the settings.js file, not by passing arguments at runtime. When run with docker, it instead runs on port 8080 in the container. If you are using docker-compose, you can use the environment variable WEB_PORT to choose what port is forwarded to port 8080 on the container. If you are not using docker-compose, you can simply specify which port will be forwarded yourself, just make sure it is being forwarded to port 8080 on the container.
As mentioned before, the web UI was built to hopefully be intuitive to use. In the top left corner is a dropdown menu to choose the op that you want to work with. Initially, none are selected, so you will need to select one to make use of any of the functionality. If you have not already created an op, you can do so with the button right below the dropdown menu.
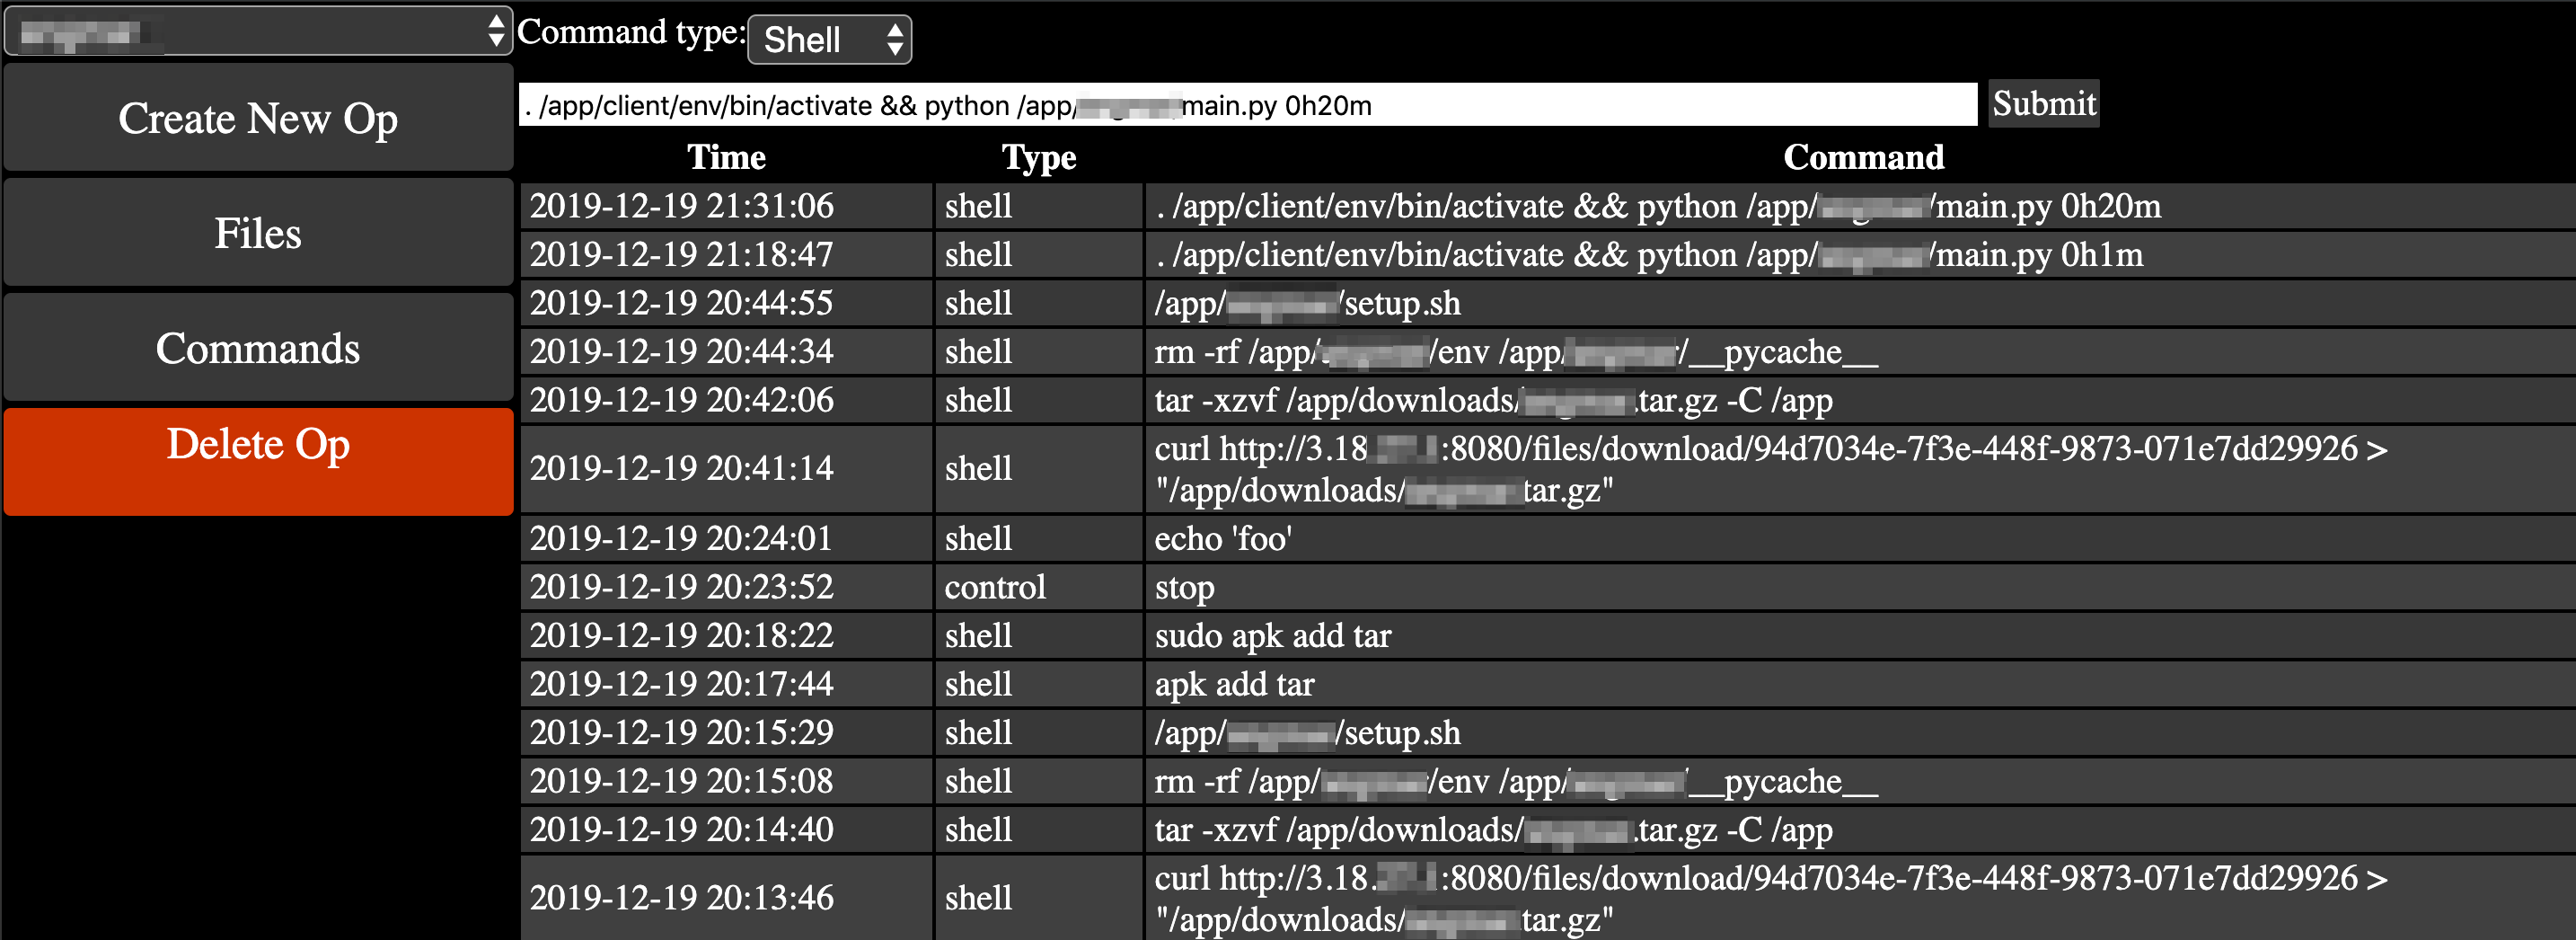
Upon selecting an op, you will be taken to the command screen. Here, you can select the type of command you want to issue, and see previously issued commands, sorted by recency. Again, there's a dropdown menu for the command type, and you can choose between shell, python, and control.
Shell commands are run with Python's os.system() function, and behaves as though you were actually using a shell on the machine. These are run as the user running the python script, so keep this in mind if you are planning to run commands with sudo, or that otherwise might require elevated privileges. The docker containers are not run as root, and are alpine linux images, so be aware that their shell functionality may be quite limited. They were originally designed with the intent of running python scripts concurrently, so not much is installed on them.
Python commands run raw python that is input into the text box. This feature is still in development, and currently only supports one-liners in the web UI. Behind the scenes, it uses python's exec() function to run the code. If you were to send custom requests to the API endpoint, you could increase your mileage with this. However, if you are using the web interface, I recommend sending files to the clients and using shell commands to execute those files instead.
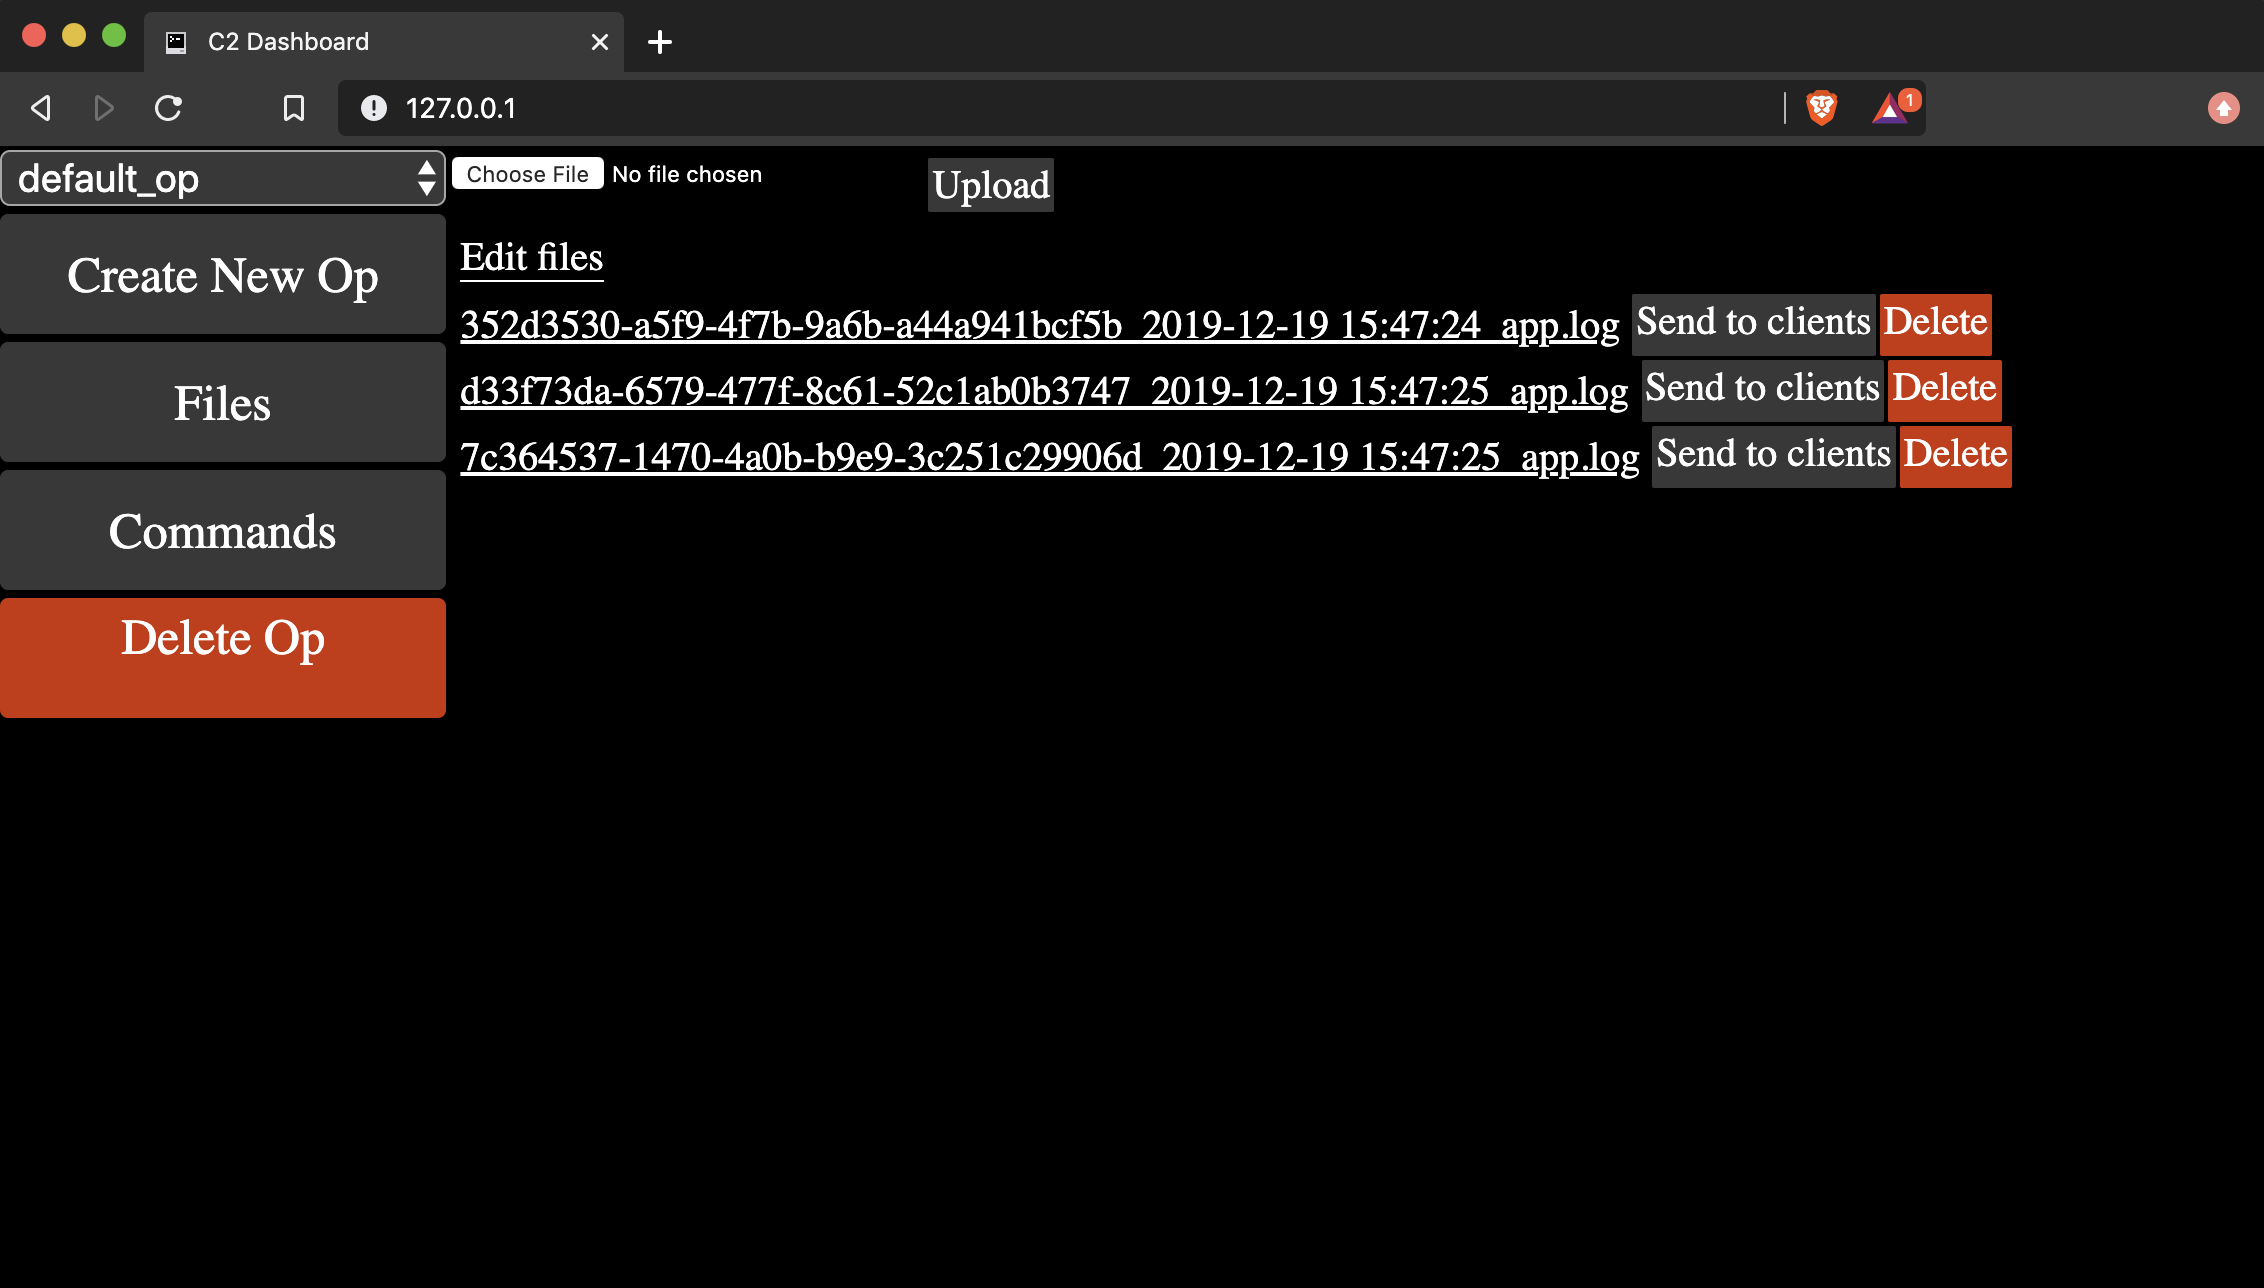
Control commands are miscellaneous functions for the bots that have specific useful behavior. Right now only two exist: stop and logs. The former halts the client, by telling the client script to call python's exit() function. The latter tells clients to upload their log files to the server for inspection.
There is also a Files section on the web UI. If you navigate to this section, you will be able to upload and download files to and from the server, as well as issue commands to the bots to download specific files using a convenience button. This is where you can find the clients' log files when you request them, as well as a location where you can upload scripts for the clients to download. For example, you might upload a tarball with a handful of python scripts, then navigate to the Commands page to tell the client what to do with those files. When clients download files using the convenience buttons on this page, they save them to /app/downloads for consistency. The convenience button is simply a way to issue a shell command instructing the bots to download the files from the server to a specific folder, so it will show up in the command history. It's worth noting that the files that are displayed are only files associated with the selected op, so be aware of this when you are working with multiple ops simulatenously.
Finally, when an op is selected, there is a Delete Op button. This will delete the op from the database, as well as its command history. Files are not deleted using this button, so be sure to delete them in the Files interface beforehand if you need to. If files are not deleted beforehand, and you create a new op with the same name, the old files will show up for that new op.
This code is not designed to be used for unauthorized activity, it is intended to be used as a testing tool in environments where you are authorized to do so. It may be useful for simulating network load, small-scale stress testing, multi-device orchestration, or automation activities. Quite frankly, if you're hoping to deploy this to perform a DDoS, you'd be better off finding something else because deploying this at scale may be costly.


