Simple module that supports displaying Zendesk Chat within a React Native Application.
This library assumes you're familiar with Zendesk's Official Documentation: iOS and Android.
- For Zendesk Chat v2 use version >= 0.4.0 (this requires RN 0.59 or later!)
- For RN version >= 0.59 use version >= 0.3.0 (Zendesk Chat v1)
- For RN version < 0.59 use version <= 0.2.2 (Zendesk Chat v1)
With npm:
npm install react-native-zendesk-chat --save
or with yarn:
yarn add react-native-zendesk-chat
- Setup Native Dependencies
iOS If you're on react-native >= 0.60 and you have Cocoapods setup, then you just need to:
$ yarn install # and see if there are any errors
$ (cd ios; pod install) # and see if there are any errors
 # -- you may need to do `pod install --repo-update`
If you're on older react-native versions, please see the Advanced Setup section below
Android If you're on react-native >= 0.60, Android should autodetect this dependency. If you're on 0.59, you may need to call react-native link
- Call the JS Initializer:
import ZendeskChat from "react-native-zendesk-chat";

// Once in your application:
ZendeskChat.init("YOUR_ZENDESK_ACCOUNT_KEY");

// Optionally specify the appId provided by Zendesk
ZendeskChat.init("YOUR_ZENDESK_ACCOUNT_KEY", "APP_ID_PROVIDED_BY_ZENDESK");- Show the Chat UI
// On button press, when you want to show chat:
ZendeskChat.startChat({
	name: user.full_name,
	email: user.email,
	phone: user.mobile_phone,
	tags: ["tag1", "tag2"],
	department: "Your department",
	// The behaviorFlags are optional, and each default to 'true' if omitted
	behaviorFlags: {
		showAgentAvailability: true,
		showChatTranscriptPrompt: true,
		showPreChatForm: true,
		showOfflineForm: true,
	},
	// The preChatFormOptions are optional & each defaults to "optional" if omitted
	preChatFormOptions: {
		name: !user.full_name ? "required" : "optional",
		email: "optional",
		phone: "optional",
		department: "required",
	},
	localizedDismissButtonTitle: "Dismiss",
});To optain your zendesk account key see the instructions in Initializing the SDK in the Zendesk SDK.
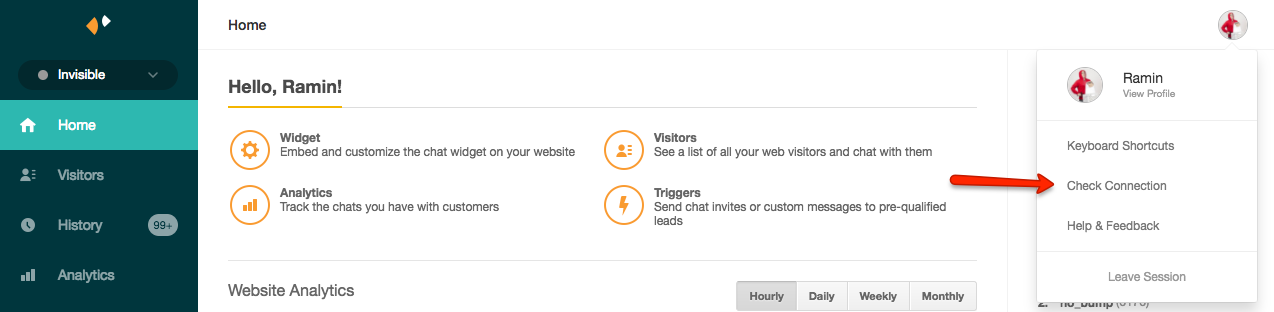
To get your account key, follow these steps:
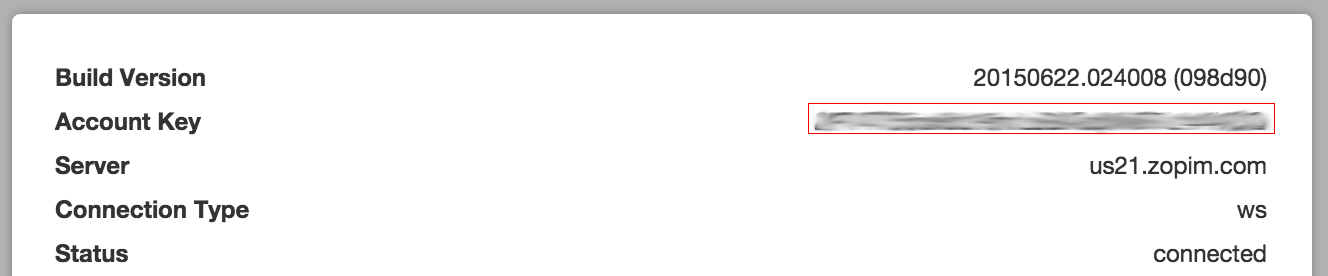
- In the Zendesk Chat Dashboard, click on your profile in the upper right corner and click on the 'Check Connection' option:
- In the dialog, copy the account key value
Changing the UI Styling is mostly achieved through native techniques.
On Android, this is the official documentation -- and an example might be adding these 3 lines to your app theme
While on iOS, the options are more minimal -- check the official doc page
From react-native-zendesk-chat <= 0.3.0
To migrate from previous versions of the library, you should probably remove all integration steps you applied, and start over from the Quick Start.
The JS API calls are very similar, with mostly additive changes.
Advanced users, or users running on older versions of react-native may want to initialize things in native.
If you're on iOS < 0.60, you may need to manually install the cocoapod:
Add a reference to your Podfile:
pod 'RNZendeskChat', :git => 'https://github.com/taskrabbit/react-native-zendesk-chat.git'
then run pod install: (cd ios; pod install)
or manually:
In Xcode, drag and drop node_modules/react-native-zendesk-chat/RNZendeskChat.m and node_modules/react-native-zendesk-chat/RNZendeskChat.h into your project.
#import <ZDCChat/ZDCChat.h>

// ...

// Inside the appropriate appDidFinishLaunching method
[ZDCChat initializeWithAccountKey:@"YOUR_ZENDESK_ACCOUNT_KEY" appId:"YOUR_ZENDESK_APP_ID"];

// And access other interesting APIsIf you're on react-native < 0.60, you should be able to call react-native link.
If this doesn't work, then you may need to do a complete manual install as follows:
- Open up
android/app/main/java/[...]/MainApplication.java
- Add
import com.taskrabbit.zendesk.*;to the imports at the top of the file - Add
new RNZendeskChatPackage(this)to the list returned by thegetPackages()method
- Append the following lines to
android/settings.gradle:
include ':react-native-zendesk-chat'
project(':react-native-zendesk-chat').projectDir = new File(rootProject.projectDir, '../node_modules/react-native-zendesk-chat/android')- Insert the following lines inside the dependencies block in
android/app/build.gradle:
For RN >= 0.60:
dependencies {
	//
  api group: 'com.zendesk', name: 'chat', version: '2.2.0'
  api group: 'com.zendesk', name: 'messaging', version: '4.3.1'
also in project build.gradle
Add gradle maven { url 'https://zendesk.jfrog.io/zendesk/repo' }
For RN < 0.60:
compile project(':react-native-zendesk-chat')- Configure
Chatinandroid/app/main/java/[...]/MainActivity.java
// Note: there is a JS method to do this -- prefer doing that! -- This is for advanced users only.

// Call this once in your Activity's bootup lifecycle
Chat.INSTANCE.init(mReactContext, key, appId);- Pull Requests are encouraged!
- Be respectful!
- The trunk branch of this repo is called
main
React Native Zendesk Chat is MIT licensed, as found in the LICENSE file.