作者:鲍丹
2024-6-5
在二次开发中,可能发现框架、产品提供的功能需要个性化。一种方法是修改原有的框架和产品源码。另一种方法是使用spring的机制实现不改框架、产品源码,进行插件式开发。
修改原有框架或产品源码会导致版本分支过多,难以维护。
插件式开发的优点是:不用修改框架、产品源码,无需关心版本分支,无需进行全量测试。只需要对插件进行测试。
ConditionalOnMissingBean的使用场景是:底层框架提供了一个默认Bean实现(注意这个底层框架必须是独立的jar包)。上层应用觉得框架提供的Bean不满足需求,需要在自己的工程中用自己应用中的Bean。
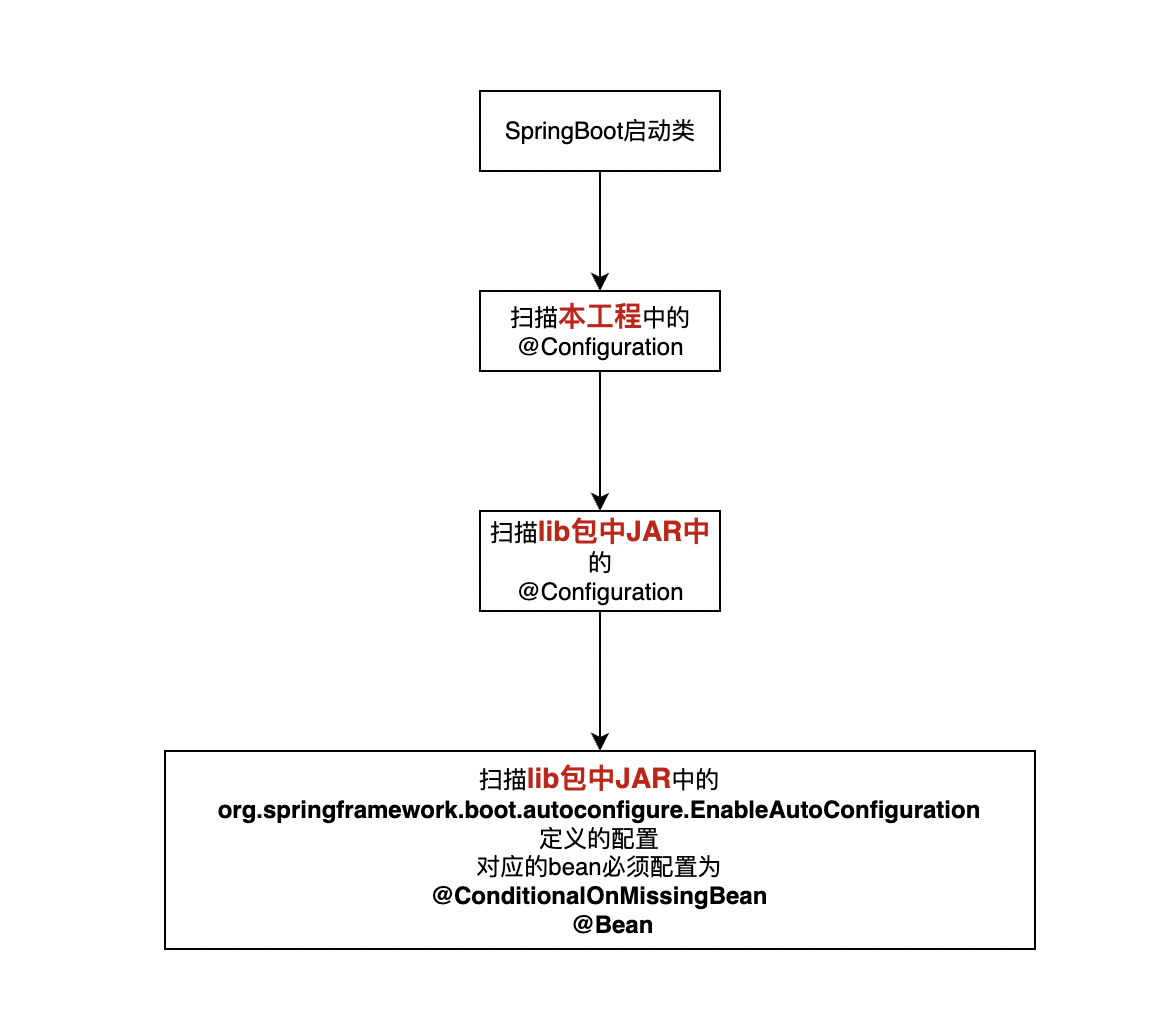
SpringBoot启动时扫描的顺序如下
首先扫描本工程的@Configuration定义的bean。
然后扫描lib包中的@Configuration定义的bean。
最后扫描lib包中的@ConditionalOnMissingBean,并且这个bean不能用@Configuration进行注解,必须在resources/META-INF/spring.factories中,用org.springframework.boot.autoconfigure.EnableAutoConfiguration 来进行注释。
注意,@Configuration和AutoConfiguration ,不是同一种东西!
注意,@Configuration和AutoConfiguration ,不是同一种东西!
注意,@Configuration和AutoConfiguration ,不是同一种东西!
-
在一个独立的API工程中,定义一个公共接口Service 例如 DemoBeanInter
package org.example.api;

public interface DemoBeanInter {
    String sayHello();
}
-
在独立的框架类工程中,定义一个默认实现 例如DemoBean
package org.example.defaultimpl;

import org.example.api.DemoBeanInter;
public class DemoBean implements DemoBeanInter {
    @Override
    public String sayHello() {
        return "Hello World!";
    }
}
-
定义这个Bean的Configuration配置类,但是不能使用@Configuration。
package org.example.defaultimpl;

import org.example.api.DemoBeanInter;
import org.springframework.boot.autoconfigure.condition.ConditionalOnMissingBean;
import org.springframework.context.annotation.Bean;
import org.springframework.context.annotation.Configuration;


public class DefaultBeanConfiguration {
    @ConditionalOnMissingBean
    @Bean
    public DemoBeanInter conditionInstance(){
        return new DemoBean();
    }
}
-
一定要在这个独立架构类工程中的resources目录中指定spring.factories,这个factories指向DefaultBeanConfiguration
org.springframework.boot.autoconfigure.EnableAutoConfiguration=\
  org.example.defaultimpl.DefaultBeanConfiguration
-
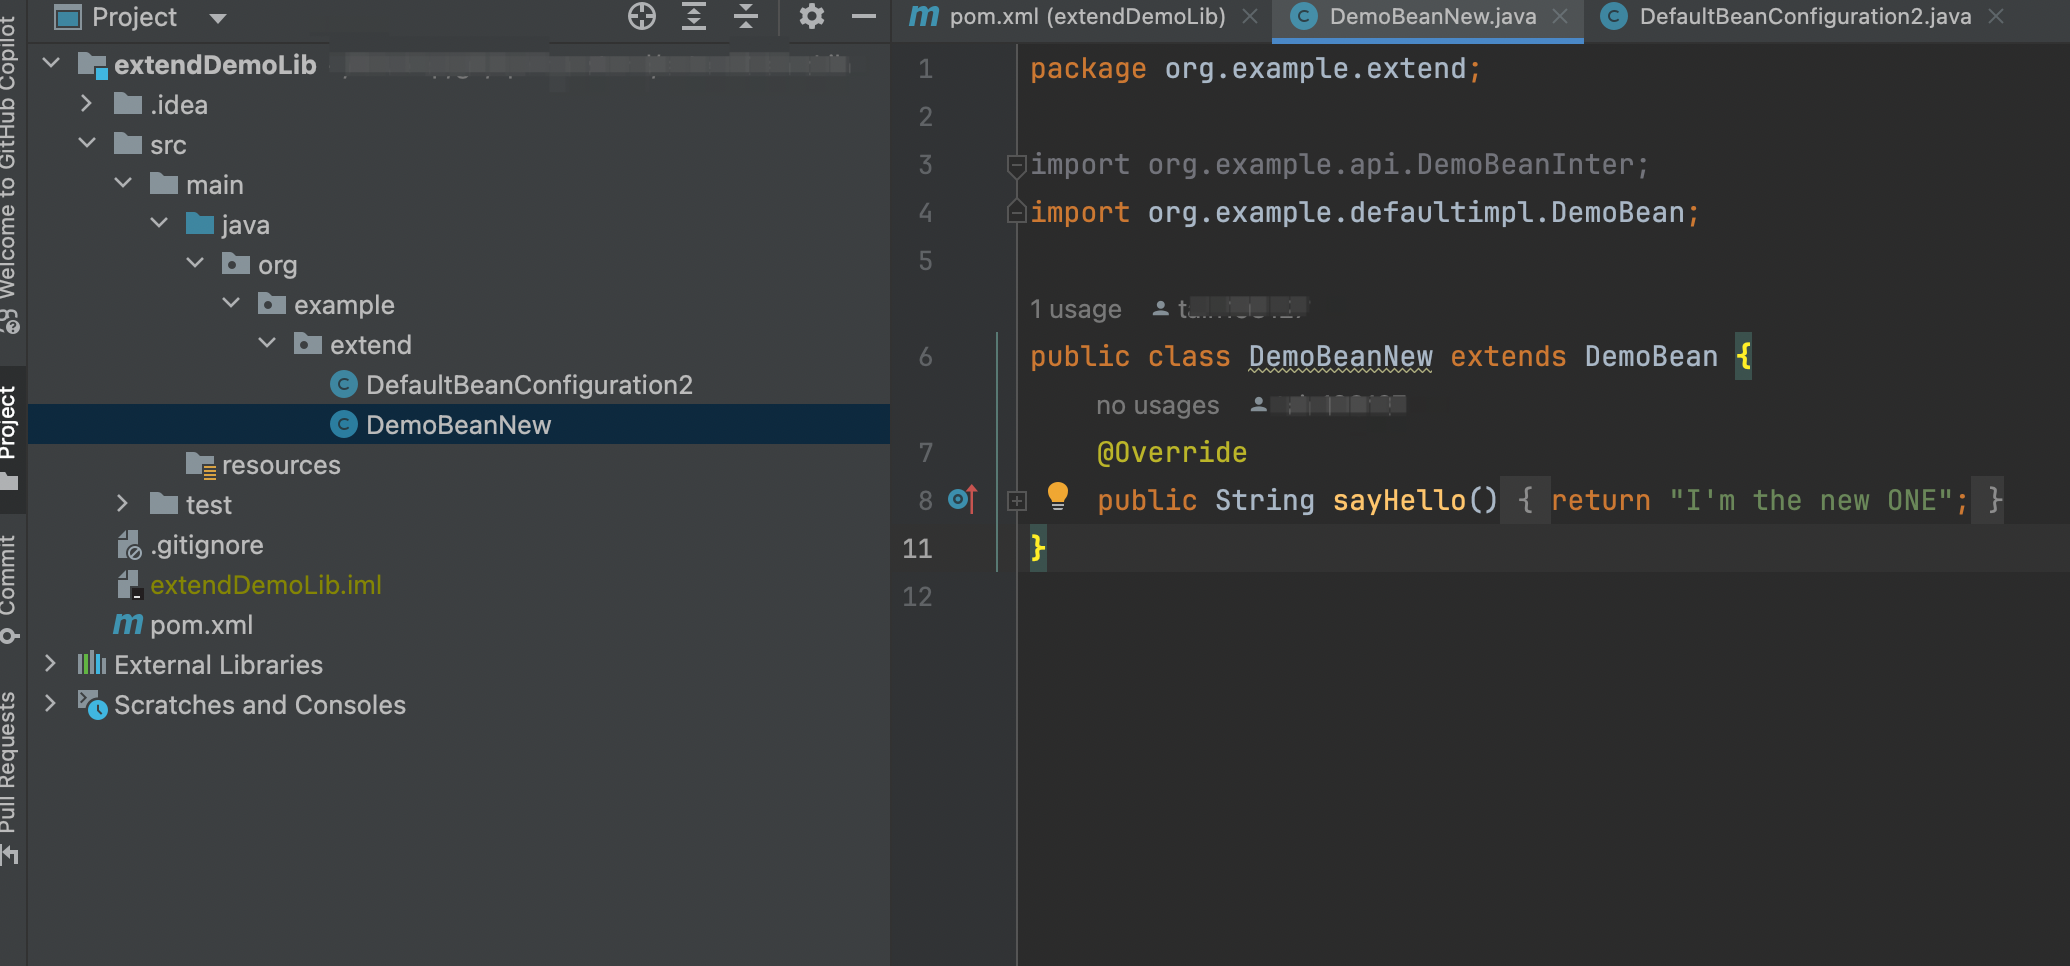
定义一个新的类
package org.example.extend;

import org.example.api.DemoBeanInter;

public class DemoBeanNew implements DemoBeanInter {
    @Override
    public String sayHello() {
        return "I'm the new ONE";
    }
}
- 定义这个类的装配类,注意直接使用@Configuration
package org.example.extend;

import org.example.api.DemoBeanInter;
import org.springframework.context.annotation.Bean;
import org.springframework.context.annotation.Configuration;

@Configuration
public class DefaultBeanConfiguration2 {
    @Bean
    public DemoBeanInter defaultInstance() {
        return new DemoBeanNew();
    }
}
-
直接在controller中引用即可
package org.example;

import org.example.api.DemoBeanInter;
import org.springframework.beans.factory.annotation.Autowired;
import org.springframework.web.bind.annotation.GetMapping;
import org.springframework.web.bind.annotation.RestController;

import javax.annotation.Resource;

@RestController("/")
public class DemoController {
    @Resource
    private DemoBeanInter bean;

    @GetMapping("/hello")
    public String hello() {
        return bean.sayHello();
    }
}
-
记得在@SpringBootApplication中要scanBasePackages对应的packages。不然GG
package org.example;

import org.springframework.boot.SpringApplication;
import org.springframework.boot.WebApplicationType;
import org.springframework.boot.autoconfigure.SpringBootApplication;

/**
 * Hello world!
 */
@SpringBootApplication(scanBasePackages = "org.example")
public class App {
    public static void main(String[] args) {
        SpringApplication springApplication = new SpringApplication(App.class);
        springApplication.setWebApplicationType(WebApplicationType.SERVLET);
        springApplication.run(App.class, args);
    }
}
上述的方法没有问题,但是还需要在主应用中使用maven的pom.xml引用@Configuration新定义的bean。有没有扩展性更好的方法?
有!!!!!!
使用PropertiesLanuncher!!!
首先,在因公的pom中使用spring-boot-maven-plugin,定义layout为ZIP
<plugin>
    <groupId>org.springframework.boot</groupId>
    <artifactId>spring-boot-maven-plugin</artifactId>
    <version>2.7.18</version>
    <configuration>
        <mainClass>org.example.App</mainClass>
        <includeSystemScope>true</includeSystemScope>
        <layout>ZIP</layout>
    </configuration>
    <executions>
        <execution>
            <id>repackage</id>
            <goals>
                <goal>repackage</goal>
            </goals>
        </execution>
    </executions>
</plugin>
注意,此时并没有dependes上并没有引入二次开发要覆盖的bean的pom依赖。
编译出来的jar包名称是:extendDemoApp-1.0-SNAPSHOT.jar
假设此时已经把二次开发要用的bean写好了。
其中的DefaultBeanConfiguration2就是一个普通的@Configuration
java -jar -Dloader.path=../extendDemoLib/target target/extendDemoApp-1.0-SNAPSHOT.jar 其中-Dloader.path指向的就是我们的二开jar包所在的路径。

