Blaze is a fluid solver and renderer running entirely on the GPU. Our framework avoids expensive memory transfers between host and device by only allocating grid information on the device which leads to remarkable performance gain in practice. Blaze can be configured with scene descriptions generated using a minimalist user interface for a simple and yet powerful fluid workflow.
- Scene Description
- User-friendly Houdini Digital Asset to generate novel scenes
- JSON scene descriptions (.blz)
- Custom binary file format for efficient particle sourcing (.part)
- Simulation
- Particle-to-grid sourcing using cubic pulse
- Gauss-Seidel red-black parallel solve
- Staggered grids for more accurate differentiation
- Tricubic interpolation
- Third order Runge-Kutta Semi-Lagrangian advection
- Solid walls and free surface boundary conditions
- Wind force at domain boundaries support
- Procedural curlnoise turbulence
- Vorticity confinement
- Rendering
- Approximated multiple scattering of emission based on convolution
- Shader with color ramp to remap the temperature grid as emission colors
- Spectrally varying scattering coefficient (wavelength dependency)
- Multiple directional lights support
- OpenEXR, PNG and PPM output file format
💥 Blaze was developed on Linux Fedora 31 using the CUDA Toolkit 10.2. It was not compiled nor tested on any other platform or hardware and might require some modifications to run in a different environment.
In order to make the build process as straightforward as possible, we let Nsight Eclipse take care of generating the makefiles based on our hardware and environment. Nsight is part of the CUDA Toolkit and can be downloaded here: CUDA Toolkit Downloads.
From Nsight it is possible to choose New > CUDA C/C++ Project, name the project "Blaze" and uncheck Use default location to point to the location of the previously cloned Blaze repository on disk. You should be able to click next and then finish from here.
If you want the match the performance obtained in the paper you need to right-click on the project, then go to Properties > Build > Settings > Tool Settings > Debugging where you should uncheck all options. Next got to Properties > Build > Settings > Tool Settings > Optimization and check Make use of fast math as well as setting the Optimization Level to Optimize most (-O3).
From there you can simply right-click on the project and select Build Project. This will create a Debug directory containing the Blaze executable.
💥 Download the .part files: The geo directory only contains a README file with links to download the appropriate particle source files. Those are separated from the git repository because of their large size and are required to run the provided demo scenes as indicated in the next steps. See the README in the geo folder before moving to the next step.
Once you have the particle files available on disk, you can launch a Blaze simulation + render from the Debug directory by running the following command in a terminal:
$ ./Blaze ../scenes/<sceneFile.blz>If you want to log a trace of the execution you can also add the -l flag:
$ ./Blaze -l ../scenes/<sceneFile.blz>The rendered files will be written to a path relative to the .blz scene location on disk. This relative path is defined from the HDA and stored in the .blz scene file.
To create a new scene from scratch you will need to first install the free version of Houdini: Houdini Apprentice Downloads.
From there, you can open the provided Houdini scene in the houdini directory of the repository: Blaze_demoScenes_v01.hipnc. This should automatically pick up the provided HDA: BlazeSceneExport.hdanc. You can then navigate to any of the subnets to see how a basic Blaze scene can be created.
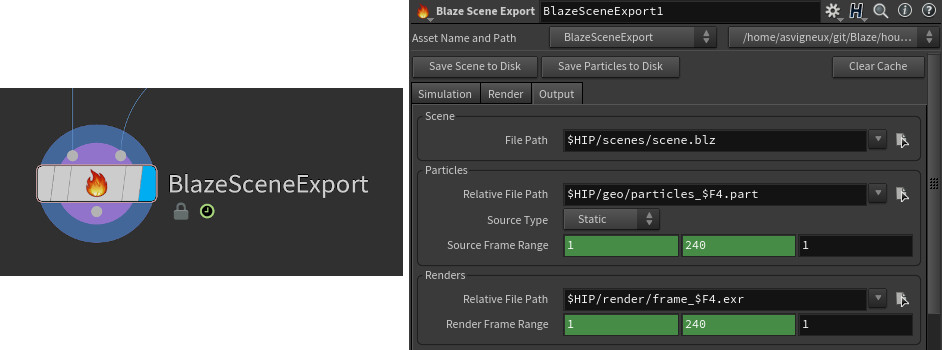
The scene creation and particle caching are handled by the HDA node at the end of each network.
💥 Not production-ready: Blaze was built as a prototype and is therefore not doing proper user input validation and exception handling.
If you have some experience using Houdini, the demo scenes should be enough to give you a good grasp of how things work. When you are done defining the new scene, you need to click on Save Scene to Disk to write the .blz file as well as Save Particles to Disk to write the .part files. At that point, you can launch your simulation and render as described in the section above.
Enjoy!
- Robert Bridson - Fluid Simulation for Computer Graphics
- Benedikt Bitterli - Incremental Fluids
- Roger Allen - Ray Tracing in One Weekend in CUDA
- OpenVDB - Open Volume DataBase
- PVR - Production Volume Rendering

