Sonoff Homekit
This firmware makes the Sonoff WIFI Smart Switch compatible with Apple Homekit!
![]()

Homekit runs on the Sonoff ! 😳
Unlike other projects on github, this firmware does NOT require anything else in order to work. It is not based on the Tasmota Fw, you don't need HomeBridge running on a Raspberry-Pi or an MQTT server, since HomeKit runs natively are enough a Wi-Fi connection and an Apple Device!
The implementation use Apple provided specifications for developers, so it is a stable and supported software and it will keep working for a long time.
Now you finally can have a HomeKit devices without spending a lot of money!
Compatible Devices
This Software is currently tested on: Sonoff Basic, Sonoff Slampher, Sonoff S26 (thanks Arjan)
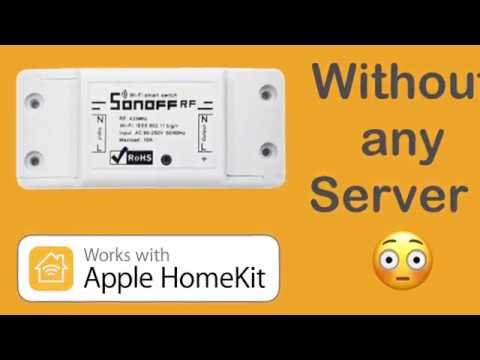
Video Demo
Click on the image for play the video:
New Functionalities
Web Page Controller
To control your Sonoff from a non-Apple device just navigate to the Sonoff IP address and a web page will allow you to turn it on or off
Rest APIs
A full set of Rest APIs are available:
- /on
- /off
- /toggle
- /state
All the request are in GET and are relative to the IP address of the Sonoff.
In order to turn on the Sonoff at IP 192.168.0.22 you can: $ curl 192.168.0.22/on
AutoReconnect after power outage
A problem with the old firmware was that after a power outage the Sonoff immediately began searching for the stored WIFI connection, but if the router had not yet powered on, the Sonoff started its configuration procedure. This problem is now fixed; if the Sonoff does not have a WIFI Connection for over ten minutes the Sonoff will restart.
Selectable PowerOn state
By default the Sonoff will have an Enabled state at power on, you can change this by selecting "OFF" in the flash.sh script
Build Instructions
Follow the esp-homekit-demo build instructions. Dockerfiles for esp-open-sdk and esp-open-rtos are provided for convenience. Here is a summary of the steps:
- Clone the repositories:
git clone https://github.com/stockhuman/Sonoff-Homekit.git
git clone --recursive https://github.com/SuperHouse/esp-open-rtos.git
git clone --recursive https://github.com/maximkulkin/esp-homekit-demo.git- Build Docker images:
cd Sonoff-Homekit
docker build . -f esp-sdk-dockerfile -t esp-sdk
docker build . -f esp-rtos-dockerfile -t esp-rtos- Setup SDK enviroment variable:
export SDK_PATH=$(dirname "$(pwd)")/esp-open-rtos- Copy source code to
esp-homekit-demofolder:
cp -R ./sonoff_advanced ../esp-homekit-demo/examples/- Compile (make sure you adjust the
POWER_ON_STATEvariable inpoweronstate.haccordingly before this step):
cd ../esp-homekit-demo
docker run -it --rm -v "$(pwd)":/project -w /project esp-rtos make -C examples/sonoff_advanced all
You should now see a sonoff.bin file in the esp-homekit-demo/examples/sonoff_advanced/firmware folder.
- Copy the firmware back for flashing:
# Adjust the "_ON" / "_OFF" suffix to reflect your `POWER_ON_STATE` choice on step 5.
cp examples/sonoff_advanced/firmware/sonoff.bin ../Sonoff-Homekit/firmware/Sonoff_OFF.bin
You should be ready for flashing the new firmware. Also, you will need the bootloader files which you can get here or compile yourself if you feel adventurous.
Installation Instructions
Prepare the hardware
- Before flashing, check out these hardware preparation instructions. Note, it may take more than the recommended 3 seconds to boot into flash mode. Holding the button down for for up to 5 seconds reliably boots the device into the appropriate state.
- Setup your serial port environment variable:
# you can run this command to find the name of your USB device
ls /dev/tty.*

export ESPPORT=/dev/tty.YOUR_PORT- Backup your current firmware. You can do this using esptool:
python -m pip install esptool

# Backup
python -m esptool --port $ESPPORT read_flash 0x00000 0x100000 fwbackup.bin
Flash the Sonoff
- Unplug your sonoff from the power line (or you can burn your PC)
- Connect your Sonoff to a serial adapter @ 3.3v and hold down the button to be able to flash your sonoff
- Run the
flash.shscript - Unplug sonoff
- Connect sonoff to the power line again
Add Sonoff to Home app
- Connect your iPhone or iPad to the new wifi network
Sonoff Switch-xxx - Wait for the Captive Portal and select your WiFi network
- Insert your WiFi Password
- Open the
Homeapp - Click the
+symbol - Click
I don't have the code... - Select the Sonoff-xxx Switch 7.1 If the Sonoff-xxx does not appear on top of the page try to press the sonoff button a couple of times and kill the Home App
- Confirm that you want to add the Sonoff
- Insert the Password that is
11111111
Done! 🎉
If you like this project please:

My supporters will also receive immediately:
- A Step-by-Step Video Tutorial that will help you to flash and connect your Sonoff
- A personal E-Mail where you can write to me your Issues
Special thanks to:
@maximkulkin
This project would not have existed without: https://github.com/maximkulkin/esp-homekit https://github.com/maximkulkin/esp-homekit-demo https://github.com/maximkulkin/esp-wifi-config