This repository contains the test data and the notebooks for the paper 'A hitchhiker's guide to statistical analysis of non-targeted LC-MS/MS data'
The result files of the notebook can be found in the Google Drive:
MASSIVE Datasets from which all the files were selected for MZmine3 :
MSV000082312 and MSV000085786
This Notebook can be also executed using Google Colab, a cloud environment for running Jupyter Notebooks. It is commonly used with Python and comes pre-installed with all essential Python packages. However, we can also run Colab with R Notebooks. Basic requirement for using Colab is to have a google account. No extra installation in your computer is needed as such for Jupyter Notebook. To execute our notebook in Colab:
In Colab, before starting to run this notebook with your own data, save a copy of this notebook in your own Google Drive by clicking on File → Save a copy in Drive. You can give whatever meaningful name to your notebook. You can find this newly created file under the folder 'Colab Notebooks' in your Drive.
Although Colab is a Jupyter Notebook environment, Colab is different from Jpyter Notebook in loading files and writing the output files.
Since Colab does not come pre-installed with R packages (or libraries), when running our R Notebook in Colab, we need to install the packages every time we run the notebook and the installation might take some time. However, direct Jupyter Notebook users need to install it only once as it is installed locally.
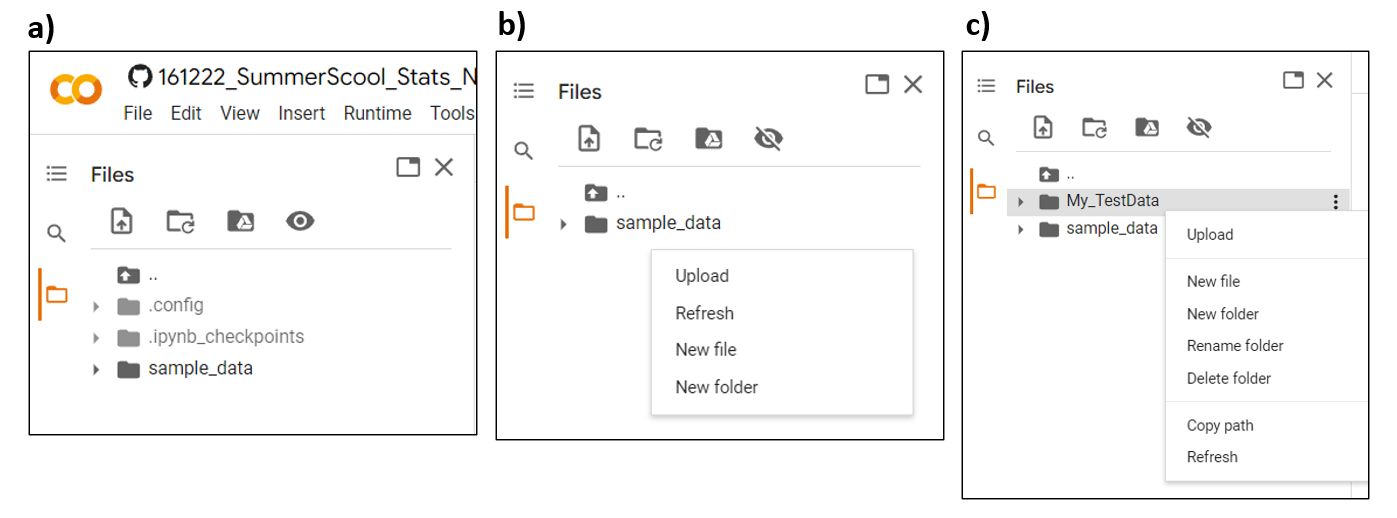
- Unlike Jupyter Notebook, it is not possible to access the files from your local computer in a Google Colab space as it is cloud-based. So we can directly upload the necessary files into the Colab using the 'Files icon' on the left corner of your Colab space as shown in the image (a).
- In order to keep our data organised, we can create a new folder called 'My_TestData' in the Colab space by right clicking on the white space as shown in image (b). We can set this new folder as our working directory.
setwd("/My_TestData")
As shown in the image (c), you can then simply upload the files from your local PC to the new folder 'My_TestData' and then continue running the rest of the script.
All the output files will be stored under the working directory. You need to download all the result files from the directory at the end of your session as they are only saved in the Colud and not in your local PC like Jupyter Notebook. You can download the individual files manually by right clicking on each file and downloading it. Else, we can zip the folder and maually download only the zip file.
utils::zip(zipfile = 'TestData_Results', files = "/My_TestData/")
Although Colab is easier to use and is all Cloud-based, the main problem with the Colab environment is when you leave the Colab notebook idle for 90 mins or continuously used it for 12 hours, the runtime will automatically disconnect. This means you will lose all your variables, installed packages, and files. Hence, you need to rerun the entire notebook. Another limitation is disk space of 77 GB for the user. Please be aware of this while working with larger datasets and running longer notebooks.