
- Raspberry Pi Zero W or WH with a power supply
- I chose the Pi Zero W because was affordable, wireless, and minimal. I bought a starter kit on Amazon that included the power suppply and other accessories.
- In hindsight, I wish I'd gotten this kit with a Raspberry Pi Zero WH because of the pre-soldered GPIO header. When I first started this project, I didn't realize the Zero W would require me to solder the pins myself.
- >= 4GB MicroSD card and adapter
- You can buy one with the Raspberry Pi OS pre-installed or install the operating system on a blank one.
- A display screen
- I chose the HiLetgo MAX7219 Dot Matrix Module. This came with 5 female-to-female jumper wires that connect the Pi to the display.
I opted for a headless setup and enabled SSH, which I documented here.
The MTA provides real time subway data via their API. Each endpoint returns a GTFS blob, which is a compressed binary format based on protocol buffers specific to transit schedules.
A2A2#Èñ±©Èñ±©"R16N8Ê>
A2A2#¢ò±©¢ò±©"R15N8Ê>
A2A2#ó±©ó±©"R14N8Ê>
A2A2#°ô±©°ô±©"R13N8Ê>
G2G2#õ±©õ±©"R11N8Ê>
G2G2# ö±© ö±©"R60N8Ê>
D2D2#ã÷±©ã÷±©"G21N8Ê>
D2D2#êø±©êø±©"G20N8Ê>
D2D2#âù±©âù±©"G19N8Ê>
D2D2#¼ú±©¼ú±©"G18N8Ê>
To read this format of response, I used the gtfs-realtime-bindings library and parsed it as a FeedMessage.
from google.transit import gtfs_realtime_pb2

feed = gtfs_realtime_pb2.FeedMessage()

response = requests.get(
  API_ENDPOINT, headers={"x-api-key": os.environ["MTA_API_KEY"]}
)
feed_json = feed.FromString(response.content)
for entity in feed_json.entity:
  ...
feed_json outputs a readable format where each entity is a distinct type of realtime data. In my case, each entity is a trip update consisting of one or more stop_time_update's. Each StopTimeUpdate is the real time update for arrival and/or departure events at a given stop.
entity {
  id: "000047R"
  trip_update {
    trip {
      trip_id: "113950_R..S"
      route_id: "R"
      start_time: "18:59:30"
      start_date: "20231015"
    }
    stop_time_update {
      stop_id: "G08S"
      arrival {
        time: 1697410770
      }
      departure {
        time: 1697410770
      }
    }
In order to find the relevant StopTimeUpdate for my local train, I had to first find the respective stop_id for my station.
This took some digging through MTA docs, but I finally found the stops.txt file nested inside of the New York City Transit Subway download link. The stops.txt file contains the stop_id's for all Subway stations and I found mine by searching for the street number.
To retrieve the relevant StopTimeUpdate, I iterated over each entity in the feed_json object and for each entity, iterated further through the stop_time_update objects within the trip_update field. When a stop_time_update was found where the stop_id matched my predefined STOP_ID, I appended the stop_time_update to a list which I sorted by the arrival timestamp.
feed_json = feed.FromString(response.content)

stop_time_update_arrivals = [
    stop_time_update
    for entity in feed_json.entity
    for stop_time_update in entity.trip_update.stop_time_update
    if stop_time_update.stop_id == STOP_ID
]

sorted_arrivals = sorted(stop_time_update_arrivals, key=lambda x: x.arrival.time)
To get the time remaining until the next arrival, I calculated the difference in sorted_arrivals[0].arrival.time and now(). I also added a check that re-runs the calculation with sorted_arrivals[1] if the time remaining is < 2 minutes, the amount of time it takes me to get to the subway.
Once I had the program working locally (i.e., printing _ MIN in the terminal and sanity-checked against Google Maps), it was time to test the functionality on the Raspberry Pi. I found a couple of different approaches to get my files running on the Pi:
- Copy the files from local to Pi
- Git clone repo in Pi
- Use the
Remote - SSHVSCode extension
I chose method #2, allowing me to edit the project locally and simply git pull on my Raspberry Pi to retrieve the latest version. Option #3 would've been ideal (and a cleaner git history), but my Raspberry Pi's architecture is ARMv6l while the Remote - SSH VSCode extension only supports ARMv7l (AArch32) Raspbian Stretch/9+ (32-bit) or ARMv8l (AArch64) Ubuntu 18.04+ (64-bit).
You can determine your Raspberry Pi's architecture by running
uname -min the shell
To setup the project on the Raspberry Pi -
- In your local project once you've installed all the necessary packages, run
pip freeze > requirements.txt. Arequirements.txtfile will be created, listing all the dependencies for your project. - Commit and push code to a Github repo.
- SSH into the Raspberry Pi
- Run
git clone <url>. This creates a project directory on your Raspberry Pi. If the repo is private, you will need to enter your username and create a Personal Access Token in Github to use as the password. - Create a Python virtual environment
python3 -m venv myenv- Remember that your Raspberry Pi is not as powerful as your computer and this step may take a few minutes.
- Activate the virtual environment
source myenv/bin/activate - Copy your local
.envto the Pi using the command. My.envfile contains the MTA API key and my localstop_id. This command should be run outside of the Raspberry Pi shell.
scp path/to/your/local/.env pi@raspberry_pi_ip_address:/path/to/remote/directory
-
Run
pip install -r requirements.txtto install all packages listed in therequirements.txtfile. -
Run
python3 main.pyto run the script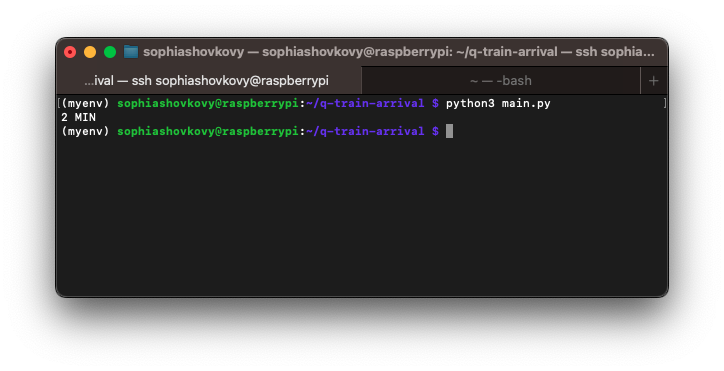
Note: This is prior to adding the code to display the text on the dot matrix module and setting up the cron job.

Given this was my first time working with a Raspberry Pi, I did a little bit of research first before attempting to connect my Pi to the MAX7219 Dot Matrix Module.
The MAX7219 Dot Matrix Module has 5 pins on the side labeled VCC, GND, DIN, CS, and CLK. Each pin has a purpose and needs to be wired to the correct pin on the Raspberry Pi.
I made the following diagram to identify the wiring.

At this point I was ready to start wiring, but didn't realize that I'd boughten a Raspberry Pi model that would require me to solder the 40-pin GPIO header to the Pi myself. In hindsight, I should've bought the Zero WH with a pre-soldered GPIO header. I have never soldered something, but decided to give it a try.
I posted my plea in a local Buy Nothing Facebook group and a kind neighbor lent me all the necessary equipment! You just need a soldering iron, solder wire, and desoldering wick in case you make a mistake.

I learned how to solder with this YouTube video. I prepped my workspace, set up shop near an open window, and wore an n95 mask and bluelight glasses as makeshift googles.

The result was not perfect, but it did work! I found that the flat head tip produced the optimal conical shape. When I connected the wires to the LED display, the dots promptly lit up.

To enable the display, I used the SPI library. Once the LED display is wired to the Raspberry Pi, SSH into your Raspberry Pi and run sudo raspi-config to enable the SPI interface. Navigate to "Interfacing Options" > "SPI" and enable SPI. Reboot your Pi with sudo reboot after making changes.

To display text, I used the Luma library, a display driver for the MAX7219. I also found that the LCD_FONT was the perfect font face and size for my 8x8 module.
from luma.led_matrix.device import max7219
from luma.core.interface.serial import spi, noop
from luma.core.legacy import text
from luma.core.legacy.font import proportional, LCD_FONT
from luma.core.render import canvas
...
def display_minutes(minutes):
    serial = spi(port=0, device=0, gpio=noop())
    device = max7219(
        serial,
        cascaded=4,
        block_orientation=90,
        rotate=0,
        blocks_arranged_in_reverse_order=True,
    )

    message = f"{minutes} MIN"

    with canvas(device) as draw:
        text(draw, (3, 1), message, fill="white", font=proportional(LCD_FONT))
To setup a cron job (i.e., enable your code to run on a schedule), SSH into your Raspberry Pi and run sudo crontab -e to open the Crontab for editing. Inside the crontab file, add the desired cron job entry to schedule the Python script.
Note: the
sudoinsudo crontab -ewill set the cron job for the root user.
* * * * * /home/sophiashovkovy/raspberry-train/myenv/bin/python /home/sophiashovkovy/raspberry-train/main.py >> /home/sophiashovkovy/cron.log 2>&1
This line schedules the job to run every minute. It includes a path to the Python interpreter that will be used to run the script and a path to the Python script that will be excuted by the cron job.
>> /home/sophiashovkovy/cron.log 2>&1 redirects the stdout and stderr of the cron job to a log file that I can review when debugging.
Cron is not designed to run jobs at intervals shorter than a minute. If you want to have shorter intervals, you can add a while loop into the script that sleeps for a specified number of seconds before it re-runs the calculation.
For example, this will calculate the time remaining twice in a single cron job.
while True:
    minutes_remaining = get_train_schedule()
    display_minutes(minutes_remaining)
    time.sleep(30)
In the end, I had a working LED display of the minutes remaining until the next train arrives at my local subway station. I moved it to the entryway table in my apartment and have been using it to time my exit perfectly, getting to wait in the comfort of my home until its time to get directly on the train 🎉
- MTA subway realtime feed (must be signed-in to view)
- GTFS Python example
- Raspberry Pi Zero W Pinout
- Luma driver for MAX7219