![]()
This documentation lives on GitHub.
To raise issues or make changes, go to https://github.com/soztag/printer.
There are three ways to connect to the printer:
smb://wisoprint2.wiso.uni-erlangen.de/nct-aeg-11219-utax-3005ci(recommended ethernet +FAU.fmWiFi)faui13printer.informatik.uni-erlangen.de(ethernet only, for cryptology)10.26.63.77(ethernet only, for SOZTAG)
- Go to
http://www.utax.deand download the driver for the printer. Navigate toDownload-Center > Treiber(yikes, no permalink). The printer make is UTAX 3005ci. Choose as in the below screenshot. Download the most recent driver for your platform.
 { width=50% }
 - Unzip the downloaded archive and install the driver.
- Add the printer.
- Navigate to
Systems Preferences > Printers & Scannersand click "plus". - For the ethernet only connections:
- Choose the
IPribbon. - Fill in the address field (see above) and choose the UTAX driver.
Replace the address in the below screenshot with the one that's right for you.
 { width=50% }
- Choose the
- For connections over ethernet and WiFi (via SMB printserver):
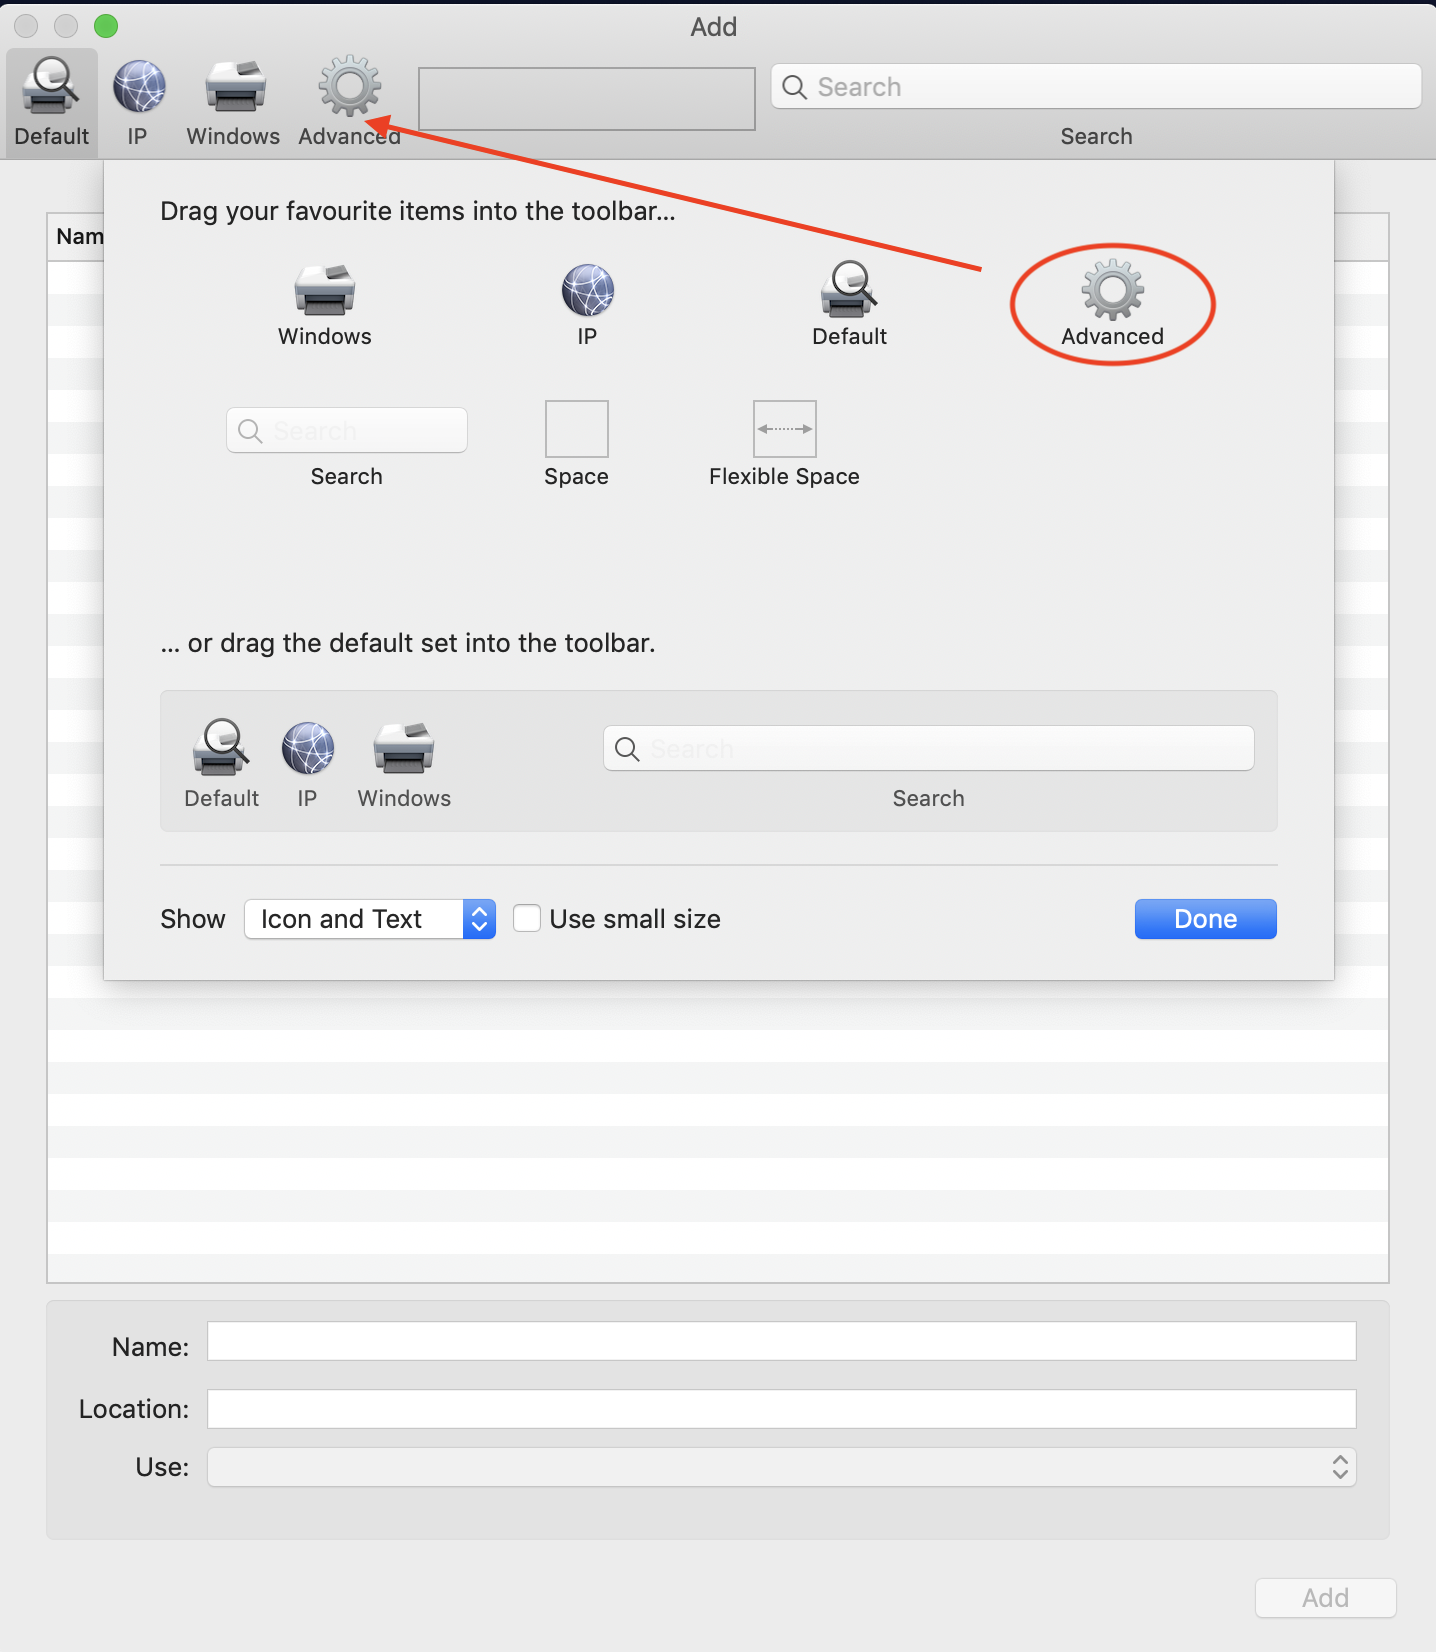
- Right click on the area next to the search field and choose
Customize Toolbar.
 { width=50% }
 - Drag the "Advanced" icon to the main ribbon.
 { width=50% }
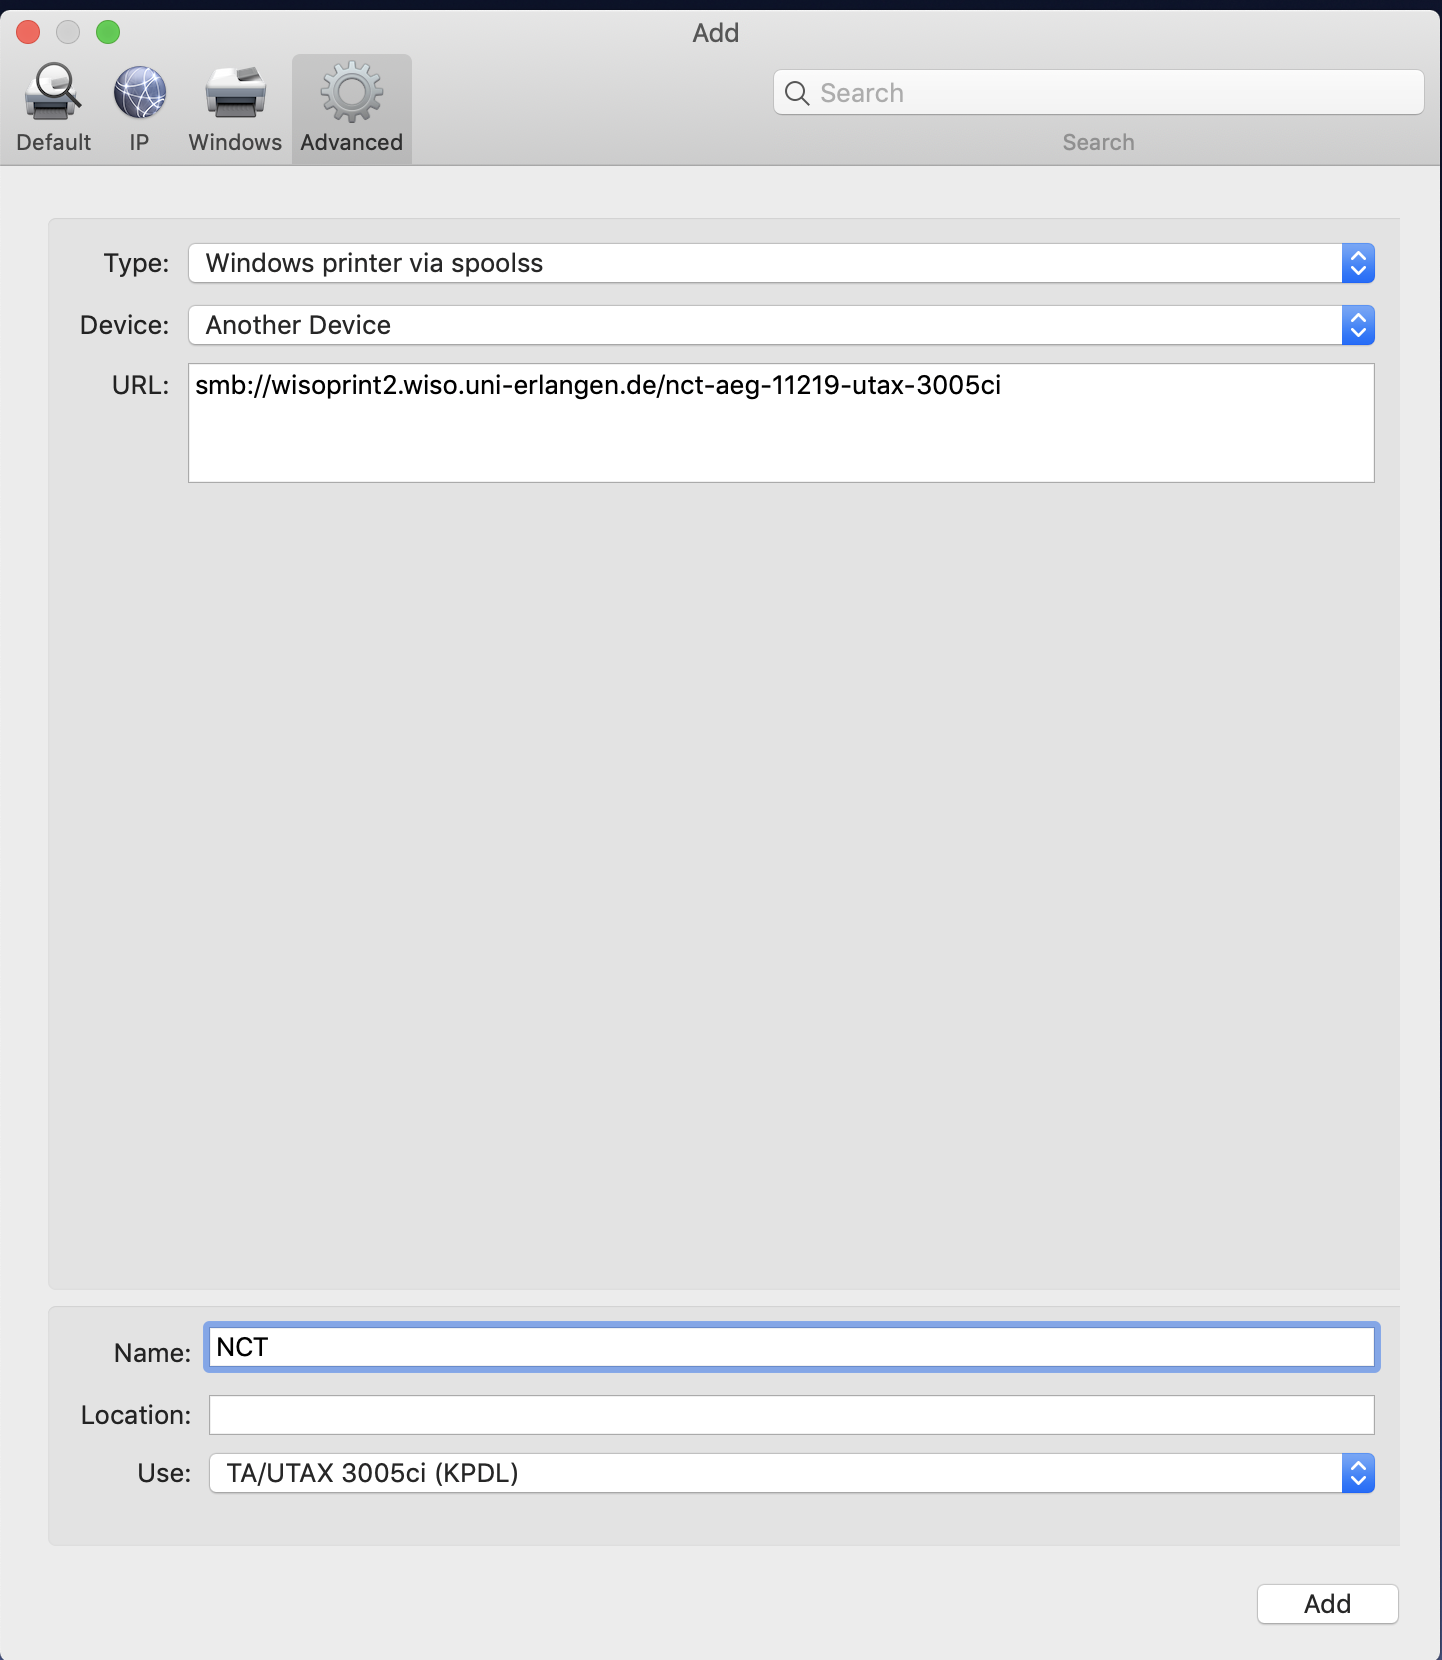
 - Then choose advanced, and fill in the SMB address and choose the UTAX driver.
 { width=50% }
- Right click on the area next to the search field and choose
- Navigate to
- Change the page description language (PDL).
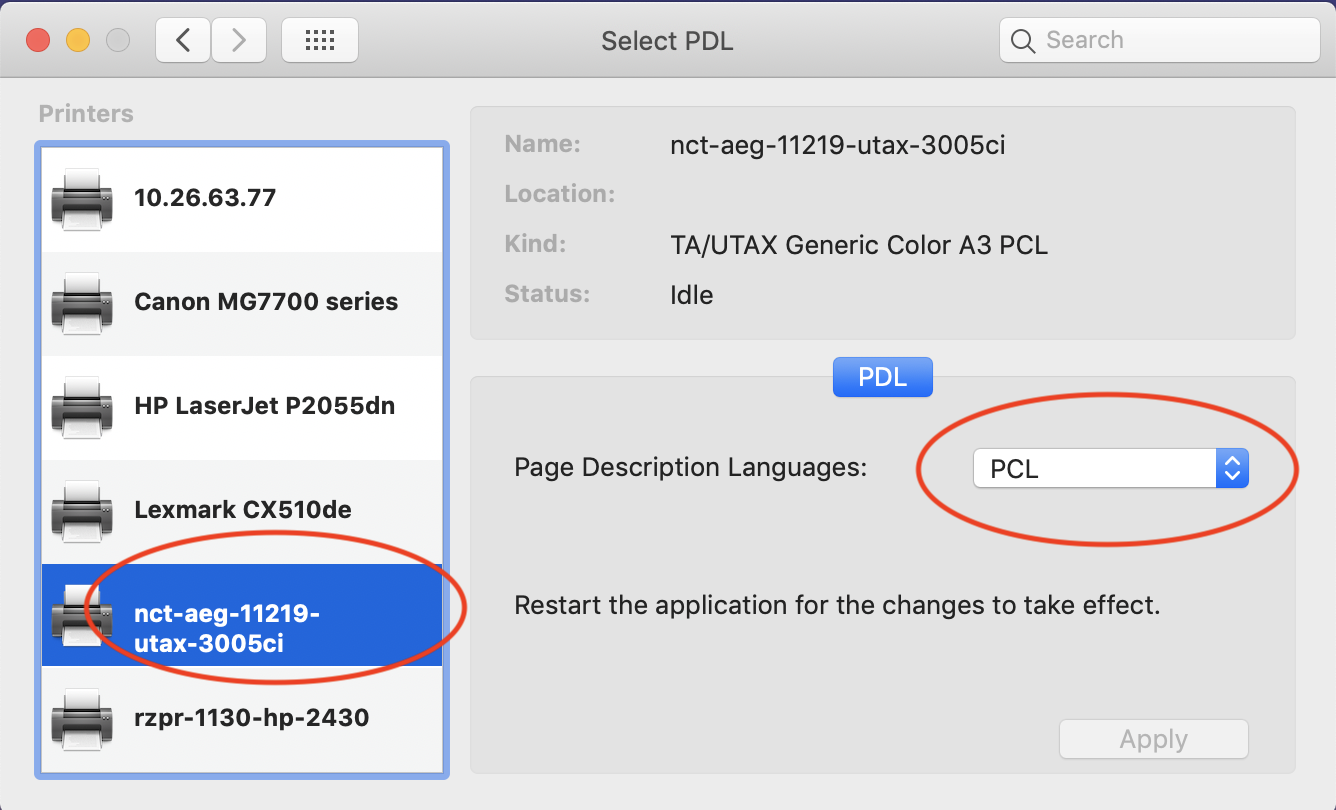
Navigate to
Systems Preferences > Select PDLand choose PCL as the PDL. Do not skip this step, or bad things (printed gibberish) may happen.
 { width=50% }
 - Save the job accounting number as a setting preset.
This is where it gets weird.
- Open a program with the old (< macOS 10.14.3), extensive print dialogue. Microsoft Word or Google Crome are a good bet. You can't use Apple programs for this step, they all use the new print dialogue.
- Bring up the print menu. Choose the newly installed printer in the dropdown.
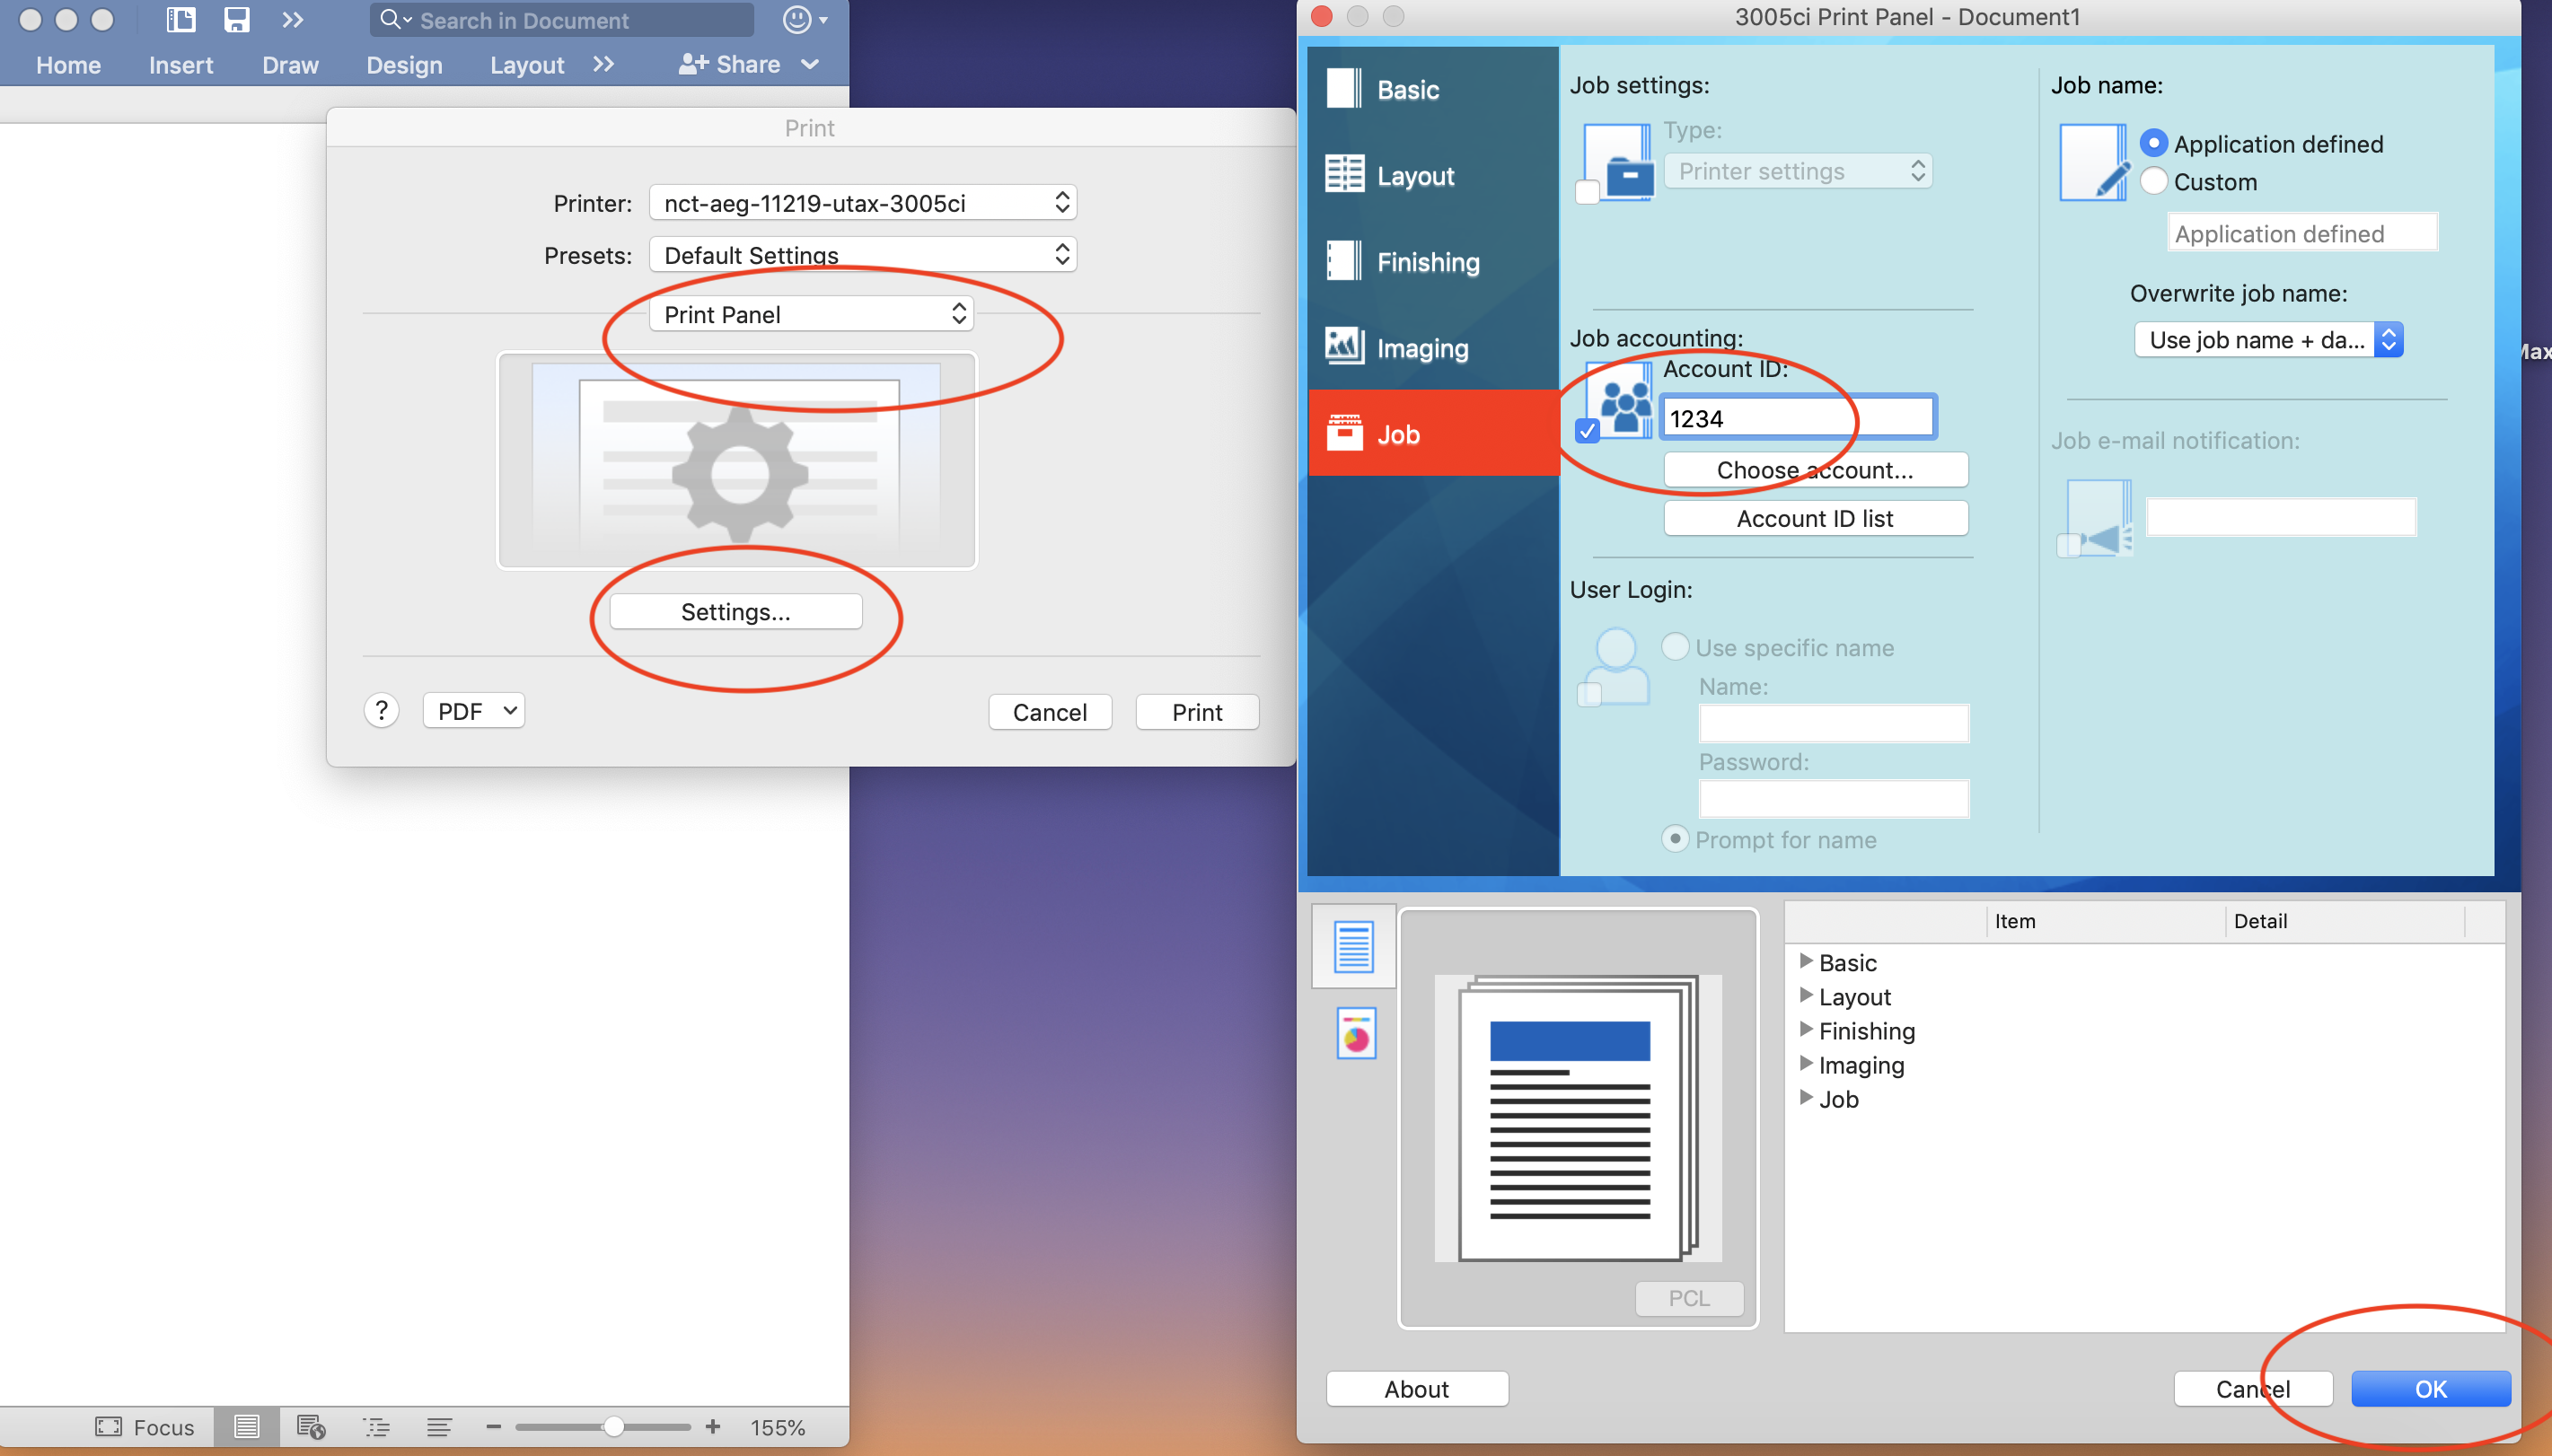
- In the print menu, choose the
Print Panelin the dropdown. ClickSettings. This will bring up TA_UTAX Print Panel application. - Inside that application, navigate to
Job > Job accountingand fill in the job accounting number (~ Kostenstelle) for your organisation.
 { width=50% }
 - While you're at it, you should also choose other sensible defaults to save paper and money (duplex printing, no color).
 { width=50% }
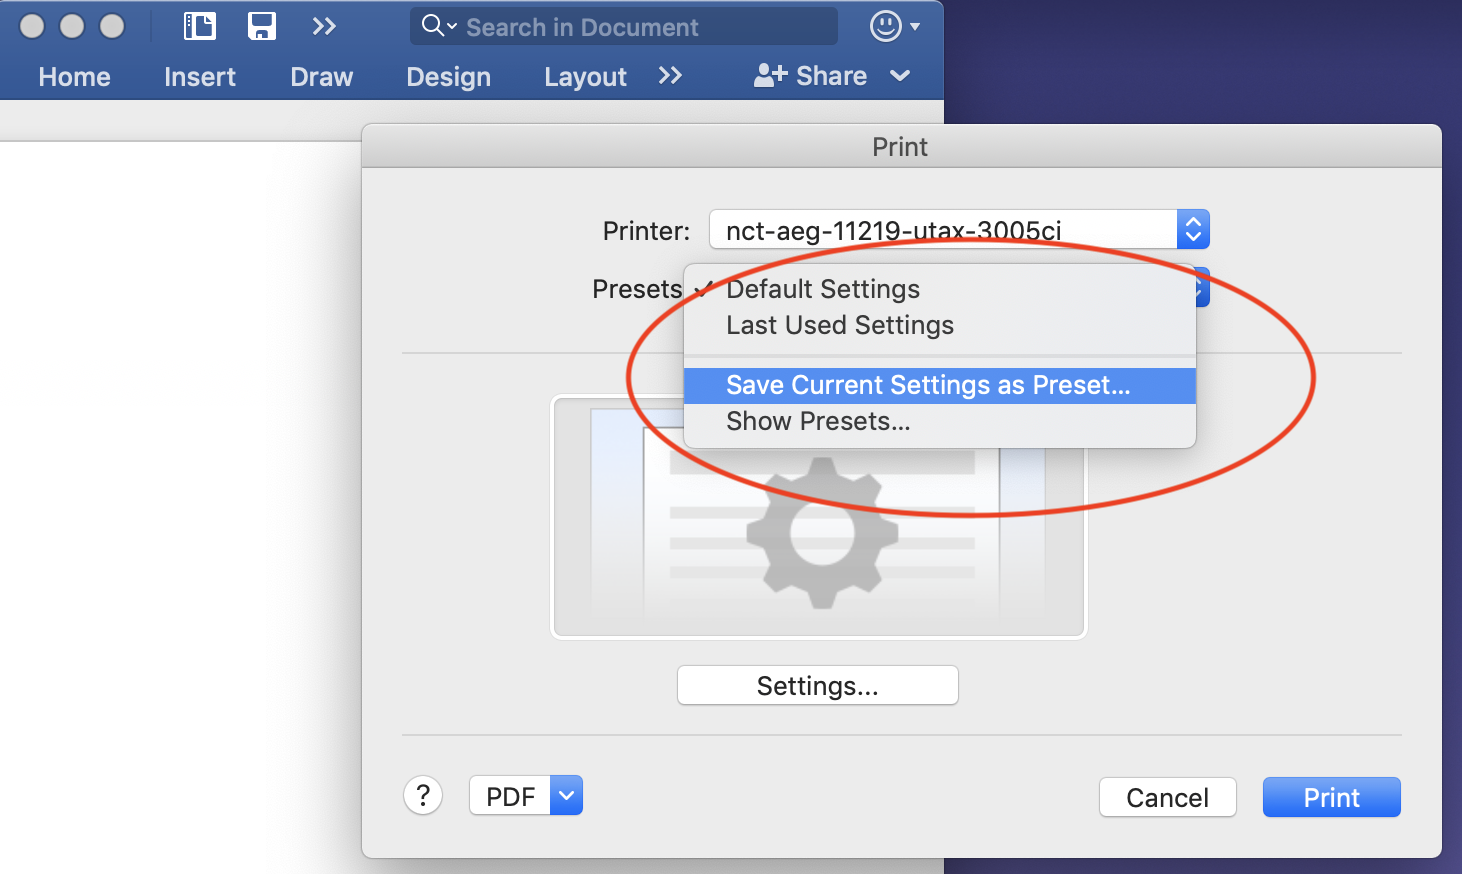
Click ok. - Choose
Save Current Setting as Preset...from thePresetsdropdown in the print menu.
 { width=50% }
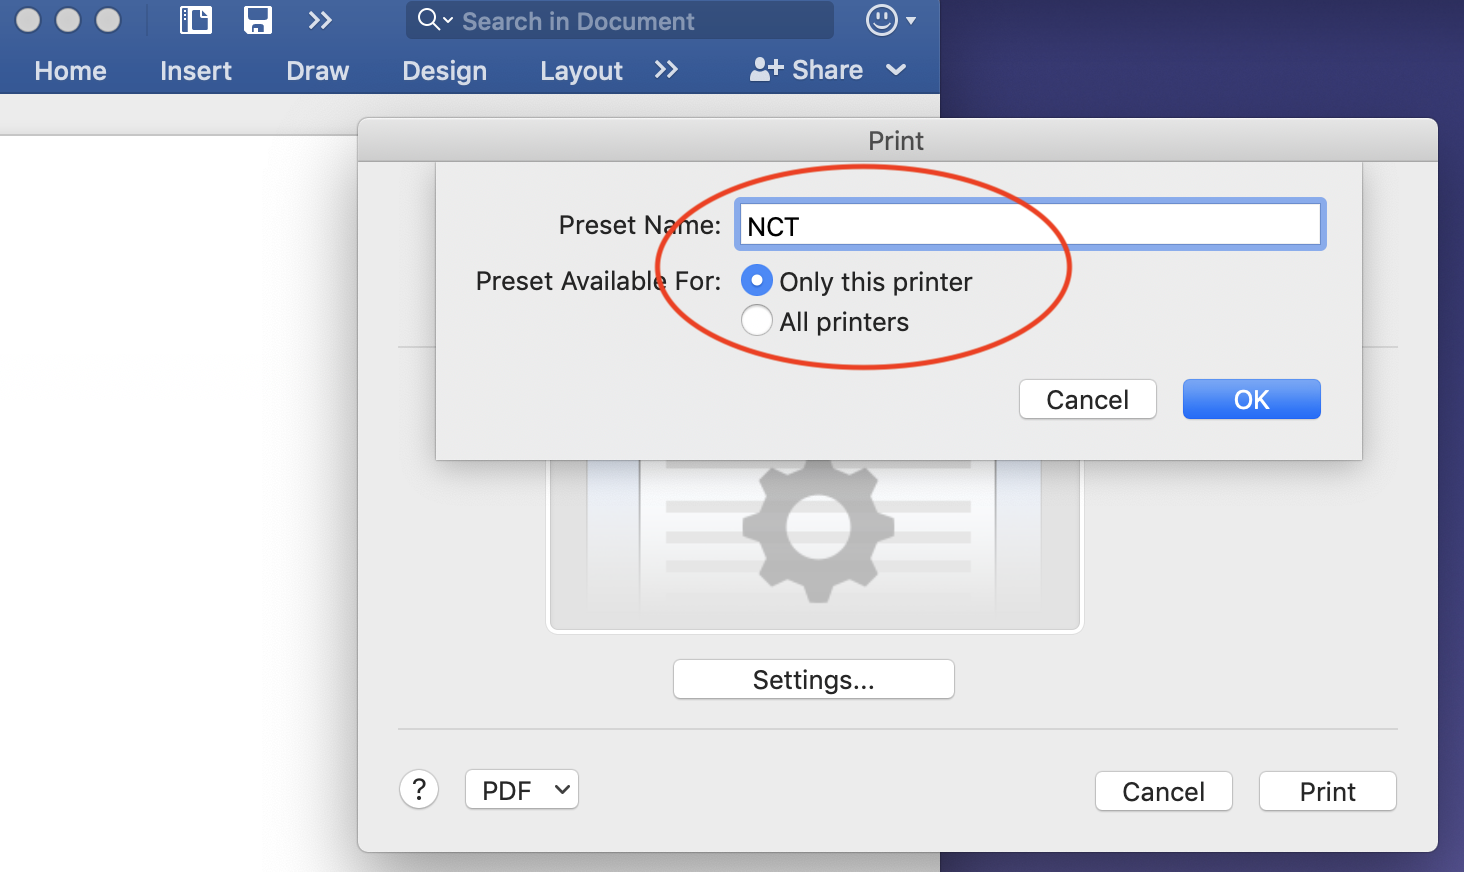
 - Name the presets, and apply them to
Only this printer.
 { width=50% }
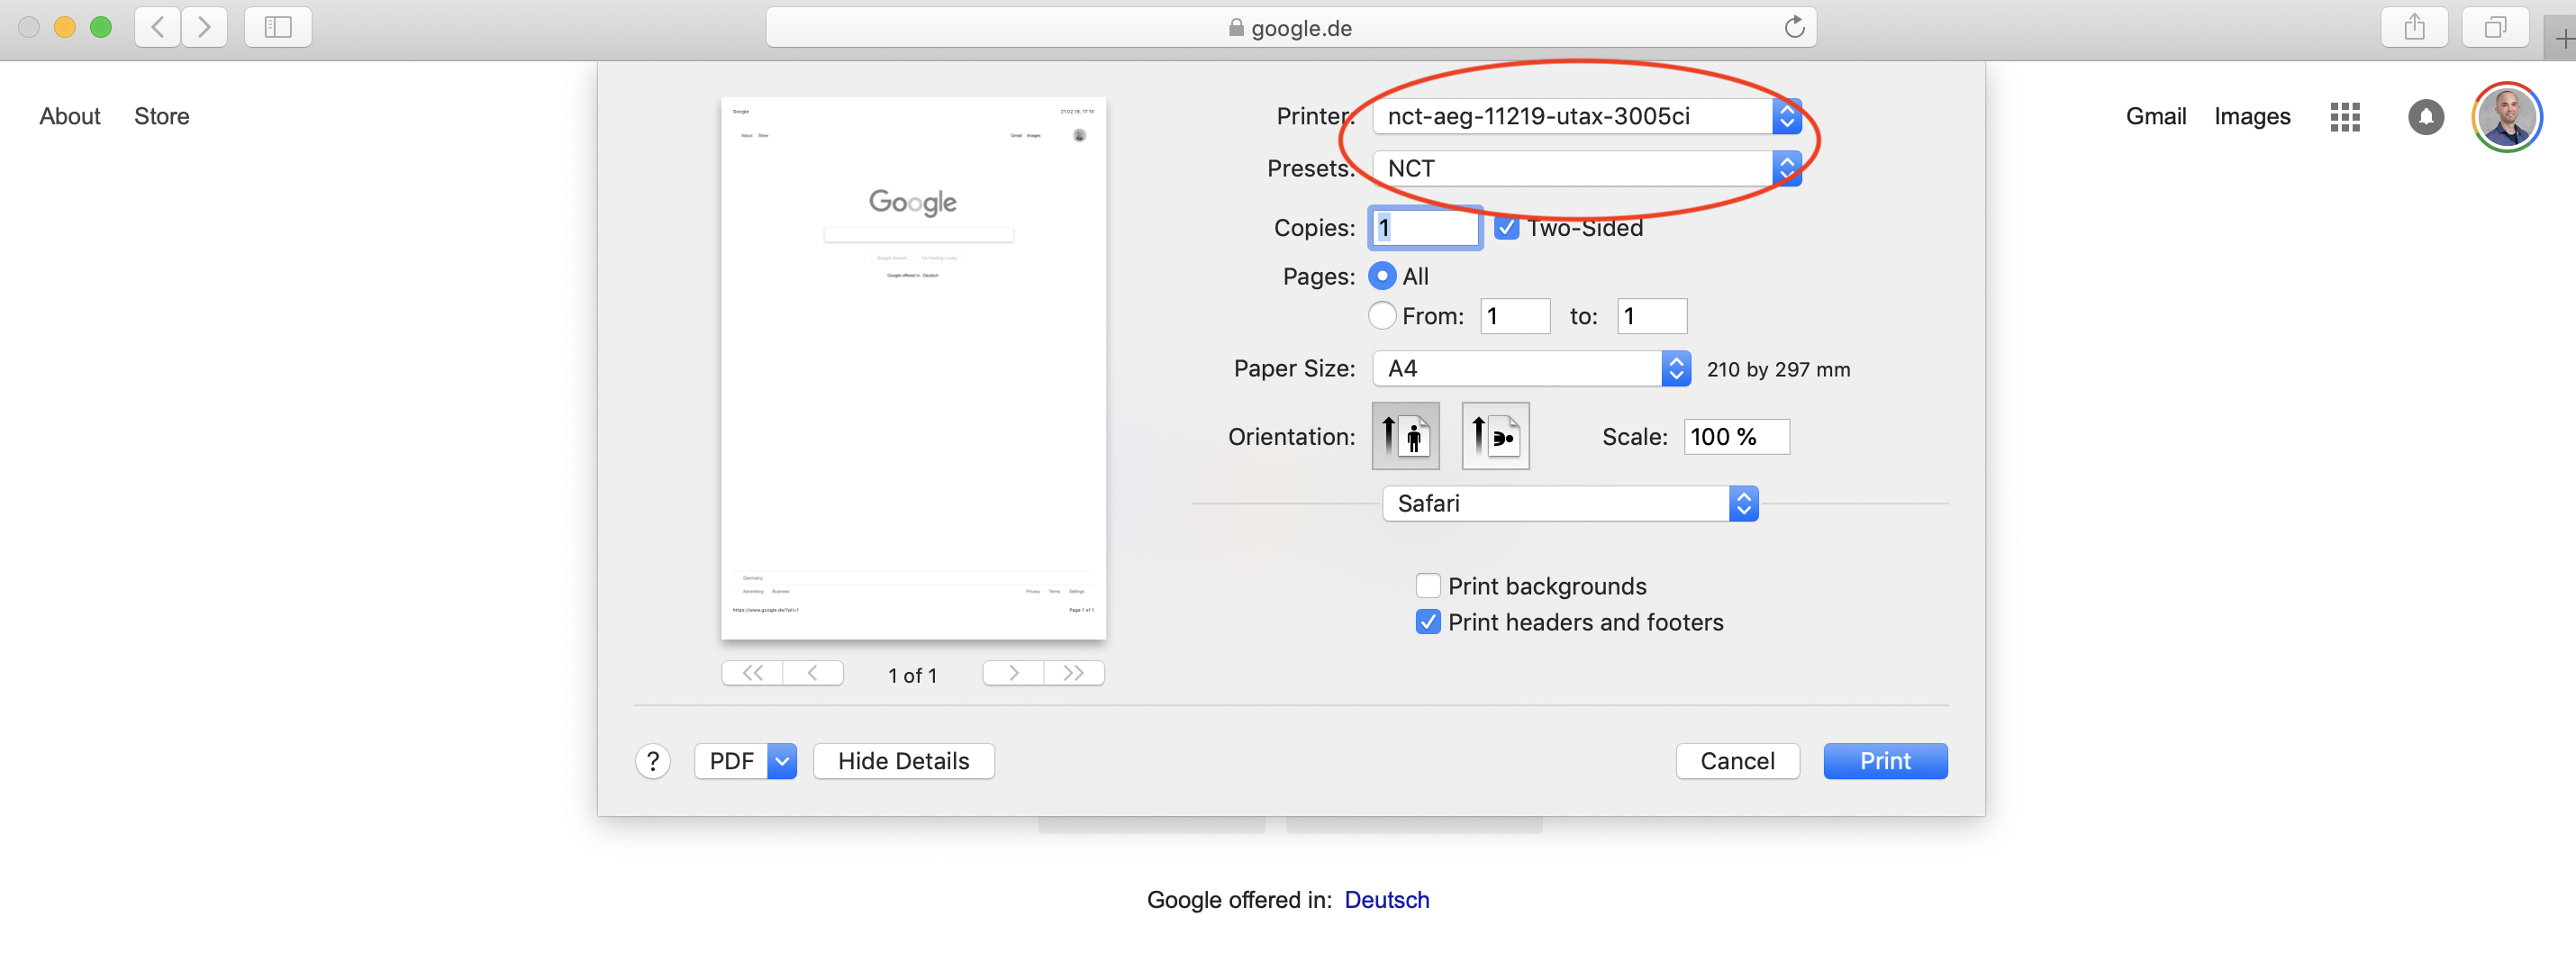
- You should now be able to print from any application.
Make sure to always choose the correct printer and presets.
 { width=50% }


If you already have the printer installed, but it's not working right, consider deleting the printer and adding it again.
To do so on macOS:
- Navigate to
Systems Preferences > Printers & Scanners. - Choose the printer to be deleted.
- Click delete.
 { width=50% }
Then start the setup from scratch.
- Consider reinstalling as per the above instructions.
- Raise an issue at
https://github.com/soztag/printer. - Contact the service provider, MOG IT MBG. The service ID for the printer is 4379.