Three ways to run this repo:
- Run JavaFX from the command line
- Run JavaFX from VS Code
- Run JavaFX from VS Code as a Maven project
- First, you need to install a runtime for JavaFX. Once you've downloaded it, make a note of the install path, the full pathto the lib folder, for example:
C:\Users\<user>\Downloads\openjfx-20.0.2_windows-x64_bin-sdk\javafx-sdk-20.0.2\lib-
Create an app by creating a file JavaFX.java with the following content:
import javafx.application.Application;
import javafx.scene.Scene;
import javafx.scene.control.Label;
import javafx.scene.layout.StackPane;
import javafx.stage.Stage;

public class HelloFX extends Application {

    @Override
    public void start(Stage stage) {
        String javaVersion = System.getProperty("java.version");
        String javafxVersion = System.getProperty("javafx.version");
        Label l = new Label("Hello, JavaFX " + javafxVersion + ", running on Java " + javaVersion + ".");
        Scene scene = new Scene(new StackPane(l), 640, 480);
        stage.setScene(scene);
        stage.show();
    }

    public static void main(String[] args) {
        launch();
    }

}
-
Now let's compile this from the terminal:
javac --module-path C:\Users\<user>\Downloads\openjfx-20.0.2_windows-x64_bin-sdk\javafx-sdk-20.0.2\lib --add-modules javafx.controls,javafx.fxml HelloFX.java
Replace the value of
--module--pathto reflect your install path of JavaFX. Note also how we add the modulesjavafx.controlsandjavafx.fxmlto the--add-modulesoption and how the final argument is the name of the file we want to compile. -
Let's run our app with:
java --module-path C:\Users\<user>\Downloads\openjfx-20.0.2_windows-x64_bin-sdk\javafx-sdk-20.0.2\lib --add-modules javafx.controls HelloFX
Replace the value of
--module--pathto reflect your install path of JavaFX.You should now see a window with the text "Hello, JavaFX 15.0.1, running on Java 15.0.1.".
To run JavaFX from VS Code, we need to ensure we got the Java project extension installed.
-
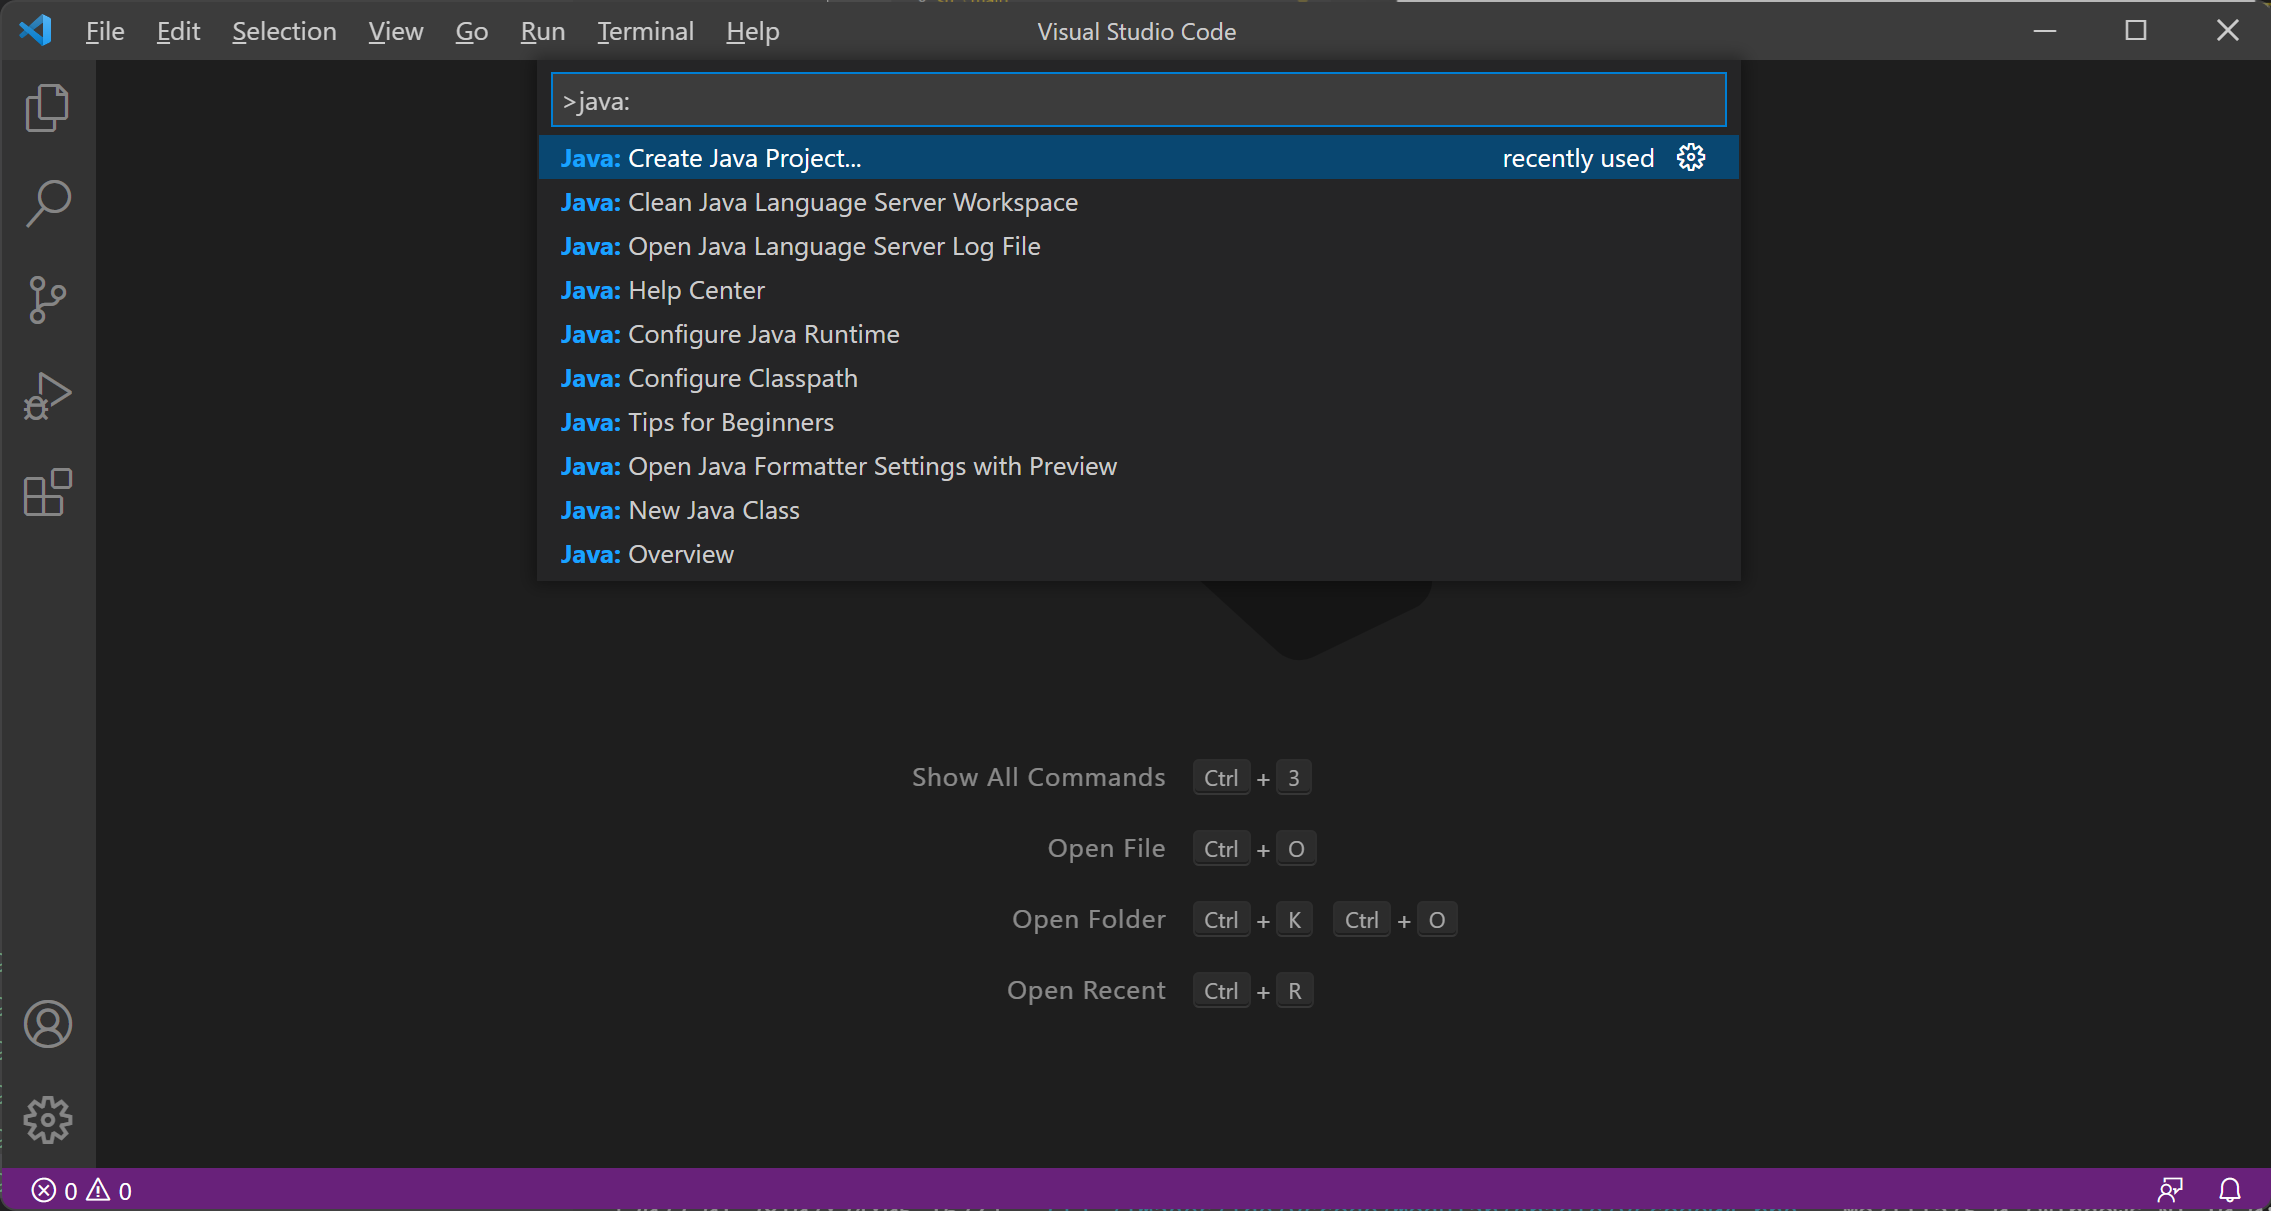
Select
Help -> Show All Commands, in the dropdown list, enter Java: Create Java project..., and select it. -
Select
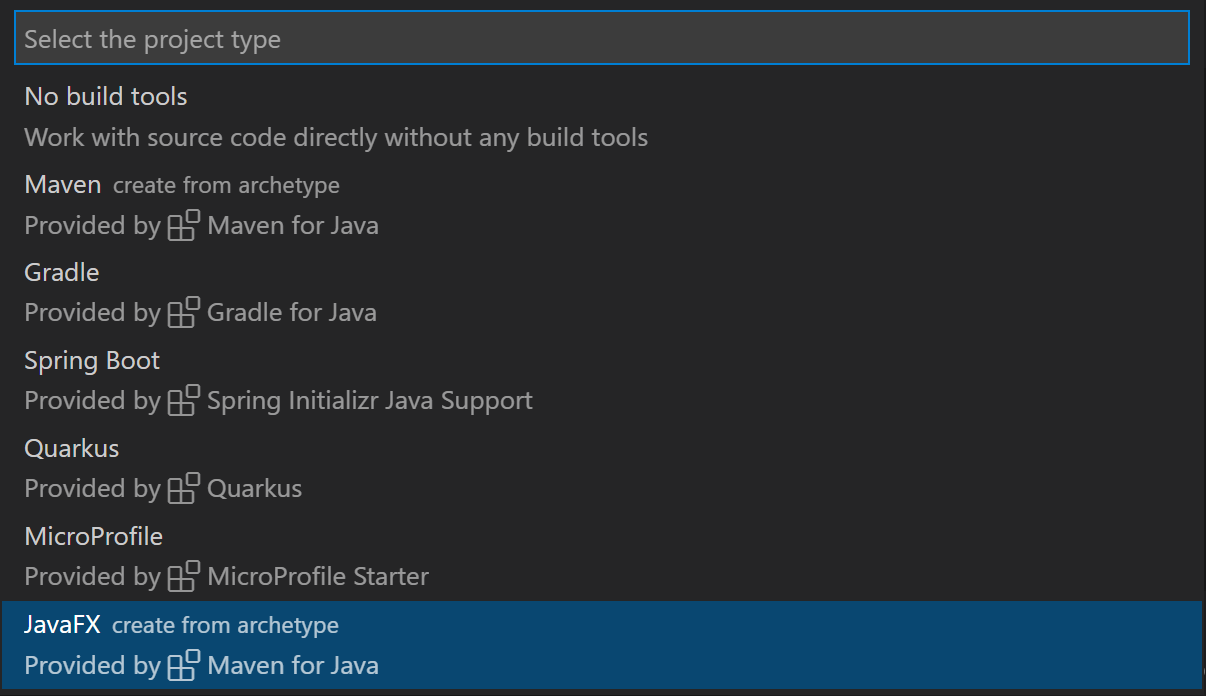
No build toolsin the list as the project type. -
Then select the target location (the directory you're in usually) you want to store the new project in the file explorer. Provide a name to the project, like HelloFX.

At this point, we have a project, but we need to add the JavaFX dependencies to it.
To add JavaFX as dependencies to your project, you can simply copy all the jar files from the lib folder of your downloaded JavaFX SDK, for instance C:\Users<user>\Downloads\openjfx-20.0.2_windows-x64_bin-sdk\javafx-sdk-20.0.2\lib to the lib folder of your project. Or alternatively, you can add them via the Java Projects explorer.
-
Click the + button beside the Referenced Libraries (in the bottom left menu), select the JavaFX library jars to add them.
It should look like so when you select the .jar files and add them as references libraries:
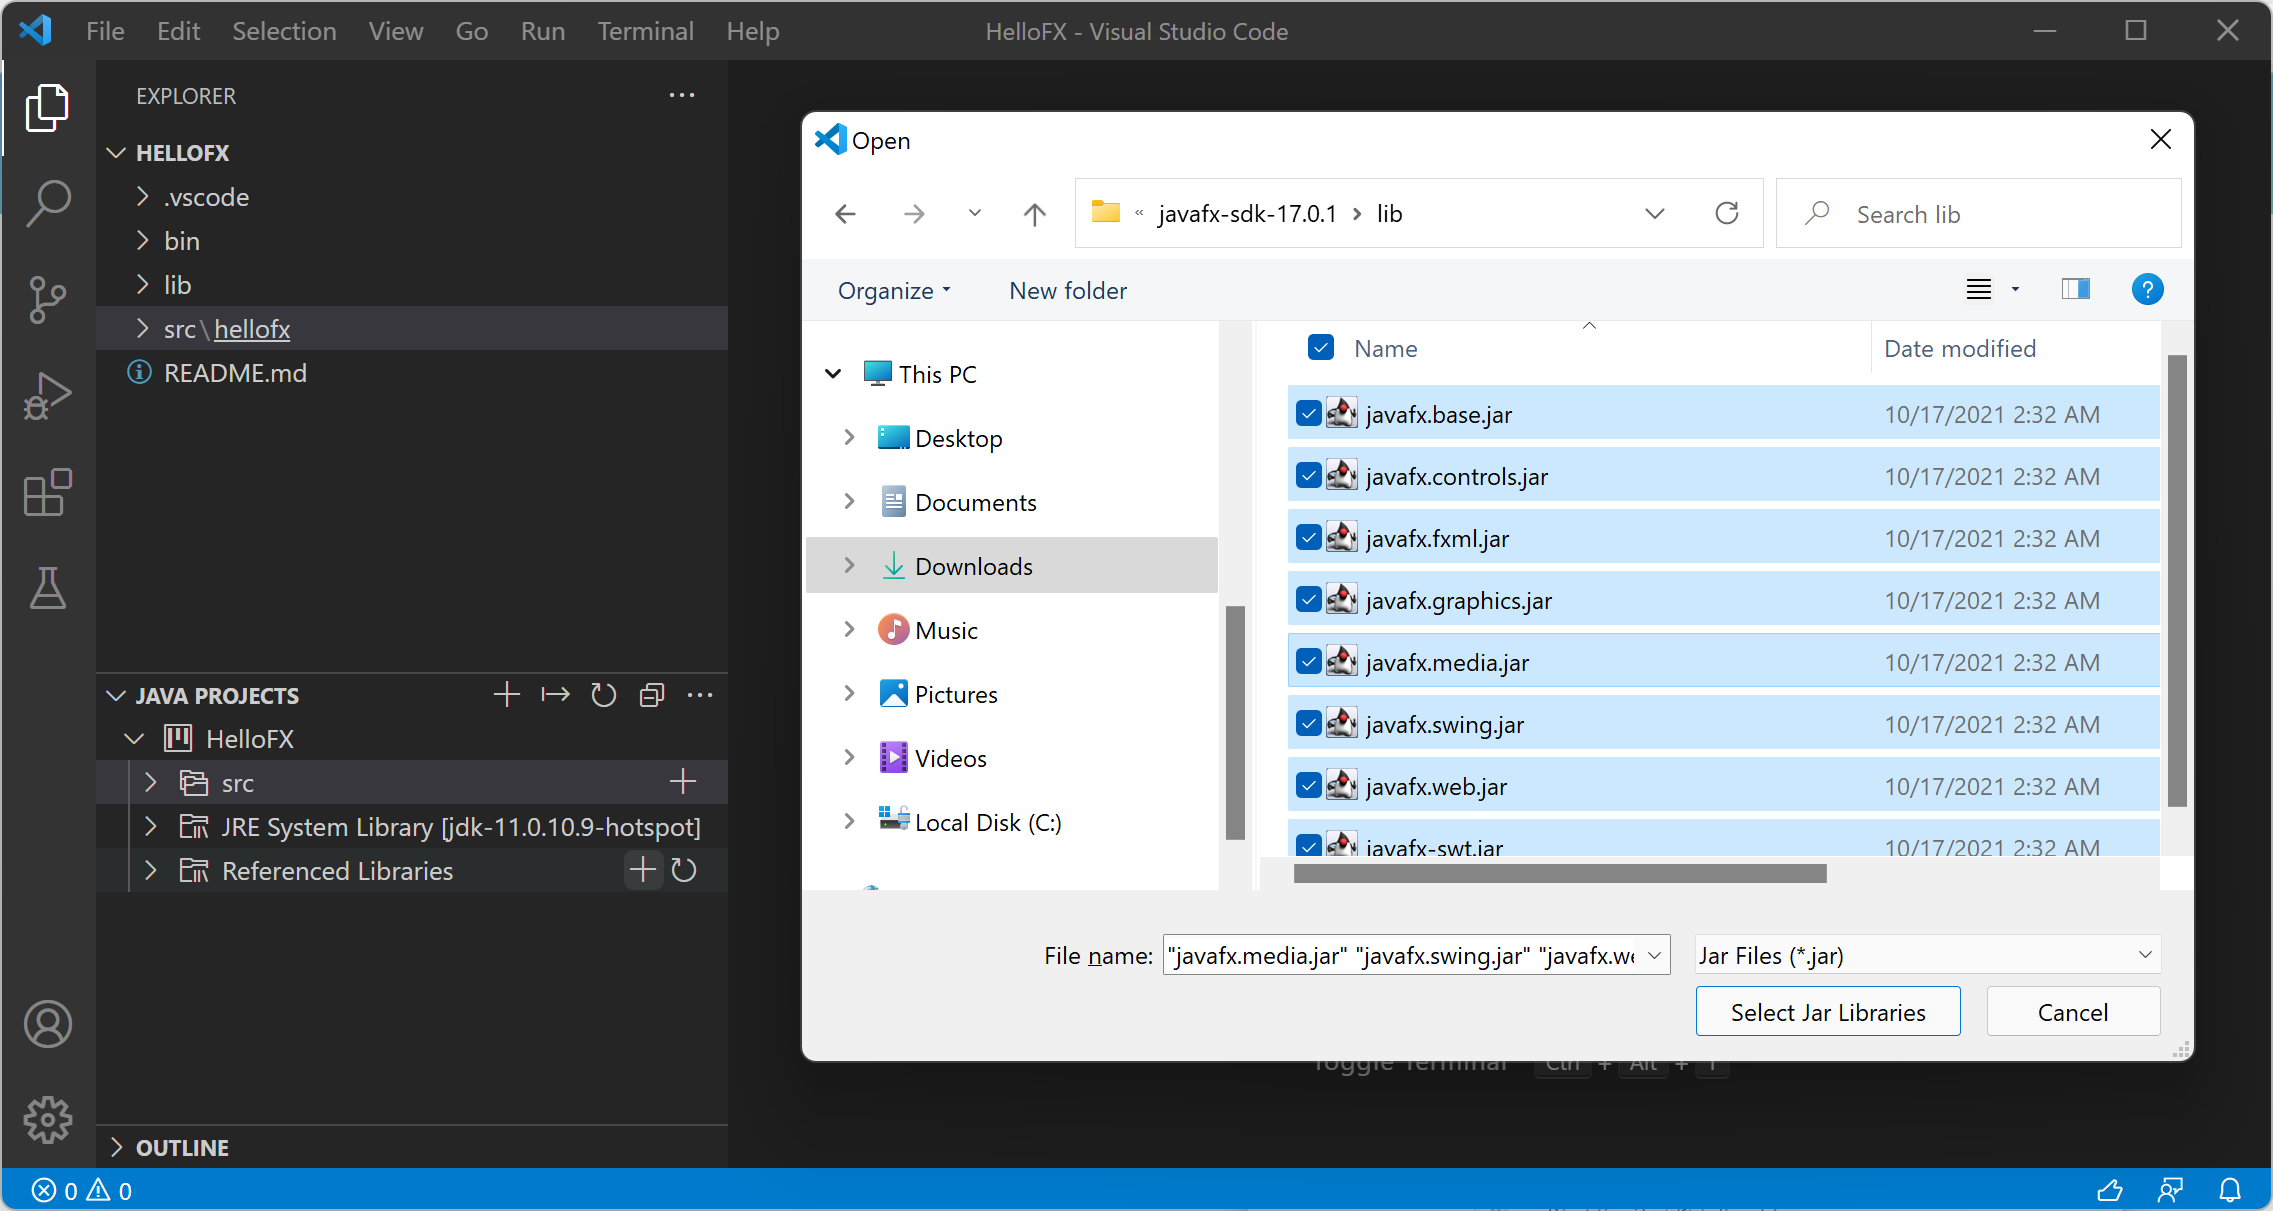
You're all setup, time to build the app.
-
Add the following files Main.java, Controller.java, hellofx.fxml.
Main.java content:
package hellofx;

import javafx.application.Application;
import javafx.fxml.FXMLLoader;
import javafx.scene.Parent;
import javafx.scene.Scene;
import javafx.stage.Stage;

public class Main extends Application {

    @Override
    public void start(Stage primaryStage) throws Exception{
        Parent root = FXMLLoader.load(getClass().getResource("hellofx.fxml"));
        primaryStage.setTitle("Hello World");
        primaryStage.setScene(new Scene(root, 400, 300));
        primaryStage.show();
    }


    public static void main(String[] args) {
        launch(args);
    }
}
Our entry point for the app.
Controller.java
package hellofx;

import javafx.fxml.FXML;
import javafx.scene.control.Label;

public class Controller {

    @FXML
    private Label label;

    public void initialize() {
        String javaVersion = System.getProperty("java.version");
        String javafxVersion = System.getProperty("javafx.version");
        label.setText("Hello, JavaFX " + javafxVersion + "\nRunning on Java " + javaVersion + ".");
    }
}
This is the controller layer where we interact with the UI and for example respond to events triggered.
hellofx.fxml
<?xml version="1.0" encoding="UTF-8"?>

<?import javafx.scene.control.Label?>
<?import javafx.scene.layout.StackPane?>


<StackPane maxHeight="-Infinity" maxWidth="-Infinity" minHeight="-Infinity" minWidth="-Infinity" prefHeight="400.0" prefWidth="600.0" xmlns="http://javafx.com/javafx/8" xmlns:fx="http://javafx.com/fxml/1" fx:controller="hellofx.Controller">
    <children>
        <Label fx:id="label" text="Label" />
    </children>
</StackPane>
this is the UI expressed as XML.
You know have an app. Let's run it.
-
Select the
Run and debugmenu option on the left. -
Select to run the app, that should generate a launch.json file in the .vscode folder. OR you can also define your own launch.json file with the following content:
{
    // Use IntelliSense to learn about possible attributes.
    // Hover to view descriptions of existing attributes.
    // For more information, visit: https://go.microsoft.com/fwlink/?linkid=830387
    "version": "0.2.0",
    "configurations": [
        {
            "type": "java",
            "name": "Launch App",
            "request": "launch",
            "mainClass": "hellofx.Main",
            "vmArgs": "--module-path C:/Users/<user>/Downloads/openjfx-20.0.2_windows-x64_bin-sdk/javafx-sdk-20.0.2/lib --add-modules javafx.controls,javafx.fxml",
        }
    ]
}
Note two important things here:
- The
vmArgsoption, which is the path to the JavaFX SDK and the modules we want to add. - The
mainClassoption, which is the entry point of our app.
- The
-
Select
Help -> Show All Commands, in the dropdown list, enter Java: Create Java project..., and select it. -
Select JavaFX in the list as the project type.
-
Input
groupid, like org.openjfx andartifact id, like hellofx and select the project location in the file explorer (the directory you're in).Then a command will be sent and executed in the terminal, which creates a JavaFX project via the Maven Archetype for you. You will use this later to run the project.
-
Ensure the pom.xml looks like so:
<project xmlns="http://maven.apache.org/POM/4.0.0" xmlns:xsi="http://www.w3.org/2001/XMLSchema-instance"
     xsi:schemaLocation="http://maven.apache.org/POM/4.0.0 http://maven.apache.org/maven-v4_0_0.xsd">
<modelVersion>4.0.0</modelVersion>
<groupId>org.openjfx</groupId>
<artifactId>hellofx</artifactId>
<version>0.0.1-SNAPSHOT</version>
    <properties>
        <project.build.sourceEncoding>UTF-8</project.build.sourceEncoding>
        <maven.compiler.release>11</maven.compiler.release>
        <javafx.version>17.0.1</javafx.version>
        <javafx.maven.plugin.version>0.0.8</javafx.maven.plugin.version>
    </properties>
    <dependencies>
        <dependency>
            <groupId>org.openjfx</groupId>
            <artifactId>javafx-controls</artifactId>
            <version>${javafx.version}</version>
        </dependency>
        <dependency>
            <groupId>org.openjfx</groupId>
            <artifactId>javafx-fxml</artifactId>
            <version>${javafx.version}</version>
        </dependency>
    </dependencies>
    <build>
        <plugins>
            <plugin>
                <groupId>org.apache.maven.plugins</groupId>
                <artifactId>maven-compiler-plugin</artifactId>
                <version>3.8.1</version>
                <configuration>
                    <release>${maven.compiler.release}</release>
                </configuration>
            </plugin>
            <plugin>
                <groupId>org.openjfx</groupId>
                <artifactId>javafx-maven-plugin</artifactId>
                <version>${javafx.maven.plugin.version}</version>
                <configuration>
                    <release>${maven.compiler.release}</release>
                    <jlinkImageName>hellofx</jlinkImageName>
                    <launcher>launcher</launcher>
                    <mainClass>hellofx.Main</mainClass>
                </configuration>
            </plugin>
        </plugins>
    </build>
</project>
and your Main.java file should look like so:
package hellofx;
import javafx.application.Application;
import javafx.scene.Scene;
import javafx.scene.control.Label;
import javafx.scene.layout.StackPane;
import javafx.stage.Stage;

public class Main extends Application {

    @Override
    public void start(Stage stage) {
        String javaVersion = System.getProperty("java.version");
        String javafxVersion = System.getProperty("javafx.version");
        Label l = new Label("Hello, JavaFX " + javafxVersion + ", running on Java " + javaVersion + ".");
        Scene scene = new Scene(new StackPane(l), 640, 480);
        stage.setScene(scene);
        stage.show();
    }

    public static void main(String[] args) {
        launch();
    }

}
and Main.java should be located in the following folder: src/main/java/hellofx/Main.java. This is because Maven expects app files to be located in src/main/java.
In the Maven menu in the bottom left of VS Code, expand the javafx section and select the play icon on the javafx:run option. This should build and run the app.