Dublin Bus Django App
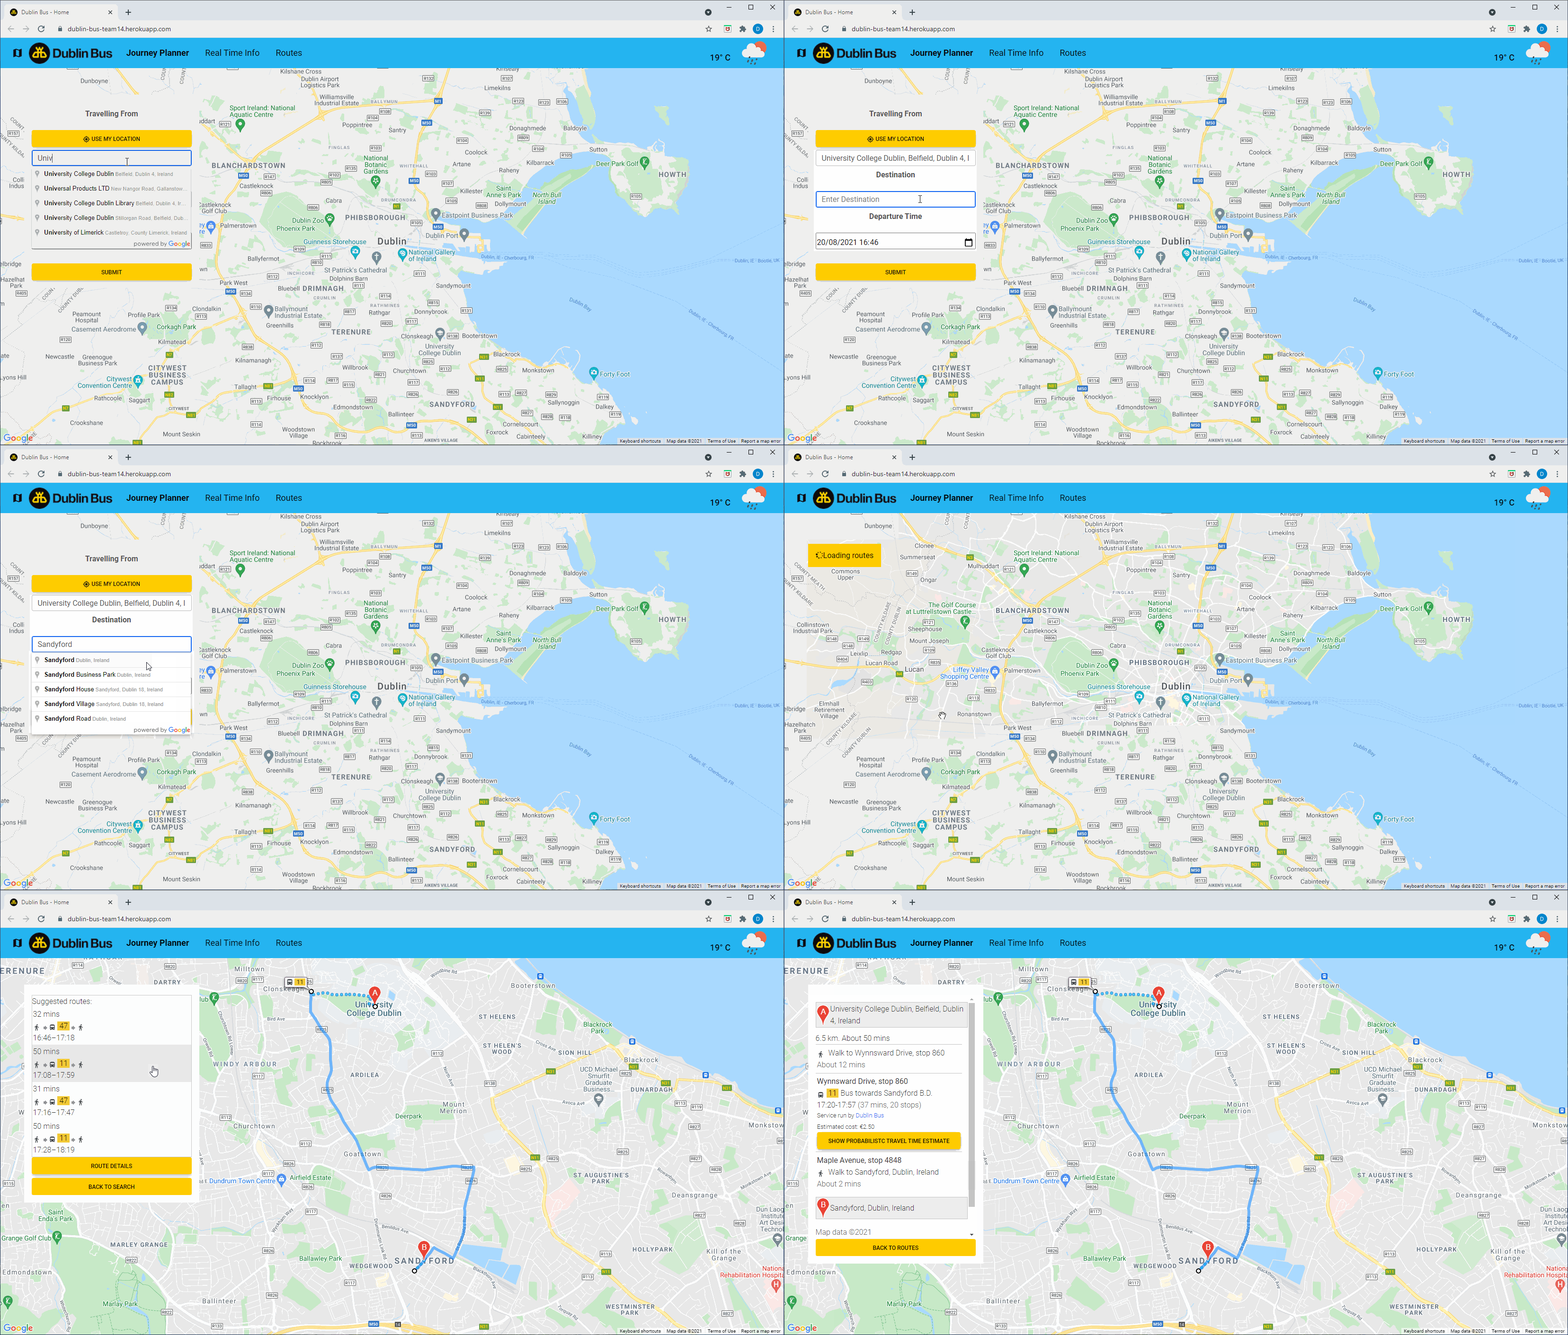
This project is a web application for Dublin Bus users to conveniently plan their trips. The application can also suggest trips using other public transportation services (e.g. DART and Go-Ahead).
We trained K-Nearest Neighbours regression models on Dublin Bus data from 2018, for each Dublin Bus route running at that time, to make travel time predictions for Dublin Bus trips. Whenever the app is not able to make a prediction using our trained models due to data differences it defaults to Google's estimations through their Directions API.
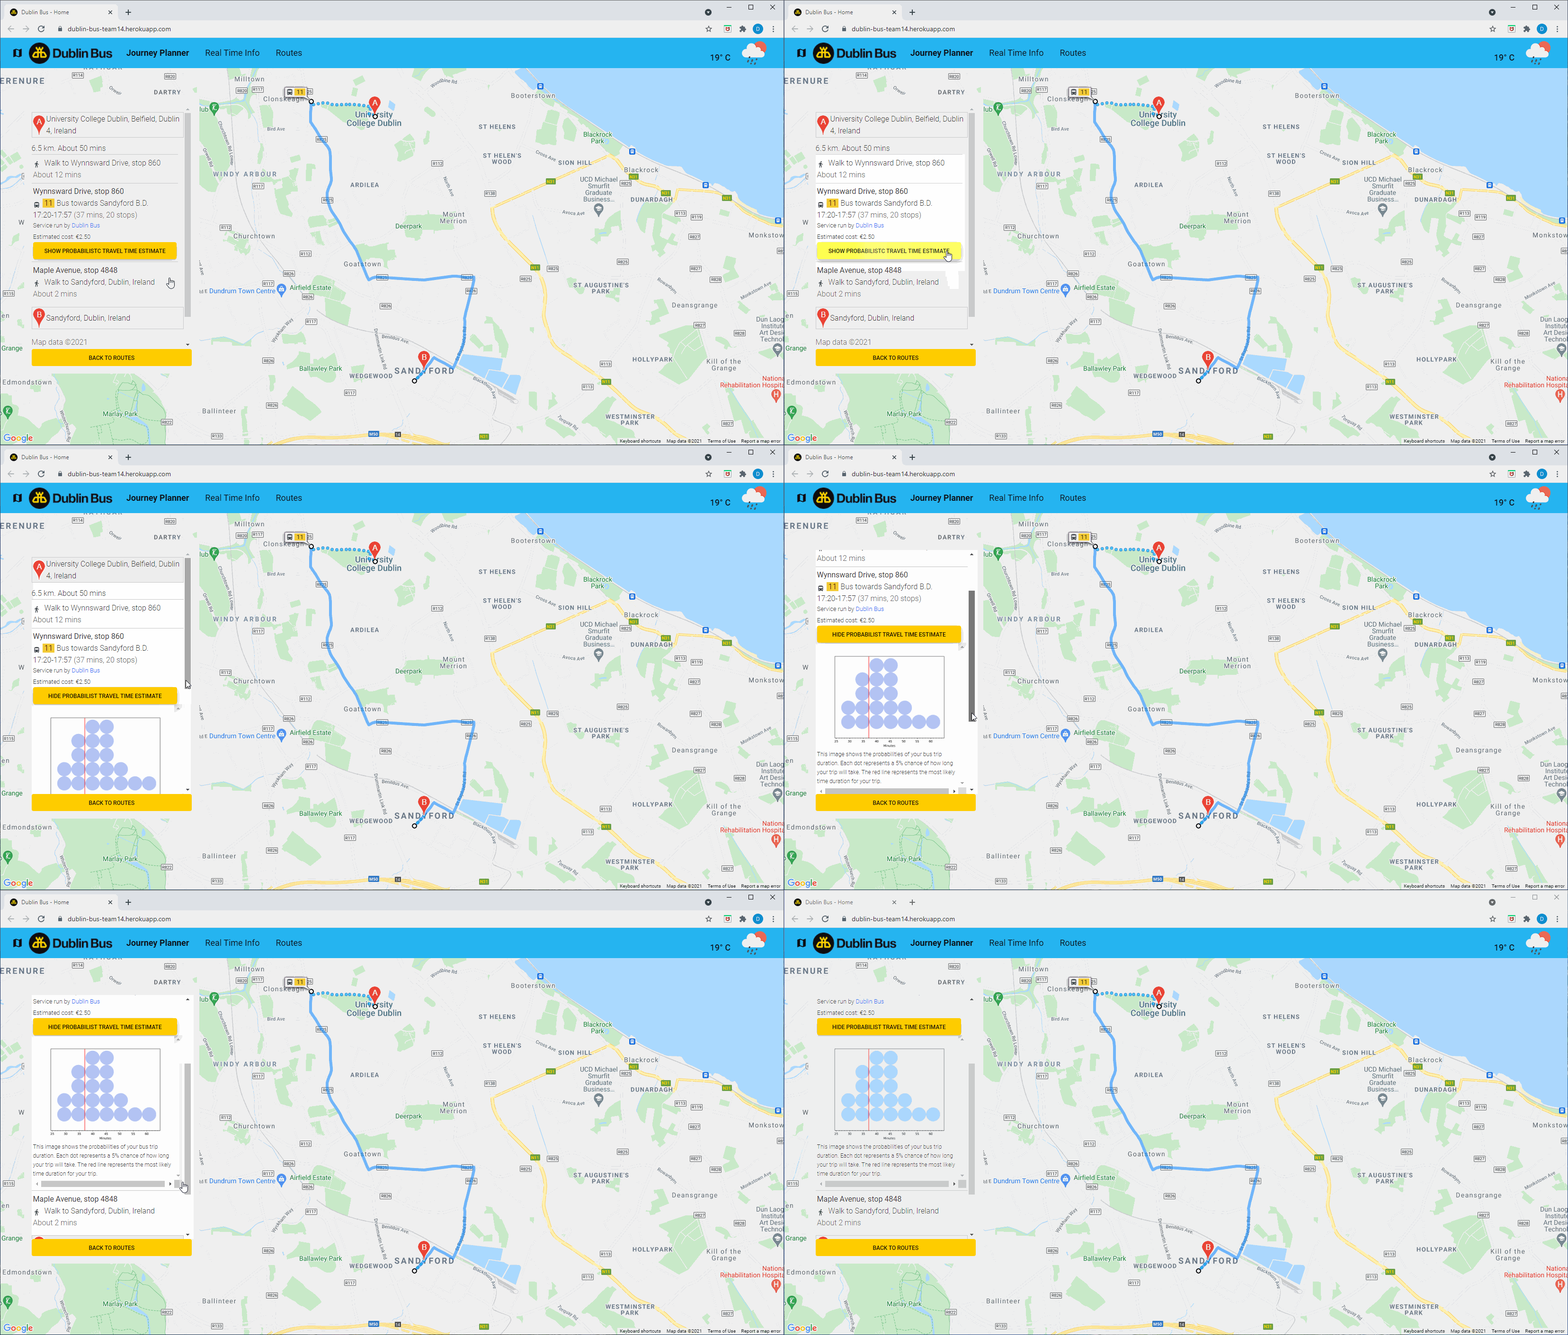
For the predictions made by the application, the users can see a probabilist travel time estimate in the format of a quantile dot plot. Each dot represents a 5% chance of how long the trip will take. The red line represents the most likely time duration for the trip. This work was inspired by the "Uncertainty Displays Using Quantile Dotplots or CDFs Improve Transit Decision-Making" white paper from Michael Fernandes1, Logan Walls1, Sean Munson1, Jessica Hullman1, and Matthew Kay.
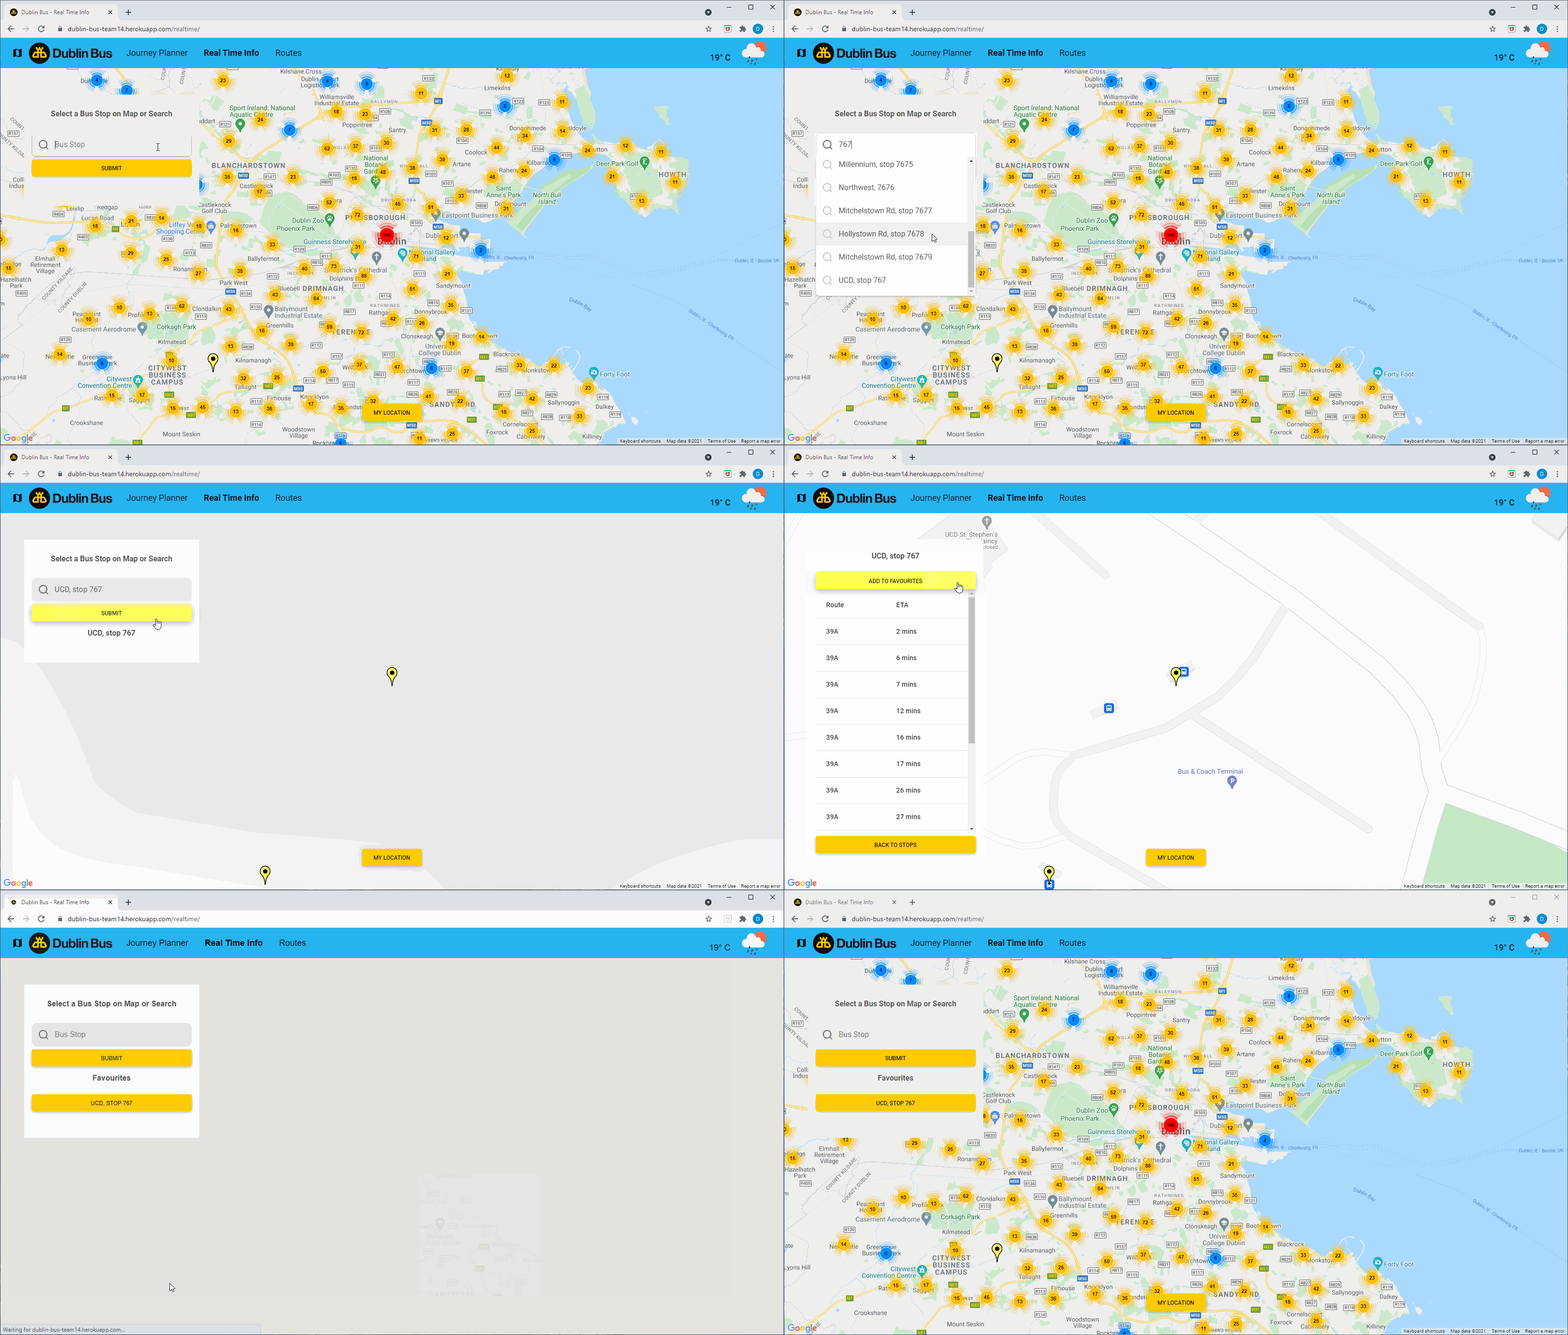
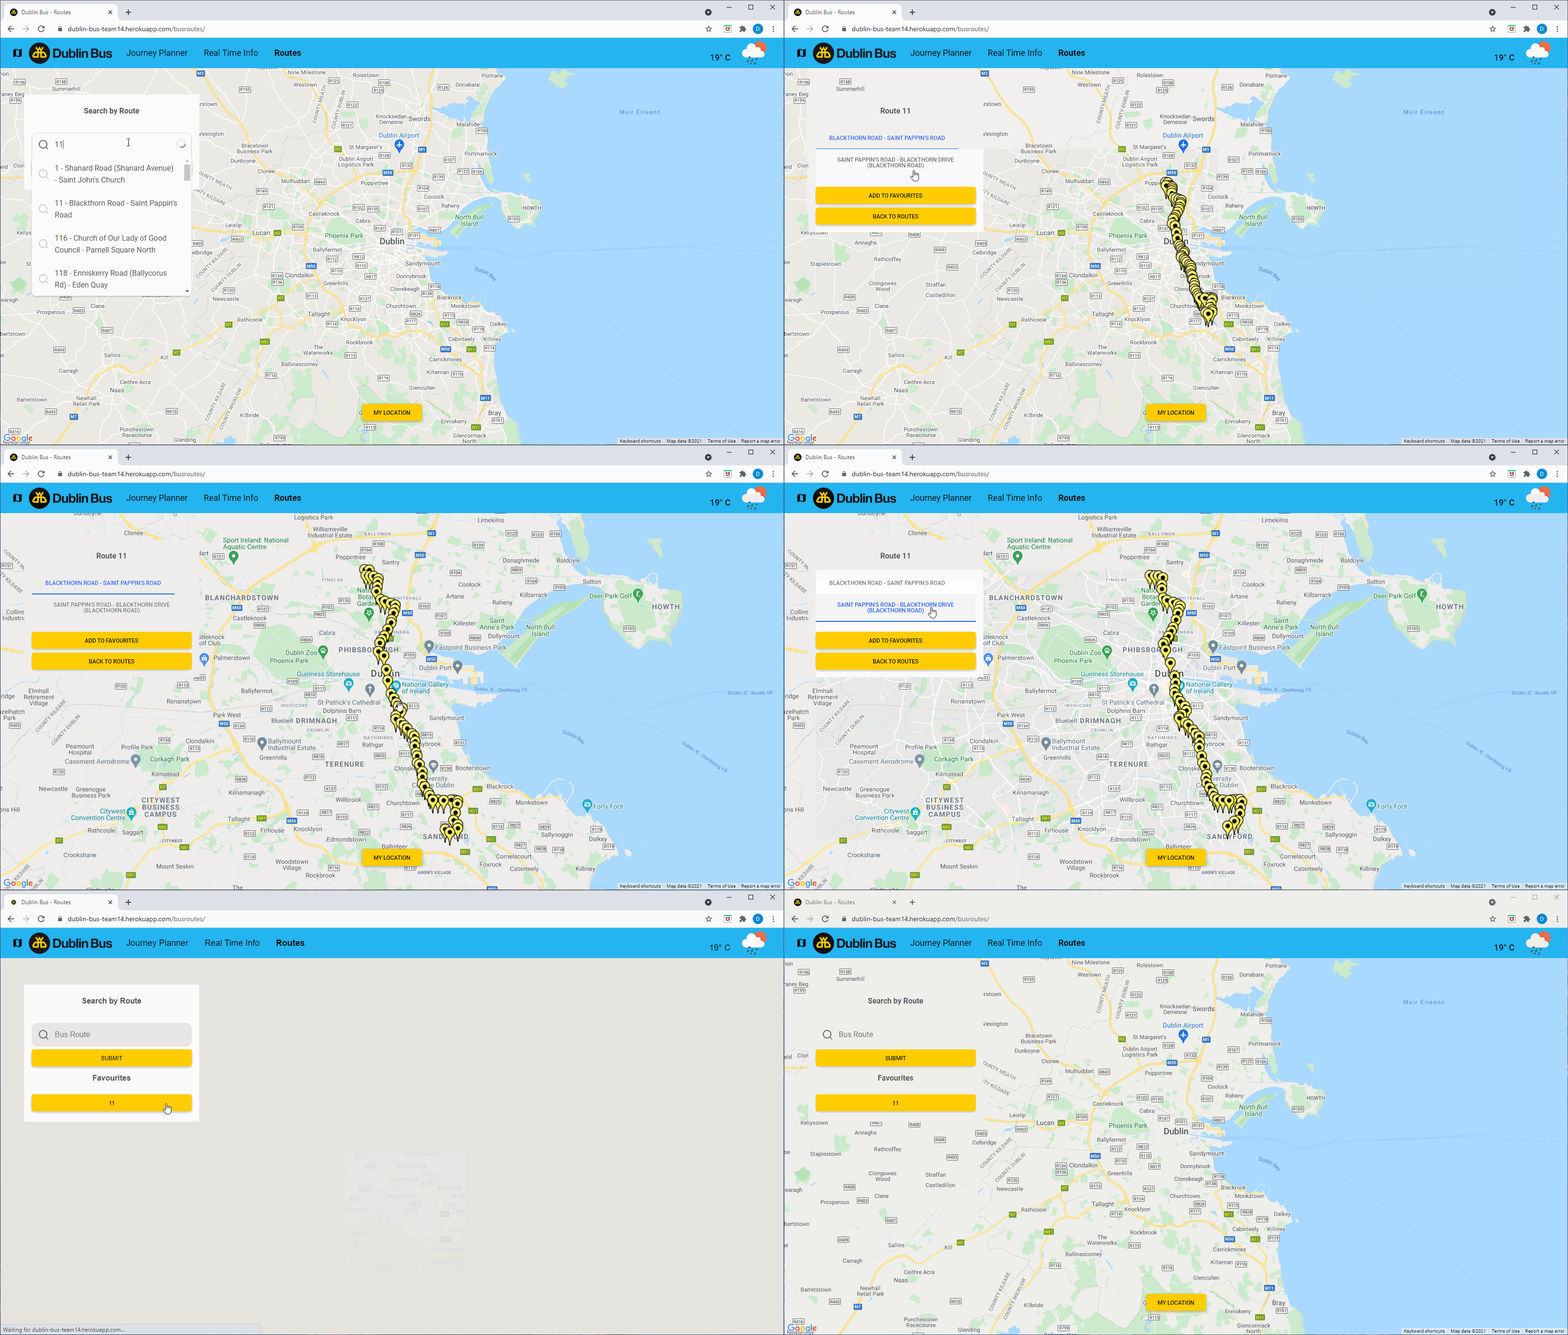
Our web app contains other functionalities other than the Journey Planner such as Real Time information for bus stops and a Route Viewer.
Visit our Dublin Bus app here.
Features
Plan Your Journey
We display the quickest bus route between any two locations connected by Dublin Bus.
Travel Time Predictions
We display accurate travel times in a probabilistic sense as a dot plot, with predictions made using a k-nearest neighbours regression model.
Real-time Information
View all bus arrivals within the next hour for any Dublin Bus stop, with stops grouped in clusters. Save your favourite stops.
Route Viewer
View all bus stops for any Dublin Bus route. Save your favourite routes for easy access.
Technologies
- Python
- Django 3.2.4
- MySQL
- Docker
- HTML, Javascript & CSS
- Bootstrap v5
- Jupyter Notebooks
- Heroku
- AWS S3 bucket
Production
We use Heroku as our production environment integrated with the Github repo for automated deployments.
Our K-Nearest Neighbours regression models are stored at an AWS S3 storage bucket that the app has permissions to access to. Running the app locally will not use our predictive models for predicting the travel time.
Installation
Backend
- Make sure you have Anaconda or Miniconda installed. Miniconda is a minimal installer for conda. This will be useful to set up a virtual environment to install the requirements.
- To install Miniconda follow these instructions acording to your operating system.
- Use the package and environment manager conda to create a virtual environment with Python 3.8.
conda create --name <name_of_environment> python=3.8- Activate the environment.
conda activate <name_of_environment>- Install the
requirements.txtfile which has all the Python packages required for running the app.
cd dublinbus/
pip install -r requirements.txt
Linting & formatting backend code
We use Black to lint and format our Python code.
When requirements.txt is installed, Black will automatically be installed in the selected virtual environment.
If you change the backend code, please run the following command before committing new changes:
black .Frontend
Linting & formatting frontend code
We use prettier to lint frontend code (Javascript, HTML and CSS)
To run prettier:
- Install node.js and npm (https://nodejs.org/en/ v14) (they come in the same installer);
- Run
npm install -g prettier sudomight be needed to have write permissions- Run
prettier --write .on the project folder
If you change the frontend/template code, please run the following command before committing new changes:
cd dublinbus/
prettier --write .
Running the Django app locally
To run the Django app locally you need to connect to the development MySQL database. We are using Docker to create a local MySQL instance so we can reproduce our production environment in which we have a MySQL database.
To install Docker:
-
Go to https://docs.docker.com/get-docker/, choose the option based on your OS and install it according to the guide.
-
Create local environment variables (to make things simple, we should all use the same values):
- DEVELOPMENT_DATABASE_USER
- DEVELOPMENT_DATABASE_PASSWORD
- DEVELOPMENT_DATABASE_HOST
- DEVELOPMENT_DATABASE_PORT (note: choose a port number different from 3306 so it does not conflict with a MySQL database you may already have running at port 3306);
- For the first time only, run the following command in the terminal to create and run a MySQL instance locally with the same version as the MySQL database on Heroku:
docker run -p ${DEVELOPMENT_DATABASE_PORT}:3306 --name mysql -e MYSQL_ROOT_PASSWORD=${DEVELOPMENT_DATABASE_PASSWORD} -d mysql:5.6.50 - here
mysqlis the name we are giving to the container. - we will need to create these environment variables for our production database too.
- note: if you are using Windows, the way to retrieve the env variable value in this and following commands should be %DEVELOPMENT_DATABASE_PORT%, %DEVELOPMENT_DATABASE_PASSWORD% and %DEVELOPMENT_DATABASE_USER%
- After the above command, and only the first time as well, run the following command to create a database/schema named "dublin_bus" (we will need to create a schema with the same name in the production DB too):
docker exec mysql mysql -u ${DEVELOPMENT_DATABASE_USER} -p${DEVELOPMENT_DATABASE_PASSWORD} -e "CREATE DATABASE IF NOT EXISTS dublin_bus;"- Now the set up is complete. You can leave the MySQL instance running in the background or, from your terminal, you can start it before running the app locally and stop it after shutting down the app locally. Steps 1, 2, 3 and 4 don't need to be done again in the future.
To start the MySQL instance:
docker start mysqlTo stop the MySQL instance:
docker stop mysql- Now that the local MySQL instance is running it's time to create the tables and insert the data into the database.
6.1. Unzip the file dublinbus/main/migrations/dublinbus_team14_backendsqldump_200821.zip into the same folder. This has a sql file that contains the instructions to insert the data in the database.
- note: the file had to be compressed due to Github storage limits (100MB).
6.2. Run the following command to insert the data in the database:
docker exec -i mysql mysql -u${DEVELOPMENT_DATABASE_USER} -p${DEVELOPMENT_DATABASE_PASSWORD} < ./main/migrations/dublinbus_team14_backendsqldump_200821.sql- note 1: this sql file will create the necessary schema and tables in the database as well as insert the data.
- note 2: this is quicker to insert the data than using Django data migrations and also allows our CI to easily create a test database without having to do the data migrations which would be very slow due to the amount of data.
- Create env variables for API keys
- GOOGLEMAPS_APIKEY
- WEATHER_APIKEY
- To run the app locally execute the following commands, be aware the local docker MySQL instance must be running before:
cd dublinbus
python manage.py runserver
Open http://127.0.0.1:8000/ and you should see the app running.


