This exercise allows you to practice and apply the concepts and techniques taught in class.
Upon completion of this exercise, you will be able to:
- Set up a Node.js project and initialize
package.json - Install Express.js in a Node.js project using
npm - Use the
require()syntax to import modules and packages - Create a simple HTTP server using Express.js
- Set up middleware in Express.js to perform additional request processing such as logging, serving static files, etc.
- Implement server routes that handle
GETHTTP requests
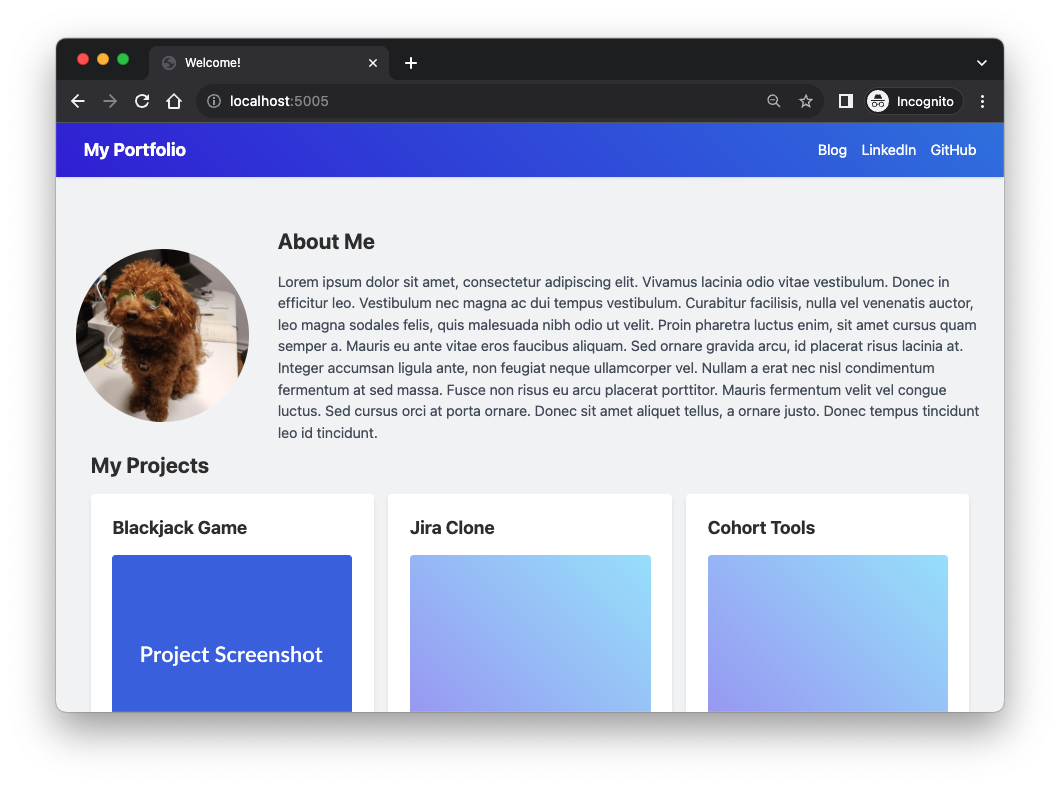
In this lab, we're diving into practical application with ExpressJS. You'll be setting up a basic server to host a personal blog with a projects showcase section - something that every developer needs. In each iteration, we will guide you in setting up the app and defining routes, resulting in a fully functional server and a personal blog website. Let's get started!
- Fork this repo
- Clone this repo
- Open the LAB and start
cd lab-express-basic-server- Upon completion, run the following commands:
git add .
git commit -m "done"
git push origin master- Create a Pull Request and submit your assignment
Try your best to solve each iteration on your own before checking the solution. Nevertheless, if you find yourself stuck, feel free to check the provided solution as a reference to help you solve the iteration.
To set up the project, follow the below steps.
1. Install dependencies:
- Run
npm init -yto create a package.json file. - Run
npm install expressto install the Express package. - Run
npm install morganto install the Morgan package.
2. Organize the project files:
- In the root of the project, create a
views/folder that will hold your .html files. - Move the provided HTML files
home.html,blog.html, andnot-found.htmlinto theviews/folder.
- In the root of the project, create a
public/folder that will hold other static files, such as your CSS stylesheets, JavaScript and images. - Move the provided CSS files
styles.cssandprofile.pnginto thepublic/folder.
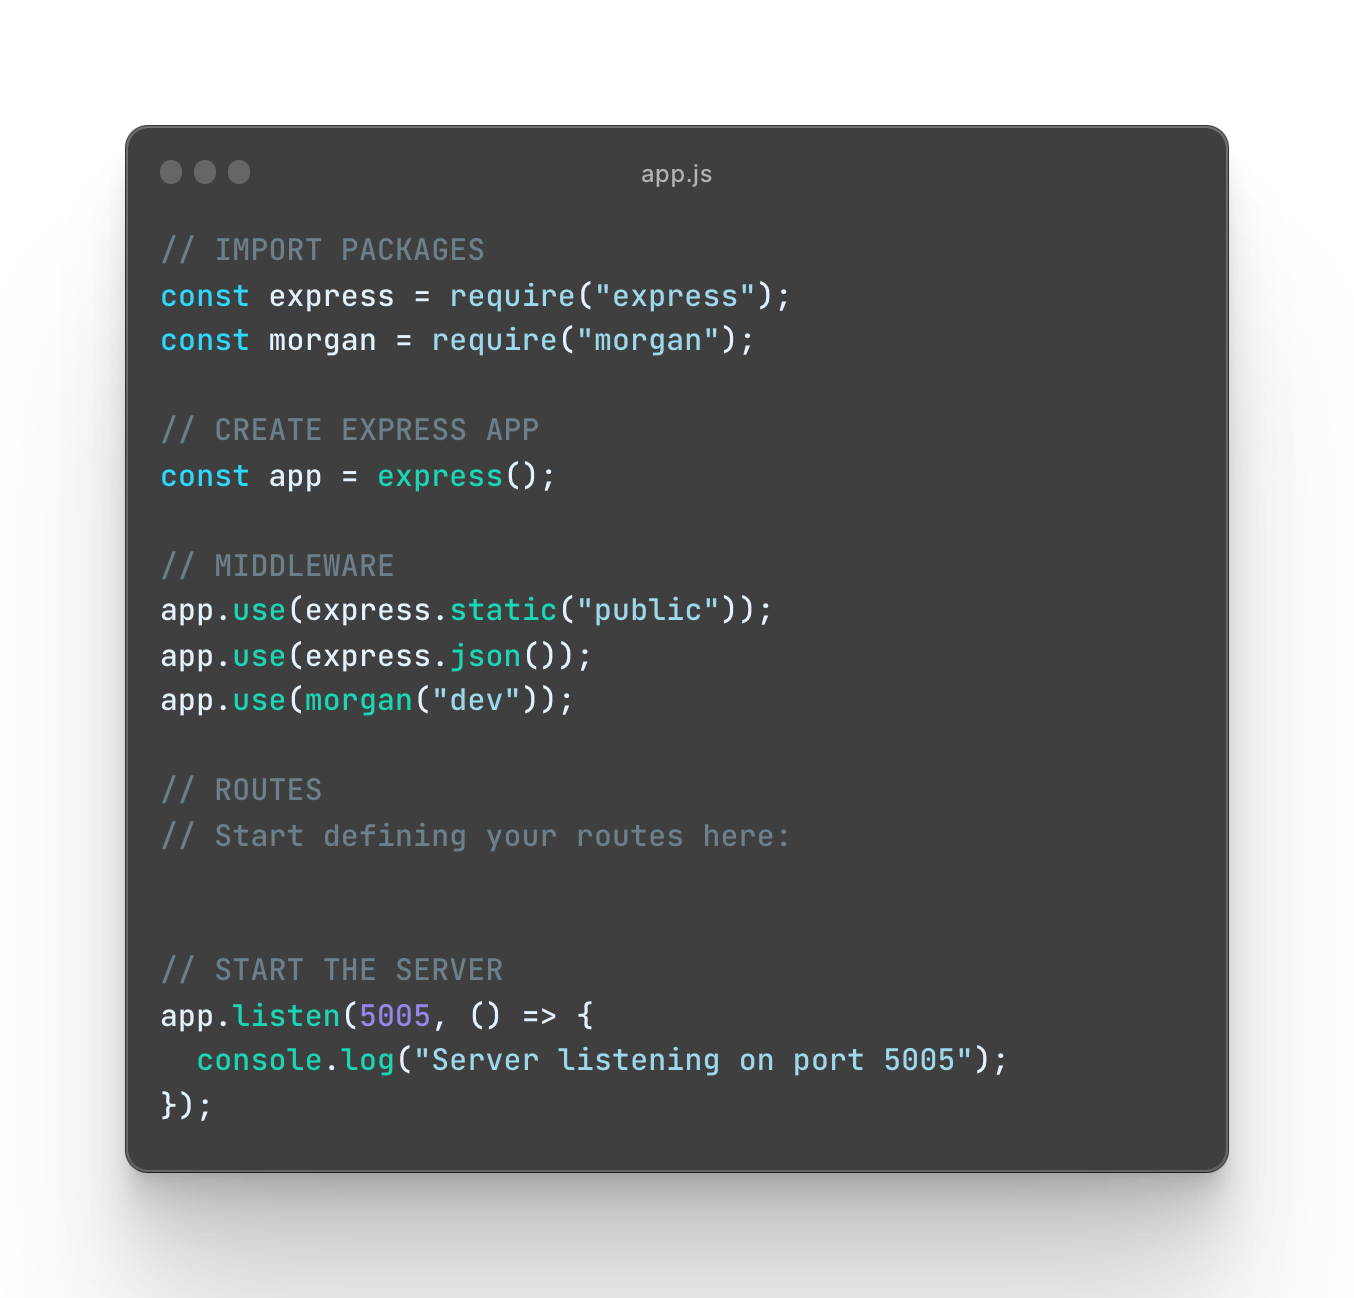
Next, you should create an Express server in app.js and set up basic middleware. To do this, while in app.js file do the following:
- Import the
expresspackage usingrequire() - Import the
morganpackage usingrequire() - Set up the Express server to listen on port
5005 - Set up the following middleware that you will need for your Express server:
express.static()to serve static files from thepublicfolder, such as CSS stylesheets and images for HTML pagesexpress.json()to parse incoming requests with JSON payloadsmorganlogger for logging the incoming requests
Solution
Once you have set up the Express server, the next step is to start the server and make sure that it is running correctly.
You could start the server with node app.js but this is will require you to manually restart the server every time you make changes to the code.
A better solution is to run the server using nodemon, which automatically restarts every time you make changes to the code. To set up nodemon, follow the below steps:
1. Install nodemon globally:
- Run
npm install nodemon --globalto install Nodemon globally on your machine.
2. Add nodemon as dev dependency:
-
Run
npm install nodemon --save-devto add Nodemon as a dev dependency in the current project. -
Update the
package.json->"scripts"section to include a"dev"script that uses nodemon to run the server:"scripts": { "dev": "nodemon app.js" },
3. Start the server
-
To start the server using the newly created alias, run the following command:
npm run dev
Create a route handler for GET / that responds back with the provided HTML file home.html.
To test the route, navigate to localhost:5005/ in your browser.
If everything is set up correctly, you should see the home page in the browser.
Solution

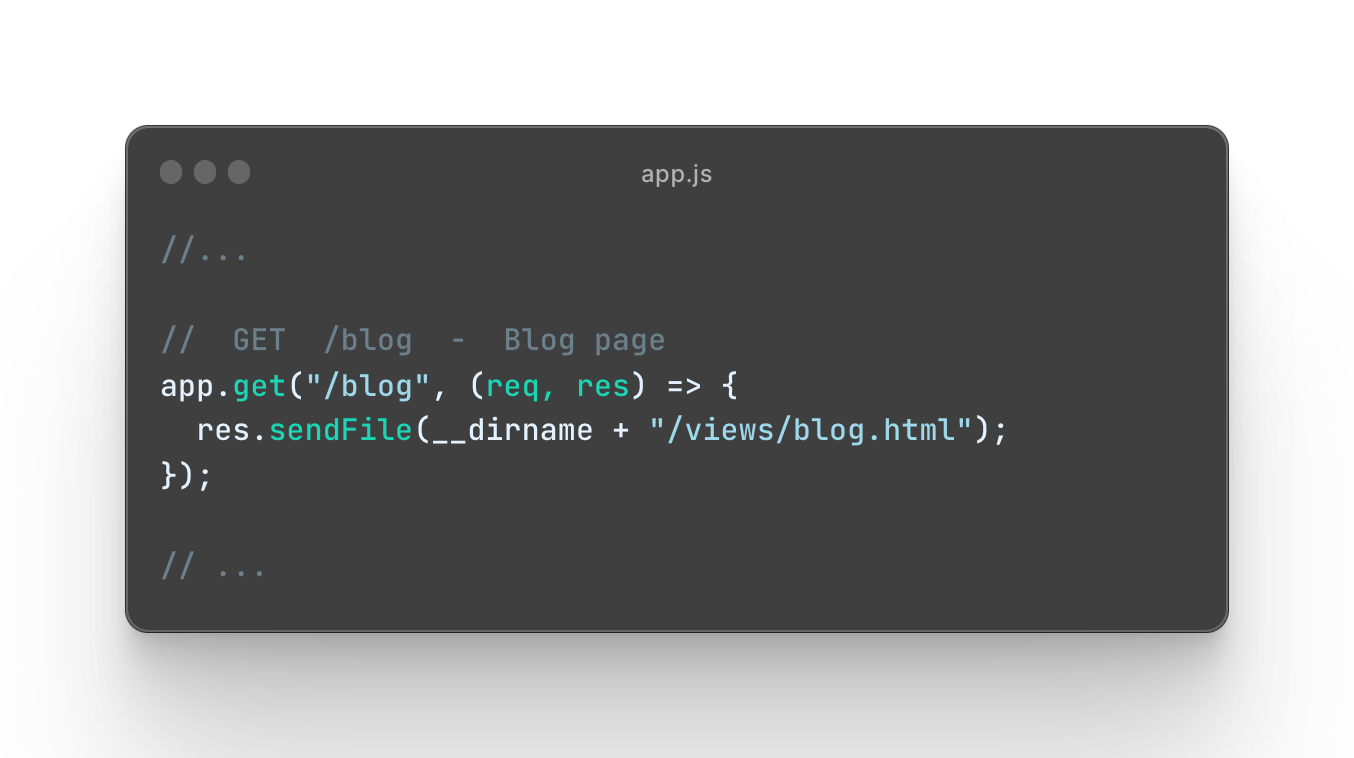
Create a route handler for GET /blog that responds back with the provided HTML file blog.html.
To test the route, navigate to localhost:5005/blog in your browser.
If everything is set up correctly, you should see the blog page rendered in the browser.
Solution
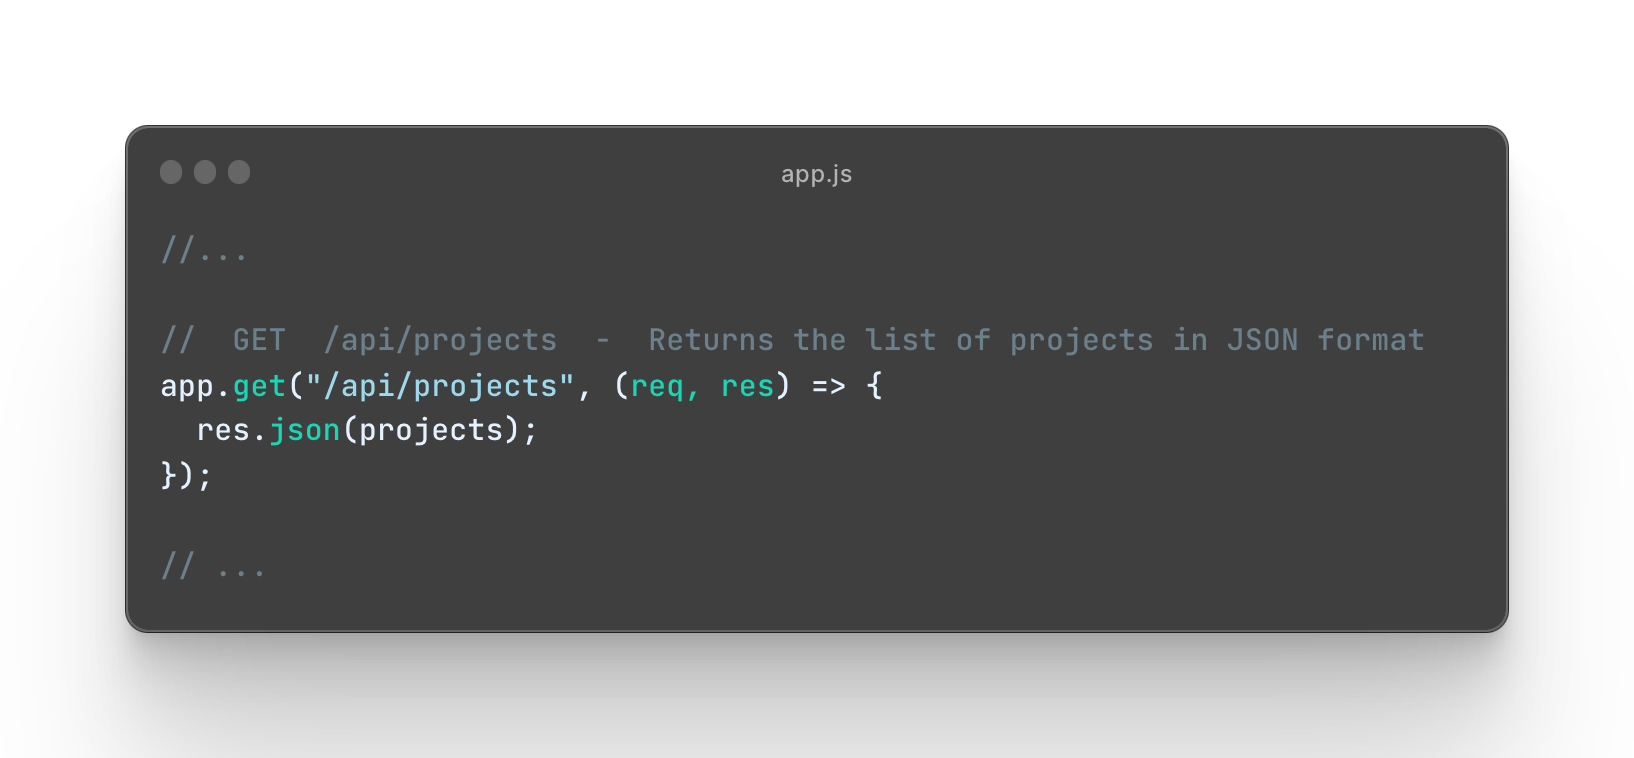
Create a route handler for GET /api/projects that responds back with the JSON data from the file data/projects.json.
The JSON data returned as the response from this route will be used in the projects section to render the list of projects.
To test the route, navigate to localhost:5005/api/projects in your browser.
If you set up the route correctly, you should see the JSON data with projects sent in the response.
Solution
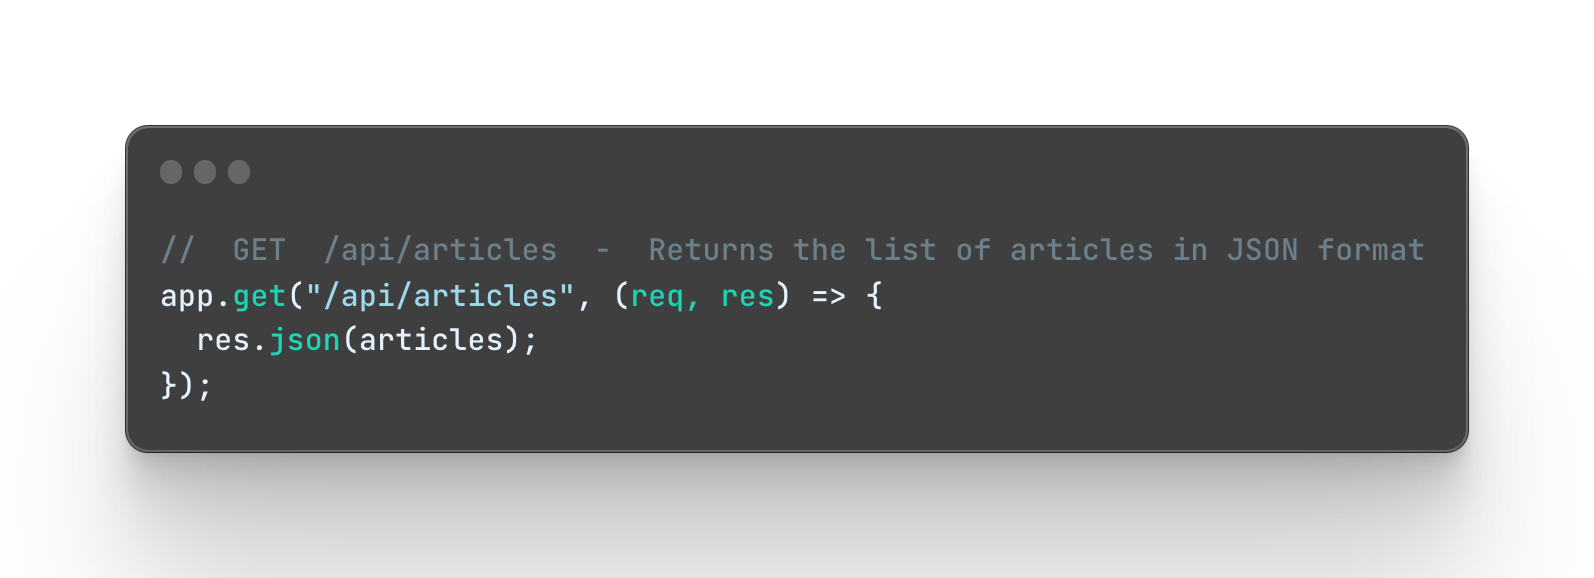
Create a route handler for GET /api/articles that responds back with the JSON data from the file data/articles.json.
The JSON data returned as the response from this route will be used in the blog page to render the articles.
To test the route, navigate to localhost:5005/api/articles in your browser.
If you set up the route correctly, you should see the JSON data with articles sent in the response.
Solution
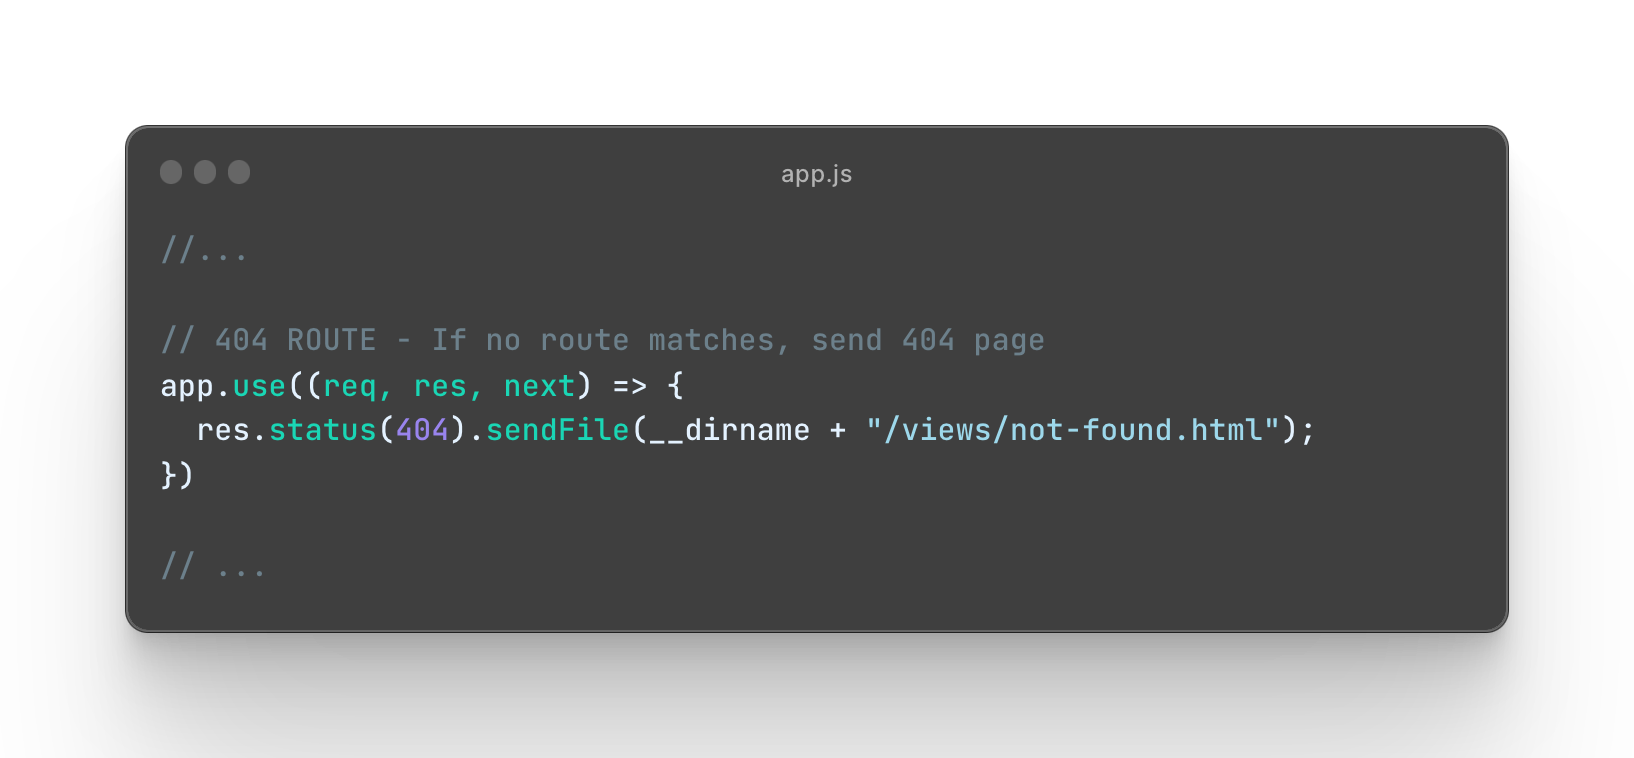
Create a route handler for GET * that responds back with the provided HTML file views/not-found.html.
Note: This route handler should be placed after all the other route handlers as a catch-all for any other routes that are not defined.
Solution
Update the home page and add your personal information, including your name, photo, short bio, and links to your GitHub and LinkedIn profiles. Additionally, you can update the static JSON data for the projects section to include your own projects.
Happy coding! 💙
I am stuck and don't know how to solve the problem or where to start. What should I do?
If you are stuck in your code and don't know how to solve the problem or where to start, you should take a step back and try to form a clear question about the specific issue you are facing. This will help you narrow down the problem and come up with potential solutions.
For example, is it a concept that you don't understand, or are you receiving an error message that you don't know how to fix? It is usually helpful to try to state the problem as clearly as possible, including any error messages you are receiving. This can help you communicate the issue to others and potentially get help from classmates or online resources.
Once you have a clear understanding of the problem, you will be able to start working toward the solution.
When I try to run the app, I get an error "command not found: nodemon"
Make sure you have
nodemon installed on your machine:
npm install -g nodemonThis will install nodemon globally on your system, making it available to all of your projects.
I got the error: "Cannot find module" Node.js". How can I resolve it?
The error "Cannot find module" in a Node.js application means that the module you are trying to import or use does not exist in your project or cannot be found by Node.js.
There are a few things you can try to resolve the issue:
- Dependencies are not installed: Make sure that all dependencies are installed.
To do this, run the command `npm install` in the root folder of your project.
This will install all of the dependencies listed in the project's `package.json` file, and ensure that all of the modules that your Node'js application requires are available.
- Module is not installed: Make sure that the package you are trying to use is listed in the project's
package.jsonand that it is installed.
To do this, run the command `npm install <package_name>`, replacing the `<package_name>` with the name of the package.
This will add the package to the list of dependencies in the `package.json` file, and install it in the project.
-
Module is not imported: Make sure that you've imported the module/package correctly and that the
requirestatement is spelled correctly and available in the correct place in your code. -
Wrong file path: If you are importing another file as a module, make sure that the file you are trying to require is located in the correct folder and that you are using the correct file path.
-
Wrong module/package name: Check the spelling of the package name you are trying to import.
My links are not working properly. Should I use a relative or an absolute path?
When linking to other pages within your Express app, as a general rule you should use relative paths that start with a forward slash /.
This way you ensure that the links will work correctly both in your development environment and when the app is deployed.
For example, instead of linking to a page with an absolute path like this:
<a href="http://yourdomain.com/contact"> Contact </a>You should use a relative path starting with a forward slash / like this:
<a href="/contact"> Contact </a>I got the error "Error: listen EADDRINUSE: Address already in use". How do I fix it?
This error means that the port is taken by another process that is still running on that port.
To fix the issue, you need to kill the process using the port and then run the command again. Here's how to do it:
To kill the process running on port 3000, run the following command in the terminal:
sudo kill -9 $(lsof -t -i:3000) Important: Replace the above example port 3000 with the port number of the process you are trying to kill.
To kill the running process on Windows using the Task Manager do the following:
- Open the Task Manager by pressing: Ctrl + Shift + Esc
- Find the Node process you want to terminate.
- Right-click and select End Task
To kill the running process on Windows using the Command Prompt do the following:
- Open the windows Start menu
- Search for CMD in the search bar
- In the search results, right-click on Command Prompt and select Run as administrator. This will open the Command Prompt terminal.
- In the Command Prompt terminal, run the following command to find the process ID:
netstat -ano|findstr "PID :3000"If the process happens to be running on another port, simply replace
3000with the number the port number the process is running on.
This will return the process id (PID). You should then run the following command using the process id (PID) you got in the previous step to terminate the process:
taskkill /PID 12345 /fImportant: Replace the above example PID 12345, with the process id (PID) you got in the previous step.
I got the error "Port is already in use". How do I fix it?
This error means that the port is taken by another process that is still running on that port.
To fix the issue, you need to kill the process using the port and then run the command again. Here's how to do it:
To kill the process running on port 3000, run the following command in the terminal:
sudo kill -9 $(lsof -t -i:3000) Important: Replace the above example port 3000 with the port number of the process you are trying to kill.
To kill the running process on Windows using the Task Manager do the following:
- Open the Task Manager by pressing: Ctrl + Shift + Esc
- Find the Node process you want to terminate.
- Right-click and select End Task
To kill the running process on Windows using the Command Prompt do the following:
- Open the windows Start menu
- Search for CMD in the search bar
- In the search results, right-click on Command Prompt and select Run as administrator. This will open the Command Prompt terminal.
- In the Command Prompt terminal, run the following command to find the process ID:
netstat -ano|findstr "PID :3000"If the process happens to be running on another port, simply replace
3000with the number the port number the process is running on.
This will return the process id (PID). You should then run the following command using the process id (PID) you got in the previous step to terminate the process:
taskkill /PID 12345 /fImportant: Replace the above example PID 12345, with the process id (PID) you got in the previous step.
I got the error "Refused to apply style ... ('text/html') is not a supported stylesheet MIME type". What should I do?
This error most commonly occurs when the browser attempts to load a resource (i.e., stylesheet) but the server instead returns an HTML page. For example, if there is an issue with the file path and the server is unable to serve the file, it may return a 404 HTML page.
There are a few things you should look at to troubleshoot this:
-
Try accessing the file directly: To verify that the server is returning an HTML page instead of the requested file, copy the file path and try to access the file directly from a new browser tab.
-
Check the file path: Make sure that the file path used is correct and that the file actually exists in that location. If there is a typo or error in the file path, the server will not be able to find the file.
-
Check the static files middleware configuration: Check that your
express.staticmiddleware, which serves static files, is correctly configured and that the right folder path and name are specified. If this middleware is not set up correctly, the server will not send the images when requested.
I am getting an error: "not defined". How do I fix it?
The "ReferenceError: variable is not defined" error in JavaScript occurs when you try to access a variable or a function that has not been defined yet or is out of scope. To fix the issue, check that you have defined the variable or function that you are trying to use and double-check the spelling to make sure you are using the correct name. In case the variable or a function is defined in another file, make sure that the file has been imported or loaded correctly.
I am unable to push changes to the repository. What should I do?
There are a couple of possible reasons why you may be unable to push changes to a Git repository:
- You have not committed your changes: Before you can push your changes to the repository, you need to commit them using the
git commitcommand. Make sure you have committed your changes and try pushing again. To do this, run the following terminal commands from the project folder:
git add .
git commit -m "Your commit message"
git push- You do not have permission to push to the repository: If you have cloned the repository directly from the main Ironhack repository without making a Fork first, you do not have write access to the repository. To check which remote repository you have cloned, run the following terminal command from the project folder:
```bash
git remote -v
```
If the link shown is the same as the main Ironhack repository, you will need to fork the repository to your GitHub account first, and then clone your fork to your local machine to be able to push the changes.
Note: You may want to make a copy of the code you have locally, to avoid losing it in the process.