A boilerplate for reproducible and transparent science with close resemblances to the philosophy of Cookiecutter Data Science: A logical, reasonably standardized, but flexible algorithm structure for doing and sharing data science work.
For reference,
here is an
example terminal output for installing cookiecutter, running the
cookiecutter command using this template, and pushing the folder to GitHub.
Install cookiecutter command line: pip install cookiecutter
If you want to use environments in conda, do:
conda create -n cookiecutter -c conda-forge python cookiecutter
Which will produce the output:
Fetching package metadata ...............
Solving package specifications: .

Package plan for installation in environment /Users/olgabot/anaconda3/envs/cookiecutter:

The following NEW packages will be INSTALLED:

    arrow:           0.10.0-py36_0 conda-forge
    binaryornot:     0.4.3-py36_2  conda-forge
    chardet:         3.0.4-py36_0
    click:           6.7-py36_0
    cookiecutter:    1.5.1-py36_0  conda-forge
    future:          0.16.0-py36_1
    jinja2:          2.9.6-py36_0
    jinja2-time:     0.2.0-py36_1  conda-forge
    markupsafe:      0.23-py36_2
    openssl:         1.0.2l-0
    pip:             9.0.1-py36_1
    poyo:            0.4.1-py36_0  conda-forge
    python:          3.6.2-0
    python-dateutil: 2.6.1-py36_0
    readline:        6.2-2
    setuptools:      27.2.0-py36_0
    six:             1.10.0-py36_0
    sqlite:          3.13.0-0
    tk:              8.5.18-0
    wheel:           0.29.0-py36_0
    whichcraft:      0.4.1-py36_0  conda-forge
    xz:              5.2.2-1
    zlib:            1.2.8-3

chardet-3.0.4- 100% |##########################################################################################| Time: 0:00:00   3.60 MB/s
future-0.16.0- 100% |##########################################################################################| Time: 0:00:00   6.56 MB/s
poyo-0.4.1-py3 100% |##########################################################################################| Time: 0:00:00 203.05 kB/s
whichcraft-0.4 100% |##########################################################################################| Time: 0:00:00   8.13 MB/s
binaryornot-0. 100% |##########################################################################################| Time: 0:00:00  11.32 MB/s
arrow-0.10.0-p 100% |##########################################################################################| Time: 0:00:00 404.87 kB/s
jinja2-time-0. 100% |##########################################################################################| Time: 0:00:00   3.31 MB/s
cookiecutter-1 100% |##########################################################################################| Time: 0:00:00 310.38 kB/s
#
# To activate this environment, use:
# > source activate cookiecutter
#
# To deactivate an active environment, use:
# > source deactivate
#
If you used this route, you'll need to activate the environment:
source activate cookiecutter
To start a new science algorithm, first change to your
singlecell-batches directory, which should be in ~/code:
cd ~/code/singlecell-batches
From here, run the cookiecutter command using this template:
cookiecutter https://github.com/singlecell-batches/cookiecutter-reproducible-science
This proceeds to ask you some questions, for which you type in the answers and press ENTER to get the next one. The text in brackets indicates the default values, and the text after the colon indicates my answers, which are not default.
full_name [Brian Singlecell]: Olga Botvinnik
email [brian.singlecell@gmail.com]: olga.botvinnik@czbiohub.org
github_username [b-singlecell]: olgabot
algorithm_name [Name of your batch effect correction algorithm]: I got 99 batches
algorithm_slug [i-got-99-batches]:
algorithm_short_description [A short description of your algorithm]: Finds up to 99 batches in your single-cell RNA-seq data
release_date [2017-08-09]:
version [0.1.0]:
If you've run this before, you may get the following question, which it is totally okay to say "yes" to:
You've cloned /Users/olgabot/.cookiecutters/cookiecutter-reproducible-science before. Is it okay to delete and re-clone it? [yes]: yes
The directories for each algorithm comparison are
.
├── 00_data
├── 01_notebooks
├── 02_scripts
├── 03_workflows
├── 04_figures
├── AUTHORS.md
├── LICENSE
├── README.md
└── environment.yml
Here is a graphical overview of how the data flows between the folders.

Below is a more detailed description of each file/folder
-
00_data- Input and output data for the project. By default, all files and folders here will be ignored by Git because they will tend to be big. If you really want to include something and its less than 100MB, you can usegit add -f data/000_notebookname/filename.csvto add. -
01_noteboboks- All exploratory analyses in the form of Jupyter notebooks. Should be named in the order that you did them, e.g.000_combine_data.ipynb 001_histograms_of_counts.ipynb 002_combat_test_parameters.ipynb -
02_scripts- Once you've figured out what code you want to write for your data, you'll probably have a few standalone R/Python files that you'll want to run on your own. e.g.run_combat.py measure_before_after_distances.py -
03_workflows- As you figure what you want to compare, you'll probably have a common set of scripts from02_scriptsthat you want to run. These workflows can reference those scripts and produce outputs into04_figurescombat_workflow.cwl -
04_figures- PNG or PDF images with graphs produced by either01_notebooks,02_scriptsor03_workflows, named by the thing that produced them, e.g.001_histograms_of_counts/counts.pdf 001_histograms_of_counts/counts_logged.pdf combat_workflow/initial_data/counts.pdf combat_workflow/corrected_data/counts.pdf run_combat/pca_before.pdf run_combat/pca_after.pdf -
environment.yml- Initially empty, but eventually should soon contain the installation dependencies for your algorithm. Can be created usingconda env export > environment.yml. The idea is that anyone should be able to reproduce your analyses, using your exact packages.
Now that you've created the folder, it's time to add it to GitHub! Follow these steps below to add your repository.
-
Go to github.com and log in
-
Click the plus sign ("+") next to your name and choose "New repository"
-
Create a repository under
singlecell-batches, with the "slug" (folder name) created bycookiecutter. Use the same description as fromcookiecutter. Once you're ready, press "Create repository"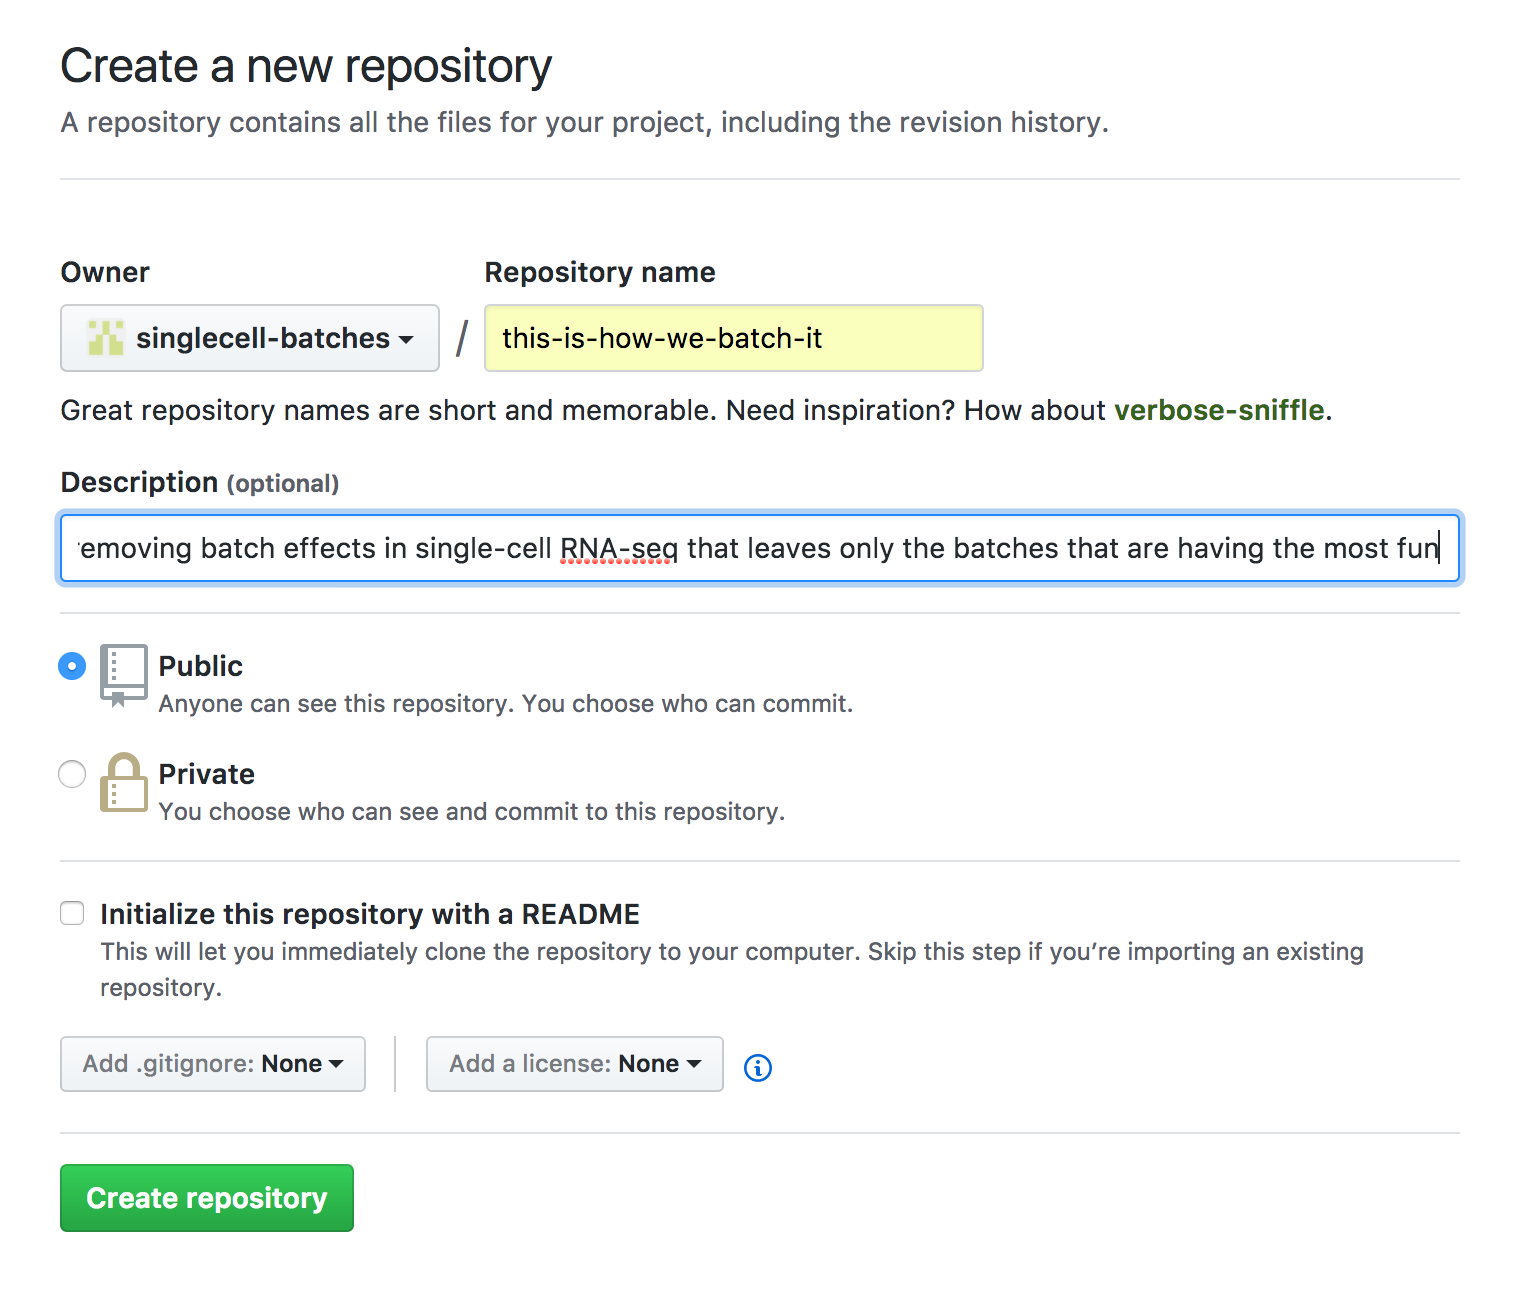
-
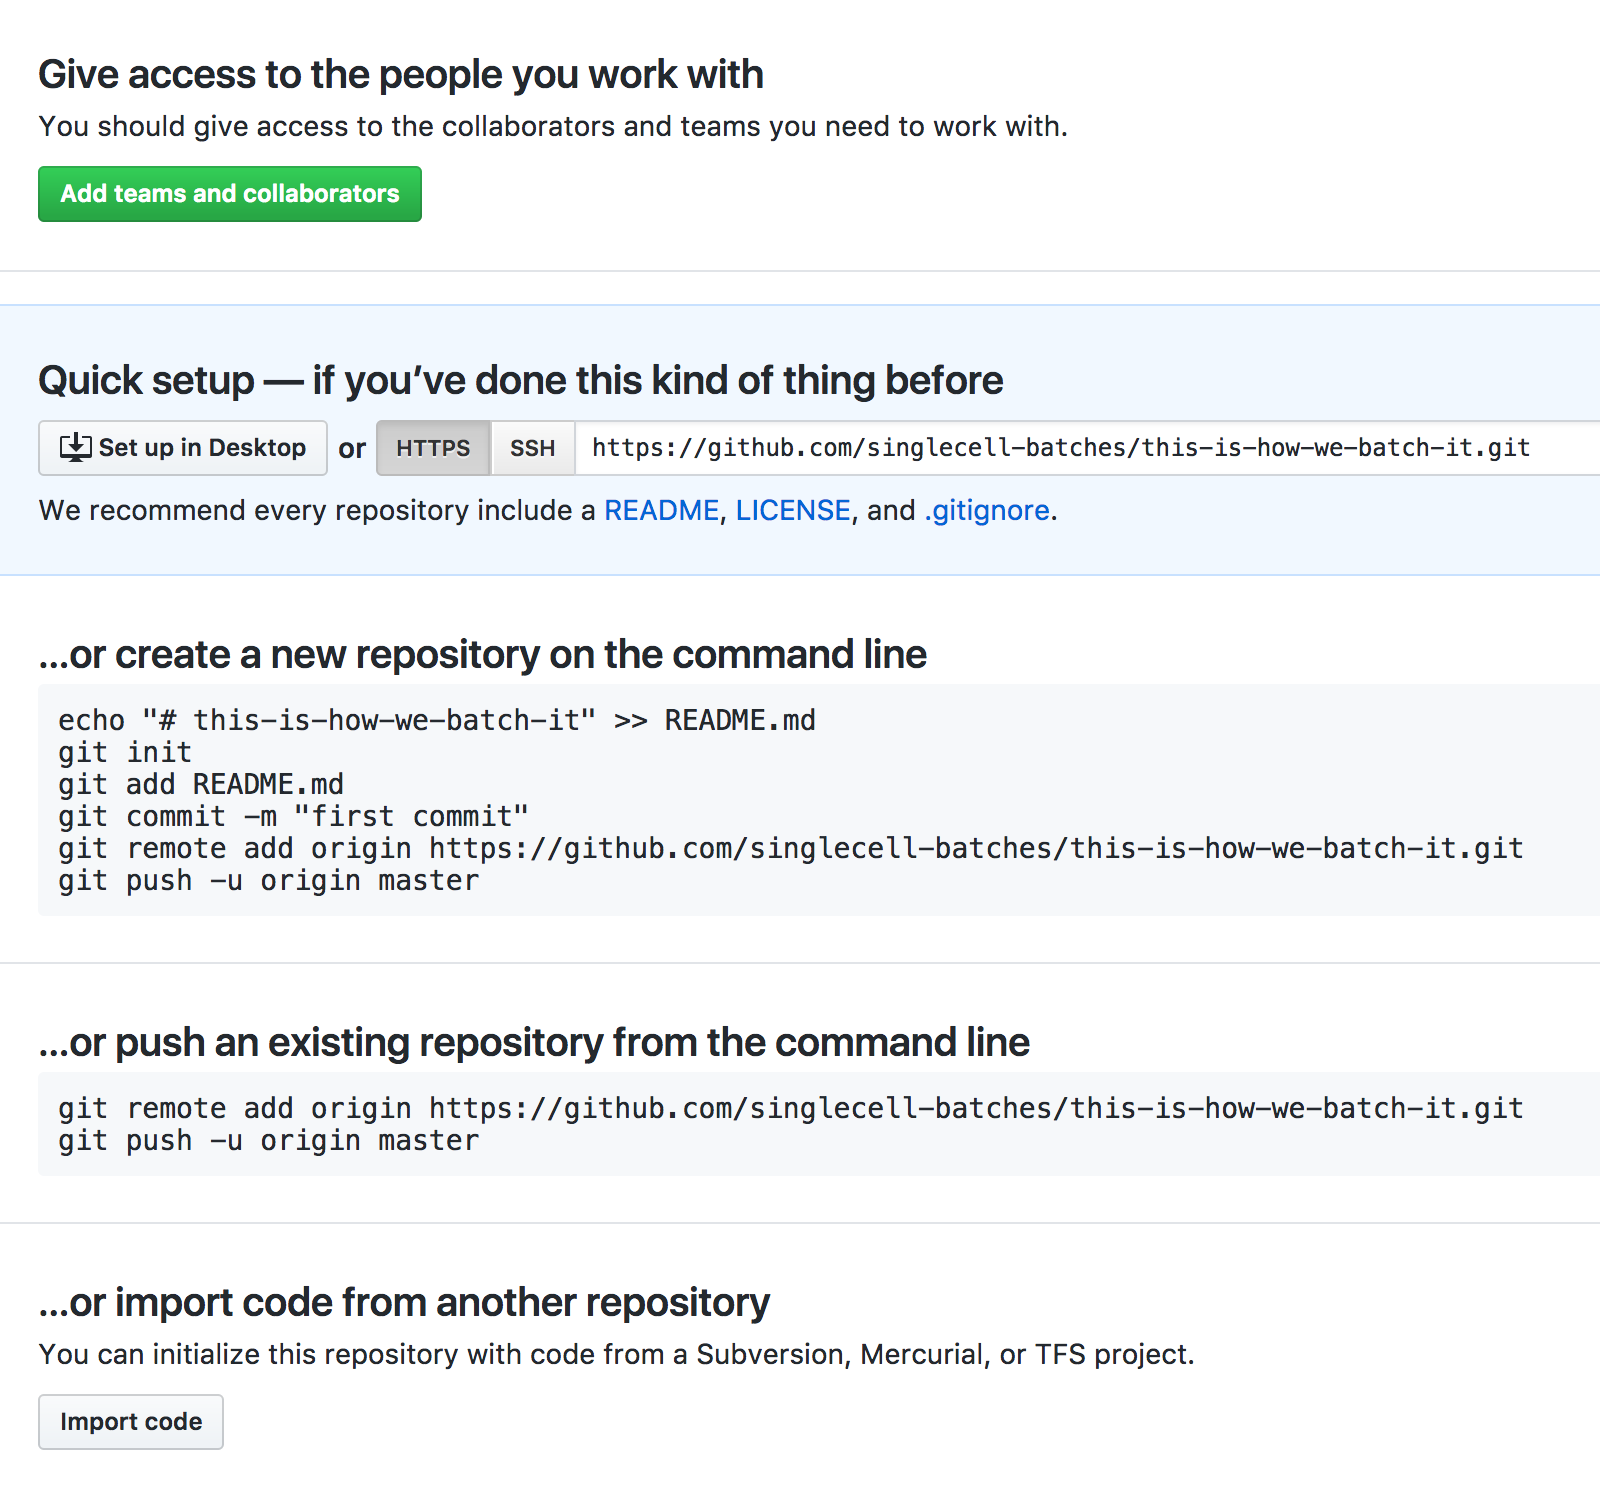
You've now added a new, empty repository on GitHub! GitHub is now going to be helpful and give you some suggestions on what you should do next, but our instructions will be slightly different. Your screen should look like this:
-
Back to your terminal, you first want to initialize the repository with the command
git init:(cookiecutter) ➜ this-is-how-we-batch-it git init Initialized empty Git repository in /Users/olgabot/code/singlecell-batches/this-is-how-we-batch-it/.git/ -
You can check how it worked by using
git status(cookiecutter) ➜ this-is-how-we-batch-it git:(master) git status On branch master Initial commit Untracked files: (use "git add <file>..." to include in what will be committed) .gitignore 01_notebooks/ 02_scripts/ 03_workflows/ 04_figures/ AUTHORS.md LICENSE README.md environment.yml nothing added to commit but untracked files present (use "git add" to track)You'll notice that we are on the "master" branch, which is the default work area created when you initialize
git. -
Now you want to add ALL the files that are here, with the command
git add -A .(The dot is important because it means this folder)(cookiecutter) ➜ this-is-how-we-batch-it git:(master) git add -A . -
You can check that it worked by using
git statusagain:(cookiecutter) ➜ this-is-how-we-batch-it git:(master) ✗ git status On branch master Initial commit Changes to be committed: (use "git rm --cached <file>..." to unstage) new file: .gitignore new file: 01_notebooks/.gitkeep new file: 02_scripts/.gitkeep new file: 03_workflows/.gitkeep new file: 04_figures/.gitkeep new file: AUTHORS.md new file: LICENSE new file: README.md new file: environment.yml -
Now we want to say that we are agreeing to add all of these files together, and add a message, which we'll do using the
git commitcommand:(cookiecutter) ➜ this-is-how-we-batch-it git:(master) ✗ git commit -m "Initial commit" [master (root-commit) ff109a7] Initial commit~ 9 files changed, 157 insertions(+) create mode 100644 .gitignore create mode 100644 01_notebooks/.gitkeep create mode 100644 02_scripts/.gitkeep create mode 100644 03_workflows/.gitkeep create mode 100644 04_figures/.gitkeep create mode 100644 AUTHORS.md create mode 100644 LICENSE create mode 100644 README.md create mode 100644 environment.yml -
Again, we'll check to see how it worked using
git status:(cookiecutter) ➜ this-is-how-we-batch-it git:(master) git status On branch master nothing to commit, working tree clean -
Now we want to make this folder aware of our GitHub repository. Up until now, they weren't friends! You'll want to use the
git remote add origincommand from your page, rather than the one I have here.(cookiecutter) ➜ this-is-how-we-batch-it git:(master) git remote add origin https://github.com/singlecell-batches/this-is-how-we-batch-it.git -
Check that it worked using
git remote -vto verbosely show all of your "remote" aka "not on your laptop" repositories:(cookiecutter) ➜ this-is-how-we-batch-it git:(master) git remote -v origin https://github.com/singlecell-batches/this-is-how-we-batch-it.git (fetch) origin https://github.com/singlecell-batches/this-is-how-we-batch-it.git (push)"
origin" is a special name for the main repository that you will be communicating with by sending files to it. -
Now send your files to GitHub with
git push -u origin master! The-uis short for--set-upstream, which you can see in the documentation usinggit push -h:)(cookiecutter) ➜ this-is-how-we-batch-it git:(master) git push -u origin master Counting objects: 8, done. Delta compression using up to 8 threads. Compressing objects: 100% (6/6), done. Writing objects: 100% (8/8), 2.15 KiB | 0 bytes/s, done. Total 8 (delta 0), reused 0 (delta 0) To https://github.com/singlecell-batches/this-is-how-we-batch-it.git * [new branch] master -> master Branch master set up to track remote branch master from origin.Yay!
-
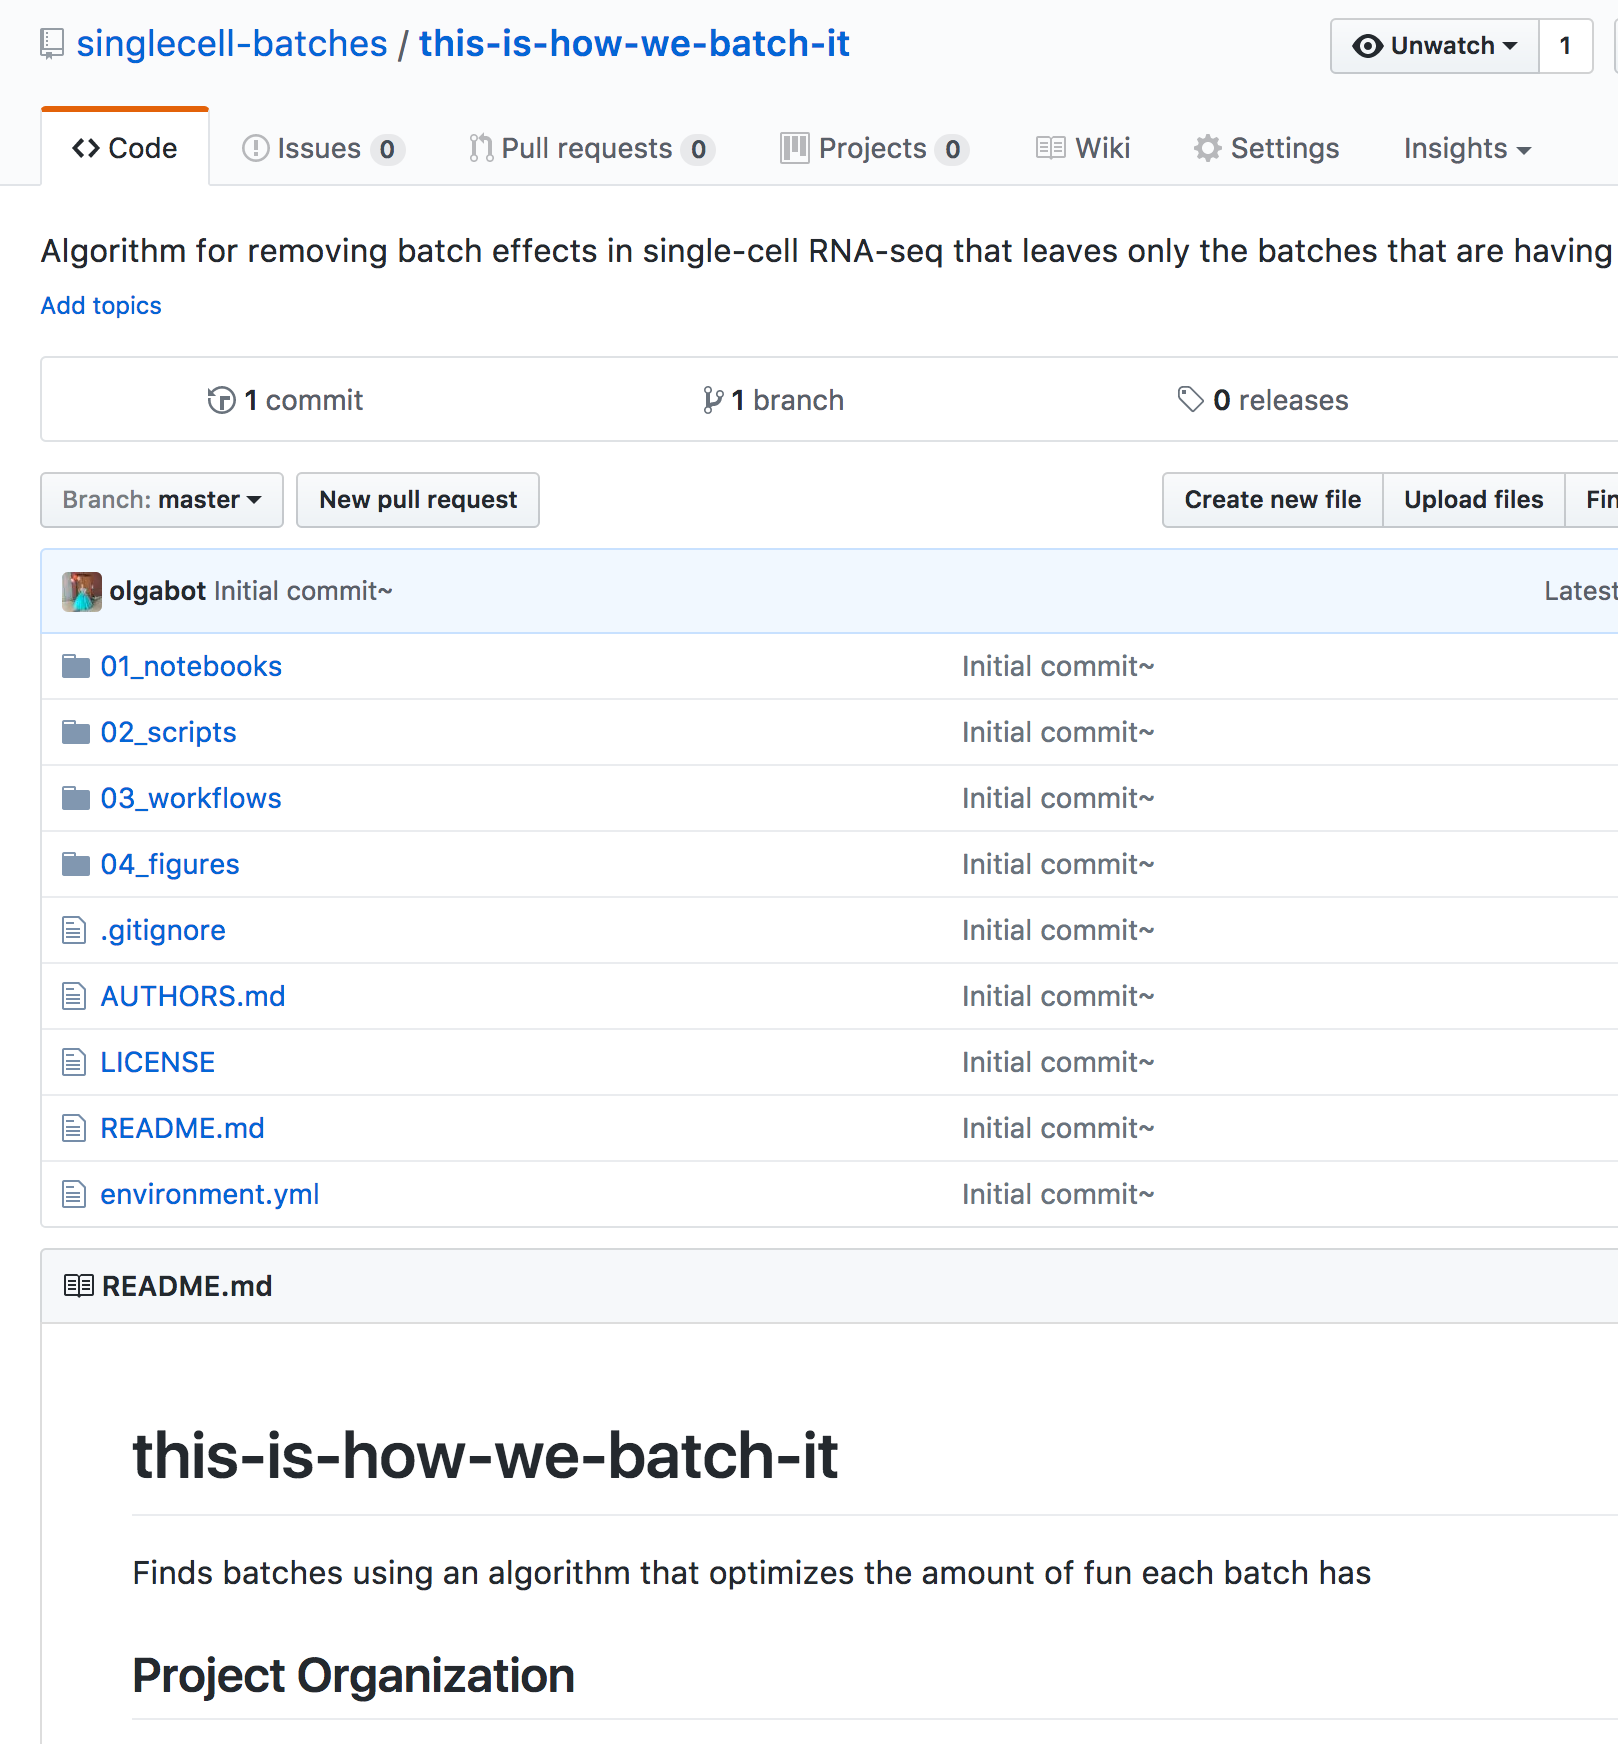
Now go back to your GitHub repository page and you should see a bunch of files!


This algorithm is licensed under the terms of the BSD License