Mockeri
Mockeri makes data mocking for spring-data-jpa applications easier than ever before. A few quick annotations and your API is ready to be tested from the get go!
- Introduction
- Installation
- Requirements
- Activation
- Hello world
- Composite entities
- Dataset size
- Specifying which fields to mock or ignore
- Customizing the mock data
Introduction
Mockeri expedites API development by simplifying the process of populating a given database with relevant, easily customizable mock data. With Mockeri employed, you can manually interrogate, or run integration tests against an API in development without the hassle of populating the database with enough mock data to properly simulate the APIs intended range of functionality. All that is required is a properly annotated data model.
Installation
Mockeri is available on maven central:
<dependency>
    <groupId>org.sindaryn</groupId>
        <artifactId>mockeri</artifactId>
    <version>0.0.1</version>
</dependency>
Requirements
- The main class must be annotated either with
@SpringBootApplication, or@MainClass. - All entities must have a public
getId()method.
Activation
Obviously, the Mockeri library is only relevant during the phases of development and testing. Therefore, in order to signal to Mockeris' DatabasePopulator bean to go ahead and populate the database with mock data, the environment varaible DUMMY_POPULATE=true must be exported, prior to running or debugging the project.
Hello world
Given the following data model:
@Entity
public class Person {
    @Id
    private String id = UUID.randomUUID().toString();
    private String name;
    private Integer age;
    private String address;
}
Here's how the database table for person now looks:
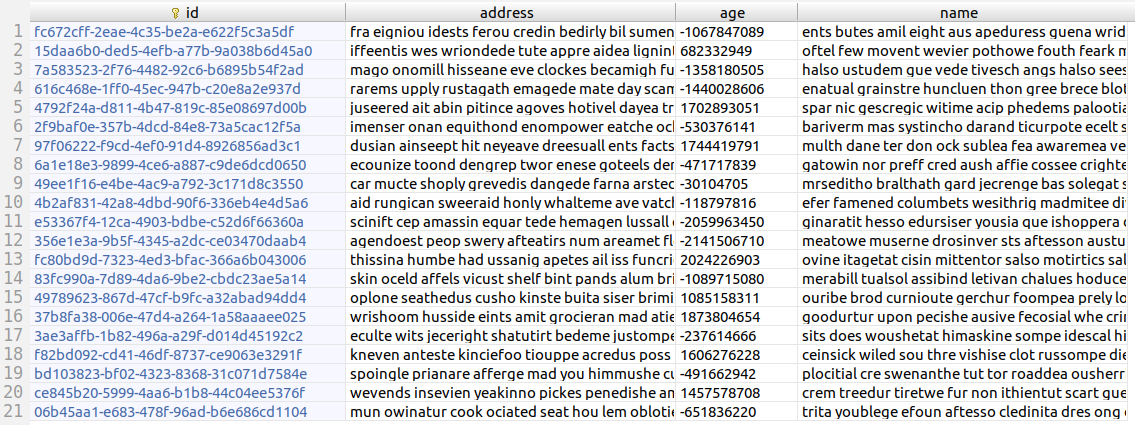
As is observable, Mockeri comes with a default configuration which scans the types of relevant entity fields to determine which dummy data to insert. While relying on this default setup may suffice for basic use cases, more often than not a greater degree of customization is required in order to achieve the desired effect. Overall, there are four issues to address:
- Which entities are to be instantiated?
- How many of each entity should be instantiated?
- Which fields should be populated, and which fields should be left alone?
- How the inserted data can be customized to adhere to a specified set of rules?
All of the above and more will be covered here.
Composite entities
Before getting into the specifics on how to customize the dummy data to be inserted, we need to determine which entities are to be directly instatiated in the first place. In object oriented datamodel design, an entity can either have its own independent lifecycle, or only exist within the context of another entities lifecycle. Entities belonging to the second group are reffered to as being composite entities. With that in mind, when Mockeris' DatabasePopulator iterates through the data model, it would make no sense to directly instantiate all entities directly. Instead, it aims to directly instatiate those entities which have their own independent lifecycle. Problem is; how exactly is DatabasePopulator supposed to know which entities are which? There are two possible ways in which this can be signalled to the DatabasePopulator:
- A given entity is annotated with the
@CompositeEntityannotation, which tellsDatabasePopulatornot to instatiate it directly. - The Apifi library is being used, in which case it'll check for
@GraphQLApiEntity(..., exposeDirectly = true, ...). If an entity is marked for direct API exposure, an independent lifecycle is implied.
Dataset size
Specifying a quantitative range
By default, DatabasePopulator will instatiate between 20 and 50 of each entity. This default behavior can be overriden by specifying both a min and a max in the application.properties / yml file as follows:
...
mockeri.quantity.min=INSERT_MIN_VALUE_HERE
mockeri.quantity.max=INSERT_MAX_VALUE_HERE
...
Specifying an exact quantity
An entity can also be annotated with the @MockEntity(quantity = INSERT_QUANTITY_HERE) annotation, and DatabasePopulator will instantiate exactly the specified quantity of instances.
Specifying which fields to mock or ignore
By default, Mockeri will try to insert mock data for all fields, including Iterables. If you want to specifically mark a field not to be mocked, use the @NonMockable annotation.
Customizing the mock data
Now for the fun part! All customization of mock data for a given field is specified by annotating the field with the @MockData(...) annotation. Let's lead off with a drastically improved version of our above example:
@Entity
public class Person {
    @Id
    private String id = UUID.randomUUID().toString();
    @MockData(keyword = KEYWORD.NAME)
    private String name;
    @MockData(min = 20, max = 80)
    private Integer age;
    @MockData(keyword = KEYWORD.ADDRESS)
    private String address;
}
And the updated person table:
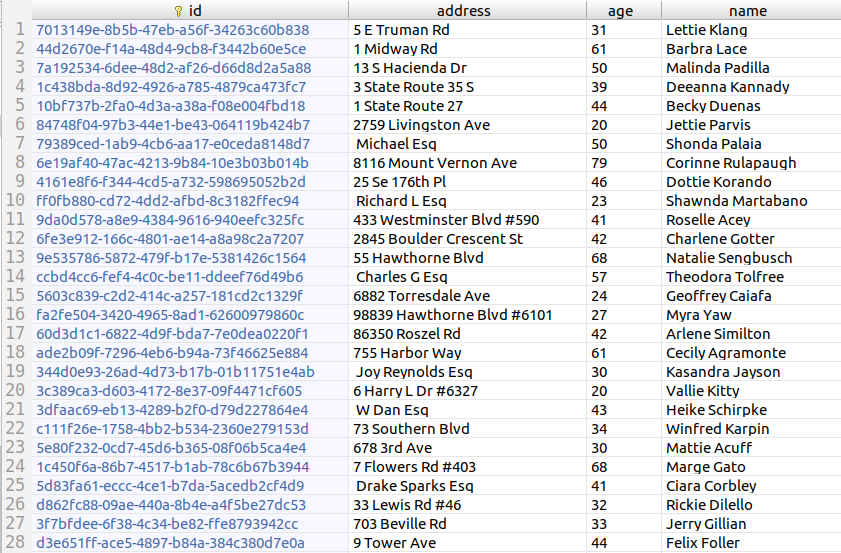
Quite a marked difference... Let's have a peek at @MockData(...) under the hood:
@Retention(RetentionPolicy.RUNTIME)
@Target(ElementType.FIELD)
public @interface MockData {
    KEYWORD keyword() default NULL;
    String customKeyword() default "";
    String[] ofSet() default "";
    double max() default -1;
    double min() default -1;
    Class<? extends MockFactory> mockFactoryBean() default NullMockFactory.class;
}
The breakdown:
-
KEYWORD keyword() default NULL;: This is what featured in our example, and is the simplest way to customize data for primitive-type fields. You just specify one of the available keywords, and Mockeri will take it from there. TheKEYWORDenum contains the following list of possible keywords:NULL: Is the default value and placeholder, it does nothing.PAST_DATE: Is relevant if the field in question is of typeDateTime, and tells Mockeri to assign a past and not future date value.FUTURE_DATE: The opposite ofPAST_DATE.NAME,ADDRESS,CITY,STATE,COUNTRY,ZIP,PHONE,EMAIL: Self explanatory.PARAGRAPH: A string containing between 20 and 30 random english words.COMPANY: A random company name.URL: A valid URL string.PASSWORDA strong password.
-
String customKeyword() default "";: Extends the concept of the previous parameter, by enabling you to create your own custom keyword-bound datasets. Let's demonstrate by example. Given aPersonentity who now has a favorite color:@Entity public class Person { @Id private String id = UUID.randomUUID().toString(); @MockData(ofSet = {"john", "david", "sam", "william", "ted", "amir"}) private String name; @MockData(min = 20, max = 80) private Integer age; @MockData(ofSet = {"address1", "address2", "address3", "address4"}) private String address; private String favoriteColor; }In order to assign a custom keyword, we must first implement the
CustomKeywordsinterface as follows:@Component// MUST be wired into the application context public class MyCustomKeywords implements CustomKeywords { @Override public Map<String, List<String>> customKeywords() { try { return new HashMap<String, List<String>>(){{ put("COLOR", getColors()); }}; }catch (Exception e){ throw new RuntimeException(); } } private List<String> getColors(){ //read through the "colors.txt" file Resource resource = resourceLoader.getResource("classpath:colors.txt"); InputStream inputStream = resource.getInputStream(); BufferedReader bufferedReader = new BufferedReader(new InputStreamReader(inputStream)); String line; //compile the colors into a list List<String> colors = new ArrayList<>(); while ((line = bufferedReader.readLine()) != null) colors.add(line); return colors; } @Autowired//for reading classpath resources private ResourceLoader resourceLoader; }The breakdown: We have a
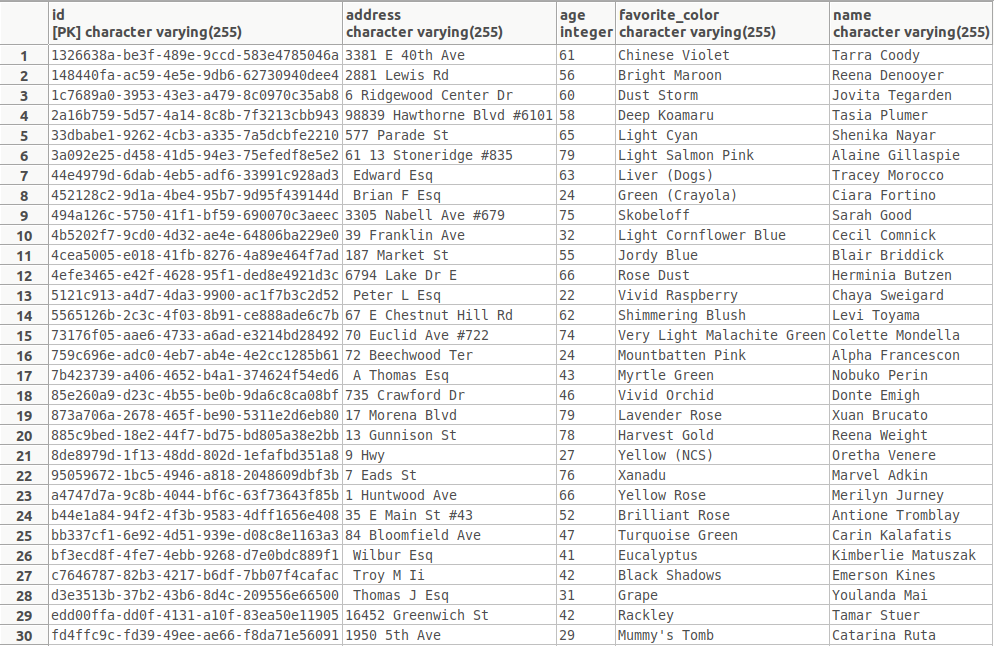
colors.txtfile with a list of 1257 different colors. We're reading that file line by line into a list of strings, and then returning a Map which tells Mockeri to associate the keyword"COLOR"(non case sensitive), with the provided list of string values.Now pass the
"COLOR"keyword as an argument to@MockData:@Entity public class Person { @Id private String id = UUID.randomUUID().toString(); @MockData(ofSet = {"john", "david", "sam", "william", "ted", "amir"}) private String name; @MockData(min = 20, max = 80) private Integer age; @MockData(ofSet = {"address1", "address2", "address3", "address4"}) private String address; @MockData(customKeyword = "COLOR") private String favoriteColor; }And the final result:
To better understand the versatility of this feature, observe the following example.
CustomKeywordsimplementation:@Component public class MyCustomKeywords implements CustomKeywords { @Override public Map<String, List<Object>> customKeywords() { try { return new HashMap<String, List<Object>>(){{ put(STRING, Arrays.asList("lorem", "ipsum", "dolor", "sit", "amet")); put(INTEGER, Arrays.asList(1, 2, 3, 4, 5, 6,7, 8, 9)); put(DOUBLE, Arrays.asList(1.1, 2.2, 3.3, 4.4, 5.5, 6.6, 7.7, 8.8, 9.9)); put(BOOLEAN, Arrays.asList(true, false)); }}; }catch (Exception e){ throw new RuntimeException(); } } public static final String STRING = "STRING"; public static final String INTEGER = "INTEGER"; public static final String DOUBLE = "DOUBLE"; public static final String BOOLEAN = "BOOLEAN"; }Data model:
 @Entity
 public class Person {
     @Id
     private String id = UUID.randomUUID().toString();

     @MockData(customKeyword = STRING)
     private String favoriteString;

     @MockData(customKeyword = INTEGER)
     private Integer favoriteInteger;

     @MockData(customKeyword = DOUBLE)
     private Double favoriteDouble;

     @MockData(customKeyword = BOOLEAN)
     private Boolean favoriteBoolean;
 }
Result:
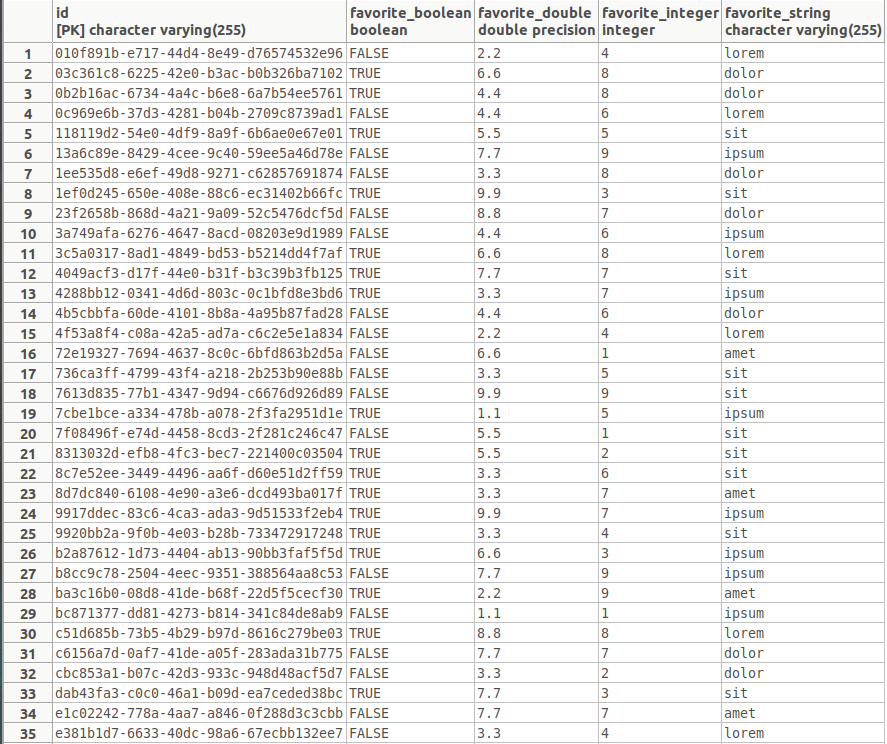
Importamt note: Type safety has been exchanged for versatility. Therefore it's up to the developer to ensure custom keyword association with the correct types. If a mismatch is found, you'll get an exception.
-
String[] ofSet() default "";: Similar to the previous parameter, but a simpler way to provide smaller datasets. Let's clarify by example:@Entity public class Person { @Id private String id = UUID.randomUUID().toString(); @MockData(ofSet = {"john", "david", "sam", "william", "ted", "amir"}) private String name; @MockData(min = 20, max = 80) private Integer age; @MockData(ofSet = {"address1", "address2", "address3", "address4"}) private String address; }And the
persontable: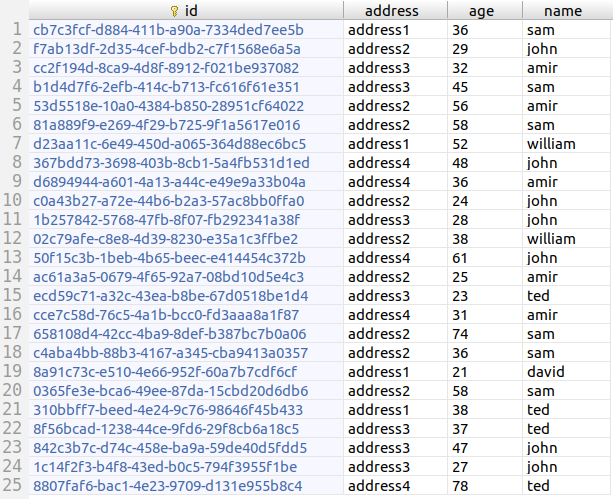
As you can see, all Mockeri is doing is selecting and assigning a random value from the provided array of strings.
-
double max() default -1;anddouble min() default -1;: Are useful for numerical field types. As with the above example where we made use of this annotation for theprivate Integer age;field, you can specify a range from which to assign a given fields value. -
Class<? extends MockFactory> mockFactoryBean() default NullMockFactory.class;: Takes customization to the next level by utilizing a custom child-class of theMockFactory<T>interface to generate the mock data. Let's illustrate with an example. Here's ourPerson, who seems to have picked up a few hobbies:@Entity public class Person { @Id private String id = UUID.randomUUID().toString(); @MockData(keyword = KEYWORD.NAME) private String name; @MockData(min = 20, max = 80) private Integer age; @MockData(keyword = KEYWORD.ADDRESS) private String address; @ElementCollection private Set<String> hobbies; }The
MockFactory<T>interface can be implmented as follows:@Component //MUST be annotated as a @Component or a @Service public class HobbyCollectionMockFactory implements MockFactory<Set<String>> { @Override public Set<String> value() { return Sets.newHashSet("Baseball", "BasketBall", "Hockey", "Karate"); } }Then pass its corresponding class type token as an argument to
@MockData(...)as follows:@Entity @MockEntity(quantity = 3)//recall from previously public class Person { @Id private String id = UUID.randomUUID().toString(); @MockData(keyword = KEYWORD.NAME) private String name; @MockData(min = 20, max = 80) private Integer age; @MockData(keyword = KEYWORD.ADDRESS) private String address; @ElementCollection @MockData(mockFactoryBean = HobbyCollectionMockFactory.class) private Set<String> hobbies; }Now when we run the project, the
persontable looks like this:
And the
person_hobbiestable looks like this: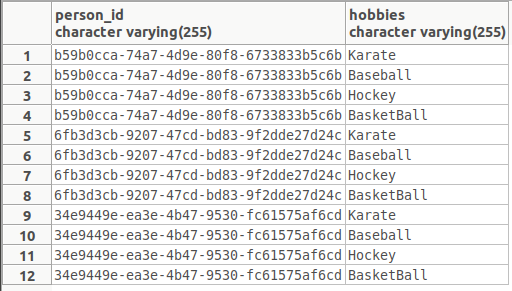
As you can see, the
HobbyCollectionMockFactorydid its job perfectly.
That's all for now, happy coding!
License
Apache 2.0