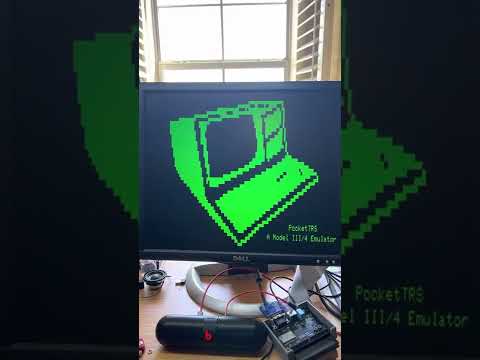
PocketTRS uses a modern microcontroller to emulate a TRS-80 personal computer. It can be connected to any compatible VGA monitor and PS/2 keyboard. PocketTRS has TRS-IO embedded for full FreHD support. PocketTRS offers the following features:
- Emulates a Model III and Model 4
- Grafyx support
- Cassette input (500 baud only)
- Game sound
- Emulates the 50-pin expansion interface
- Integrated TRS-IO
The heart of PocketTRS is an ESP32-based microcontroller. The firmware can be compiled using Espressif's ESP-IDF version 4.2. First install the ESP-IDF toolchain for your platform. Next clone the PocketTRS git repository and compile the firmware via:
git clone --recursive https://github.com/apuder/PocketTRS.git
cd PocketTRS
idf.py build
The firmware can be flashed once the ESP as well as the necessary flashing circuitry is added to the PCB as explained in the next section.
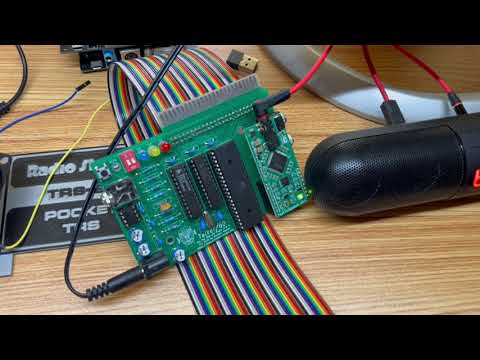
This repository contains the complete KiCad and Gerber files for PocketTRS. The figure below shows the various connectors:

- VGA connector
- PS/2 connector
- 3.5mm audio jack
- Micro USB power supply
- FTDI programmer interface
- ESP reset button
- Z80 reset button
- 50-pin expansion interface
The BOM contains all required parts. Soldering surface mounted components can be tricky. It is suggested to build up the PCB in a particular order and test the board along each step. PocketTRS contains some test code that helps with the diagnostics. The test code can be activated at compile-time via idf.py menuconfig > Component config > PocketTRS > Run PocketTRS PCB tests. When the PCB tests are activated, diagnostics will be printed to the log that can be viewed via idf.py -p <port> monitor. The following steps refer to PocketTRS V2.3:
| Step | Components | Comments |
|---|---|---|
| 1 | J6, U4, C4, C5, C11 | Connect power via the Micro-USB adapter. Confirm 5V on J5, pin 5. Confirm 3.3V on U1, pin 2. Disconnect power. Note: for polarized caps the dot on the silkscreen indicates the positive terminal. |
| 2 | Q2, Q3, R12, R13, R14, R15, R16, C9, C10, J5, SW1, U1 | It should be possible to flash the ESP firmware via a FTDI adapter with these components. The log should print MCP4361 not found. |
| 3 | U5, C8 | Log should show MCP4361 found and MCP23S17 not found. Confirm 1V on pin 1, 2V on pin 2 and 3V on pin 3 of VGA adapter. |
| 4 | U2, U3, Q1, R10, R11, R17, C6, C7 | Log should show MCP23S17 found and MCP23S08 found. Measure the voltages of the odd pins of the 50-pin connector (except pin 45). The voltages should alternate between 0V and 5V every second. Permanent 0V indicates that a pin is not properly connected. A permanent 0.7V indicates that two neighboring pins are shorted. |
| 5 | J8, R18, R19, R20, R21 | Insert a formatted SD card into the SD card reader and press the 'PTRS RST' button after booting. The log should print SD card succefully mounted. |
| 6 | The rest | Solder the remaining components. First add the surface mounted components followed by the various connectors. |
Once the PocketTRS card is assembled, connect a VGA monitor, a PS/2 keyboard and optinally a speaker to the audio jack. Power up PocketTRS via the micro-USB connector. You should see the TRS-80 Cass? prompt on the monitor. After booting PocketTRS, the following hotkeys are available via the PS/2 keyboard:
- <F4> - Enable lowercase
- <F5> - PocketTRS Configuration
- <F6> - Send screenshot to the printer
- <F9> - Reset Z80
- <ESC> - TRS-80 <BREAK> key
- '\' - TRS-80 <CLEAR> key
<F5> allows the configuration of various aspects of PocketTRS, including setting up Wifi credentials and TRS-IO. Once Wifi is setup, the printer interface can be accessed via trs-io.local/printer.
Use the configuration settings to activate TRS-IO. Alternatively it is possible to connect an external TRS-IO/FreHD card via the 50-pin expansion interface. In that case make sure that the internal TRS-IO is disabled.
For game sound, simply connect a speaker to the 3.5mm audio jack. It is also possible to load programs via the cassette interface (500 baud only). At the Cass? prompt hit 'L', connect PocketTRS audio jack to a laptop or smartphone, type CLOAD or SYSTEM in BASIC and play the 500 Baud audio file. You should see the blinking asterick in the top right corner.
The video below shows PocketTRS connected to a Talker/80 card:
The next video shows PocketTRS booting from an external FreHD. Note that PocketTRS integrates TRS-IO and therefore also is compatible with FreHD, but for the purpose of the demo, the internal TRS-IO is disabled..