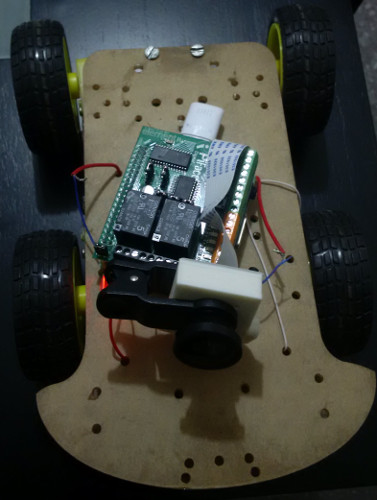
- RaspberryPi (A+ is the best option but should work with B,B+)
- RaspberryPi Camera module
- Micro SD Card
- USB Wifi dongle
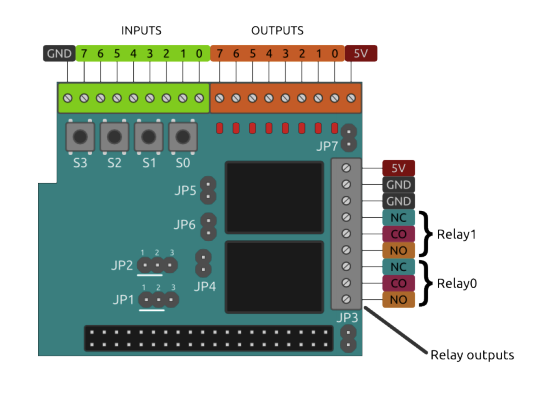
- Piface digital - Piface can be replaced with arduino / hat / relay, but the code of the robot should be adapted
- Portable battery with microUSB for RaspberryPi power, you will need more power if using other RaspberryPi than A+
- Rover kit any similar kit to this should work fine
This tutorial will work with raspbian-wheezy, you can download this from here, is not working with jessie yet...
Make a clean install of raspbian-wheezy on your sdcard, instructions here. For the first steps you will need a TV or monitor with HDMI, USB keyboard, USB mouse and the USB Wifi dongle connected.
In the first boot in raspi-config expand file system, enable ssh, camera module and piface (SPI), also change hostname from raspberrypi to nodebot.
Execute this command:
sudo nano /etc/wpa_supplicant/wpa_supplicant.conf
at the end add wifi configuration like this:
network={
	ssid="wifi_name"
	psk="wifi_password"
}
save and exit
sudo reboot
After reboot, check raspberrypi_ip with this command:
ifconfig
In your computer you can connect via ssh:
ssh pi@raspberrypi_ip
password: raspberry
Now you can disconnect TV or monitor, USB keyboard and USB mouse, just leave the USB Wifi dongle.
Upgrade system with these commands:
sudo apt-get update && sudo apt-get -y upgrade && sudo rpi-update
sudo nano /boot/cmdline.txt
At the end of the line add one space and:
cgroup_enable=memory
Make a virtual partition used by camera streaming, execute this commands:
sudo mkdir /ram
sudo nano /etc/fstab
Add this line:
tmpfs /ram tmpfs nodev,nosuid,size=1M 0 0
Save, exit and then execute this commands:
sudo mount -a
Reboot:
sudo reboot
Dependencies for piface-node:
sudo apt-get -y install automake libtool git
git clone https://github.com/thomasmacpherson/piface.git
cd piface/c
./autogen.sh && ./configure && make && sudo make install
sudo ldconfig
cd ../scripts
sudo ./spidev-setup
Reboot:
sudo reboot
Install NodeJs 0.10.36, yes is an old version but this is compatible with piface-node:
wget http://node-arm.herokuapp.com/node_0.10.36_armhf.deb
sudo dpkg -i node_0.10.36_armhf.deb
Clone Nodebot-Rover repository and install:
git clone https://github.com/sergioaraki/Nodebot-Rover.git
sudo mv /home/pi/Nodebot-Rover/Robot /home/pi/Robot
cd Robot
npm install
cd ..
Install PM2 this will run the Nodebot code at boot and keep running:
sudo npm install pm2@latest -g --unsafe-perm
pm2 startup ubuntu
Pay attention it should ask you to run another command, copy, paste and run that command.
Lets config the Nodebot code in PM2:
pm2 start /home/pi/Robot/process.json
pm2 save
Execute this commands:
sudo apt-get -y install hostapd isc-dhcp-server
sudo nano /etc/dhcp/dhcpd.conf
Comment this 2 lines:
#option domain-name "example.org";
#option domain-name-servers ns1.example.org, ns2.example.org;
And add this at the end of the file:
authoritative;

subnet 192.168.42.0 netmask 255.255.255.0 {
  range 192.168.42.10 192.168.42.50;
  option broadcast-address 192.168.42.255; option routers 192.168.42.1; default-lease-time 600;
  max-lease-time 7200;
  option domain-name "local";
  option domain-name-servers 8.8.8.8, 8.8.4.4;
}
Save, exit and then execute this command:
sudo nano /etc/default/isc-dhcp-server
Modify the last line:
INTERFACES="wlan0"
Save, exit and then execute this commands:
sudo ifdown wlan0
sudo nano /etc/network/interfaces
And left this file like this:
auto lo
iface lo inet loopback

auto eth0
allow-hotplug eth0
iface eth0 inet dhcp

allow-hotplug wlan0
iface wlan0 inet static
address 192.168.42.1
netmask 255.255.255.0
Save, exit and then execute this commands:
sudo ifconfig wlan0 192.168.42.1
sudo nano /etc/hostapd/hostapd.conf
And left this file like this (unless you want to change ssid and password):
interface=wlan0
driver=rtl871xdrv
ssid=Nodebot
hw_mode=g
channel=6
macaddr_acl=0
auth_algs=1
ignore_broadcast_ssid=0
wpa=2
wpa_passphrase=password
wpa_key_mgmt=WPA-PSK
wpa_pairwise=TKIP
rsn_pairwise=CCMP
Save, exit and then execute this command:
sudo nano /etc/default/hostapd
At the end of the file add this line:
DAEMON_CONF="/etc/hostapd/hostapd.conf"
Save, exit and then execute this command:
sudo nano /etc/sysctl.conf
Uncomment this line:
net.ipv4.ip_forward=1
Save, exit and then execute this commands:
sudo sh -c "echo 1 > /proc/sys/net/ipv4/ip_forward"
sudo iptables -t nat -A POSTROUTING -o eth0 -j MASQUERADE
sudo iptables -A FORWARD -i eth0 -o wlan0 -m state --state RELATED,ESTABLISHED -j ACCEPT
sudo iptables -A FORWARD -i wlan0 -o eth0 -j ACCEPT
sudo sh -c "iptables-save > /etc/iptables.ipv4.nat"
sudo nano /etc/network/interfaces
At the end of the file add this line:
up iptables-restore < /etc/iptables.ipv4.nat
Save, exit and then execute this commands:
sudo wget http://www.daveconroy.com/wp3/wp-content/uploads/2013/07/hostapd.zip
sudo unzip hostapd.zip
sudo mv /usr/sbin/hostapd /usr/sbin/hostapd.old
sudo mv hostapd /usr/sbin/hostapd
sudo chown root.root /usr/sbin/hostapd
sudo chmod 755 /usr/sbin/hostapd
sudo service hostapd start
sudo service isc-dhcp-server start
sudo update-rc.d hostapd enable
sudo update-rc.d isc-dhcp-server enable
If your wifi dongle requires 8188eu drivers, check this post and follow instructions to install them
Execute this command:
sudo nano /etc/wpa_supplicant/wpa_supplicant.conf
remove the wifi configuration added at the beginning, save, exit and reboot:
sudo reboot
At this point you cannot connect to the RaspberryPi in your wifi, now you need to connect to the Nodebot wifi in your computer or smartphone and access in your browser to: http://192.168.42.1:3000 and get control of your nodebot.
When the Nodebot is up and running, use the shutdown button on first screen of the web or piface's S0 switch to shutdown the RaspberryPi and avoid damage the SDCard.
If the wifi fails you can use Piface switchs to execute some actions:
- S3 will close relays and stop motors
- S2 will take a photo
- S1 will reboot the RaspberryPi
- S0 will shutdown the RaspberryPi
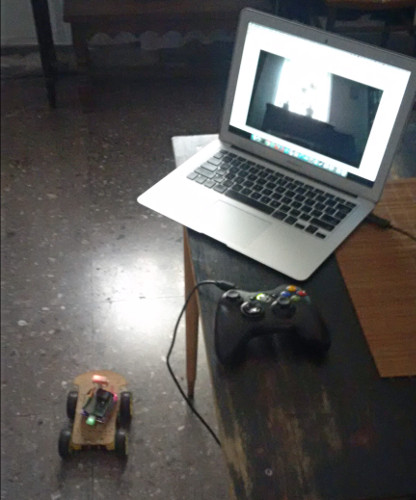
- If you have a Mac (in Windows this maybe works out of the box) and a Microsoft Xbox 360 controller, you can install this driver and you will have joystick support in your Mac.
- If you have a LeapMotion you can copy the Leap folder of this repo in your PC.
Run this command inside of that folder:
npm install
Connect to the Nodebot wifi and then execute this command:
node server.js
Now you can use your LeapMotion to move the Nodebot, also this will allow control with the arrows of your keyboard and spacebar to take a photo, just press 'q' to quit.
Robot code:
express raspicam piface-node socket.io levelup
Web controller:
Bootstrap Bootstrap-dialog nippleJS directorySlider HTML5 Gamepad API
LeapMotion and keyboard:
socket.io-client leapjs keypress
Sometimes when the RaspberryPi boot the "router mode" fails and you can't connect with the Nodebot wifi, just restart the RaspberryPi and try again.


