#Behavioral Cloning
Behavrioal Cloning Project
The goals / steps of this project are the following:
- Use the simulator to collect data of good driving behavior
- Build, a convolution neural network in Keras that predicts steering angles from images
- Train and validate the model with a training and validation set
- Test that the model successfully drives around track one without leaving the road
- Summarize the results with a written report
###Here I will consider the rubric points individually and describe how I addressed each point in my implementation.
###Files Submitted & Code Quality
####1. Submission includes all required files and can be used to run the simulator in autonomous mode
My project includes the following files:
- model.py containing the script to create and train the model
- drive.py for driving the car in autonomous mode
- model.json saved model
- weights.49-0.0327.hdf5 containing a trained convolution neural network
- README.md summarizing the results
####2. Submssion includes functional code Using the Udacity provided simulator and my drive.py file, the car can be driven autonomously around the track by executing
python drive.py model.json model.h5####3. Submssion code is usable and readable
The model.py file contains the code for training and saving the convolution neural network. The file shows the pipeline I used for training and validating the model, and it contains comments to explain how the code works.
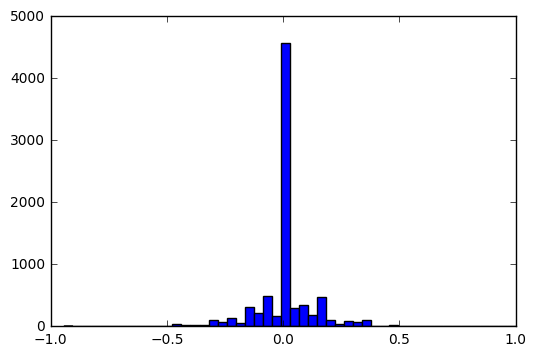
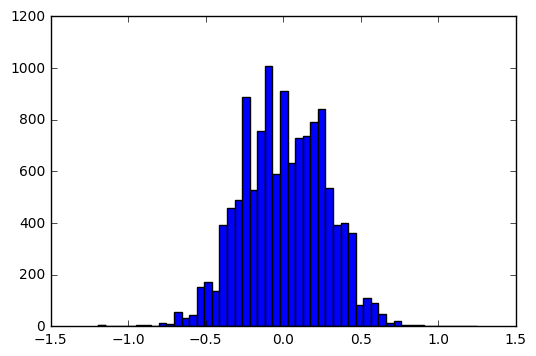
###Model Architecture and Training Strategy Initally, the original nvidia model learned the driving behavior poorly. The car ran only a very short distance before mmoving off the track or getting stuck at a point. At the time, quite naivel, I explored enhancing the model. Inspired by a post from a former Udacity student, I went ahead and made the following changes. Although, it didn't do the trick entirely. I had to downsample the overwhelming presence of 0 steering angle so that the angle distribution is more uniform across the range. This eventually did the trick.
As far as using elu as activation, I refer to the paper Fast and Accurate Deep Network learning by Exponential Linear Units (ELUs) by Djork-Arne Clevert, Thomas Unterthiner and Sepp Hochireiter who introduced the ELUs and showed that it made the learning process faster with higher classification accuracies. I incorporated that into my model.
####1. An appropriate model arcthiecture has been employed
My model consists of a convolution neural network with 3x3 filter sizes and depths between 24 and 64 (model.py lines between 434 and 475). The sizes are 24,36,48,64,64. There were two layers of size 64. Following the convolution layers, there is a Flattening layer followed by three Dense layers of sizes 100,50,10. This is followed by the output layer.
The model includes ELU layers to introduce nonlinearity, and the data is normalized in the model using a Keras lambda layer.
####2. Attempts to reduce overfitting in the model
Many dropout layers (keep_prob = 0.2) have been introduced to keep the model from overfitting.
The original dataset had been split in 80:20 ratio to produce a training set and a testing set. The model was trained on the training set and validated on the testing set to reduce overfitting and reduce the generalization error.
The model was tested by running it through the simulator and ensuring that the vehicle could stay on the track.
####3. Model parameter tuning
The model used an adam optimizer, so the learning rate was not tuned manually.
####4. Appropriate training data
Training data was chosen to keep the vehicle driving on the road. I used a combination of center lane driving, recovering from the left and right sides of the road. I have also used the left and right camera images with appropriate corrections so that they can be transformed to the center. This allowed me to add additional data to the training set.
Note that, steering angle 0 was overwhelming represented in the dataset provided to us by Udacity. I used this dataset for my project. In order to keep my model to learn driving only in a straight line (which would led the car drive out of the provided tracks near the turns), I down sampled the data with steering angle 0, so that my final training set contains a fairly even distribution of the steering angles.
###Model Architecture and Training Strategy
####1. Solution Design Approach
The overall strategy for deriving a model architecture was to use the provided training data, modify it as alluded to above, and then run a convolutional neural network to learn from the camera images of the provided dataset.
The overfitting was minimized by splitting the dataset into training and testing set as well as introducing dropout layers after the convolutional layers.
The final step was to run the simulator to see how well the car was driving around track one. The car fell off the track on the first sharp turn, giving hints at the fact that the car is not turning enough or learning to drive straight rather than negotiate turnings on the road. I went back and down sampled the data with steering angles 0 even further. This modification allowed the car to stay on the track.
At the end of the process, the vehicle is able to drive autonomously around the track without leaving the road.
####2. Final Model Architecture
The final model architecture consists of the following layers:
- Lambda Layer
- Color Map layer
- Convolution Layer (24x3x3)
- Dropout Layer (keep_prob=0.2)
- Convolution Layer (36x3x3)
- Dropout Layer (keep_prob=0.2)
- Convolution Layer (48x3x3)
- Dropout Layer (keep_prob=0.2)
- Convolution Layer (64x3x3)
- Dropout Layer (keep_prob=0.2)
- Convolution Layer (64x3x3)
- Dropout Layer (keep_prob=0.2)
- Flattening Layer
- Dense Layer (100)
- Dense Layer (50)
- Dense Layer (10)
- Output Layer (1)
####3. Creation of the Training Set & Training Process
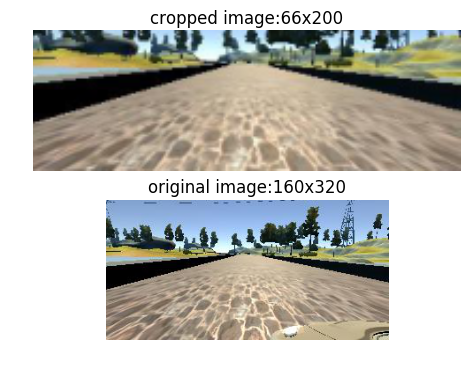
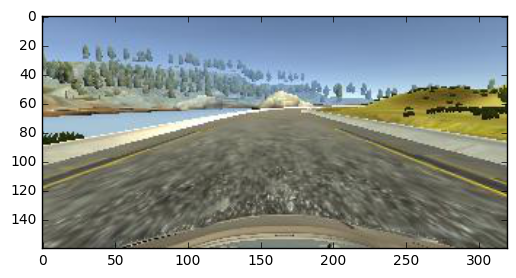
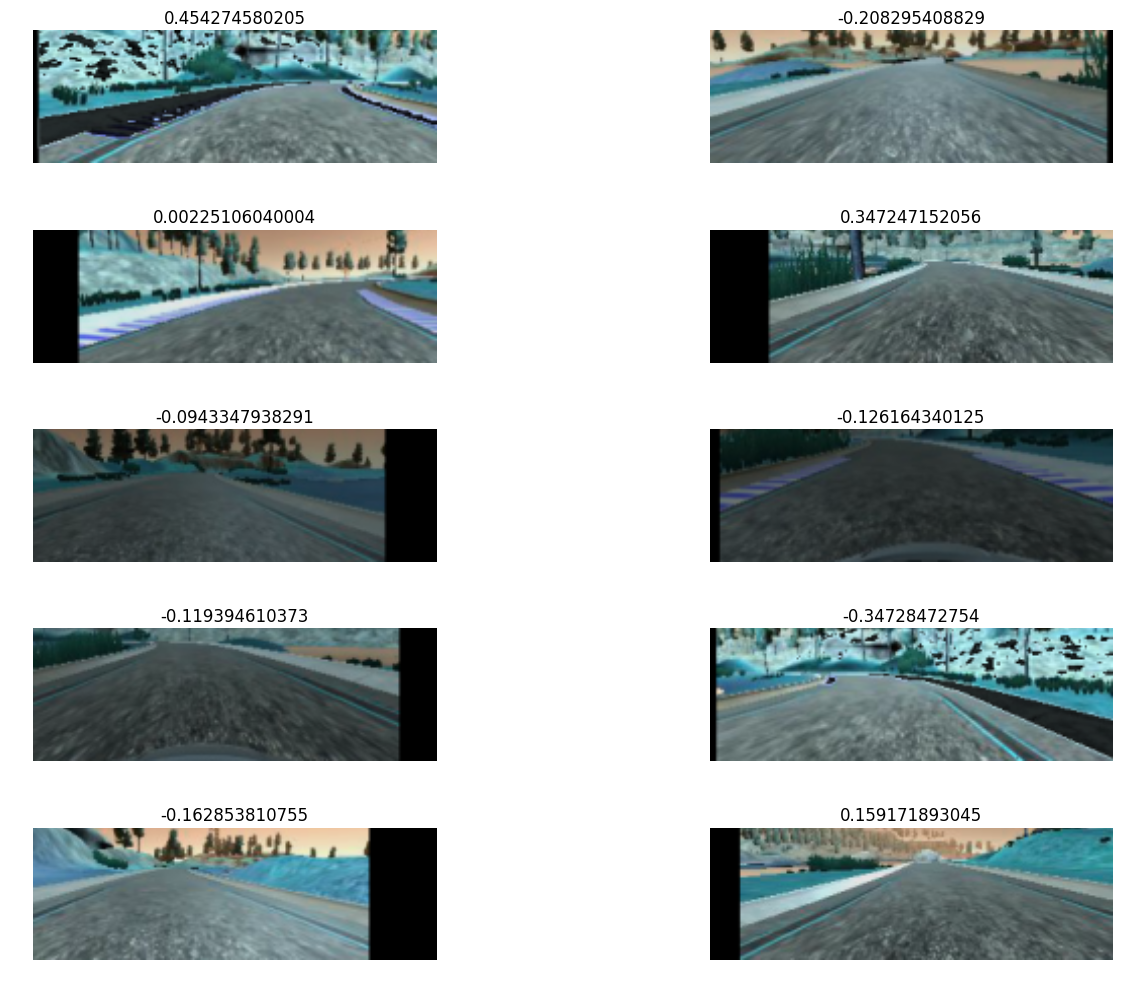
I have used the dataset provided by Udacity. As previously mentioned, I used the left and right camera, with appropriate corrections to transform the images to align with the center camera, to increase the number of available data. The steering angle had overwhelming number of 0s in it, which would push the model to learn a driving on a straight line. I down sampled the data so that the steering angle is more evenly distributed. Once that is done, I augmented each of the images by first Grayscaling, cropping and randomly changing the brightness values. In addition, I have shifted the images vertically and horizontally by a small amount to simulate jerky motion of the car. The images are also randomly flipped horizontally to simulate left and right turns on the road. These augmentations were necessary to simulate a more normal driving behavior.
Below are some images to show the augmention.
The video of the car running on Track 1 autonomously can be found .
I finally randomly shuffled the data set and put Y% of the data into a validation set.
I used this training data for training the model. The validation set helped determine if the model was over or under fitting. I ran the model for 50 epochs to obtain a small validation set error (about 0.0327).

