The goals / steps of this project are the following:
- Use the simulator to collect data of good driving behavior
- Build, a convolution neural network in Keras that predicts steering angles from images
- Train and validate the model with a training and validation set
- Test that the model successfully drives around track one without leaving the road
My project includes the following files:
- model.py containing the script to create and train the model
- drive.py for driving the car in autonomous mode
- model.h5 containing a trained convolution neural network
- README.md summarizing the results
Using the simulator, the drive.py and my model.h5 file, the car can be driven autonomously around the track by executing python drive.py model.h5 in the command prompt window, and starting the simulator in autonomous mode for the track 1.
The model.py file conains the code for training and saving the convolution neural network. The file shows the pipeline I used for training and validating the model, and it contains comments to explain how the code works.
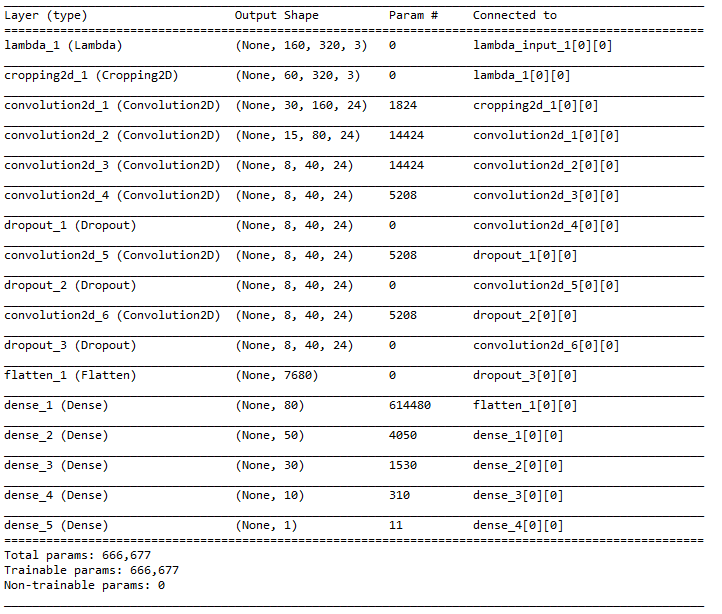
My model consists of multiple layers of convolution neural network with 5x5, 3x3 filter sizes and depth of 24 and a stride of 2(model.py lines 24-32). The model includes RELU layers to introduce nonlinearity along with every convolutution layer and dense layer, and the data is normalized in the model using a Keras lambda layer (code line 22).
The model contains dropout layers in order to reduce overfitting (model.py lines 29,31,33). The model was trained and validated on different data sets to ensure that the model was not overfitting (code line 10-16). The model was tested by running it through the simulator and ensuring that the vehicle could stay on the track.
The model used an adam optimizer, so the learning rate was not tuned manually (model.py line 40).
Training data was chosen to keep the vehicle driving on the road. I used a combination of center lane driving, recovering from the left and right sides of the road. I also used some training data from patches of the road where some side lines are missing. The next section gives more details about how I created the training data.
The overall strategy for deriving a model architecture was to be able to have a tuned model with lowest possible training data set. My initial attempts were to use a very deep network with several convolutional neural network layers with too many output filters. However, the model size was too high. For one such model, I got the model of about 250MB, yet unsatisfactory driving performance on the road. I believe that small models are better for faster response of the model in real-time conditions.
Then, I limited my model depth to 17 layers in the final version(including lambda, dense, and dropout layers), with each convolution layer having only 24 output filters but with different convolution filter sizes.
In order to gauge how well the model was working, I split my image data and steering angle data into a training and validation set. I found that my first model had a low mean squared error on the training set but a high mean squared error on the validation set. This implied that the model was overfitting.
To combat the overfitting, I included three dropout layers in my network. I used an aggressive dropout layer set, each with a 0.5 dropout factor, but it worked.
In order to combat the problem of reducing image sizes with each convolution filter, I used 'same' padding. As a part of each convolutional layer, I included relu activator.
I found that the model does not perform well with the simulator yet. I then used a lambda layer to crop the images to remove sky view, and some unnecessary static views from the bottom of the image.
This step changed the model performance in autonomous mode drastically, but did not meet my expectations.
Then I increased the number of epochs from 10 to 20, and the performance improvement is considerable.
At the end of every change, I was running the simulator to see how well the car was driving around track one. There were a few spots where the vehicle fell off the track.
I realized that the input data quality has a great deal of effect on the model's training. I tried to capture fresh data with only recoveries from the sides of the roads, at turns and at places where track might not have side lines. This data is surprizingly a small set, and took only 1/4th the time compared to the time it took for my earlier data set.
At the end of the process, the vehicle is able to drive autonomously around the track without leaving the road.
Below is a visualization of the architecture
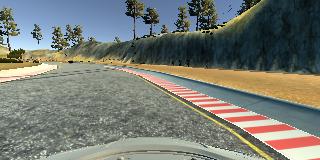
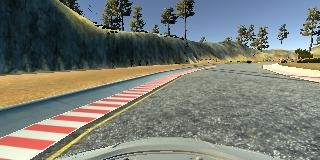
To capture good recovery behavior, I recorded recovery conditions on track one at different instances. These images show what a recovery looks like starting from right to center:
To augment the data sat, I also flipped images and angles thinking that this would increase increase the number of training data points. For example, here is an image that has then been flipped:
Additionally, the images with more steering angles are used for data augumentation. Some images are blurred, some images are shifted in X direction (lines 105 to 182).
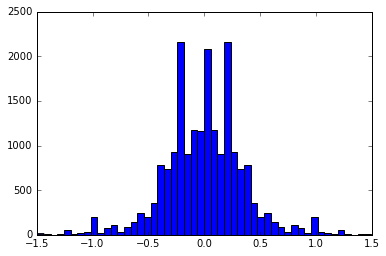
After the collection process, I had 19886 data points from an original 5610 number of data points. I preprocessed this data by normalizing first and then cropping.
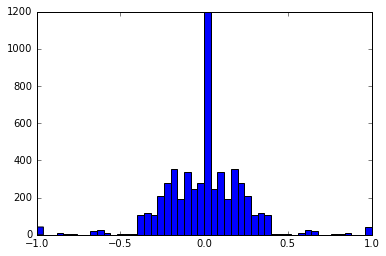
Distribution of the data points before and after data augumentation is below
I finally randomly shuffled the data set and put 20% of the data into a validation set.
I used this training data for training the model. The validation set helped determine if the model was over or under fitting. The ideal number of epochs was 20 as evidenced by the outcome. I used an adam optimizer so that manually training the learning rate wasn't necessary.
The model has been able to successfully run the car in the simulator in the autonomous environment. I have tested the model with simulator on track 1 with different resolutions and it worked equally well.
It is interesting to note that I tried running the car in autonomous mode at 30 mph limit, instead of the given 9 mph limit. Car was able to drive well within the drivable limits of the road, but it wanders a lot from the center. This behaviour is due to the fact that the steering angle control is implemented with open loop control and is marginally stable. Further increase in speed limit ( the simulator does not run above 30mph when I checked for this) will set the car off-road. To eliminate this behaviour, a PI (proportional-integral) or PID (proportional-integral-derivarive) control for steering angles need to be implemented with the coefficients tuned for safely turning at the sharp curves. My attempts at this are not successful yet, as the PID tuning takes too much time, and the tuning is usually model dependent, i.e. in this case the road type and car dependent. However, with the open loop control of the steering angles, the car is able to finish multiple laps without any problems.
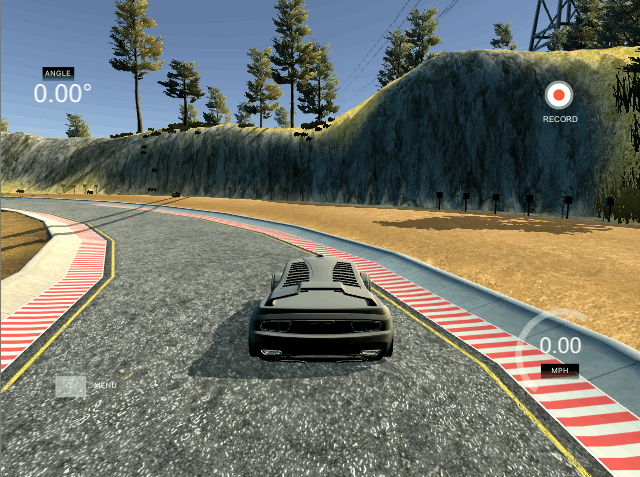
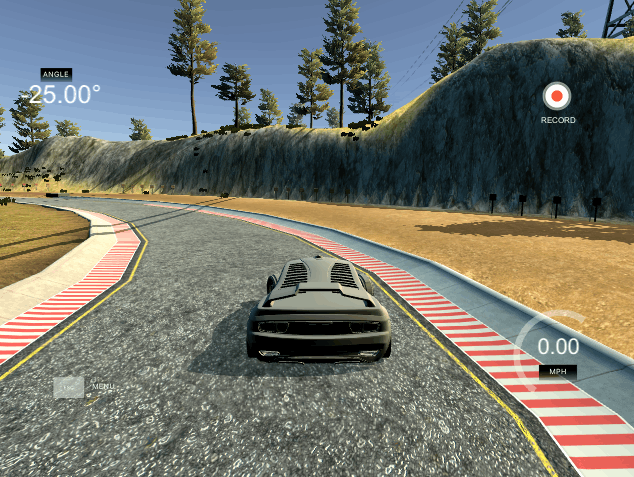
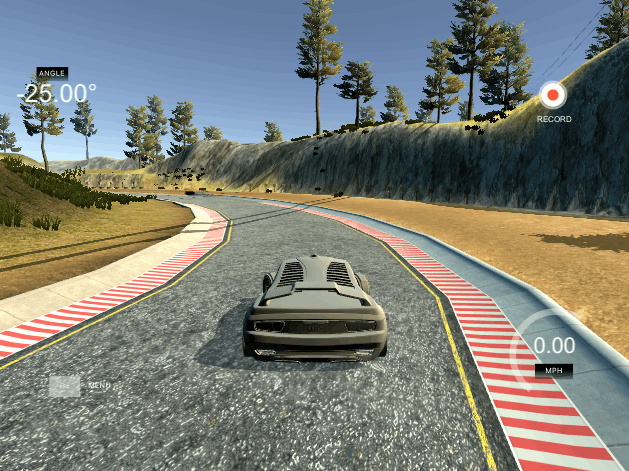
One of the difficult turns on the track ( in terms of road identification and turn angles) is presented below.
