The origin code is from https://github.com/becxer/cnn-dailymail/
It processes your test data into the binary format expected by the code for the Tensorflow model , as used in the ACL 2017 paper Get To The Point: Summarization with Pointer-Generator Networks.
| item | detail |
|---|---|
| OS | Windows 10 64 bit |
| Python | Python 3.5 |
| Tensorflow | Tensorflow 1.2.1 |
| CUDA | CUDA® Toolkit 8.0 |
| cuDNN | cuDNN v5.1 |
| stanford-corenlp | stanford-corenlp-3.9.1 |
We will need Stanford CoreNLP to tokenize the data. Download it here and unzip it.
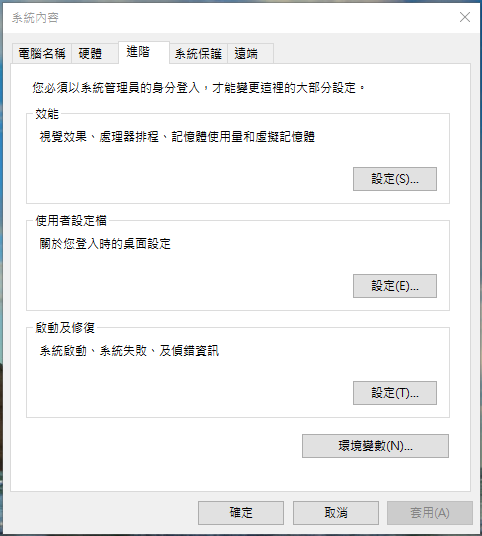
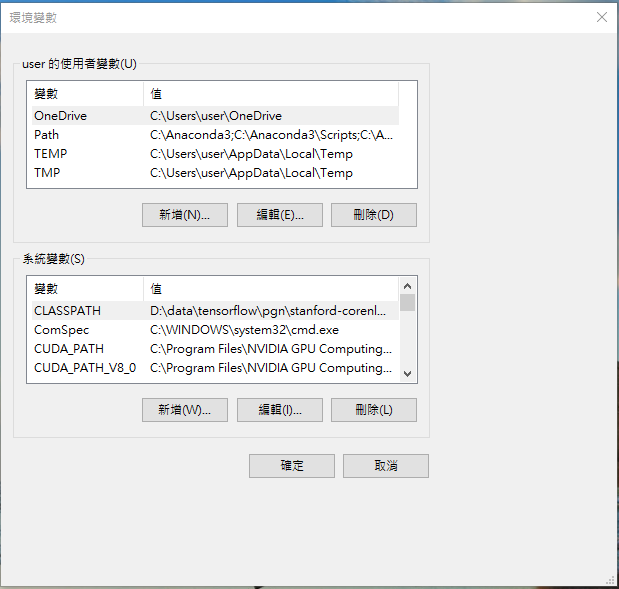
Then add stanford-corenlp-3.7.0.jar(stanford-corenlp-full-2018-02-27/stanford-corenlp-3.9.1.jar) to ypur environment variable.
In my case,I add below
D:\data\tensorflow\pgn\stanford-corenlp-full-2018-02-27\stanford-corenlp-3.9.1.jar
You can check if it's working by running
echo "Please tokenize this text." | java edu.stanford.nlp.process.PTBTokenizer
You should see something like:
Please
tokenize
this
text
.
PTBTokenizer tokenized 5 tokens at 68.97 tokens per second.
USAGE : python make_datafiles.py <stories_dir> <out_dir>
d:
cd make_datafiles_dondon
python make_datafiles.py  ./stories  ./output
User @JafferWilson has provided the processed data, which you can download here.
python run_summarization.py --mode=decode --data_path=C:\\tmp\\data\\finished_files\\chunked\\test_* --vocab_path=D:\\data\\tensorflow\\pgn\\CNN_Daily_Mail\\finished_files\\vocab --log_root=D:\\data\\tensorflow\\pgn --exp_name=pretrained_model --max_enc_steps=500 --max_dec_steps=40 --coverage=1 --single_pass=1


