MIVisionX Inference Tutorial

In this tutorial, we will learn how to run inference efficiently using OpenVX and OpenVX Extensions. The tutorial will go over each step required to convert a pre-trained neural net model into an OpenVX Graph and run this graph efficiently on any target hardware. In this tutorial, we will learn about AMD MIVisionX which delivers open source implementation of OpenVX and OpenVX Extensions along with MIVisionX Neural Net Model Compiler & Optimizer.
Neural Net Model Compiler & Optimizer converts pre-trained neural network models to MIVisionX runtime code for optimized inference.

Pre-trained models in ONNX, NNEF, & Caffe formats are supported by the model compiler & optimizer. The model compiler first converts the pre-trained models to AMD Neural Net Intermediate Representation (NNIR), once the model has been translated into AMD NNIR (AMD's internal open format), the Optimizer goes through the NNIR and applies various optimizations which would allow the model to be deployed on to target hardware most efficiently. Finally, AMD NNIR is converted into OpenVX C code, which could be compiled and deployed on any targeted hardware.
Prerequisites
- Ubuntu
16.04/18.04or CentOS7.5/7.6 - ROCm supported hardware
- GPU or APU required
- ROCm
- Build & Install MIVisionX
- MIVisionX installs model compiler at
/opt/rocm/mivisionx
- MIVisionX installs model compiler at
Usage
Convert Pre-Trained Models into OpenVX
Use MIVisionX Neural Net Model Compiler & Optimizer to generate OpenVX code from your pre-trained neural net model. The model compiler generates annmodule.cpp & annmodule.h during the OpenVX code generation. Copy annmodule.cpp & annmodule.h into the module_files folder of this project. The whole process of inference from a pre-trained neural net model will be shown in 3 different samples below.
Build - Inference Application
| Classification | Detection | Segmentation |
|---|---|---|
 |
 |
 |
Once the OpenVX code is generated(annmodule.cpp & annmodule.h), follow the instructions below to build the project.
- Clone this Project
git clone https://github.com/kiritigowda/MIVisionX-Inference-Tutorial.git
-
Copy the files (annmodule.cpp & annmodule.h) generated by the model compiler into this project's module_files folder.
-
Build this project
cd MIVisionX-Image-Classifier
mkdir build
cd build
cmake ../
make
Run
| Classification | Detection |
|---|---|
 |
 |
./classifier	--mode				<1/2/3 - 1:classification 2:detetction 3:segmentation>	[required]
		--video/--capture/--image	<video file>/<0>/<image file>				[required]
		--model_weights			<model_weights.bin>					[required]
		--label				<label text>						[required]
		--model_inputs			<c,h,w - channel,height,width>				[required]
		--model_outputs			<c,h,w - channel,height,width>				[required]

		--model_name			<model name>					[optional - default:NN_ModelName]
		--add				<Ax,Ay,Az - input preprocessing factor>		[optional - default:0,0,0]
		--multiply			<Mx,My,Mz - input preprocessing factor>		[optional - default:1,1,1]


[usage help]	--help/--h
Generating weights.bin, annmodule.cpp, & annmodule.h for different Models
-
Download or train your own
Caffe Model/ONNX Model/NNEF Model. -
Use MIVisionX Model Compiler to generate OpenVX C Code from the pre-trained models.
Note: MIVisionX installs all the model compiler scripts in /opt/rocm/mivisionx/model_compiler/python/ folder
-
Convert the pre-trained models into AMD NNIR model:
- Caffe Models
% python /opt/rocm/mivisionx/model_compiler/python/caffe_to_nnir.py <net.caffeModel> <nnirOutputFolder> --input-dims <n,c,h,w> [--verbose <0|1>]Sample: % python /opt/rocm/mivisionx/model_compiler/python/caffe_to_nnir.py VGG_ILSVRC_16_layers.caffemodel VGG16_NNIR --input-dims 1,3,224,224- ONNX Models
% python /opt/rocm/mivisionx/model_compiler/python/onnx_to_nnir.py <onnxModel> <nnirOutputFolder> [--input_dims n,c,h,w (optional)]Sample: % python /opt/rocm/mivisionx/model_compiler/python/onnx_to_nnir.py VGG_ILSVRC_16_layers.onnx VGG16_NNIR --input-dims 1,3,224,224- NNEF Models
% python /opt/rocm/mivisionx/model_compiler/python/nnef_to_nnir.py <nnefInputFolder> <outputFolder>Sample: % python /opt/rocm/mivisionx/model_compiler/python/nnef_to_nnir.py VGG_ILSVRC_16 VGG16_NNIR -
Convert an AMD NNIR model into OpenVX C code:
% python /opt/rocm/mivisionx/model_compiler/python/nnir_to_openvx.py <nnirModelFolder> <nnirModelOutputFolder>Sample: % python /opt/rocm/mivisionx/model_compiler/python/nnir_to_openvx.py VGG16_NNIR VGG16_OpenVX
Note:
* The weights.bin, annmodule.cpp, & annmodule.h files will be generated inside the OpenVX folder and you can use these as inputs for this project.
* Copy annmodule.cpp & annmodule.h into the module_files folder.
label < path to labels file >
Use Classification labels or Detection labels or Segmentation Labels files in the data folder depending on the type of model you are converting to OpenVX
video < path to video file >
Run inference on pre-recorded video with this option.
image < path to image file >
Run inference on an image with this option.
capture <0>
Run inference on the live camera feed with this option.
Note: --video/--capture/--image options are not supported concurrently
Supported Pre-Trained Model Formats
- Caffe
- NNEF
- ONNX

Sample 1 - Classification Using Pre-Trained ONNX Model
Run SqueezeNet on Live Video

-
Step 1: Install all the Prerequisites
Note:
- Install ONNX using
pip install onnx - MIVisionX installs all the model compiler scripts in
/opt/rocm/mivisionx/model_compiler/python/folder
- Install ONNX using
-
Step 2: Download pre-trained SqueezeNet ONNX model - SqueezeNet Model
 % wget https://s3.amazonaws.com/download.onnx/models/opset_8/squeezenet.tar.gz
 % tar -xvf squeezenet.tar.gz
Note: pre-trained model -
squeezenet/model.onnx -
Step 3: Use MIVisionX Model Compiler to generate OpenVX files from the pre-trained ONNX model
- Convert .onnx to NNIR
% python /opt/rocm/mivisionx/model_compiler/python/onnx_to_nnir.py squeezenet/model.onnx squeezenet-nnir- Convert NNIR to OpenVX
% python /opt/rocm/mivisionx/model_compiler/python/nnir_to_openvx.py squeezenet-nnir/ squeezenet-openvxNote:
- Copy annmodule.cpp & annmodule.h generated in squeezenet-openvx into the module_files folder
- Use weights.bin generated in squeezenet-openvx folder for the classifier --model_weights option
-
Step 4: Copy the annmodule.cpp & annmodule.h files into module_files folder. CMake and build this project
 mkdir build
 cd build
 cmake ../
 make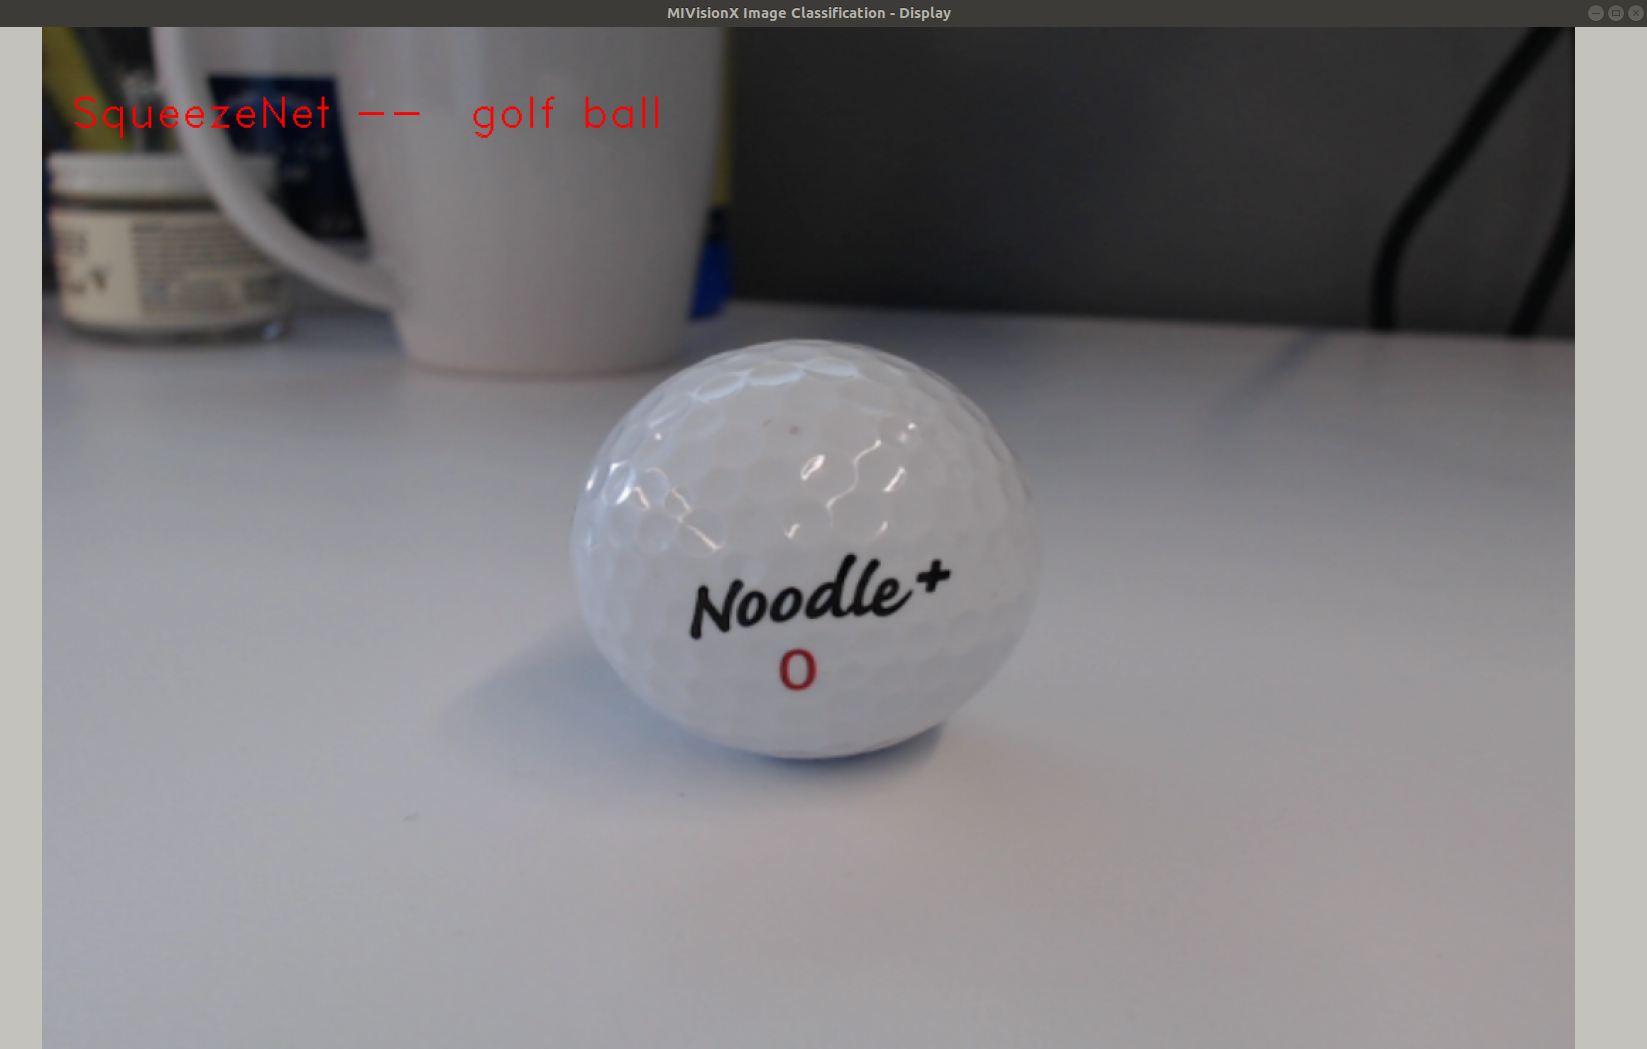
-
Step 5: Use the command below to run the classifier

./classifier 	--mode 1
		--capture 0
		--model_weights PATH_TO/squeezenet-openvx/weights.bin
		--label PATH_TO/MIVisionX-Inference-Tutorial/data/sample_classification_labels.txt
		--model_inputs 3,224,224
		--model_outputs 1000,1,1
		--model_name SqueezeNet
Sample 2 - Detection Using Pre-Trained Caffe Model
Run Tiny YoloV2 on an Image
-
Step 1: Install all the Prerequisites
Note: MIVisionX installs all the model compiler scripts in
/opt/rocm/mivisionx/model_compiler/python/folder -
Step 2: Download pre-trained Tiny YoloV2 caffe model - yoloV2Tiny20.caffemodel
-
Step 3: Use MIVisionX Model Compiler to generate OpenVX files from the pre-trained caffe model
- Convert .caffemodel to NNIR
% python /opt/rocm/mivisionx/model_compiler/python/caffe_to_nnir.py yoloV2Tiny20.caffemodel yoloV2_NNIR --input-dims 1,3,416,416- Convert NNIR to OpenVX
% python /opt/rocm/mivisionx/model_compiler/python/nnir_to_openvx.py yoloV2_NNIR yoloV2_OpenVXNote:
- Copy annmodule.cpp & annmodule.h generated in yoloV2_OpenVX into the module_files folder
- Use weights.bin generated in yoloV2_OpenVX folder for the classifier --model_weights option
-
Step 4: Copy the annmodule.cpp & annmodule.h files into module_files folder. CMake and build this project
 mkdir build
 cd build
 cmake ../
 make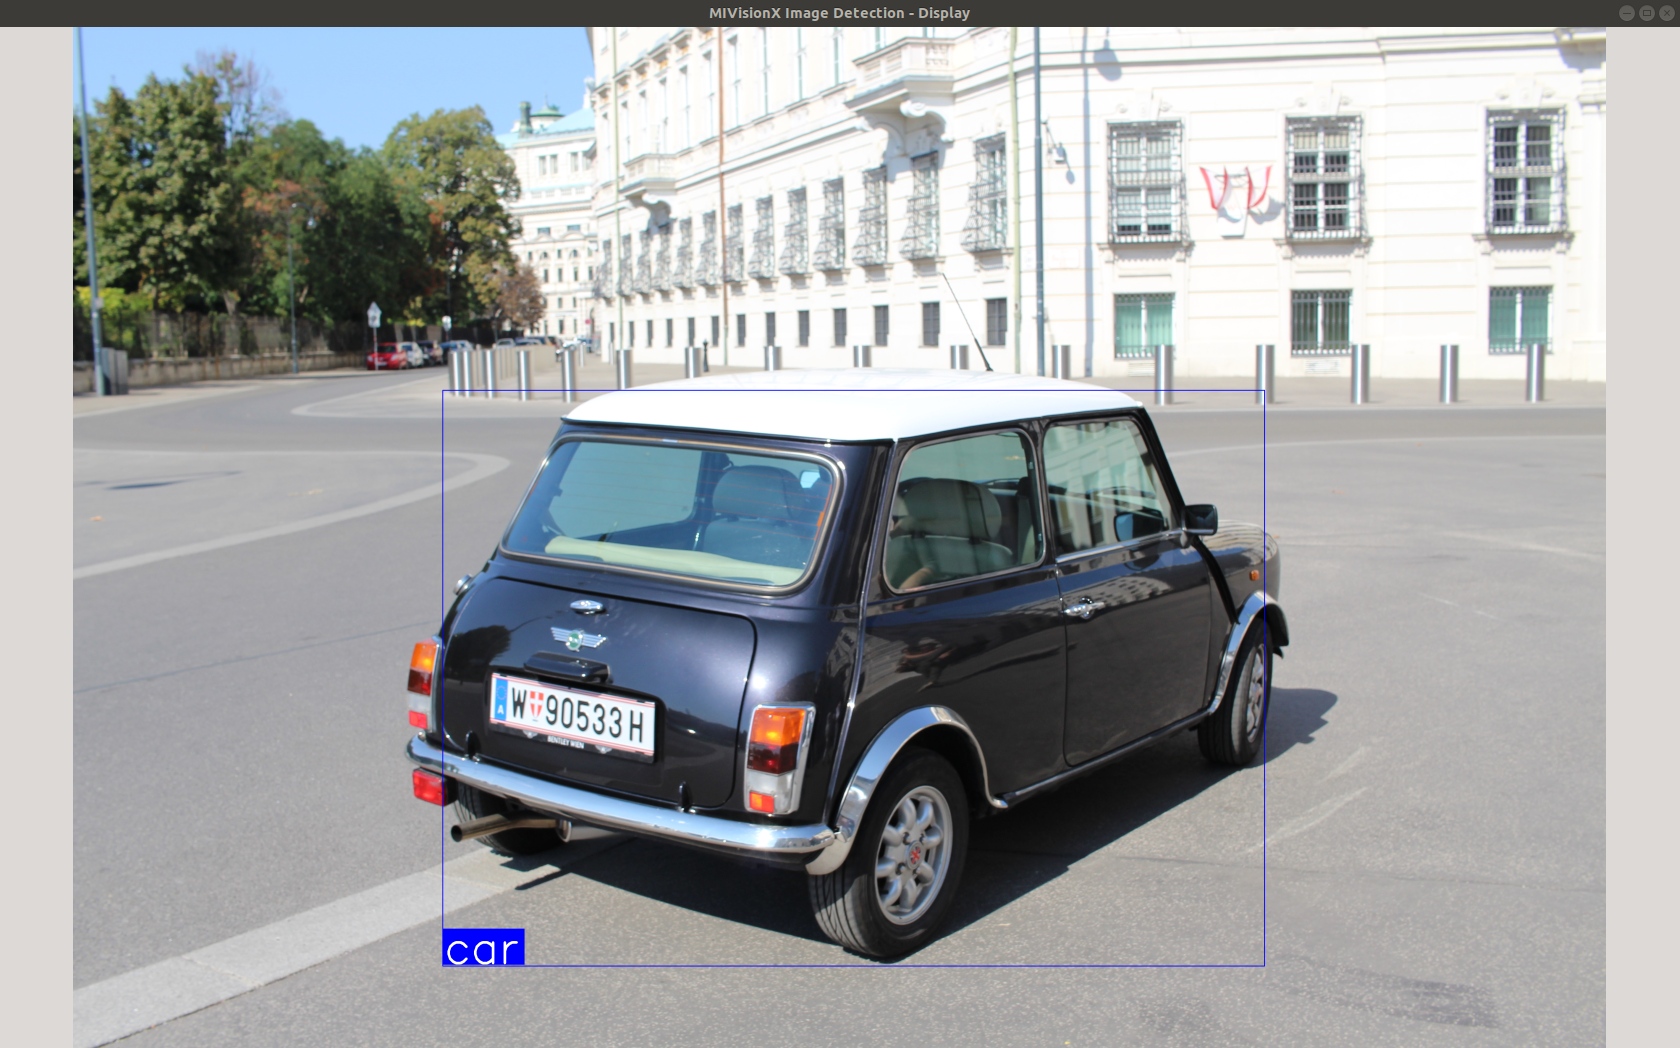
-
Step 5: Use the command below to run the classifier
./classifier 	--mode 2
		--image PATH_TO/MIVisionX-Inference-Tutorial/data/images/img_01.JPG
		--model_weights PATH_TO/yoloV2_OpenVX/weights.bin
		--label PATH_TO/MIVisionX-Inference-Tutorial/data/sample_detection_labels.txt
		--model_inputs 3,416,416
		--model_outputs 125,12,12
		--model_name YoloV2
		--multiply 0.003922,0.003922,0.003922
Note: Tiny YoloV2 input needs to be preprocessed. We use the --multiply option to preprocess the input by a factor 1/255
Sample 3 - Classification Using Pre-Trained Caffe Model
Run VGG 16 on Live Video
-
Step 1: Install all the Prerequisites
Note: MIVisionX installs all the model compiler scripts in
/opt/rocm/mivisionx/model_compiler/python/folder -
Step 2: Download pre-trained VGG 16 caffe model - VGG_ILSVRC_16_layers.caffemodel
-
Step 3: Use MIVisionX Model Compiler to generate OpenVX files from the pre-trained caffe model
- Convert .caffemodel to NNIR
% python /opt/rocm/mivisionx/model_compiler/python/caffe_to_nnir.py VGG_ILSVRC_16_layers.caffemodel VGG16_NNIR --input-dims 1,3,224,224- Convert NNIR to OpenVX
% python /opt/rocm/mivisionx/model_compiler/python/nnir_to_openvx.py VGG16_NNIR VGG16_OpenVXNote:
- Copy annmodule.cpp & annmodule.h generated in VGG16_OpenVX into the module_files folder
- Use weights.bin generated in VGG16_OpenVX folder for the classifier --model_weights option
-
Step 4: Copy the annmodule.cpp & annmodule.h files into module_files folder. CMake and build this project
 mkdir build
 cd build
 cmake ../
 make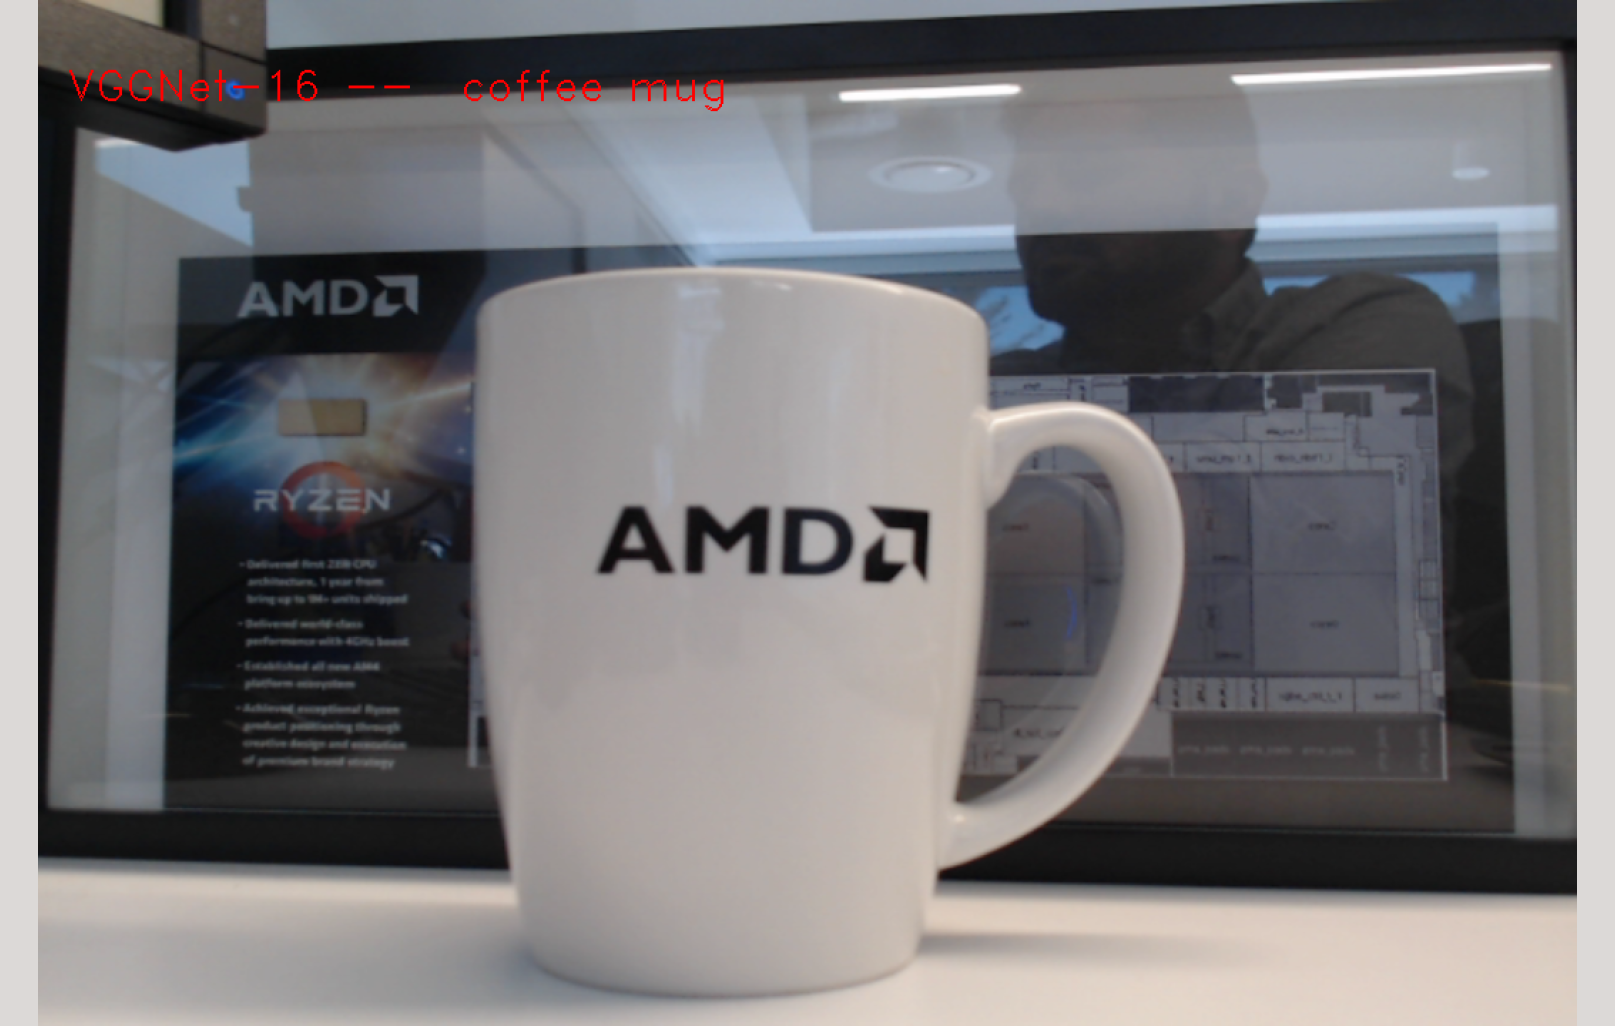
-
Step 5: Use the command below to run the classifier
./classifier 	--mode 1
		--capture 0
		--model_weights PATH_TO/VGG16_OpenVX/weights.bin
		--label PATH_TO/MIVisionX-Inference-Tutorial/data/sample_classification_labels.txt
		--model_inputs 3,224,224
		--model_outputs 1000,1,1
		--model_name VGG16