Behavrioal Cloning Project
The goals / steps of this project are the following:
- Use the simulator to collect data of good driving behavior
- Build, a convolution neural network in Keras that predicts steering angles from images
- Train and validate the model with a training and validation set
- Test that the model successfully drives around track one without leaving the road
- Summarize the results with a written report
Here I will consider the rubric points individually and describe how I addressed each point in my implementation.
My project includes the following files:
- model.py containing the script to create and train the model
- drive.py for driving the car in autonomous mode
- model.h5 containing a trained convolution neural network
- writeup_report.md or writeup_report.pdf summarizing the results
Using the Udacity provided simulator and my drive.py file, the car can be driven autonomously around the track by executing
python drive.py model.h5The model.py file contains the code for training and saving the convolution neural network. The file shows the pipeline I used for training and validating the model, and it contains comments to explain how the code works.
My model consists of a convolution neural network with 5x5 filter sizes (subsample 2) and depths between 24 and 48 (model.py lines 20, 26-27), and also with 3x3 filter sizes (subsample 1) and depths 64 (model.py lines 20, 28-29).
The model includes RELU layers to introduce nonlinearity (model.py lines 26-29), and the data is normalized in the model using a Keras lambda layer (model.py line 24) and cropped unimportant parts (top 70 pixels and bottom 25 pixels) using a Keras Cropping2D layer (model.py line 25).
The model was trained and validated on different data sets to ensure that the model was not overfitting (model.py lines 64-74). The model was tested by running it through the simulator and ensuring that the vehicle could stay on the track.
To prevent overfitting, the training data sets are preprocessed by the image augmentations, where the original images are randomly flipped (model.py lines 117-124) and horizontally translated (model.py lines 99-114) with the appropriate angle corrections, and the order of the training data set are shuffled (model.py lines 77-96).
The model used an adam optimizer, so the learning rate was not tuned manually (model.py line 25).
I used three hyper-parameters to turn model: The steering angle corrections for the left and right cameras with respect to central camera (model.py line 45), the maximal horizontal shift range, and the maximal angle range (model.py lines 103-104). Those parameters were manually turned by testing the driving stability on the simulator.
Training data was chosen to keep the vehicle driving on the road. I used three types of images: center lane driving, left lane driving by left camera, and right lane driving by right camera. For recovering from the left and right sides of the road, the images from left and right cameras were used with the angle corrections, which make the car drive toward the center of lane.
For details about how I created the training data, see the next section.
The overall strategy for deriving a model architecture was inspired by Nvidia's End-to-End Learning for Self-Driving article Car.
My first step was to use a convolution neural network model similar to the LeNet. I thought this model might be appropriate because although the target variable of the model (angle) is a regression, the input is image data, and usually when the input data is image the convolution neural network model surpasses other neural network models.
In order to gauge how well the model was working, I split my image and steering angle data into a training and validation set. I found that my first model was very slow to train, the mean squared errors for both training and validation sets are very high, and the driving simulation did not work well with the model (my car immediately diverge to the edge of the lane and was stuck). To resolve this problem, I cropped and normalized the input images, and also add the additional convolutional layers following Nvidia's example. This improved the mean squared errors a lot and made car enable to drive longer on the simulator.
Then, I applied the random flip image augmentation (model.py lines 117-124), and then the car was manage to complete the entire racetrack although the driving was very wavy.
To mitigate the wavy driving, I added the random image translation augmentation (model.py lines 99-114). But this did not improve model. Actually after its application, my car drove even more wavy and failed to navigate the racetrack successfully on the simulator.
I found the unstable drive would be improved by adjusting the steering angle corrections for the left and right cameras (model.py line 45), and the maximal horizontal shift range and angle range (model.py lines 103-104). After changing the value of steering angle correction to 0.2, the wavy driving reduced significantly. Then, the car was driving around the track without leaving the road.
After that, I further fine-tuned maximal horizontal shift range and angle range parameters several times with the simulator, and the driving became more stabilized.
The final model architecture (model.py lines 20-34) ends up being almost like the Nvidia's convolution neural network although the input image size is differ. The layers and layer sizes are following:
- Input planes 3@160x320
- Normalized input planes 3@160x320
- Cropped input planes 3@65x32
- 5x5 Convolutional feature map 24@31x158
- 5x5 Convolutional feature map 36@14x77
- 5x5 Convolutional feature map 48@5x37
- 3x3 Convolutional feature map 64@3x35
- 3x3 Convolutional feature map 64@1x33
- Flatten 2112
- Fully-connected layer 100
- Fully-connected layer 50
- Fully-connected layer 10
- Fully-connected output layer 1.
Here, The convolutional layers are followed by Relu activation functions and final output layer followed by linear activation function because it is regression model.
The following is a visualization of the architecture:
To capture good driving dataset, I first analyzed the recorded data by visualization.
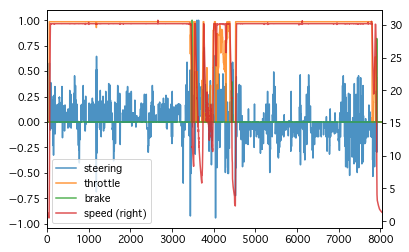
Here is the visualization of the steering, throttle, break, and speed (right):
From the figure above, I found that the most of stable run is obtained when car's speed is around 30. Thus I only used the driving data with its speed greater than 25 as training data input (model.py line 54).
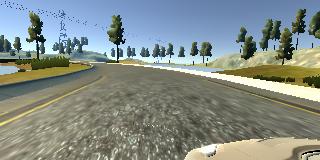
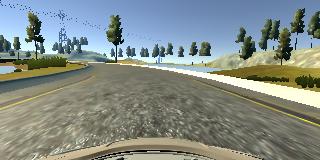
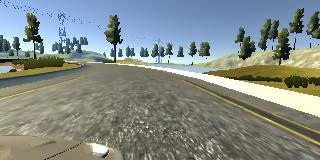
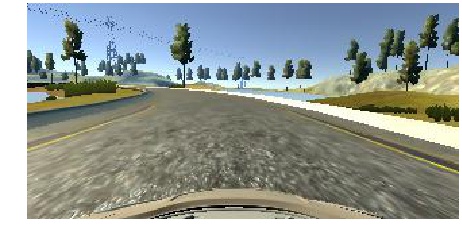
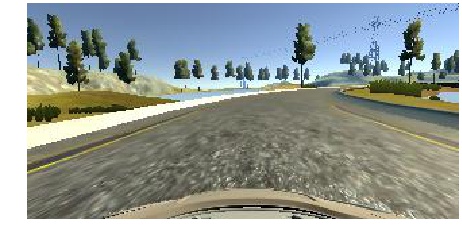
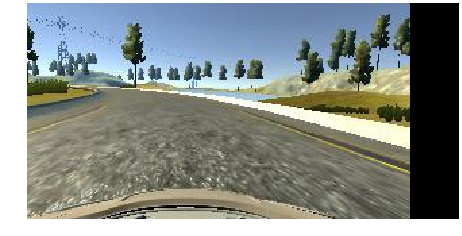
Then for the vehicle recovering from left side and right sides of the road, I used the images obtained from left and right cameras on the simulator with the steering angle corrections (model.py line 45). The sample images of left, center, and right cameras are as follow:
To augment the data set, I flipped images with negative angles of its original image (model.py lines 117-124). Here is the sample of flipped image following it's original image:
In addition to the image flip, the horizontal image translation is also conducted with the angle adjustment (model.py lines 99-114) for the data augmentation. Sample shifted image with its original image is given below:
I used a generator to produce the above mentioned augmented data
and trained model by keras' fig_generator method with
the number of original training data set as samples_per_epoch.
Thus the generated training data set in each epoch will be
slightly changed every time.
Also, the order of the training data were shuffled randomly at each epoch (model.py lines 86-97).
Furthermore, I cropped top 75 and bottom 25 pixels of the input images to remove unimportant information to predict the steering angle. This improve not only model accuracy but computing speed significantly.
The sample of cropped image is following:
The original data set are split to the training data and validation data before data augmentation to assure each data is independent. I did not keep test data set because the purpose of this project is not obtaining good accuracy model but good model that perform on the driving simulator. Instead of measuring final accuracy on test set, I tested model by observing how smoothing the car ran on the simulator. Nevertheless, because the model's first step is predicting the steering angle, observing prediction accuracy could be important metrics. Thus, for the model validation, I used the validation data with mean square error to check if the model was over or under fitting.
For the optimizer the Adam optimizer is used and so tuning of the learning rate is not necessary as it automatically adjust effective learning rate.
Other parameter such as the steering angle corrections for the left and right cameras (model.py line 45), and the maximal horizontal shift range and angle range (model.py lines 103-104) were tuned so that the model's mean square error was reduced and the car can drive the track smoothly.

