The following README is designed to help you get setup and running with 8th Wall and QLab.
Our project is run through 8th Wall, a web AR framework. To begin we want to create our own copy of the 8th Wall project to use during this demo.
- Go to https://www.8thwall.com/ and create an account
- Navigate to the public 8th Wall project, click on the top right and select duplicate.
- Remember what name you use for the project! It will come up in future steps.
To send messages between our Firebase instance and QLab, we use a custom python script. It takes OSC commands and publishes them to the Firebase instance. To begin, we need to copy the project:
- Open the for the "Terminal" application on your Mac Computer and launch it
- You can do this by hitting SPACE+HOME and typing in "Terminal"
- Within the terminal type the following command:
cd ~/Desktop; git clone https://github.com/remap/usitt24- This will create a folder called
usitt24on your Desktop.
The OSC forwarder uses certain python libraries (specifically the firebase python library) We need to ensure those are installed on our device.
Python will need to be installed on your device. You can check if it's installed by going to the terminal and typing in python. If you get an error, you must install python. You can do so by visiting https://www.python.org/downloads/.
Once python is installed on our device, we can download pip (package installer for Python)
python -m ensurepip --upgrade
Then, using pip, we can install the firebase dependency used in our OSC forwarder.
pip install firebase
We use QLab to manage and run our performance cues. To get setup with QLab:
- Create a QLab account here
- Purchase a QLab 5
Audiolicense, this will work with QLab 4.7 - Download QLab4.7
This repo contains an example project USITT24 Demo.qlab4 , which demonstrates some project functionality.
Our QLab files need to know what 8th Wall project to talk to. So we need to edit them to reference the correct project.
-
For this step we'll need the name of our 8th wall project. This can be found on the main page of the 8th wall project.
- Example: In the project below the name is
pq23-aidanstrong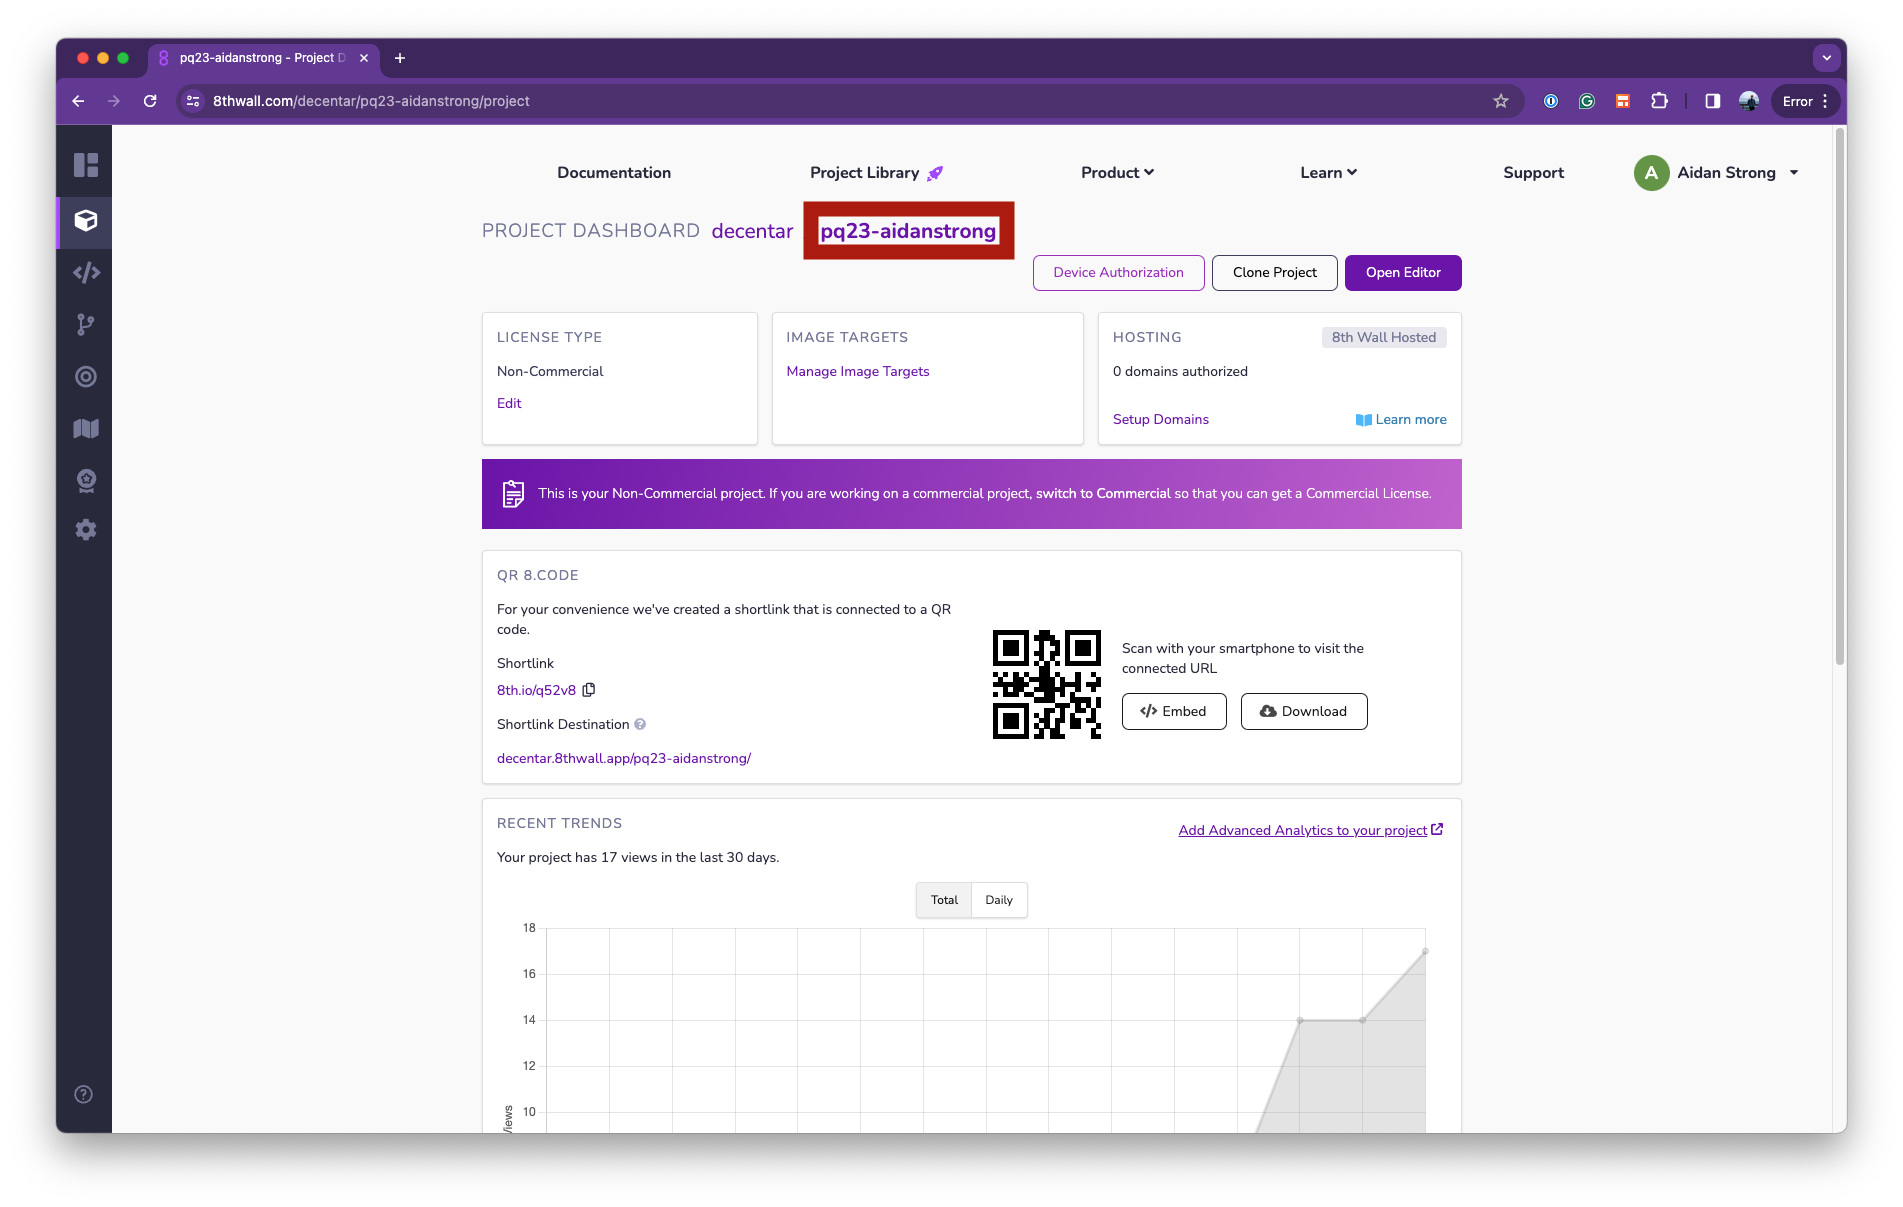
- Example: In the project below the name is
-
Going back to our QLab project. Click on the queue titled "Update Namespace - run once after saving a new copy". Type in your project name at the box on the bottom of the window.
- Example: We put the project name
pq23-aidanstrongin the box on the bottom of our QLab file.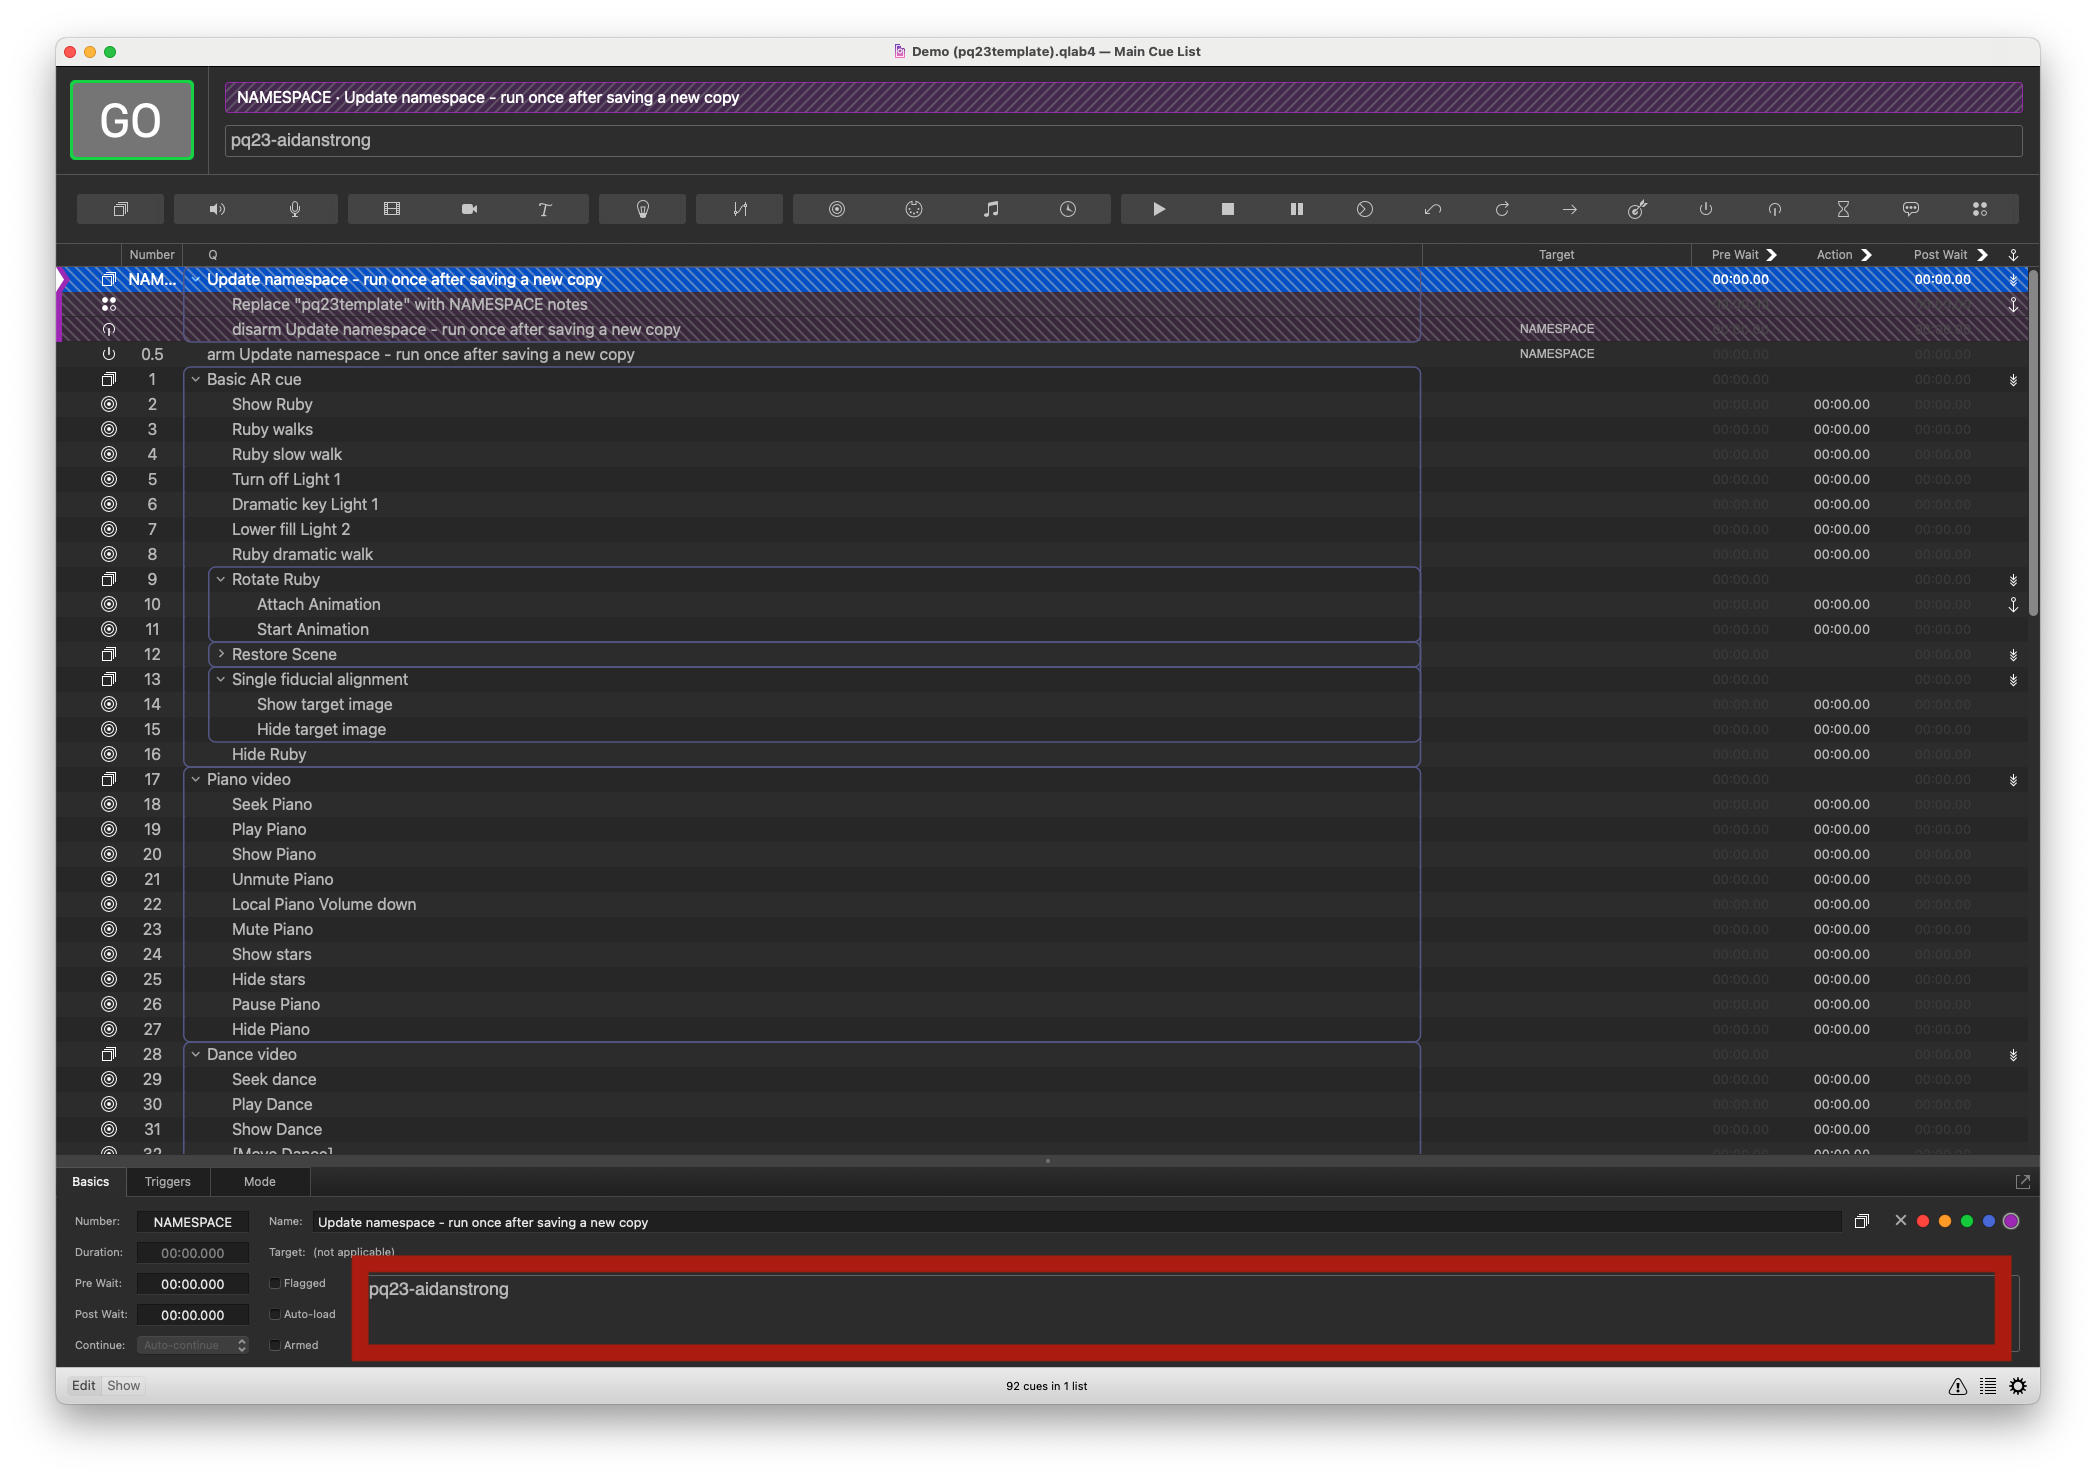
- Example: We put the project name
-
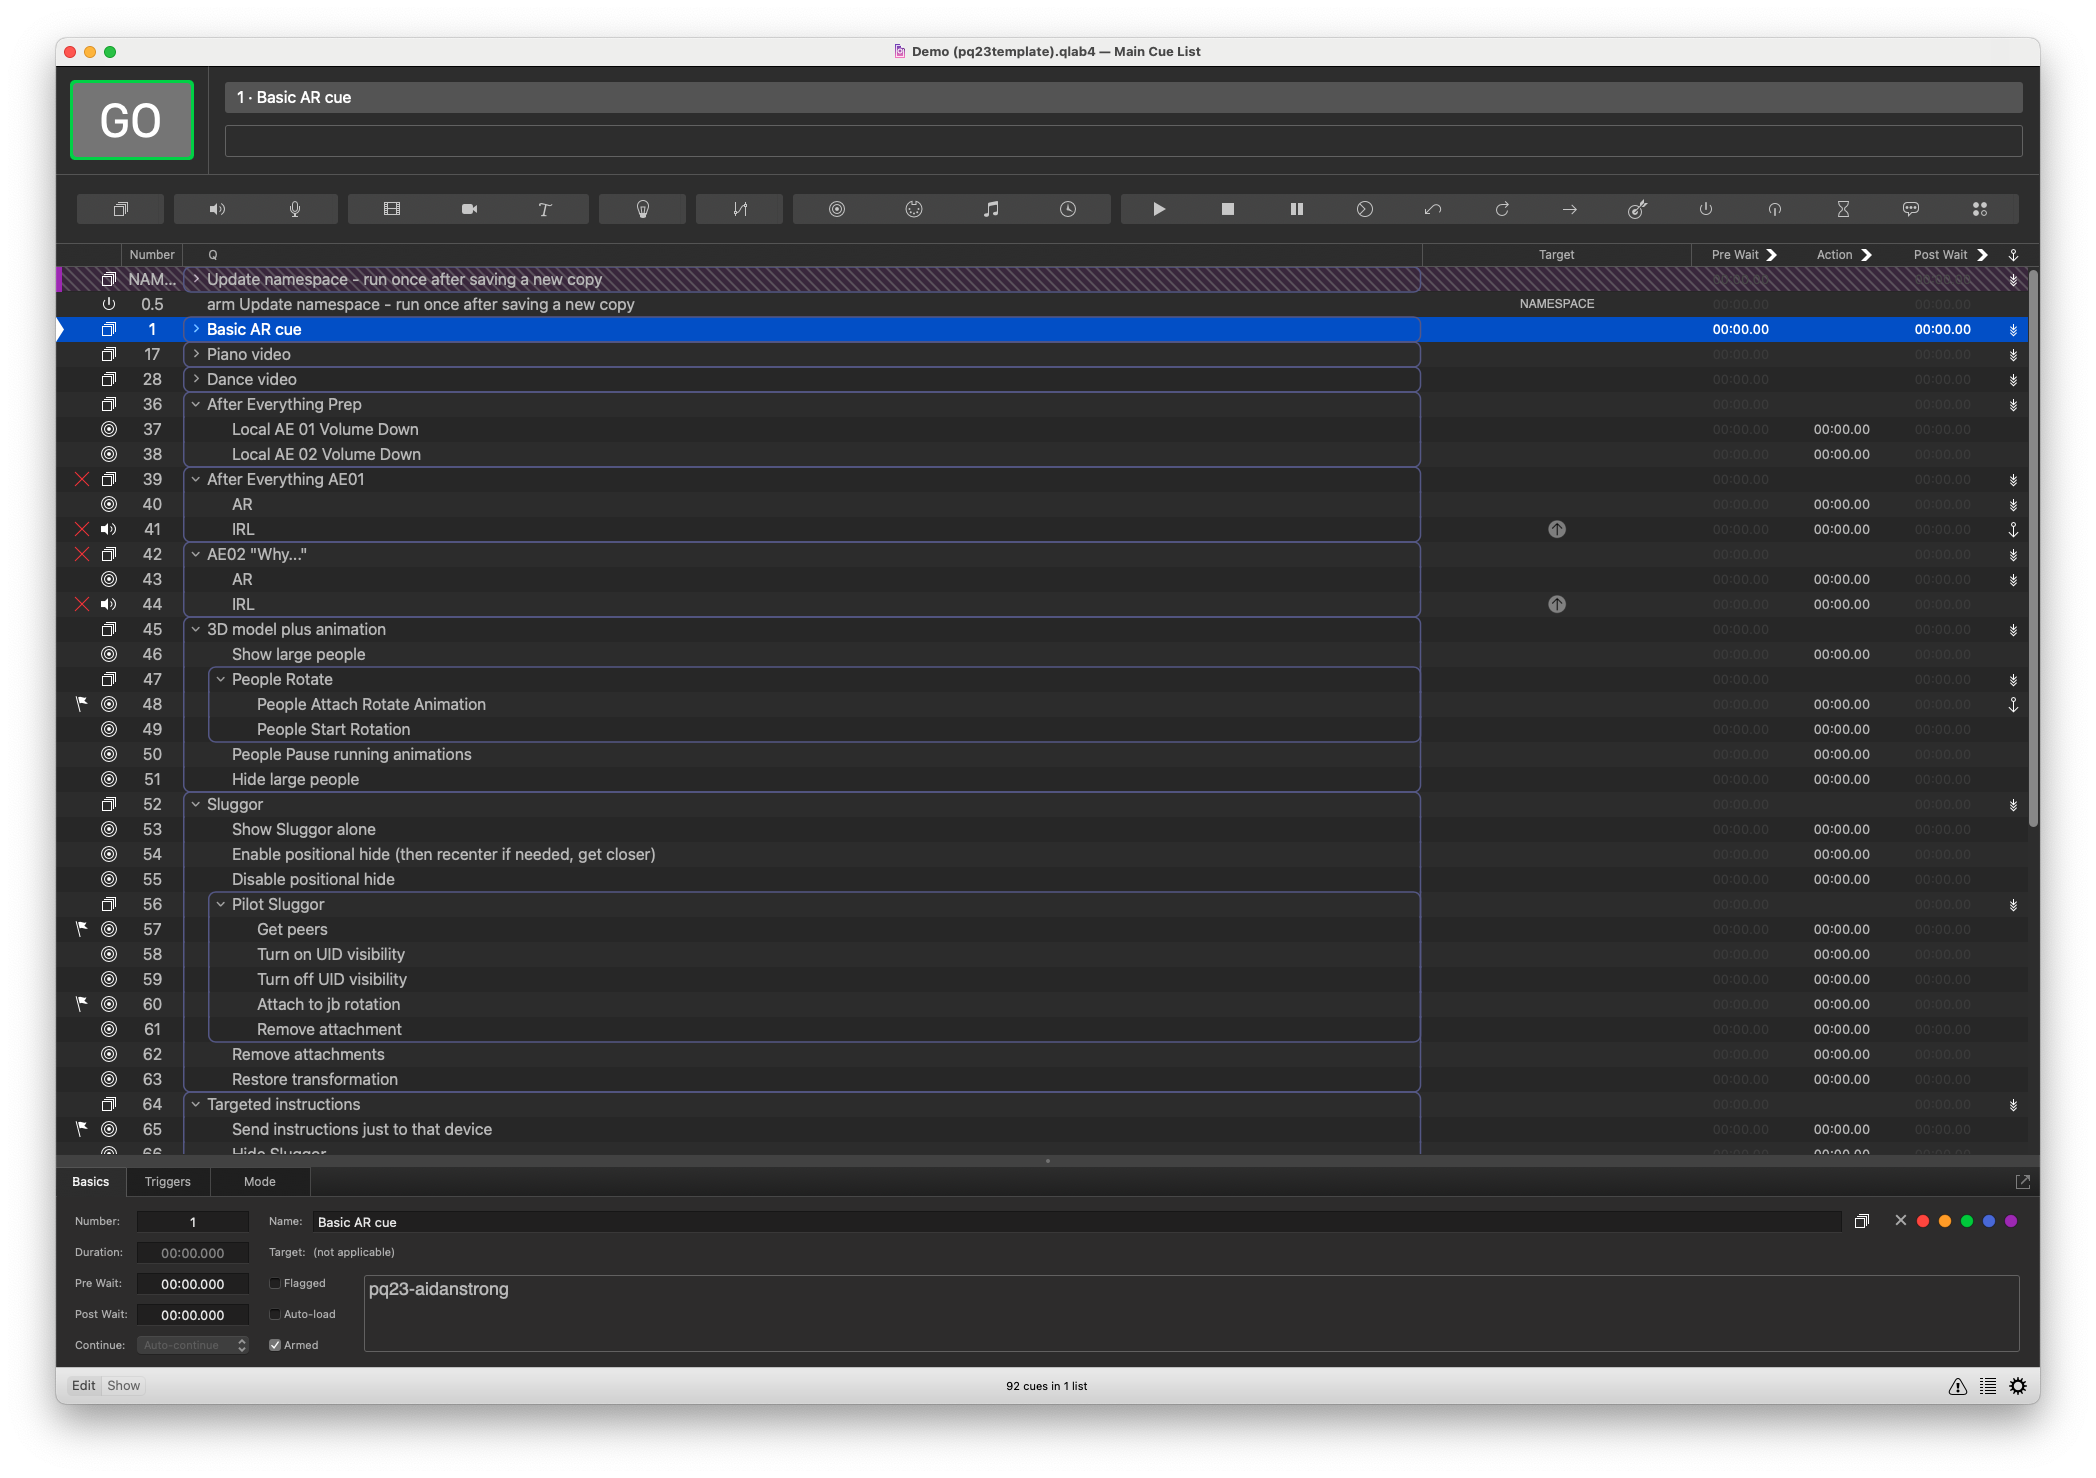
If you click
GOin the top right when selecting this cue, it should update all the namespaces. This only needs to be done once for each project.


Now that we have everything installed, we can try putting it all together!
To begin, we have to start up our python OSC forwarder.
- To begin, we want to run the python script inside of the
usitt24folder we copied from Github,. - Open the for the "Terminal" application on your Mac Computer and launch it
- You can do this by hitting SPACE+HOME and typing in "Terminal"
- Within the terminal type the following command:
python3 ~/Desktop/usitt24/oscfirebase/oscfirebase.py- If a window appears, you've done this step successfully.
- Navigating to our 8th Wall Project we can click on "Open Editor", which should open up a new window.
- All we need to do is hit "Preview" at the top of the screen and scan the QR Code on our Device.

- Finally, returning to QLab, we can select the first cue (indicated by the number 1 on the left) and hit GO.
- This will step through the WebAR performance.

By default the Python Forwarder and 8th Wall project use a Firebase instance hosted and managed by UCLA. We use the Firebase to handle the storage of OSC messages and data. The Python forwarder sends OSC messages to this Firebase instance, and then 8th wall reads from that Firebase instance.
It is simple to set up your own Firebase instance.
- Navigate to https://console.firebase.google.com/u/1/ and log in
- Create a new project, in this example we'll title ours
REMAP-OSC-FORWARDER - On the left menu, go to
Realtime Databaseand create a new database. - For Security rules, we will use the
test modedefaults. Which gives all users access to read,write, and delete for 30 days.- If you're interested in using more complex security models, you can read the following: https://firebase.google.com/docs/database/security/get-started
- Now we need to set up the Web App component. Navigate to the Project Settings and Select "General". Under the "Your Apps" section, we will click on the
</>button. - After you register your app, you'll be presented with the following screen.
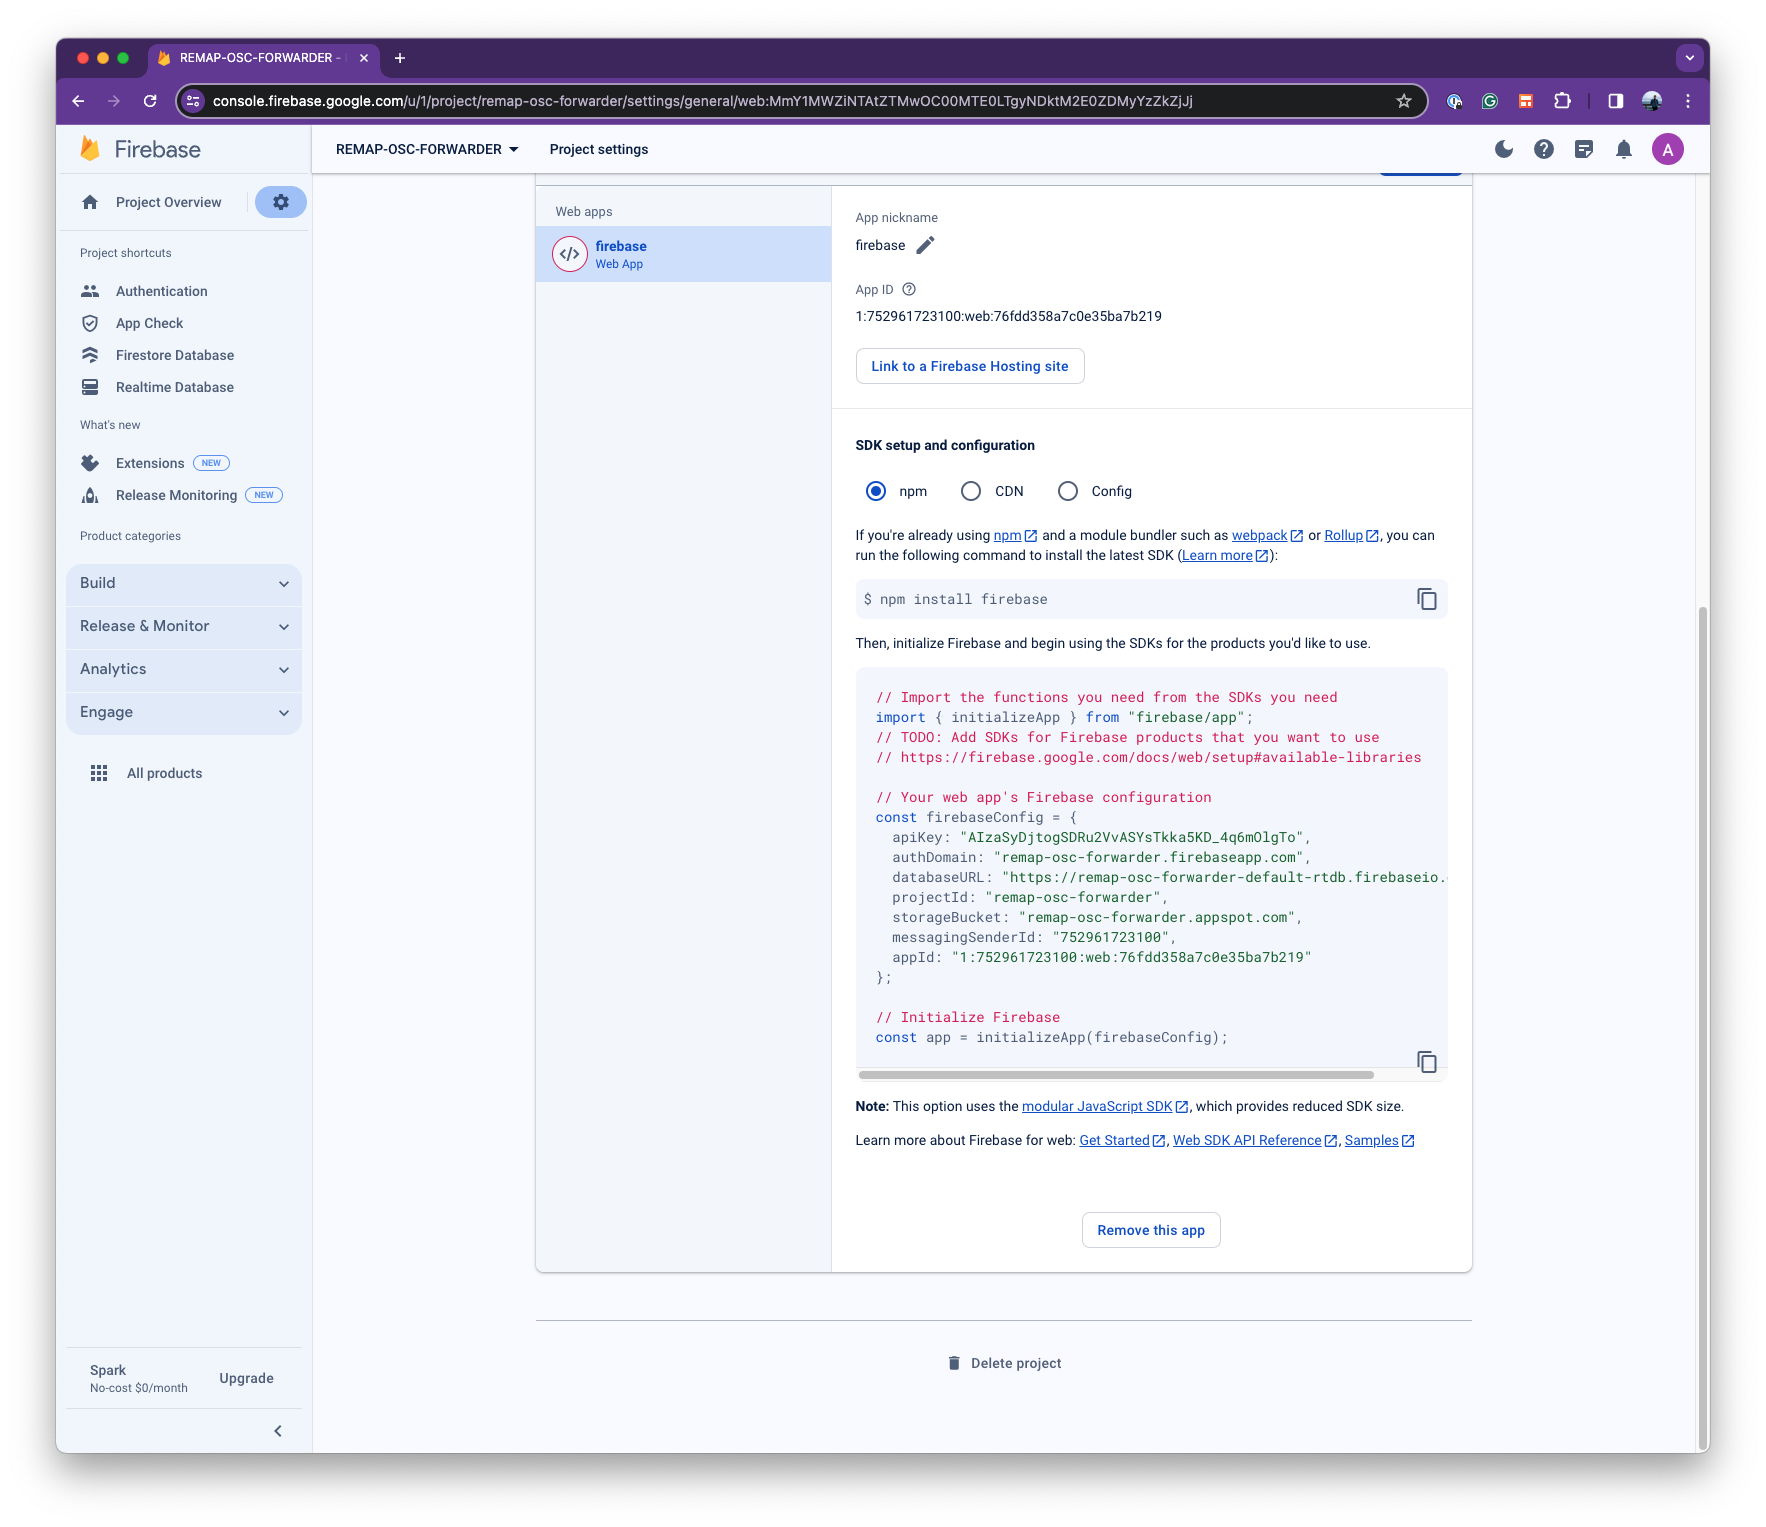
- Copy the
firebaseConfigdata, and paste it into thefirebaseConfiginhead.htmlin our 8th Wall project. - Within
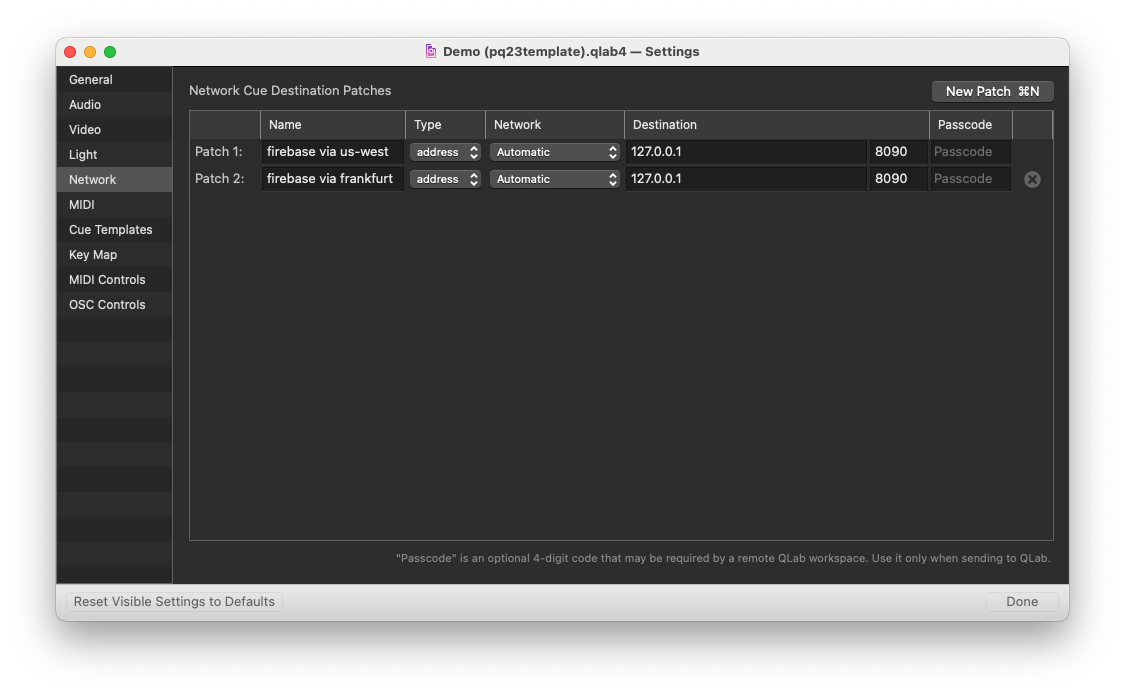
oscfirebase.py, on line 37, change the Firebase URL to the databaseURL copied in the last step. This will tell the Python forwarder where the forwarding destination is. - Finally, since we are using a local python forwarder, we must change the IP that our QLab networking uses. By clicking on the bottom left of our QLab project, and going to
Network, we can make the following changes (changing the destination to localhost):