This is a set of 3D printed parts that let you mount N20 gearmotors (a.k.a. "micro metal gearmotors") on some things like "smart car" robot kits that are designed to take TT gearmotors (the cheap ones with yellow plastic gearboxes). It provides an "upgrade path" for people with an otherwise nice robot that is stuck with yellow motors.
I used the motors with gearbox ratio 50:1 (50:1 micro metal geamotor with extended back shaft that I used on Pimoroni store). Don't get the "push header shims" to use with this, they won't fit.
You'll need 4 M2 10mm (12mm will work) screws and 4 M2 nuts per mount to clamp the motor in place.
It's designed so you can run the wires through the middle of the mount to keep them out of the way.
The centre of the axle is the same as on a TT motor.
You'll need to mirror the motor_mash.stl STL and then print that and the original to get a pair of mounts, one for each side, as they aren't symetrical.
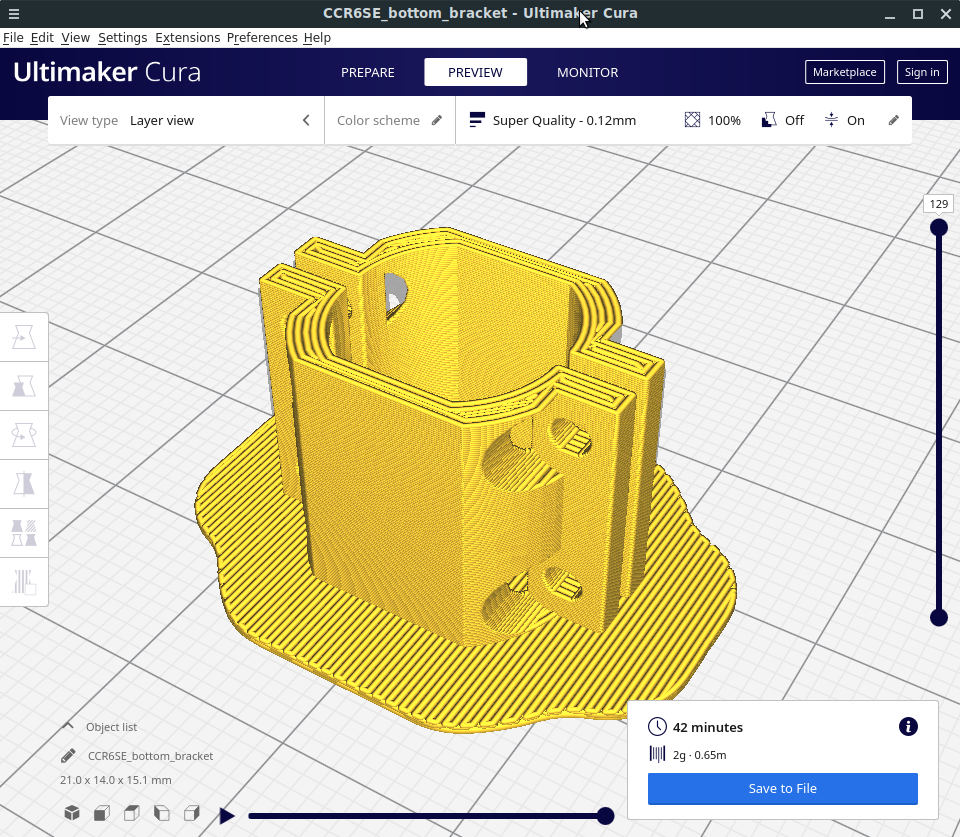
The brackets that then hold the motors in the mounts, bottom_bracket.stl are symetrical. For best results these should be printed standing on their ends, to prevent them snapping when screwed in securely.
I didn't model the "nub" on the side of the TT gearbox (yet) as my kit doesn't require that, and so for me it would only get in the way.
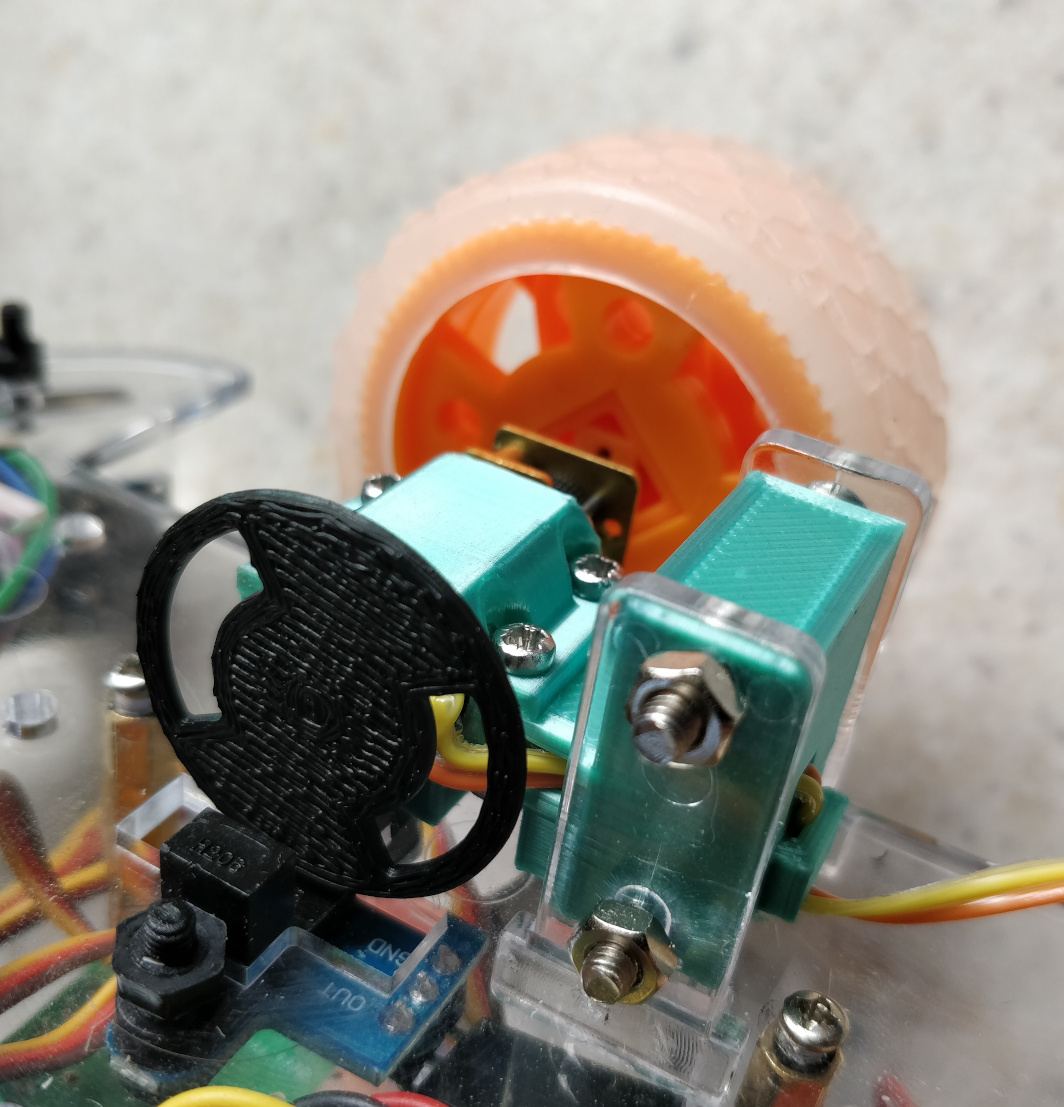
Optical encoder wheels are provided, allowing you to use the same optical encoders you would have used with your yellow motors. You will need the version of the N20 motors with the extended back shaft. The extended back shaft of the N20 motor spins a lot faster than the output shaft, so I've provided the encoder wheels in two different styles.
n20_encoder_20.stl is the wheel with 20 holes cut in it, which is the same pattern as the encoder wheels which norlally come with "smart car" kits. I found that this spins too fast to read, so I prefer n20_encoder_newschool.stl which is the same wheel but with only 2 holes in it, resulting in a 10x slower tick rate.
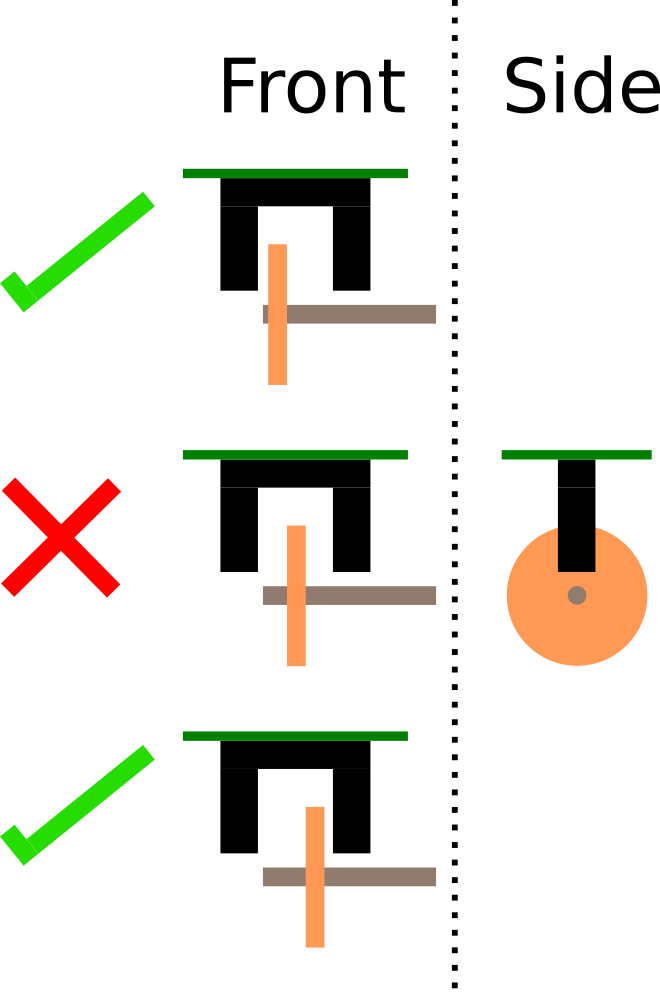
I found the encoder wheels that I printed did not register until I spray painted them black (a different filament may have worked fine). I also found that the placement of the wheels within the "jaws" of the encoder was very important; the wheel had to be close to one side or the other in order to register, and if it was close to the middle then it didn't work at all.
These should push and fit securely on the back shafts. The result looks like this:
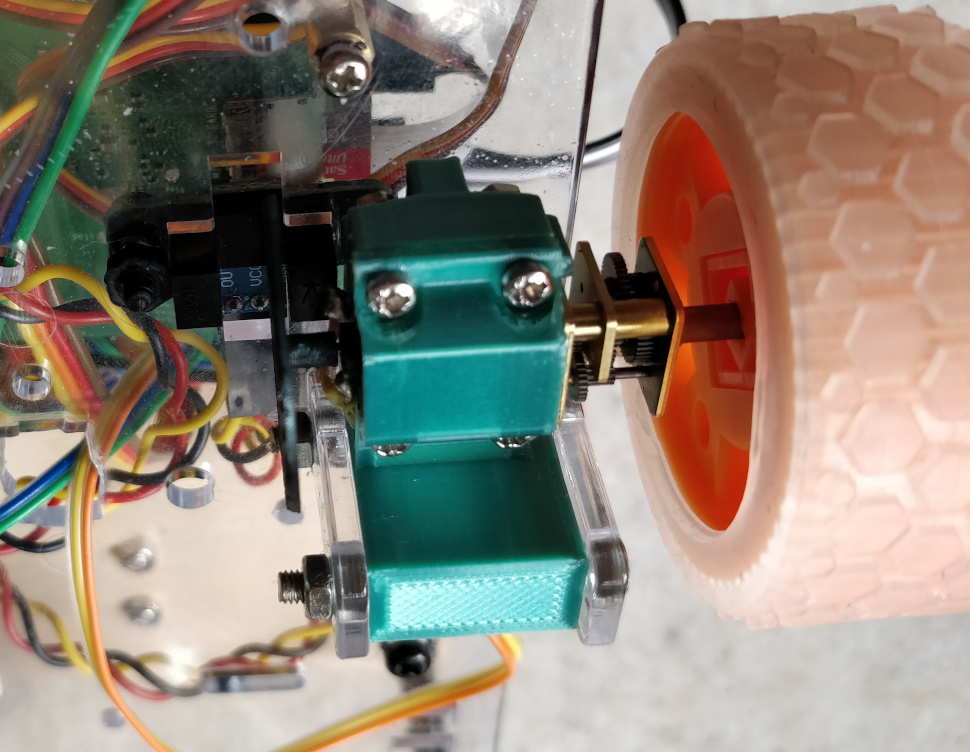
with very little little space between the sleeve of the encoder wheel and the back of the motor.
I designed these to use with the robot I was building following the instructions in the book Learn Robotics Programming by Danny Staple.
I used a 2WD smart car chassis I found on Amazon and the N20-compatible Moon Buggy Wheels from Pimoroni.
The settings I used in robot.py with the 50:1 motors and the newschoool encoder wheels were:
...
class Robot:
    wheel_diameter_mm = 48.0
    ticks_per_revolution = 200.0
    wheel_distance_mm = 130.0
...