We will explore the folders and files created by the Angular CLI. And by building a simple application, we will study the key concepts of angular: Components, Data Binding, Directives and Service.
Components are used to control the different views that we use in a web app. A component consists of a controller class written in TypeScript and the view template.
For coordinating the controlling class with the view template, angular offers different ways of data binding. Typically, data stored in a class property is rendered in a view template and when an event raised in the template is sent back to the controlling class to be handled by a class method.
Sometimes, simple data binding is not enough, for example, if we want to render an entire array as an HTML list, for situations like that where we need to generate or manipulate DOM elements, we use one of the angulars’ built-in directives.
As mentioned already the task of the component class is to control the view. All the logic needed to control the behavior of the related view template should be part of the class. On the other hand, everything which is not directly related to the view and requires substantial coding and resources should be moved into a separate class called a service. As an example, the service could be responsible for requesting data from the server and a component class would consume the service to load the data and render it in the view template.
To see these concepts in practice, first create a new empty folder on your machine to store your first angular app and switch over to VSCode and open the folder created.
Install the Angular CLI globally npm install @angular/cli -g, the Angular CLI is a tool which makes it easy to create new angular applications, setting up the development environment and also assisting in common angular tasks like creating new components or services.
Create a new angular project by the command "ng new" followed by the "name-of-the-app" ng new books-app.
When the setup is done navigate into the app folder by using the command cd books-app in the terminal window. Then, we are ready to run the application with the CLI command ng serve. The server will be started and the app will be available locally on port 4200 (http://localhost:4200/). The app will automatically reload if you change any of the source files.
Within the app's main folder books-app, there are three sub folders and a couple of configuration files. The e2e folder is for testing purposes. The node_modules folder contains all the node modules angular depends on. The src folder contains the source code for the app.
Within the src folder, we find the file index.html which is the html shown in the browser. The file contains a simple HTML boilerplate, and the body of this HTML consists of nothing more than a custom tag called app-root.
app-root refers to the root component which is found in the "src/app" folder. The component is called here app component and the main file is "app.component.ts". This file contains the controller class which is basically just an ordinary TypeScript class but with metadata attached through a class decorator. The selector 'app-root' is used to include the component in an HTML file, in a case of the root component, we saw it was included in the index.html file. And we have references to the HTML template and CSS stylesheet belonging to the component.
Let's proceed creating a simple books app which shows a list of books. To start, we need a model for the books data. In the folder app, create a sub folder model and in there create a file book.ts, exporting a class Book containing properties like the title, a list of authors and coverImage.
export class Book {
    title: string
    authors: string[]
    coverImage: string
}
The Book class is then imported in the app component.
import { Book } from './model/book';In a first step, we will provide some test data directly in the component class. For that, create a property books which is an array of books and add some data manually.
We could take the data from google books api, there you will find an example for a get request for searching book volumes, copy this link into the browser's address bar and modify it to search for books written by Alex Garland, to this end set the search string q to inauthor:"Alex Garland" and add a second property langRestrict to restrict search results to the English language. After submitting the get request/[modified link](https://www.googleapis.com/books/v1/volumes?q=inauthor:"Alex Garland"&langRestrict=en), you should see the results in JSON format on the screen. Now copy the relevant data; title, author and thumbnail from a few results and use it to generate some test data.
In the component's template, Add a unordered list and include just one element for the beginning corrsspoding to the first entry in the books array. To display the data in a template we use what is called interpolation, for that we place the relevant properties from the component class within double curly braces.
{{ books[0].authors[0] }} <strong>{{ books[0].title }}</strong>Interpolation is one of the four ways of data binding in angular. Data binding is a convieninet mechanism for coordinating the controlling class with the view template. In this case, we push data from the class into the HTML template.
Beside interpolation, there is another way to push data from the class into the HTML, which is called property binding. With property binding we can bind a DOM property to a property in the component class. In our case we add an image tag and bind the src property to the thumbnail link which is part of our test data in the component class. To bind the DOM property src, enclose it in square brackets and set it to the property coverImage. Moreover, add some CSS class.
<img [src]="books[0].coverImage" class="preview">So right now, we control which image is shown by binding the DOM's property src, But we don't have control over the class property yet. To get control over it we can use the class property binding which is a special kind of property binding. Again we use square brackets, and within the square brackets we qualify the class by [class.className] in our case [class.preview] and set it to a Boolean value, let's say "previewMode" defined in the component class.
<img [src]="books[0].coverImage" [class.preview]="previewMode">by setting previewMode to true, we have the same situation as before, the preview class is always on, with the difference that we can now toggle the class based on some logic within the component. For example, we could toggle the preview class when we click on the image. To implement a click handler, we use angular's event binding which is again another way of data binding. However, data flows not from the class into the HTML but goes the opposite direction. The event originating in the view is propagated to the class and handled by a class method. For implementing the event binding, we enclose the event in ordinary round brackets and set it to the class method used to handle the event. Here we call the class method onClickImage and define that method in the component class.
<img [src]="books[0].coverImage" [class.preview]="previewMode" (click) ="onClickImage()">At this point, we learned about three of the four fundamental ways of data binding in angular; interpolation and property binding where data is pushed from the class into the HTML and event binding where the data flows the opposite direction from the view to the component class. The remaining type is two-way binding, where data flows in both directions and in which we will come across later.
For now, let’s go back to our small project and observe that all the content is at the moment included in the app's root component. when the app grows bigger, it is not practical to keep everything in a single component. For refactoring the code, start with creating a separate books component for showing the books list. This is done by the CLI command "ng generate component" followed by the "component-name". So, within the terminal submit the command ng generate component books. Then, angular creates a component books as a child of the root component.
Now, you need to copy all the books list related content to that new component. Also check that the angular CLI automatically assign the selector 'app-books' for including the books component in the parent template. In this case, we include the books component in the root component.
<div class="container">
<div style="text-align:center">
<h1>
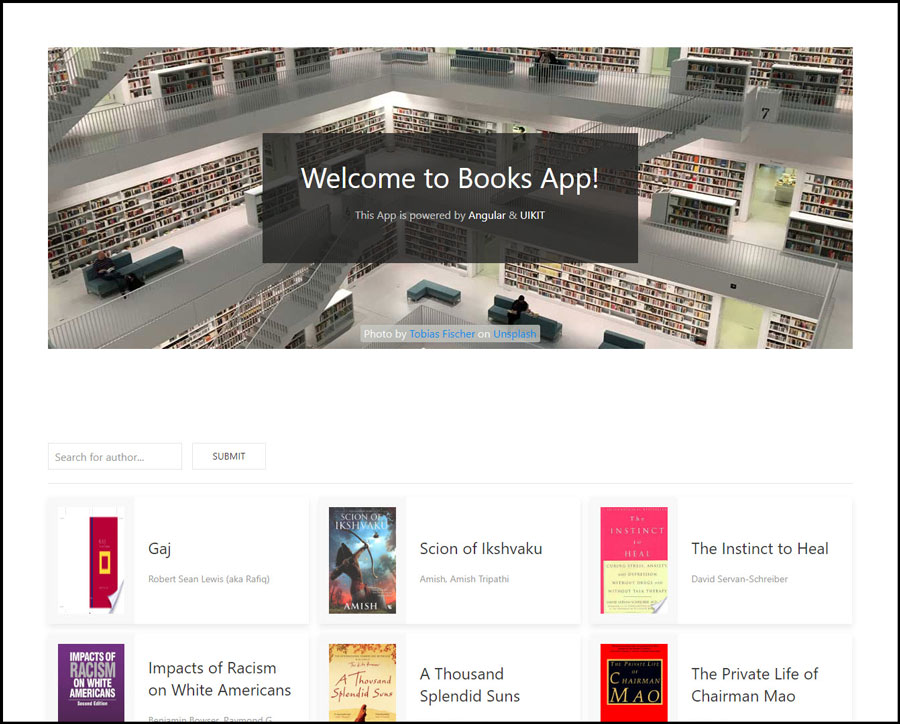
Welcome to {{ title }}!
</h1>
</div>
</div>
<app-books></app-books>After finishing the refactoring, serve the application with ng serve and test in the browser that everything is still the same.
Currently, we still don't show the whole list of books but just the first entry of the books array. To change that we need to generate a list item for each book in the books array. This is done by using the structural directive ngFor which is provided by angular to generate a list of elements based on a component array. The built-in structural directives are proceeded by a star '*'. So, within the li tag add a directive *ngFor and for the instruction in double quotes use the syntax let book of books to define a template input variable book and run through all the elements of the component's books array. Thus, ngFor does the following: It repeats the list item element and provide the respective element of the given array in a template variable. Now, all what we need to change is to replace the first book in the list that was hard coded by the template variable book.
<ul>
  <li *ngFor ="let book of books">
      <img [src]="book.coverImage" [class.preview]="previewMode" (click) ="onClickImage()">
    {{ book.authors[0] }} <strong>{{ books.title }}</strong>
  </li>
</ul>
Back in the browser, we now see a list of all the books contained in the component's books array. However, by clicking on a thumbnail all cover images resize not just the one we clicked on. The reason is that we defined previewMode as a global class property and not as a property of each book object. To change that, include the property previewMode in the book model.
export class Book {
    title: string
    authors: string[]
    coverImage: string
    previewMode: true
}
And remove it from the component class. Instead, initialize it with true in each element of the dummy data.
books: Book[] = [
  {
    title: "Sunshine",
    authors: ["Alex Garland"],
    coverImage: "http://books.google.com/books/content?id=uqhlAAAAMAAJ&printsec=frontcover&img=1&zoom=1&source=gbs_api",
    previewMode : true
  },
  {
    title: "Ex Machina",
    authors: ["Alex Garland"],
    coverImage: "http://books.google.com/books/content?id=yvFMBgAAQBAJ&printsec=frontcover&img=1&zoom=1&edge=curl&source=gbs_api",
    previewMode : true
  },
  {
    title: "Annihilation",
    authors: ["Alex Garland"],
    coverImage: "http://books.google.com/books/content?id=pjBHDwAAQBAJ&printsec=frontcover&img=1&zoom=1&edge=curl&source=gbs_api",
    previewMode : true
  }
];
In the books template, modify the class property binding. Also add the book variable as parameter to the event handler onClickImage.
<img [src]="book.coverImage" [class.preview]="book.previewMode" (click) ="onClickImage(book)">And update the onClickImage method in the component class.
onClickImage(book) {
  book.previewMode = !book.previewMode;
}
Back in the browser, clicking on an item's thumbnail, now only the size of the clicked image should change, that’s because on click we send the individual book object clicked to the class and there we switch on and off the previewMode property of the respective book.
One aspect we didn't care about yet is a case of multiple authors which is not reflected in our test data right now. Currently we just render the first author in a list of authors. In order to take account of that, we add a method getAuthorsList in the class that is modeling the book data. The method returns a string which is built by joining the authors separated by a comma.
export class Book {
    title: string
    authors: string[]
    coverImage: string
    previewMode: true
    getAuthorsList() : string {
        return this.authors.join(", ");
    }
}
In the template of the books component we then use this method to display the list of authors.
<ul>
  <li *ngFor ="let book of books">
      <img [src]="book.coverImage" [class.preview]="book.previewMode" (click) ="onClickImage(book)">
      {{ book.getAuthorsList() }} <strong>{{ books.title }}</strong>
  </li>
</ul>
One more thing we should add in the model class is a class constructor used to create book objects. We use the class properties title, authors and coverImage as constructor parameters since these properties have to be supplied from outside the class. On the other hand, previewMode is not provided from outside but is initialized to true for all new objects.
export class Book {
    constructor(public title: string, public authors: string[], public coverImage: string) {
        this.previewMode = true;
    }
    previewMode: true
    getAuthorsList() : string {
        return this.authors.join(", ");
    }
}
In the books component we modify the definition of the test data accordingly using the class constructor to create a dummy data.
books: Book[] = [
  new Book(
    "Sunshine",
    ["Alex Garland"],
    "http://books.google.com/books/content?id=uqhlAAAAMAAJ&printsec=frontcover&img=1&zoom=1&source=gbs_api"
  ),
  new Book(
    "Ex Machina",
    ["Alex Garland"],
    "http://books.google.com/books/content?id=yvFMBgAAQBAJ&printsec=frontcover&img=1&zoom=1&edge=curl&source=gbs_api"
  ),
  new Book(
    "Annihilation",
    ["Alex Garland"],
    "http://books.google.com/books/content?id=pjBHDwAAQBAJ&printsec=frontcover&img=1&zoom=1&edge=curl&source=gbs_api"
  )
];
Back in the browser, check that everything still working as before. So far, we talked about the angular component architecture, different ways of data binding for coordinating the component class with the view template and we used an angular directive to generate DOM elements.
Now let’s talk about the angular service concept. A service is nothing else but an ordinary TypeScript class with a specific purpose like providing the data used in the component. In general, a component class should only contain the code required for controlling the component's view. The books component for instance, should include the event handlers and the properties displayed in the view but it should not include complex and resource intensive code for retrieving the books data from a data source. Such tasks should be delegated to a separate service class. In our case we will create a data service for providing the books data. This can be done by the angular CLI command "ng generate service" followed by the "name-of-the-service" in our case book ng generate service book.
After the generation is complete, open the file book.service.ts and there import the book model. Also Move the dummy data from the books component to the book service and rename the property into testData and add a method getBooks that just returns the testData.
To make the book service available in the book component, we have to add the service as a provider in the app module (app.module.ts), then the book service can be consumed by any component in that module.
We didn't take about angular modules so far. Modules are used to group components together that belong to the same work flow or feature. In our simple application we have only the root module, called app module.
Now that we provided the service, we can consume it in the books component. For that import the service class with a TypeScript import statement. Add a class property to hold the books data. Inject the book service in the class constructor. And in the method ngOnInit retrieve the data from the service and assign it to the books property. Behind the scene, angular injects an instance of the book service when creating the component. And at time of initializing the component, that’s when the life cycle method ngOnInit is called, the data is fetched by the book service and stored in the component’s books property.
To sum up what we have learned so far, we learned how to setup a basic angular app using Angular CLI and on our way we came across some of the key concepts of Angular; components, data binding, directives and services. Next, we use Angular forms to implement a two-way data binding for a simple input box and instead of hard-coding some dummy data, we retrieve the books data from Google’s book API via angular HttpClient. Furthermore, we briefly look at angular's modular and component architecture and libraries used for improving the app's UI.
(Angular Forms Module and Two-Way Binding) First, we add a search box on top of the book list and implement some logic to search books for a specific author. Then we include the forms module which contains the attribute directive ngModel. With ngModel we can implement Two-Way data binding, synchronizing the input value in the search box with a property in the component class.
(Client-Server Communication) Next, we are going to request books data from Google’s book API using Angular's HttpClient. To retrieve the data asynchronously we use TypeScript promises.
(Outlook) Moreover, we will talk a little bit about angular's modular and component architecture and about improving the app's UI using external UI libraries like Angular Material.
Open the books template and add a div at the top with three elements inside of it:
- A label search for author for the input box with id author
- The input box itself with name and id both equals author
- The submit button.
<div>
  <label for="author">Search for Authors:</label>
  <input type="text" name="author" id="author">
  <button type="submit">Submit</button>
</div>
When done, serve the application with ng serve and check in the browser that the search-box appears in the view.
Next, we add some functionality to the new elements. For hinting the submit event add a click listener onSubmit() to the button. And in order to send the search-box's input on submit, add a reference variable #author to the input filed referencing the HTML input element. Then we call onSubmit with the value of the search-box's input as parameter; onSubmit(author.value).
For testing purposes, we also modify the code in the BookService and the BooksComponent classes:
- In the BookService class, add a string parameter author in the getBooks method and only provide the test data when searching for Alex Garland. Otherwise, send an empty books array.
getBooks(author: string) : Book[] {
  if (author == "Alex Garland") {
    return this.testData;
  }
  else return [];
}- In the BooksComponent class add a private method getBooks to retrieve the books for a search string provided as parameter and call this method in ngOnInit with empty search string. Also add onSubmit method with the search string sent along the submit event.
ngOnInit() {
  this.getBooks("");
}

onSubmit(author: string) {
  this.getBooks(author)
}

private getBooks(author: string) {
  this.books = this.bookService.getBooks(author)
}
Finally, verify in the browser that it works as expected; Only in case we search for "Alex Garland", we retrieve the test data. Otherwise, no data is shown.
Up to this moment, the search form we created is very simple since it only contains a single input field and lacks features such as change tracking, form validation or error handling. All these things can be realized in a more complex setting using the angular's Forms module. The Forms module also contains support for Two-Way data binding. Earlier we covered variants of data binding where the data flows in one direction; either from the class to the view template as with interpolation and property binding or from the template back to the class as with the event binding.
Two-Way binding is a convenient alternative in a case where data flows in both directions. For instance, synchronizing the entry in our search-box with a property in the component class. Whenever the user adds the input, the class property is updated to reflect the current entry and whenever we change the value of the class property programmatically the input filed is updated with the respective value. Two-Way binding is implemented by the attribute directive ngModel.
Before we take a look at the implementation, we have to add the FormsModule in app.module.ts. First, import it from @angular/forms as a TypeScript module. And second, add it to the imports listed in the module's metadata.
As mentioned already ngModel is an attribute directive. We saw previously an example for a structural directive modifying the structure of the DOM, in a case of ngFor, generating new DOM elements. On the other hand, attribute directives change the appearance or behavior of elements.
ngModel is applied on a form control like the input field in the books template and follows a two-way binding syntax which is also called banana in a box syntax since ngModel is enclosed by round and square brackets. Then we assign a class property to ngModel, in our case we might call the property searchString. The ngModel directive will then synchronzie the input's filed entry with the value of the class property searchString. Now that we use ngModel for Two-Way binding, the parameter in the event handler on submit becomes obsolete just as the reference variable for the input field.
<input [(ngModel)]="searchString" type="text" name="author" id="author">
<button type="submit" (click)="onSubmit()">Submit</button>
Next, in the BooksComponent class add the property searchString and initialize it with an empty string. Also delete the author parameter from the class methods and call the service method with searchString as input.
Back to the browser and observe; Since Two-Way binding guarantees that property searchString reflects the entry in the search-box at any time, the app behaves the same way as before.
Though we implemented a basic search we still provide dummy data for Alex Garland. Let's change that and connect to the Google's books API using angular's HttpClientModule. To begin with, we have to add the HttpClientModule in app.module.ts. First, import it from @angular/common/http as a TypeScript module. And second, add it to the imports listed in the module's metadata.
Within the book service import the HttpClient from the same path and inject it into the class constructor. Then remove the testData and add a property apiRoot holding the root address for a volume search in Google's book API.
We use asynchronous programming to retrieve data from the API. Therefore, the getBooks method doesn't return an array of books directly but a Promise of an array of type Book. The Promise we'll return is described by the two function parameters resolve and reject. When everything goes well, we resolve with an array of books resulting from our search and in the optional error case we call reject.
getBooks(author: string) : Promise<Book[]> {
  return new Promise((resolve, reject) => {

  });
}
Now let's do our job and get the search results as an array of book objects from Google's book API. The steps to take as follows:
- First, we have to construct the request URL based on a search parameter author.
- Second, we send the get request to that URL using the HttpClient and we get back data structured like in this (example)[https://www.googleapis.com/books/v1/volumes?q=inauthor:"Alex Garland"&langRestrict=en]. We are interested in the items array, which contains the list of books. However, each book is described by a lot of properties but in our book model we are only interested in three attributes; title, authors and the thumbnail. So, what we have to do is to map the data modeled in our own book model. And finally, we can resolve the resulting list of book objects.
Now let's go back to the service implementation and start with constructing the URL. Write the URL as a TypeScript template string with the "apiRoot" property and the "author" parameter as " embed expressions".
let apiURL = `${this.apiRoot}?q=inauthor:"${author}"&langRestrict=en`;Then use the get method of the HttpClient to send a get request to the URL. Since angular uses something called Observables instead of Promises for asynchronous tasks we convert the observable returned by the get method into a Promise. The data promised has a structure like the example link above. In order to convert it into an array of book objects we apply the method map on the items array and map each single element on a new book object. The book object is created by calling the constructor with a "title", list of "authors" and "thumbnail" as parameters. These properties are retrieved from the respective properties in a JSON sent back as a response by the API. Finally, resolve the promise with the resulting array of books.
this.http.get(apiURL).toPromise().then((data: any) => {
  let results : Book[] = data.items.map(item => {
    return new Book(
      item.volumeInfo.title,
      item.volumeInfo.authors,
      item.volumeInfo.imageLinks.thumbnail
    )
  })
  resolve(results);
});
In the books component modify the getBooks method to retrieve data asynchronously.
private getBooks() {
  this.bookService.getBooks(this.searchString).then(data => {
    this.books = data;
  })
}
Now back to the browser, test the application by searching again for Alex Garland. As it seems the data service works as expected.
However, by playing around with our simple BooksApp! we realize that for some inputs the view doesn't update. For example, when searching for Stephen Hawking, nothing happens, we still see the results for Alex Garland. So, what is the reason for that behavior? The reason is a run-time error which is not shown in the IDE, that because the log is written into the browser's console.
To view the log Open chrome's developer console and observe the error message is telling us that property thumbnail doesn't exist on undefined. Obviously, the imageLinks property is missing in some of the items listed by the Google's book API. You can verify that by submitting the search (request for the author Stephen Hawking)[https://www.googleapis.com/books/v1/volumes?q=inauthor:%22Stephen%20Hawking%22&langRestrict=en] in the browser.
For solving this problem, we have to check the existence of each property before accessing it. In deep object hierarchies this can be awkward if done manually and unfortunately TypeScript doesn't get support optional chaining. To implement safe access to the properties we write a method getSafe trying to access the property and in case the attempt fails, setting the value to undefined. For the implementation execute the function within a try block to retrieve the value and in the error case return undefined.
  private getSafe<T> (f: () => T) : T {
    try {
      return f();
    } catch (error) {
      return undefined;
    }
  }
For the method input wrap the access property in a function and return the property value. Then apply the method on the three properties title, authors and thumbnail.
this.getSafe(() => item.volumeInfo.title),
this.getSafe(() => item.volumeInfo.authors),
this.getSafe(() => item.volumeInfo.imageLinks.thumbnail)
Also take care of the case undefined when binding the src property to the thumbnail link in the view template.
<img [src]="book.coverImage ? book.coverImage : ''" [class.preview]="book.previewMode" (click) ="onClickImage(book)">Now back to the browser and check that now everything works correctly.
In our small application we only have one angular module, the root module, called AppModule (app.module.ts). Angular modules are not to be confused with TypeScript modules.
In TypeScript, each file is a module and as you know we use export and import statements for granting access to specific objects of those modules. In contrast, an angular module is a logical grouping for parts of the application dedicated to a common feature or workflow.
The components belonging to an angular module are stated in the Module's metadata which is described by the @ngModule decorator. In our simple scenario we just have one feature; the book search which is part of the root module. However, we use some standard libraries which are also come as angular modules; the FormsModule and HttpClientModule.
@NgModule({
  declarations: [
    AppComponent,
    BooksComponent
  ],
  imports: [
    BrowserModule,
    FormsModule,
    HttpClientModule
  ],
  providers: [BookService],
  bootstrap: [AppComponent]
})
In a more complex application, we can create our own feature modules for grouping the code with a common functionality. The application building blocks below the level of modules are mainly components.
We have are already created our own BooksComponent as a child of the root component, AppComponent. However, when our solution becomes more sophisticated we should break the BooksComponent in its child components; the search form and the books list showing the search results. The books list could be further buildup of book item components, each representing the view of a single book in a books list.
By such an architecture we make our code more maintainable and reusable but we also need to care about communication between the components. In general child components will propagate events to the parent components by using event emitters and parent components will configure the child components by setting components parameters.
When it comes to UI design we have the choice between various external libraries. Angular Material is a great library providing material design components for angular.
We could render the books as cards with a title and author in the card header and the coverImage as a card image.
Before we can use angular material, we have to install two packages, the angular material package npm install @angular/material -S and the angular CDK which stands for Component Development Kit which is required by angular material npm install @angular/cdk -S.
Then we import the specific UI modules we want to use in our project. In our case the card Module into the app.module.ts. Also add the module to the angular module imports within the app module metadata.
Now we are ready to use the card component in the books template instead of the unordered list.