Application Main Features:
- Responsive UI for desktop and mobile
- Register new user accounts with Log in/Log out
- Users passwords are stored as a hash in the database (not as plain text)
- Users can edit their own information such as username, email, first/last name
- Users can leave likes and comments on each blog article
- Users with
add_blogpostpermission can create/edit/delete main blog articles directly from front-end (these options are not shown in the front-end for normal users withoutadd_blogpostpermission) - URL routes are not directly accessible if conditions are not met (eg.
LoginRequired) - Rich Text-Editor for blog articles and comments (with text formatting, code snippets, links and images using CKEditor)
- Media Files are stored using Google Drive Storage (free alternative to Amazon S3 Bucket)
- Site deployed using a free Heroku plan with PostgreSQL as DB.
- Django Blog with Authentication, Coding-Articles, Likes and Comments

Background Photo by Jordan Whitt on Unsplash

DjangoPublishingPlatform/
┣ assets/
┃ ┣ admin/
┃ ┣ css/
┃ ┃ ┣ bootstrap.css
┃ ┃ ┣ bootstrap.min.css
┃ ┃ ┣ clean-blog.css
┃ ┃ ┗ clean-blog.min.css
┃ ┣ img/
┃ ┃ ┣ about-bg.jpg
┃ ┃ ┣ contact-bg.jpg
┃ ┃ ┣ home-bg.jpg
┃ ┃ ┣ post-bg.jpg
┃ ┃ ┗ post-sample-image.jpg
┃ ┗ js/
┃   ┣ bootstrap.bundle.min.js
┃   ┣ bootstrap.min.js
┃   ┣ clean-blog.js
┃   ┣ clean-blog.min.js
┃   ┣ contact_me.js
┃   ┣ jqBootstrapValidation.js
┃   ┣ jquery.min.js
┃   ┗ jquery.slim.min.js
┃
┣ DjangoPublishingPlatform/
┃ ┣ asgi.py
┃ ┣ settings.py
┃ ┣ urls.py
┃ ┣ wsgi.py
┃ ┗ __init__.py
┃
┣ MainApp/
┃ ┣ admin.py
┃ ┣ apps.py
┃ ┣ forms.py
┃ ┣ models.py
┃ ┣ sitemaps.py
┃ ┣ tests.py
┃ ┣ urls.py
┃ ┣ views.py
┃ ┗ __init__.py
┃
┣ templates/
┃ ┣ MainApp/
┃ ┃ ┣ about.html
┃ ┃ ┣ base.html
┃ ┃ ┣ blogpost_confirm_delete.html
┃ ┃ ┣ blogpost_detail.html
┃ ┃ ┣ blogpost_form.html
┃ ┃ ┣ contact.html
┃ ┃ ┣ index.html
┃ ┃ ┣ post.html
┃ ┃ ┗ user_posts.html
┃ ┗ users/
┃   ┣ login.html
┃   ┣ logout.html
┃   ┣ profile.html
┃   ┣ register.html
┃   ┗ user_confirm_delete.html
┃
┣ users/
┃ ┣ admin.py
┃ ┣ apps.py
┃ ┣ forms.py
┃ ┣ models.py
┃ ┣ tests.py
┃ ┣ views.py
┃ ┗ __init__.py
┃
┣ manage.py
┣ Procfile
┗ requirements.txt
Python version used: +v3.7
You can refer to requirements.txt and install all the dependencies (in your custom Anaconda environment or your Linux Virtual Environment) by using:
pip install -r requirements.txtYou can also install the latest versions of the modules used in this project, separately, by running:
pip install django
pip install django-crispy-forms
pip install django-ckeditor
pip install django-googledrive-storage
pip install django-heroku
pip install gunicorn
pip install pillow
Note: To create a Custom Anaconda Environment and switch to it after it was created, run:
conda create -n django_blog
activate django_blog

# now install the packages via requirements.txt or install with pip separately- Clone this repository:
git clone https://github.com/radualexandrub/CodingTranquillity-DjangoBlog.gitBefore we start running the app, we need to generate a secret key. Note: Make sure that the key used in production isn't the same as the one used in development (localhost).
We can generate a secret key using https://djecrety.ir/
Or, open a Command Prompt / Terminal and, in a Python3 environment, write:
import secrets
print(secrets.token_hex(24))This project currently uses environments variables in its ./DjangoPublishingPlatform/settings.py:
# settings.py
SECRET_KEY = os.environ.get('SECRET_KEY')
DEBUG = (os.environ.get("DEBUG_VALUE") == "True")
On Windows, open the start menu and search for "environment variables", select Edit the system environment variables, click on Environment Variables. under "User variables" click on New... and write the followings:
Variable name: SECRET_KEYVariable value: (your generated secret key)Variable name: DEBUG_VALUEVariable value: True

On Linux, if you are not running Python in a custom virtual environment, then open your bash_profile file:
sudo nano ~/.bash_profile
Add to the end of the file the followings:
export SECRET_KEY="your_secret_key"
export DEBUG_VALUE="True"
Save and quit (press CTRL+X then type y for Nano editor).
If you're using a virtual ENV, you can add the environment variables to that specific environment, by opening:
sudo nano your_environment_name/bin/activate
Then write the same "exports" at the end of the file. Restart your ENV for changes to take effect.
If you don't want to store anything in your system variables (eg. for running the project only on your machine, only you developing it and without any intention of pushing the source code on GitHub while deployed), just open ./DjangoPublishingPlatform/settings.py and replace SECRET_KEY and DEBUG variables with "True", and "your_secret_key".
This project currently uses Django Google Drive Storage in order to store the media files (photos) that are uploaded by users.
In order to use this cloud based storage, you need to have a lucid-burner.json file (GOOGLE_DRIVE_STORAGE_JSON_KEY_FILE) that you can obtain from developers.google.com.
- First, open console.cloud.google.com and log in with your current Google Account
- Click on
CREATE PROJECTand follow the corresponding steps on creating a new project - Open your new project and click on
CREATE SERVICE ACCOUNT(Pick any name, eg. GoogleDriveStorage), then click onDONE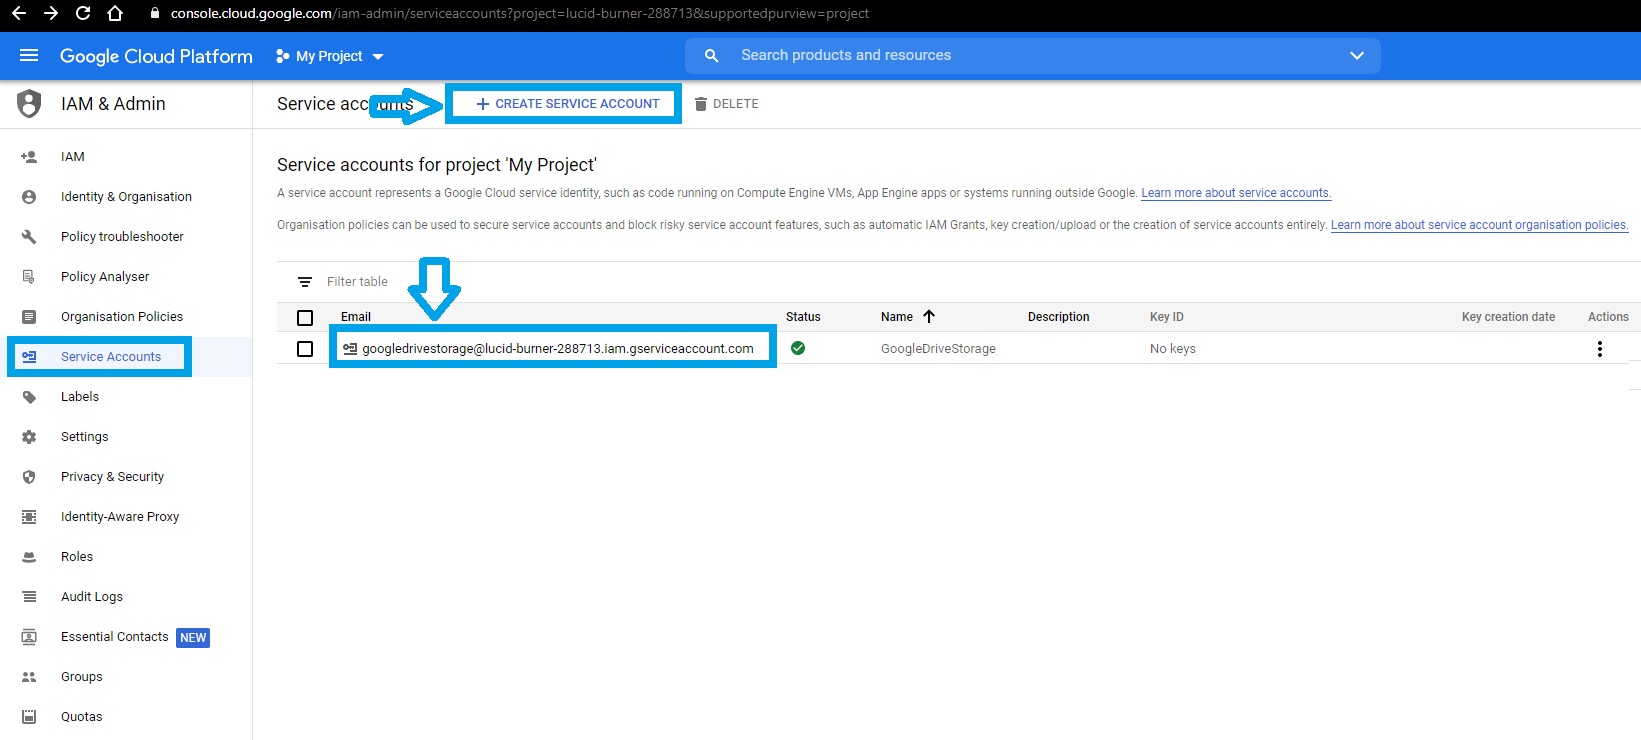
- Open your newly created "Service Account" and click on
ADD KEY->CREATE NEW KEY->JSON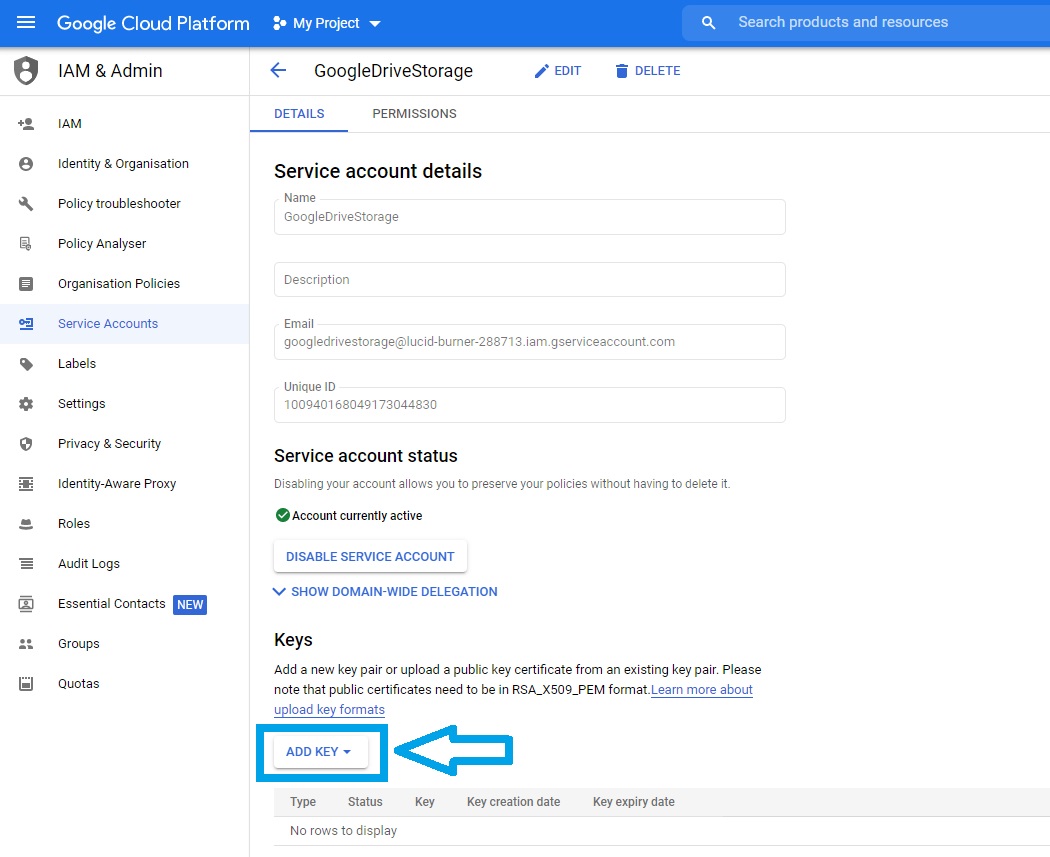
- A new
lucid-burner.jsonfile was generated and downloaded. Make sure you place thisjsonfile in your Main Django Project directory (eg. where./manage.pyis also located) - Make sure in your
settings.pythat you havegdstorageand the path to yourlucid-burner.jsonfile:


# settings.py
INSTALLED_APPS = [
     ...
     'gdstorage'
 ]

GOOGLE_DRIVE_STORAGE_JSON_KEY_FILE = os.path.join(
    BASE_DIR, 'lucid-burner.json')
GOOGLE_DRIVE_STORAGE_MEDIA_ROOT = os.path.join(BASE_DIR, 'media')- Make sure in your
models.pyyou usegdstorage:
# ./MainApp/models.py
from gdstorage.storage import GoogleDriveStorage

# Define Google Drive Storage
gd_storage = GoogleDriveStorage()

class BlogPost(models.Model):
    ...
    image = models.ImageField(upload_to='blog_images',
storage=gd_storage, null=True, blank=True)- Make sure your form (where users can upload images via google drive storage) uses
enctypeproperty:
<!-- ./templates/MainApp/blogpost_form.html -->
<form method="POST" enctype="multipart/form-data">
    {% csrf_token %}
    <div class="control-group">
        {{ form.media }}
    </div>
    <button class="btn" type="submit">Create this article!</button>
</form>If you don't want to use Google Drive (Cloud) Storage for your media files, then:
- In
settings.py, removegdstoragefromINSTALLED_APPSand also removeGOOGLE_DRIVE_STORAGE_JSON_KEY_FILEandGOOGLE_DRIVE_STORAGE_MEDIA_ROOTvariables. - In
models.py, remove the settings made for using Google Drive Storage (written above), and add/replace to your class model the following:
class BlogPost(models.Model):
    ...
image = models.ImageField(upload_to='blog_images')- After every change in the
models.pyfile, open the terminal and make the migrations to the database:
# CLI/Terminal
>> cd C:\Projects\...\YourDjangoAppMainFolder
>> python manage.py makemigrations
>> python manage.py migrateOpen Cmd Prompt/Terminal in the project's path and run runserver command:
cd ./PathToProject/DjangoPublishingPlatform
python ./manage.py runserver
Open your favorite Browser at the address: http://localhost:8000/.
- The application is not so responsive on mobile:
- Comment Section in each Blog Post is larger than the screen size, needing to scroll horizontally
- Comment Form is larger than the screen size, needing to scroll horizontally
- Images in Blog Posts can be larger than the screen size, needing to scroll horizontally
- Empty comments can still be posted (needs a check
""condition) - The search articles option can display a maximum of 10 posts, the rest of the pages will redirect user to the main index page
- The App does not have a custom 404 page
- Corey's Schafer 10h tutorial on creating a Full-Featured Web App
- HTML and CSS Bootstrap theme from StartBootstrap.com
- Pexels and Unsplash - Free Stock Photos
- Django Crispy Forms
- Django CKEditor - Rich Text-Editor for Input Forms
- Heroku - cloud platform for hosting web applications
- Cron-job.org - Scheduled execution of your websites - used to prevent Heroku's dyno (server) from going to sleep after 30 minutes of Website inactivity.
My portfolio: radubulai.com
My blog: CodingTranquillity
Released under the MIT license.