- View your AKS clusters in the Kubernetes extension cloud explorer
- Add AKS clusters to kubeconfig
- Perform AKS Diagnostics checks on your AKS cluster
- Run AKS Periscope within VS Code
- Install Azure Service Operator on your AKS cluster
- Create GitHub Workflow from your AKS cluster
- Show AKS cluster overview in Azure Portal
- Show AKS cluster properties
- Create AKS cluster from Azure Portal
-
Download and install the Azure Kubernetes Service extension for Visual Studio Code.
-
Wait for the extension to finish installing then reload Visual Studio Code when prompted.
-
Once the installation is complete, you'll see a section named Azure under Clouds.
-
Sign in to your Azure Account by clicking Sign in to Azure…
Once you successfully log in with your Azure Account, you can view all AKS clusters in your Azure subscriptions(s) under the section named Azure. You can right click on your AKS cluster and click a menu item to perform following actions.
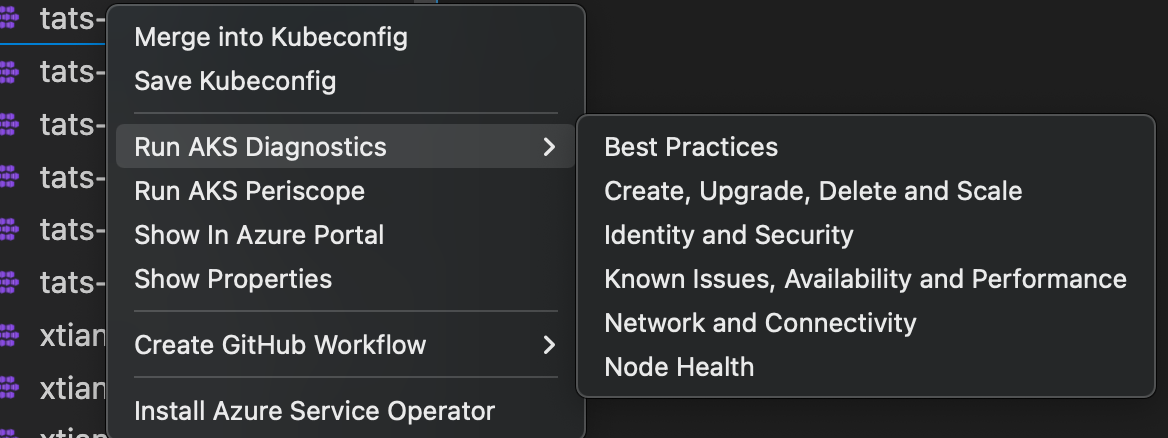
Right click on your AKS cluster and click on Merge into Kubeconfig to add the selected AKS cluster to the kubeconfig file.
Right click on your AKS cluster and click on Save Kubeconfig to save the kubeconfig of the selected AKS cluster.
Right click on your AKS cluster and click on Run AKS Diagnostics to display diagnostics information based on your AKS cluster's backend telemetry for:
- Best Practices
- Create, Upgrade, Delete and Scale issues
- Identity and Security
- Known Issues, Availability and Performance
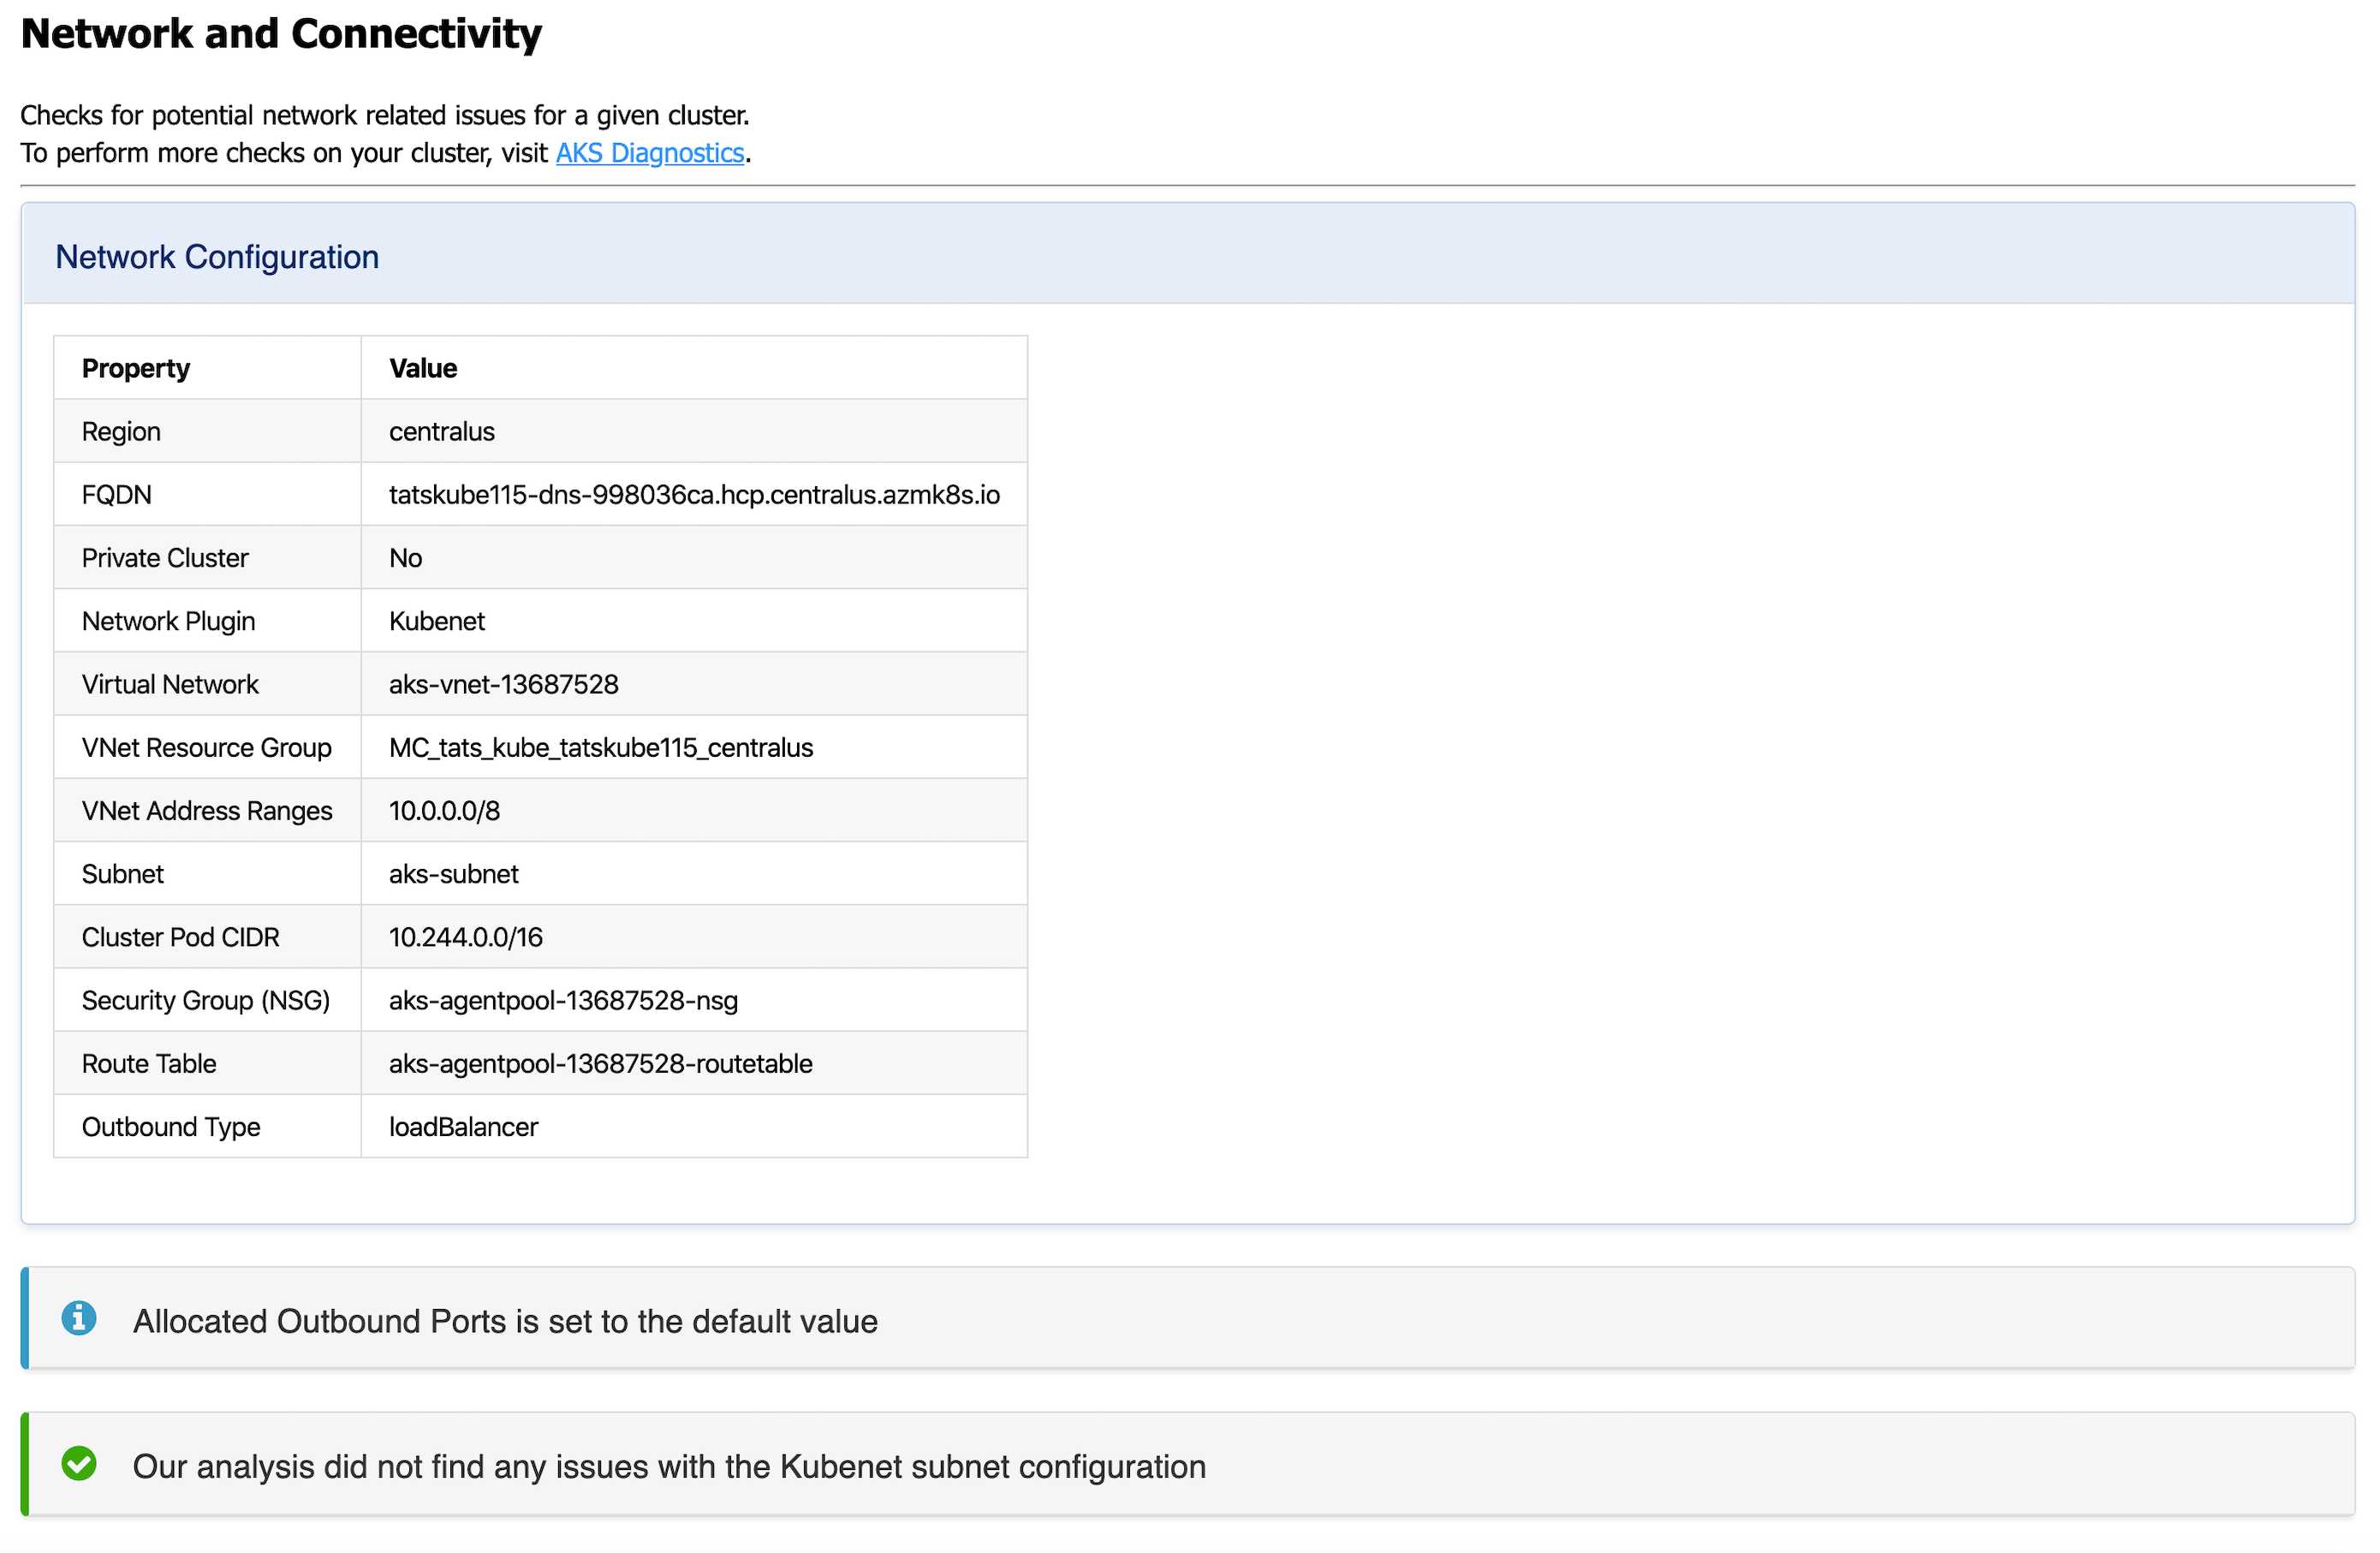
- Network and Connectivity issues
- Node Health
To perform further checks on your AKS cluster to troubleshoot and get recommended solutions, click on the AKS Diagnostics link at the top of the page to open it for the selected cluster. For more information on AKS Diagnostics, visit AKS Diagnostics Overview.
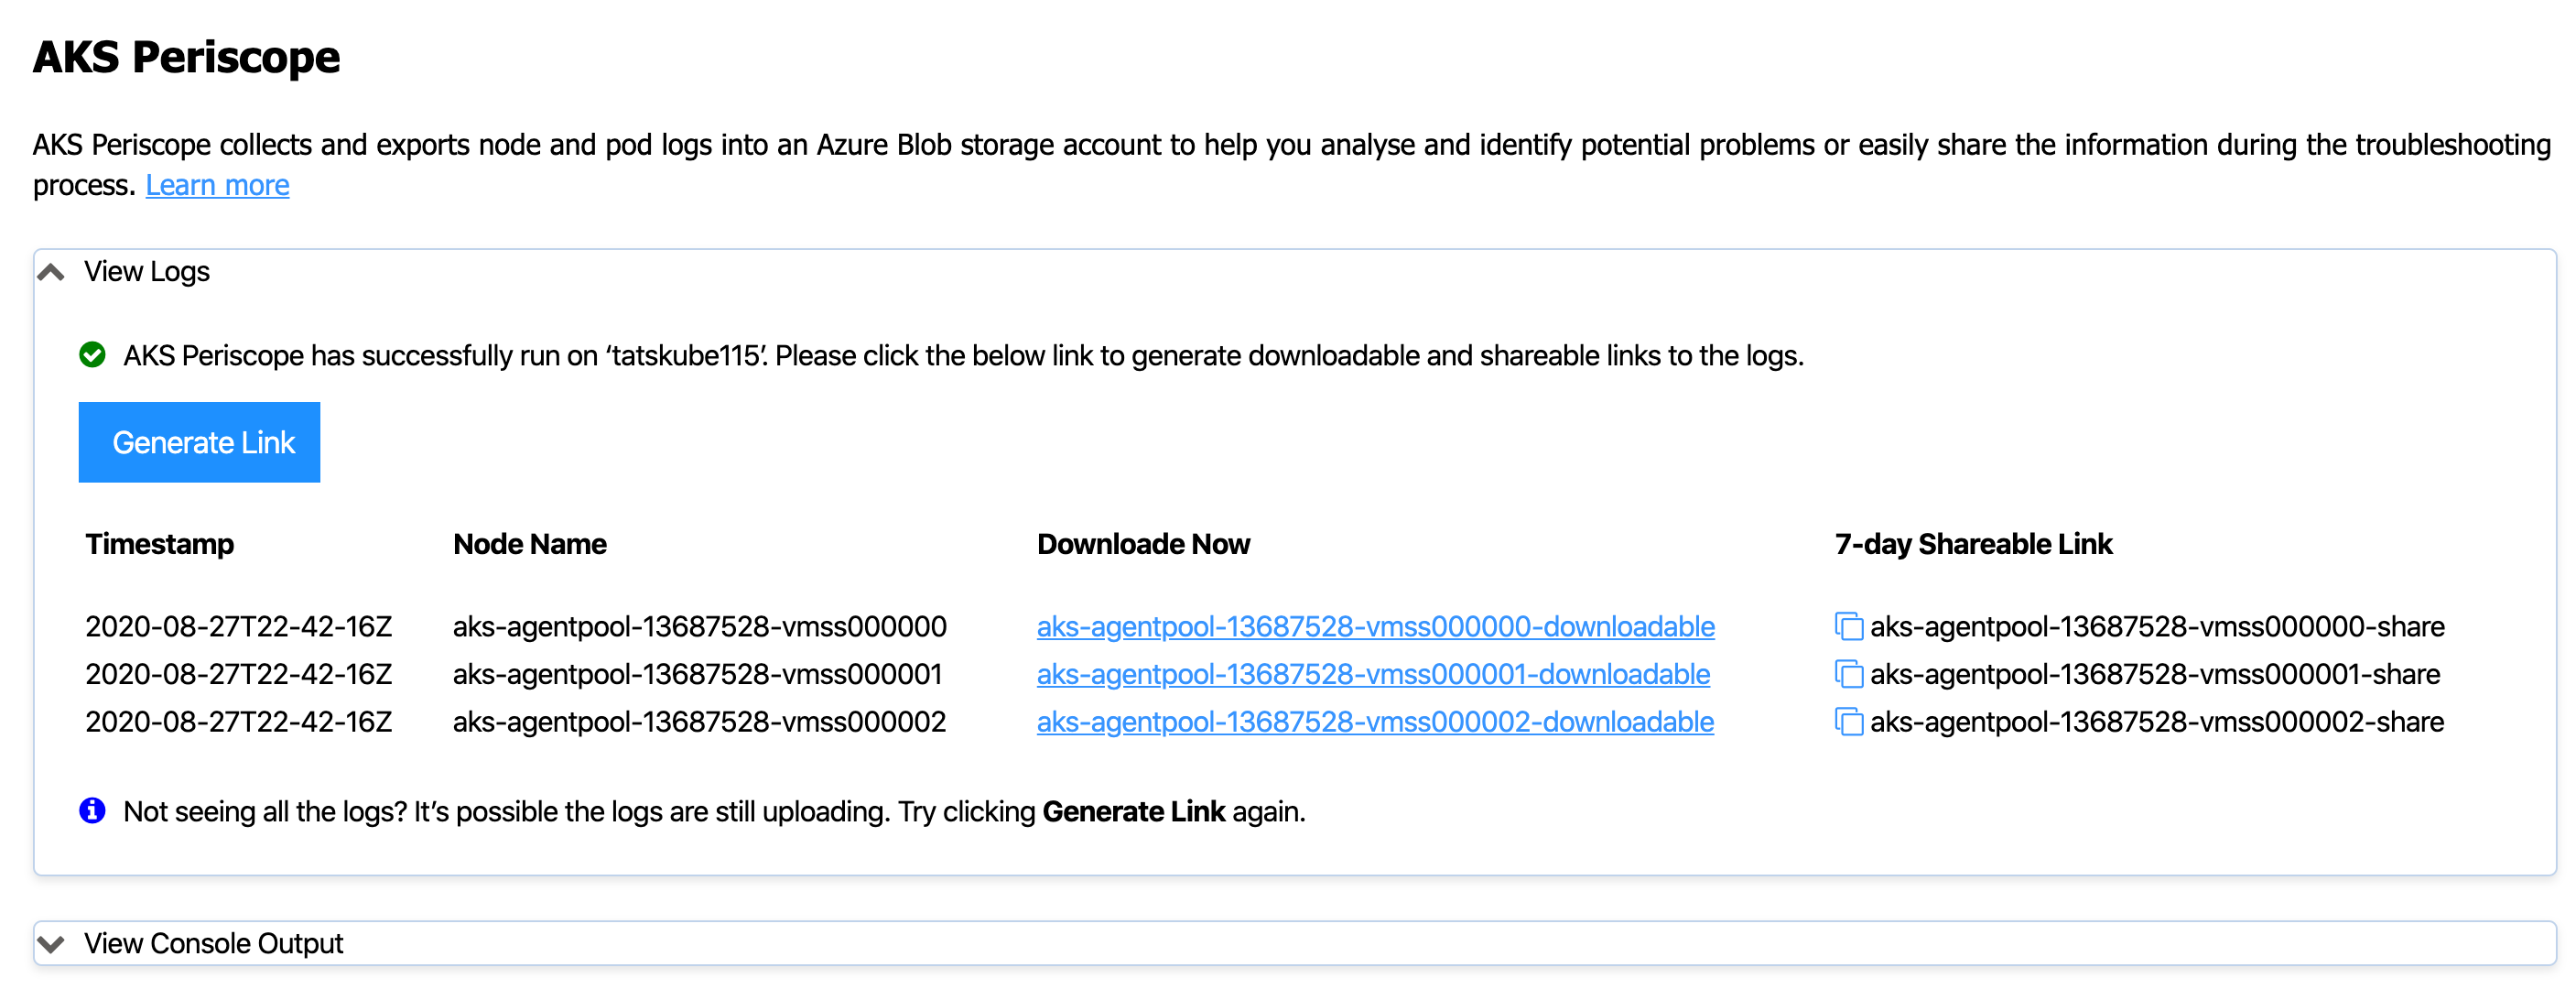
Right click on your AKS cluster and click on Run AKS Periscope to collect node and pod logs for your AKS cluster and to export them to an Azure storage account. Upon selecting the option, a web view will load providing you the option to generate a downloadable link for the collected logs as well as a shareable link with 7-day expiry.
If you are not seeing the logs for all the nodes, it is possible the logs were still uploading. Try clicking the Generate Link button again to load more logs.
For more information, visit AKS Periscope.
Running the AKS Periscope requires you to have a storage account associated with the Diagnostic settings of your AKS cluster. If you have only one storage account associated with the Diagnostic settings of your AKS cluster, the collected logs will be stored in the associated storage account by default. If you have more than one storage account associated with the Diagnostics settings of your AKS cluster, then the extension will prompt you to choose the storage account for saving collected logs. If you don't have a storage account configured in the Diagnostic settings, please follow these instructions to enable it.
-
Navigate to your AKS cluster in the Azure Portal.
-
Click on Diagnostic Settings under Monitoring in the left navigation.
-
Click on Add diagnostic setting.
-
Enter a name, such as myAKSClusterLogs, then select the option to Archive to a storage account.
-
Select a storage account of your choice.
-
In the list of available logs, select the logs you wish to enable.
Note: The incurred cost is subject to your storage account usage and Azure Storage Policy.
-
When ready, select Save to enable collection of the selected logs.
For more information on Diagnostics settings, visit Create diagnostic settings to send platform logs and metics to different destinations.
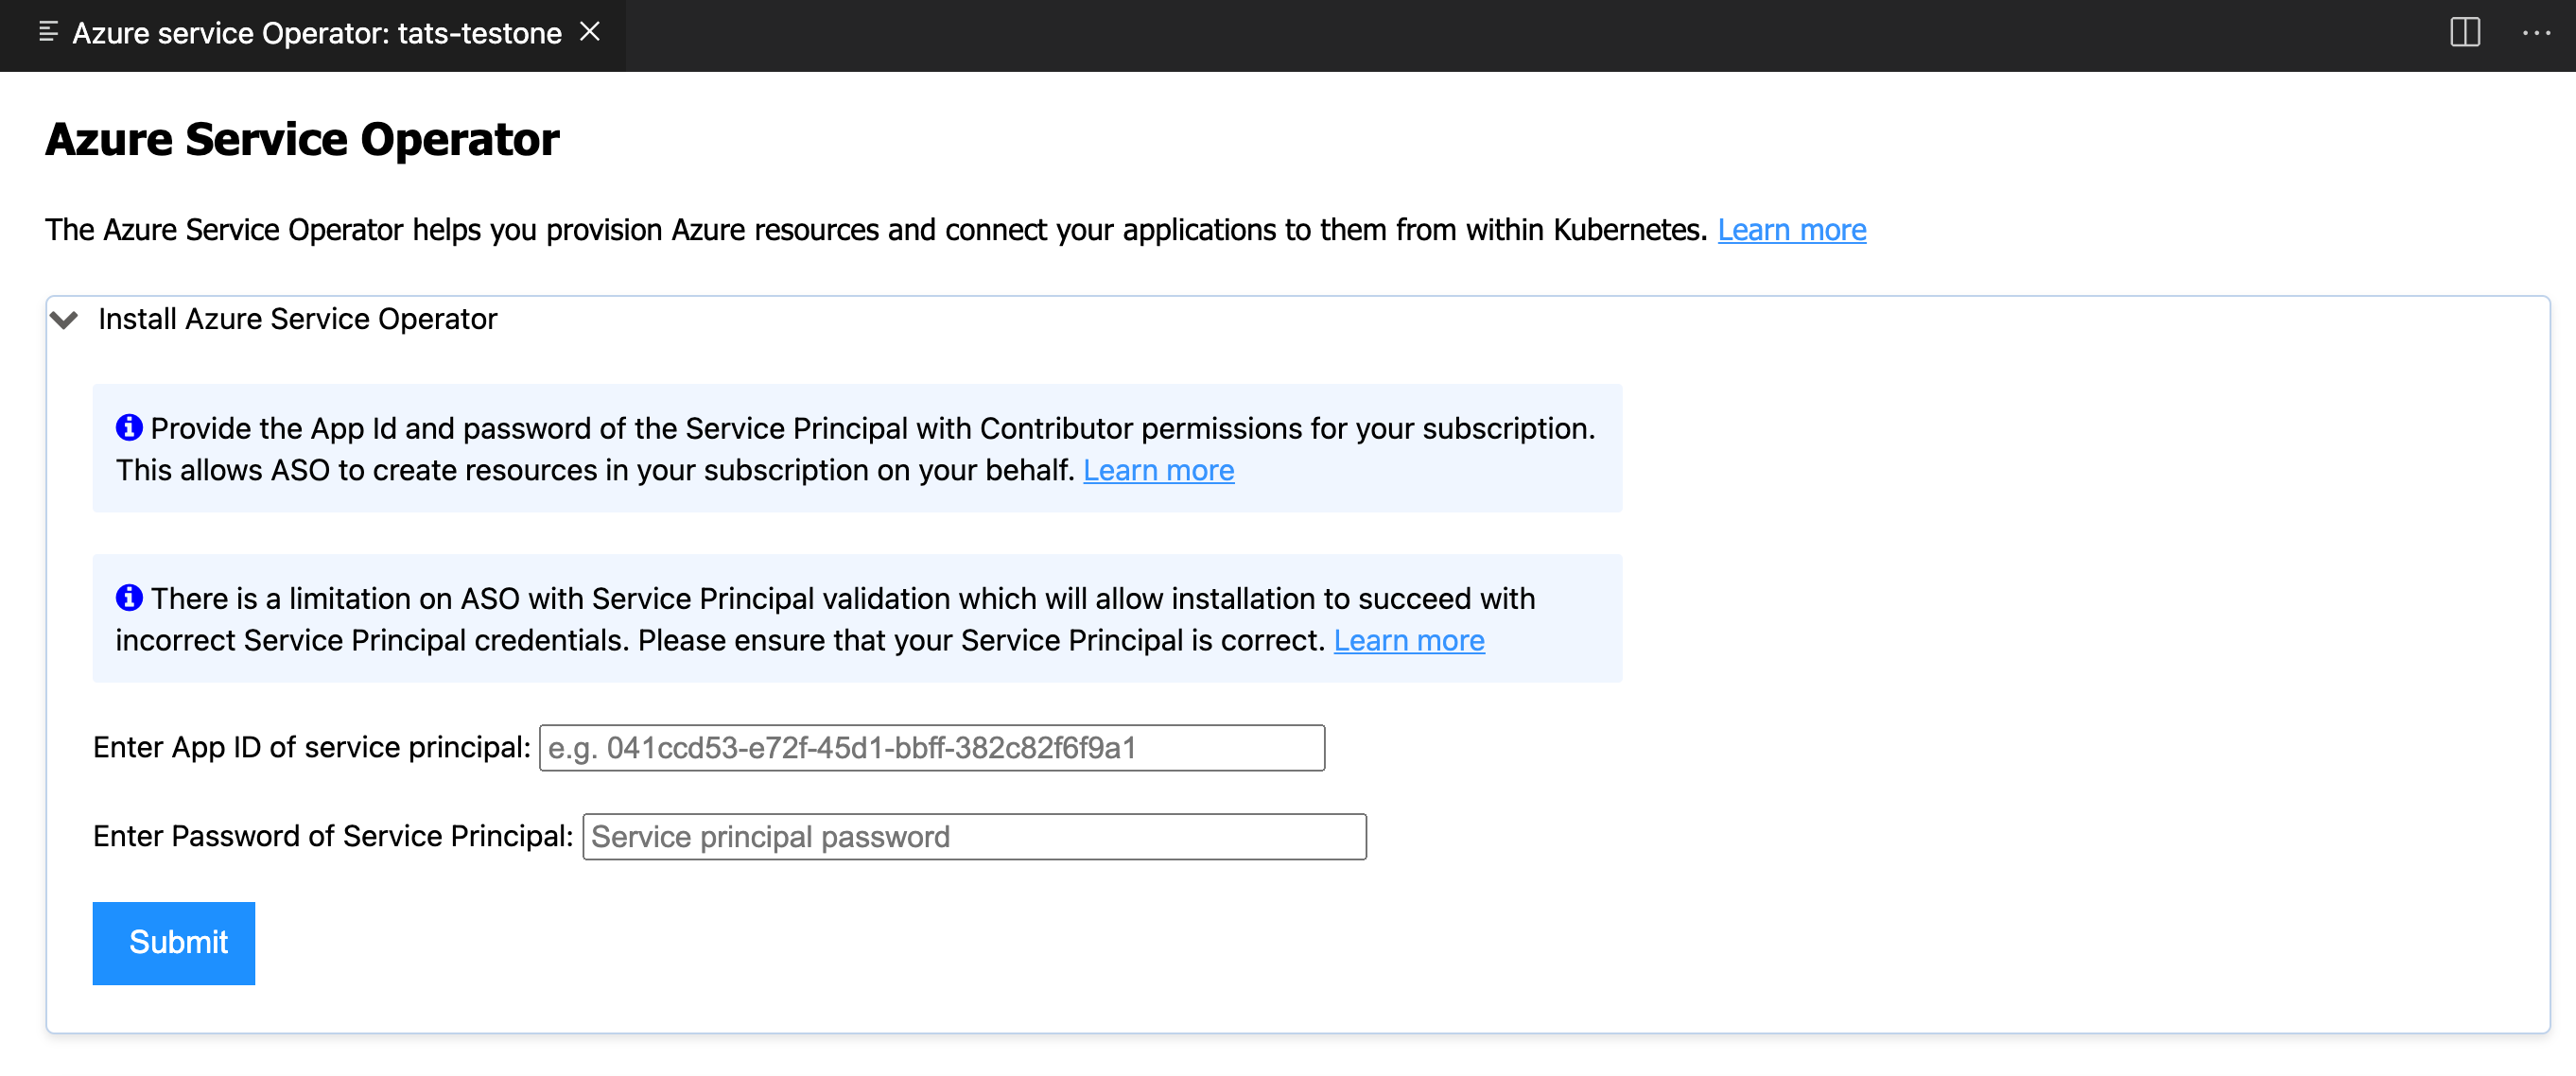
Right click on your AKS cluster and click on Install Azure Service Operator to easily deploy the latest version of Azure Service Operator (ASO) on your AKS cluster and provision and connect applications to Azure resources within Kubernetes. When you select this option, you'll be prompted for a service principal for ASO to use when performing Azure resource operations. This service principal must have appropriate permissions (typically Contributor at suitable scope). Fill out the service principal details and click Submit to kick off the installation of Azure Service Operator.
Install Azure Service Operator can only be performed on an AKS cluster that has never had ASO installed before. If you have already initiated the installation manually, follow the instructions on Azure Service Operator to complete.
For more information on Azure Service Operator, visit Azure Service Operator (for Kubernetes). If you are experiencing issues with Azure Service Operator, visit Azure Service Operator (ASO) troubleshooting.
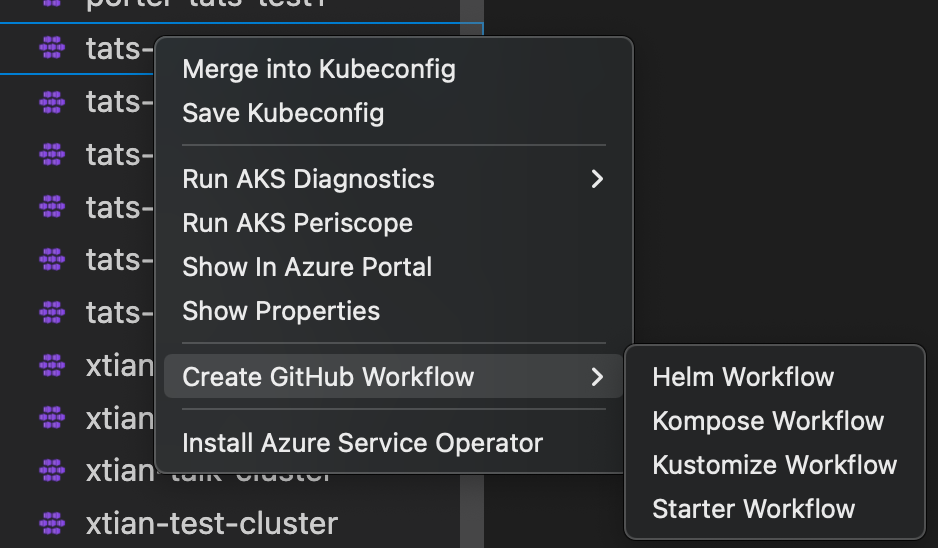
Right click on your AKS cluster and click on Create GitHub Workflow to easily open and create a workflow starter template. This helps in quick generation of the workflow templates with pre populates resource and clustername for:
Right click on your AKS cluster and click on Show in Azure Portal to easily navigate to AKS cluster overview page in Azure Portal.
Right click on your AKS cluster and click on Show Properties to display the AKS cluster and agent pool properties like provisioning state, fqdn, k8s version, along with node properties like node version, vm type, vm size, o/s type, o/s disk size and nodes provisioning state.
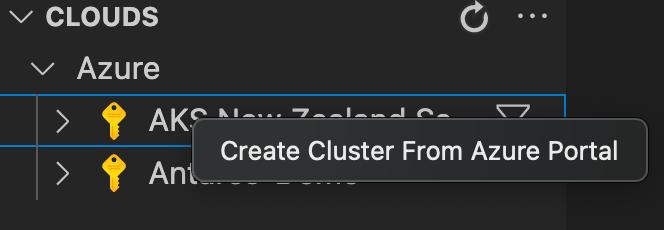
Right click on your AKS sunscription and click on Create cluster from Azure Portal to easily navigate to AKS create cluster page in Azure Portal.
This extension collects telemetry data to help us build a better experience for building applications with Azure Kubernetes Service and VS Code. We only collect the following data:
- Which commands are executed.
We do not collect any information about image names, paths, etc. Read our privacy statement to learn more. If you don’t wish to send usage data to Microsoft, you can set the telemetry.enableTelemetry setting to false. Learn more in our FAQ.
This project welcomes contributions and suggestions. Most contributions require you to agree to a Contributor License Agreement (CLA) declaring that you have the right to, and actually do, grant us the rights to use your contribution. For details, visit https://cla.microsoft.com.
When you submit a pull request, a CLA-bot will automatically determine whether you need to provide a CLA and decorate the PR appropriately (e.g., label, comment). Simply follow the instructions provided by the bot. You will only need to do this once across all repos using our CLA.
This project has adopted the Microsoft Open Source Code of Conduct. For more information see the Code of Conduct FAQ or contact opencode@microsoft.com with any additional questions or comments.

