Instructions on how to build PYNQ on zedboard with ADI linux kernel.
- Building environment
- Ubuntu 16.04
- PetaLinux 2018.3
- Vivado 2018.3
- Testing boards
- V3 FMC9361_V1.0
Refer to ADI's hdl repository to build a hardware project. You may switch to proper branches to match the petalinux and vivado version. Refer to meta-adi for more information on different versions.
-
Create a petalinux project
petalinux-create -t project --template zynq --name zedboard-adi
-
Clone meta-adi and checkout at branch
2019_R1git clone https://github.com/analogdevicesinc/meta-adi.git cd meta-adi && git checkout 2019_R1 && cd ..
-
Config project using the hardware descriptions (.hdf or .xsa files) exported from vivado
cd zedboard-adi
petalinux-config --get-hw-description <path_to_hdf>
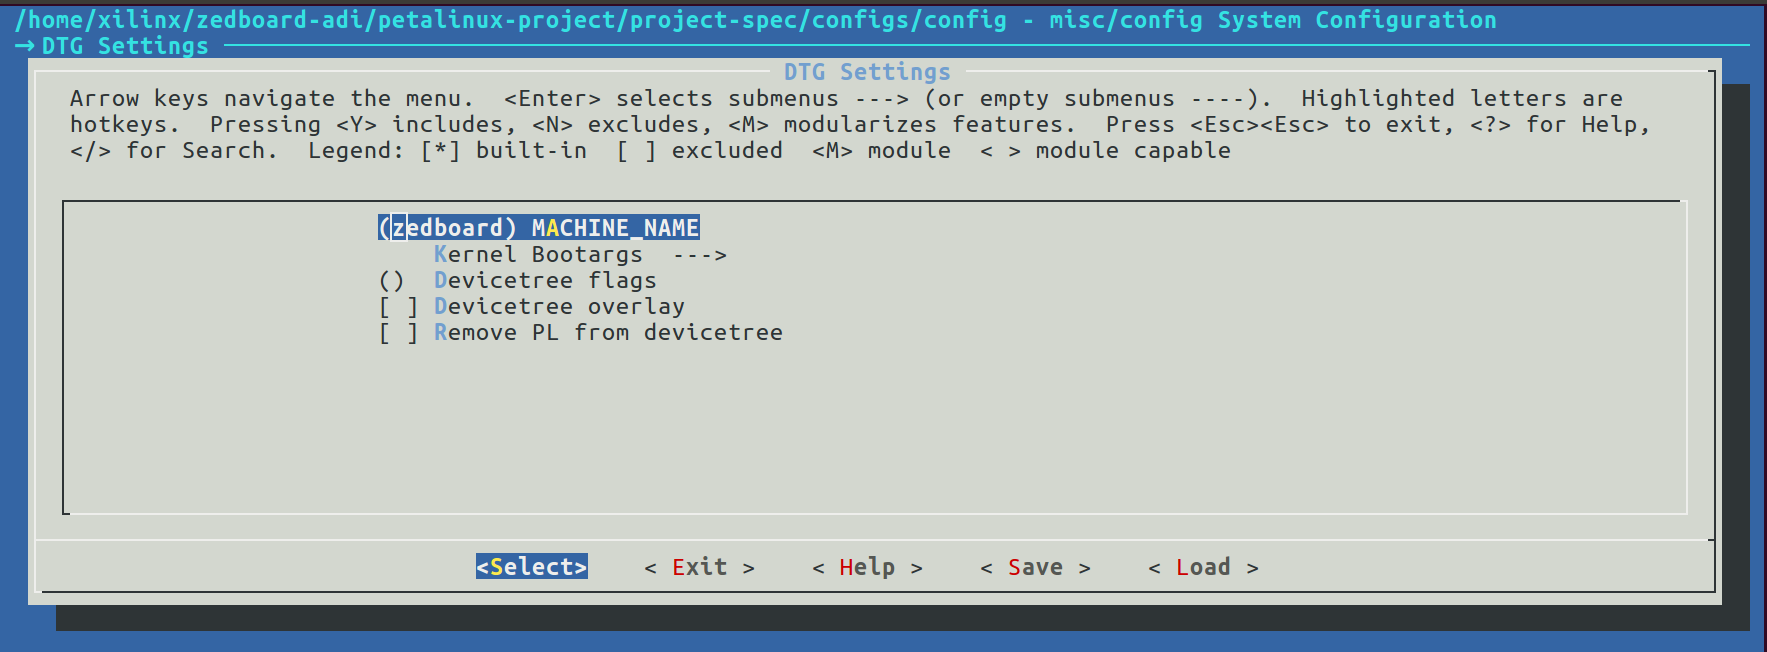
After running petalinux-config, a configuration menu will come up.
Go to DTG Settings, change MACHINE NAME to zedboard
Go to Yocto Settings -> User Layers, add meta-adi-core and meta-adi-xilinx layers by typing the absolute path of those two folders.
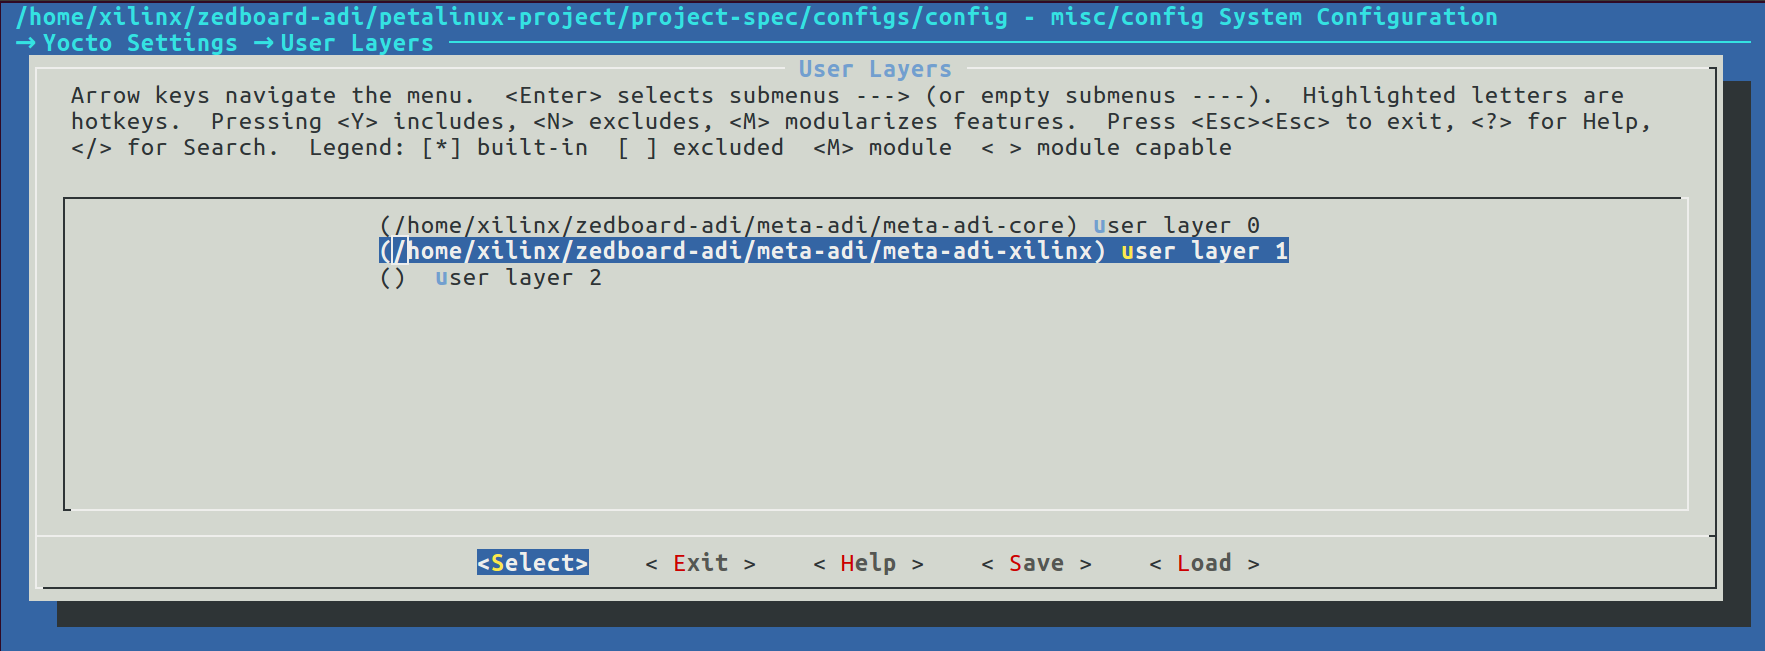
Save and exit.
-
Export petalinux bsp
petalinux-package --bsp --project ./ --output ZedBoard-ADI.bsp


-
Clone PYNQ and checkout at branch image_v2.4
git clone https://github.com/Xilinx/PYNQ.git
cd PYNQ && git checkout image_v2.4
-
Setup environment
sudo bash sdbuild/scripts/setup_host.sh
-
Edit
sdbuild/Makefile.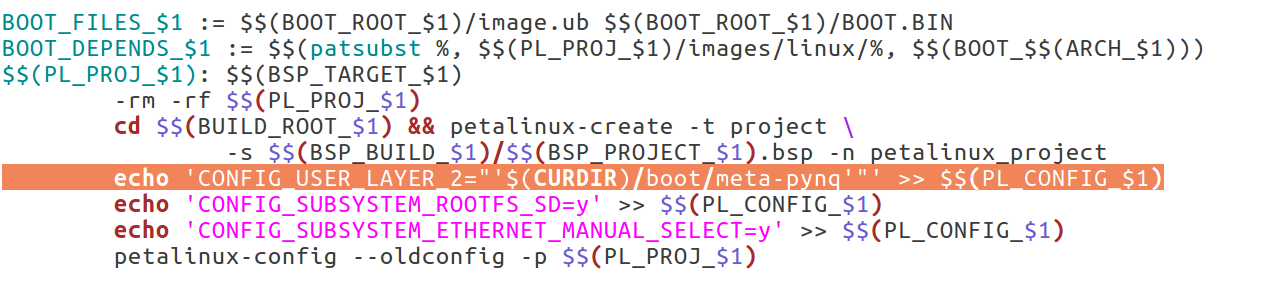
In line 127, change
CONFIG_USER_LAYER_0toCONFIG_USER_LAYER_2. (We edit this because by default it will add the meta-pynq layer to user layer 0, which will overwrite the meta-adi-core layer we added before.) -
Prepare board folder
Create a new folder under
boardswith name ZedBoard-ADI. Copy bitstream and bsp file (exported from petalinux) into the new-created folder. Create a new file with name ZedBoard-ADI.spec, and add the following contentARCH_ZedBoard-ADI := arm BSP_ZedBoard-ADI := ZedBoard-ADI.bsp BITSTREAM_ZedBoard-ADI := system_top.bit STAGE4_PACKAGES_ZedBoard-ADI := ethernetmake sure the name of bsp and bitstream is correct.
-
Prepare prebuilt image
Download pynq v2.4 prebuilt image from Xilinx official website
-
Run make
cd sdbuild
make BOARDS=ZedBoard-ADI PREBUILT=<path_to_prebuilt_image>
After the compilation is finished, The SD card image is located in
sdbuild/output/

Mount the AD9361 and power on the board, you should see four iio devices under /dev (one for xadc, three for ad3961)

Now we can install some libraries to drive the AD9361
-
Install dependencies
sudo apt update sudo apt install build-essential \ libxml2-dev bison flex libcdk5-dev cmake \ libaio-dev libusb-1.0-0-dev \ libserialport-dev libavahi-client-dev \ doxygen graphviz \ -
Install libiio and pylibiio
git clone https://github.com/analogdevicesinc/libiio.git
cd libiio
cmake ./
make all
sudo make install
sudo ldconfig
cd bindings/python/
sudo python3 setup.py.cmakein install
cd ~
Now you can use
iio_infoto get the information of iio devices.
Refer to pyadi-iio to interact with AD9361 through python
