Repository that contains the starter codes for assignments and general instructions, links and resources.
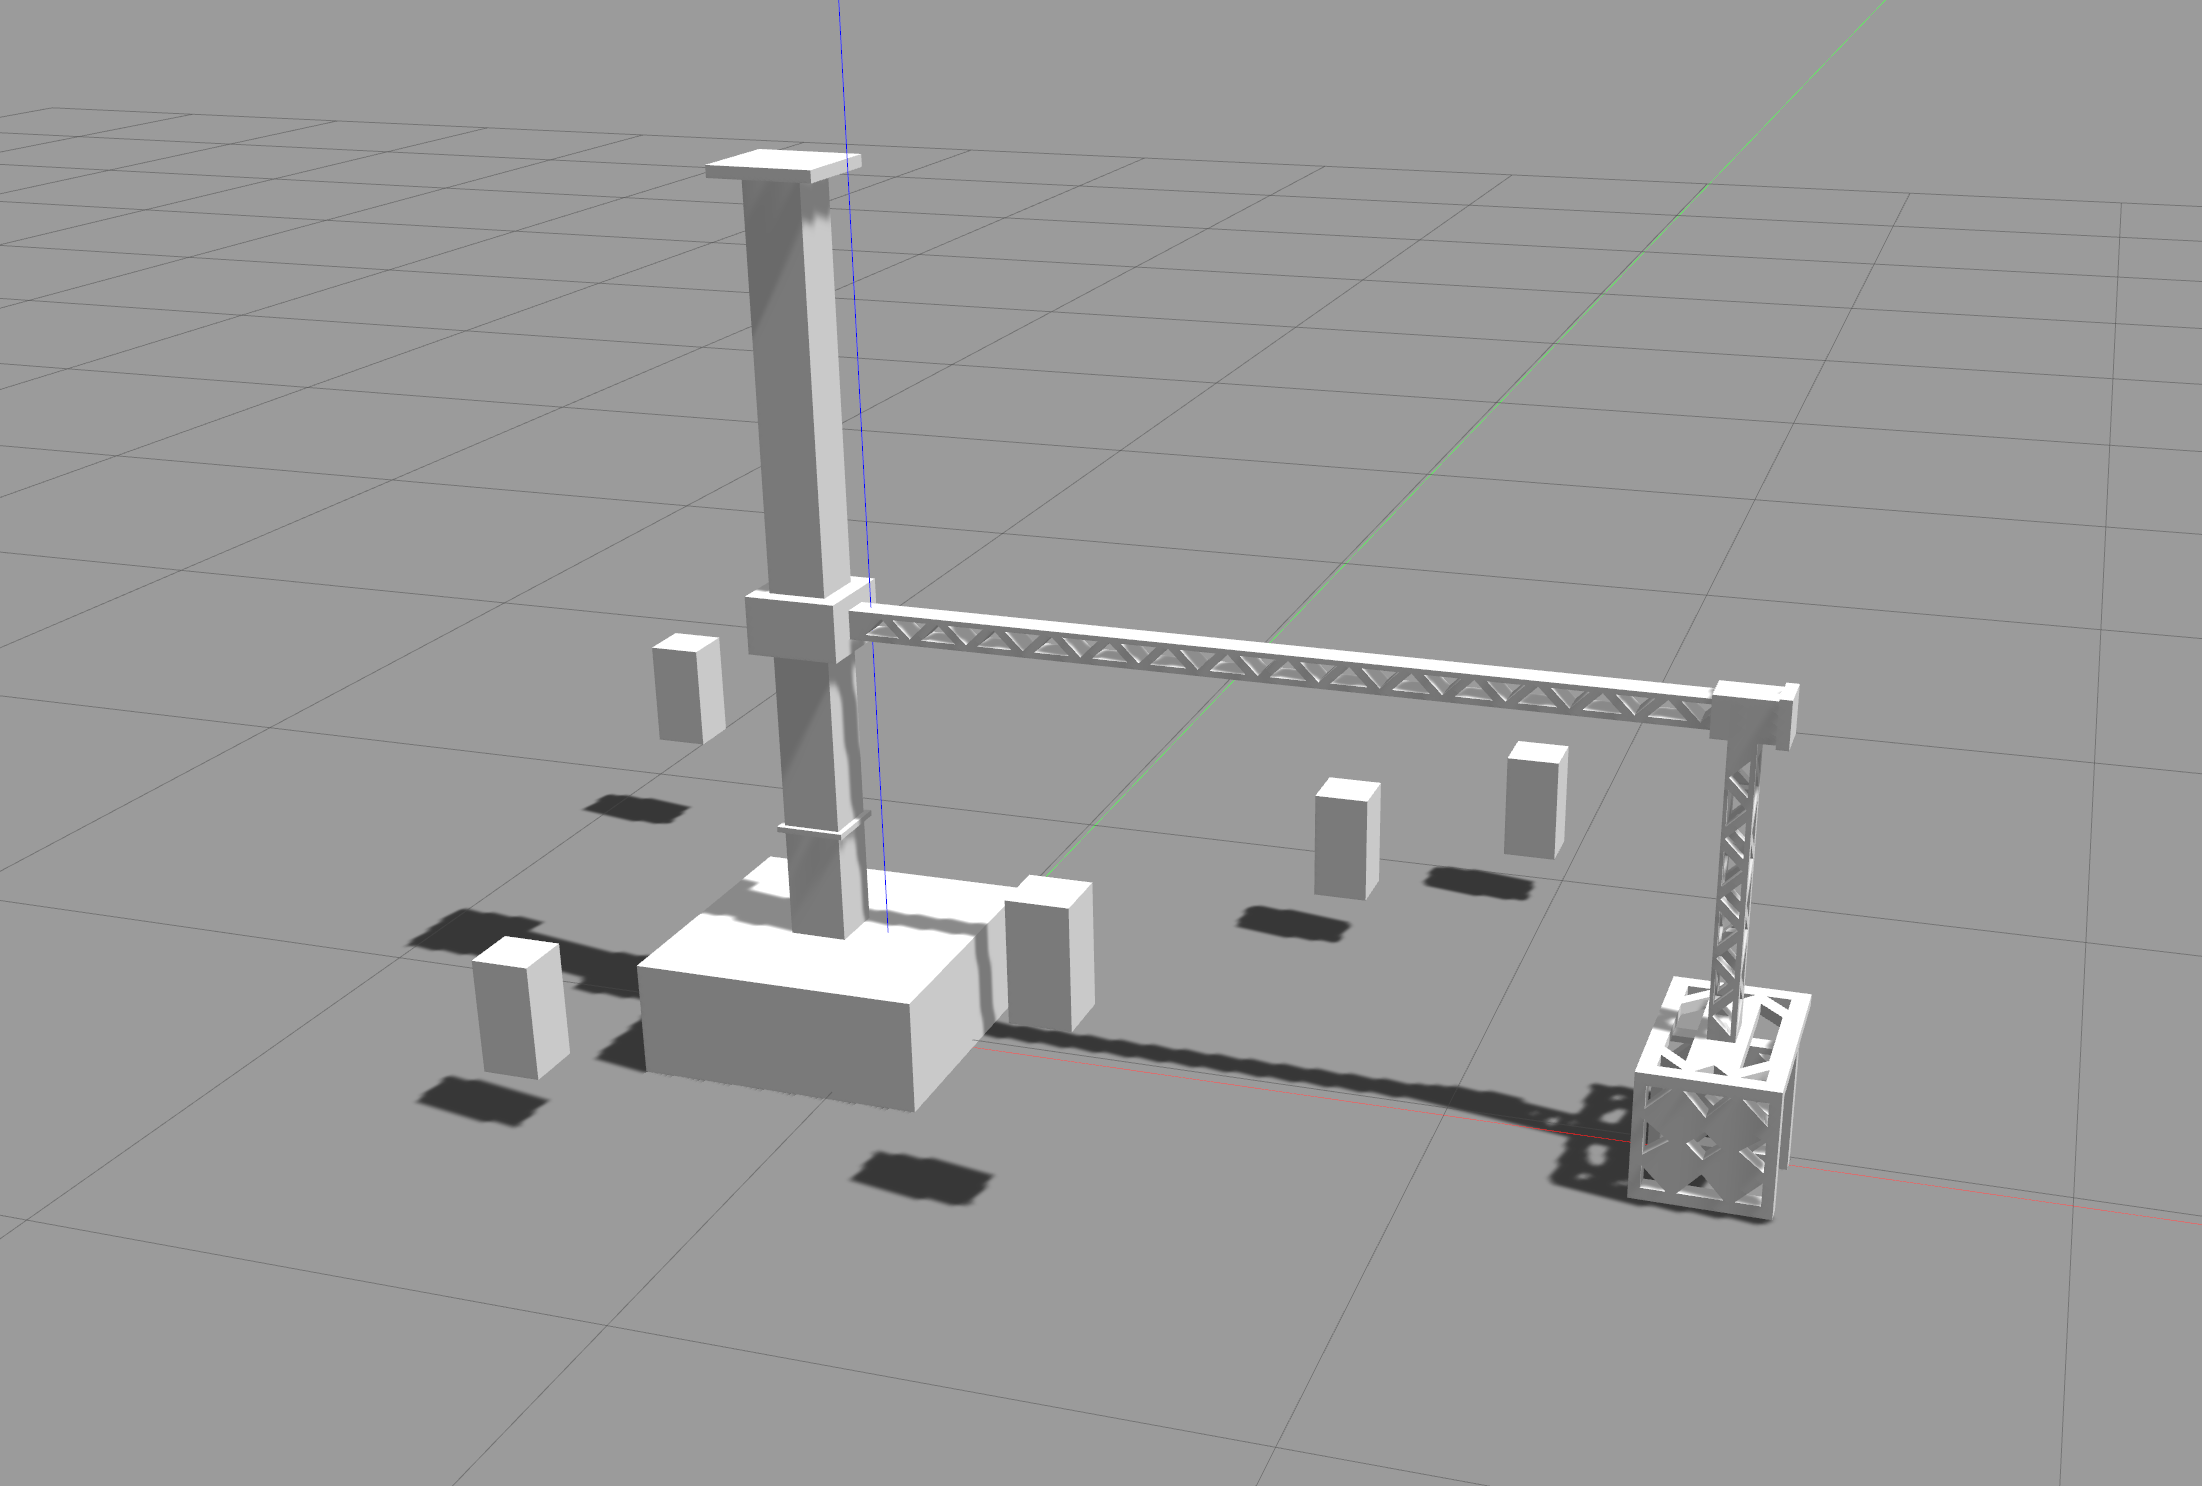
The grip_and_sense metapackage consists of two packages janitor_description and robotic_arm_control which provide
the arm itself and its functionality respectively. These packages also contain the necessary starter code and utility classes
that provide controllers for each joint of the arm and a spawner for the boxes to be gripped.
The objective of this project is to understand and solve for the kinematics of a simple RPP (Revolute-Prismatic-Prismatic) gripper in order to grip the spawned boxes and make contact with them. The function of the arm is just a gripper which is used in pick and place tasks. The ends of the gripper are attached with contact sensors that senses when another object touches either end. The task is to solve for its inverse kinematics, move the gripper to the obtained pose and make contact with each of the spawned boxes.
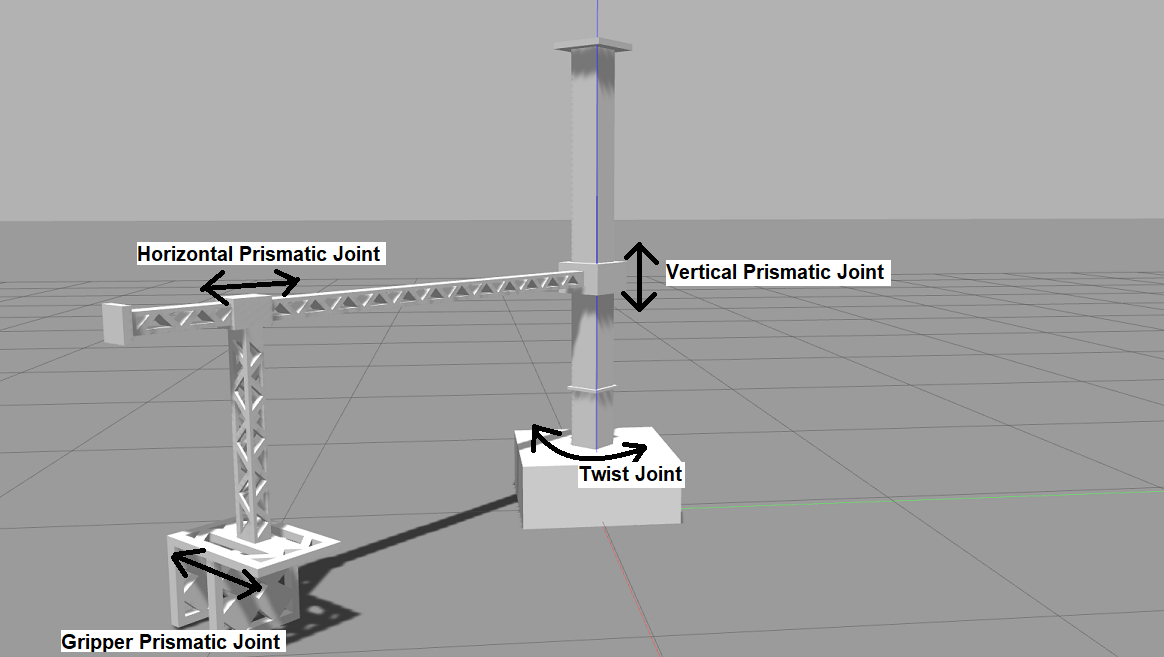
The robotic arm consists of four joints as seen in this figure. All joints except the gripper prismatic joint can be influenced
by your solution to the inverse kinematics and implementation of iKine.
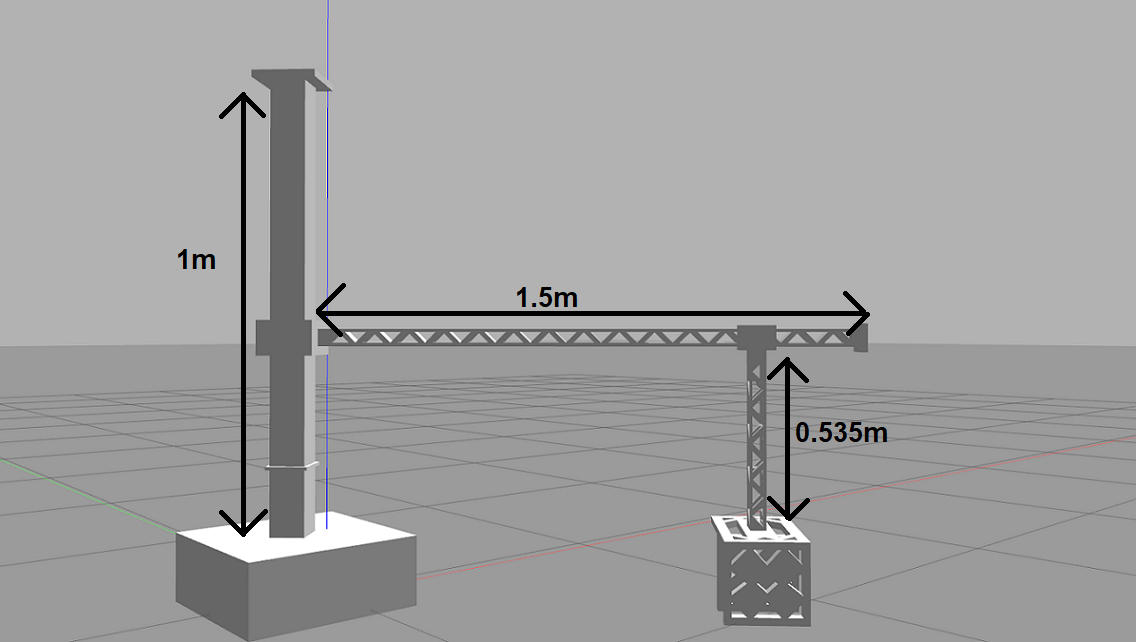
The lengths of each link are as shown below. This information is needed to solve for the inverse kinematics of the arm.
The class arm_control is responsible for controlling the joints of the RPP arm. It subscribes to the state and
publishes the desired theta(the angle swept by the revolute/twist joint), vert_pos(the vertical displacement of the first prismatic joint measured from the base) and hor_pos(the horizontal displacement of the second prismatic joint measured from
the first prismatic joint).
model_spawner spawns rectangular boxes which float at fixed positions around the robotic arm.
- Clone this repo, copy
grip_and_senseto thesrcof your workspace andcdinto it. - Run
cp ./libcontact.so ../../devel/lib/. - Change the permissions on the python scripts by running
chmod +x *.pyinsiderobotic_arm_control/scripts. - Install the dependencies mentioned here using
sudo apt install. - Build your workspace by running
catkin_makeas usual. Don't forget tosource devel/setup.bash! Please let the TAs know if the build fails due to a missing package! - Spawn the RPP arm using
roslaunch janitor_description janitor.launch. - In a new terminal, run the main task script using
rosrun robotic_arm_control main.py. You should see the rectangular boxes spawn and the arm moving to a fixed position.
- Please use our implementation of the inverse tangent function,
myAtan2. This is for compatibility with the model of the robotic arm. pointis a 3x1 vector consisting of the desired x, y and z coordinates at which the gripper must make contact with the box.- Solve for the inverse kinematics of the RPP arm. Use those equations to find the values of the joint variables
theta,vert_posandhor_pos. - Return the computed values of the joint variables in a list.
- Solve for the inverse kinematics on paper and attach a picture of the same inside
grip_and_sense. - Complete the function
iKineininverse_kinematics.py. - Perform a run as indicated in 4, 5 and 6 here.
- Run the following to copy the submission binary to
grip_and_sense->cp ~/.ros/submit.bin <path_to_your_ws>/src/grip_and_sense. - An automated script will grade based on the binary generated. This will be compared to the reference binary generated using our solution.
- Submit a zip containing only the modified metapackage
grip_and_sense. The zip should bear your name, team ID and SRN (FullName_TeamID_PES1UG19XXXXX). It should containsubmit.binand an attached picture of your solution to the inverse kinematics problem. Each group must make only one submission, preferably by a team leader.
ros-noetic-ros-controlros-noetic-ros-controllersros-noetic-joint-state-controllerros-noetic-effort-controllersros-noetic-position-controllersros-noetic-velocity-controllersros-noetic-gazebo-rosros-noetic-gazebo-ros-control
The cube_sim package contains the necessary starter code and a utility class that implements a discrete integrator.
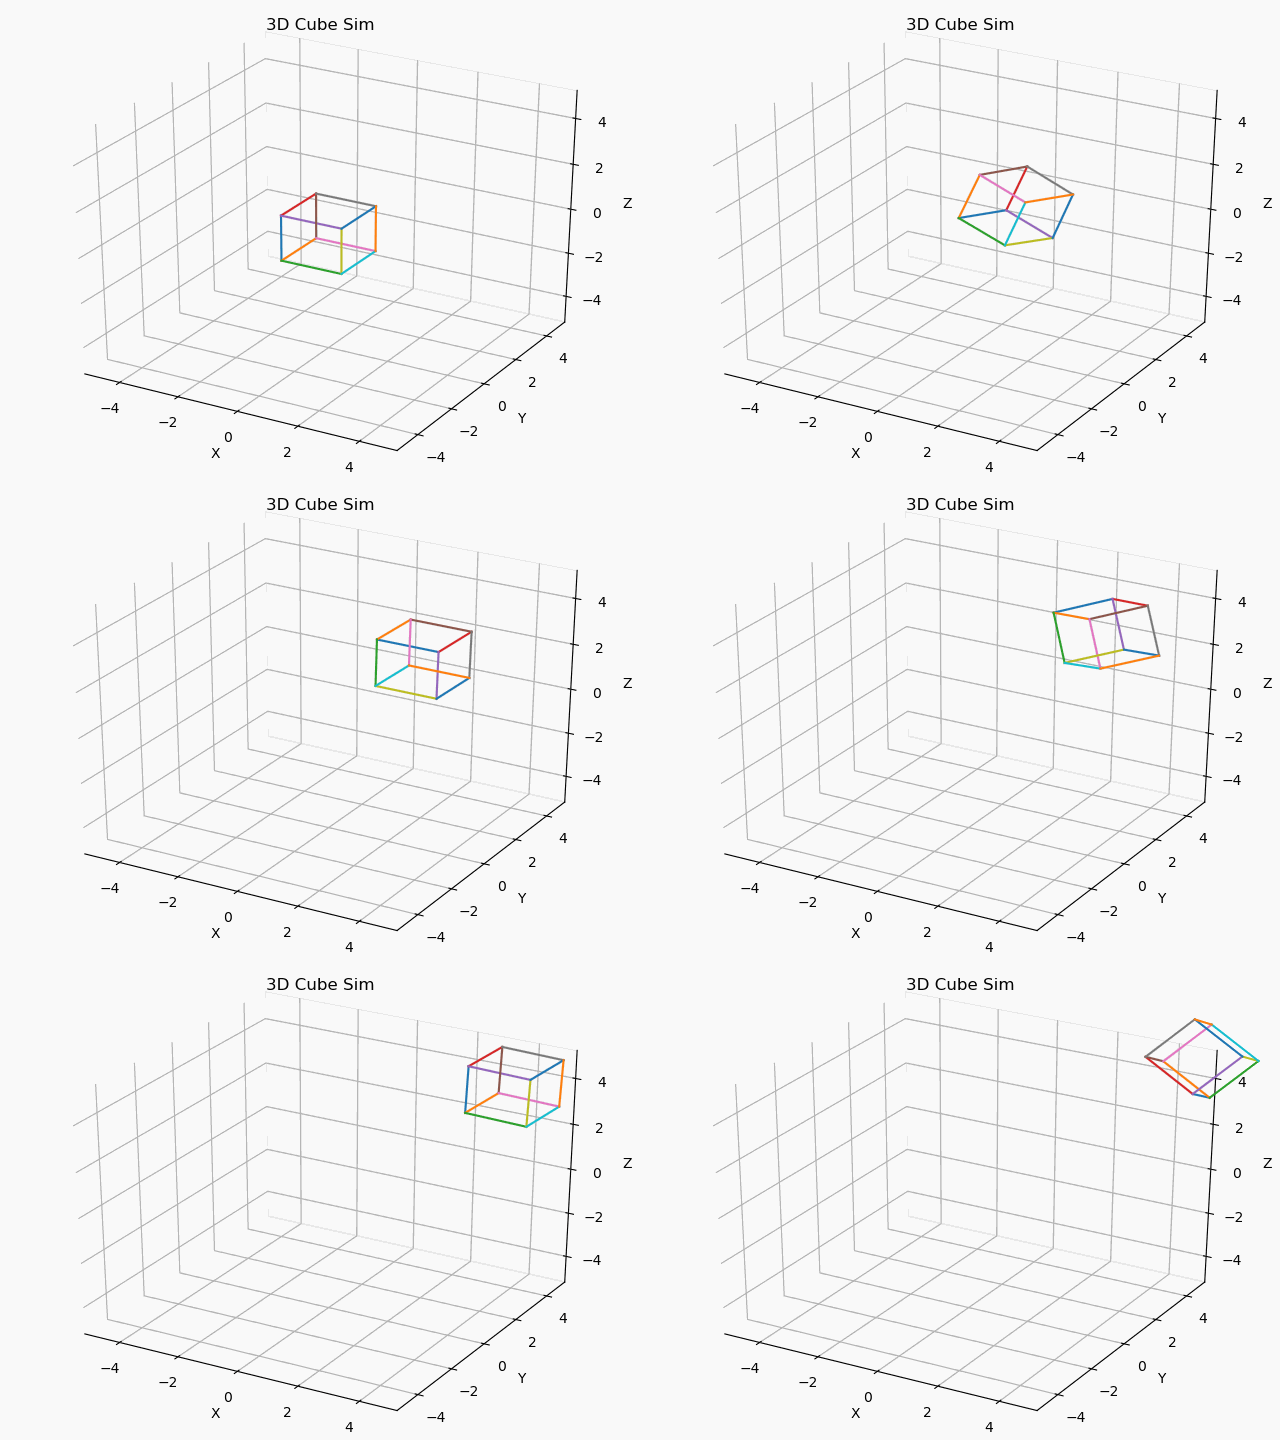
The objective of this project is to understand and develop a framework for simulating an object, in our case, a simple cube in 3 dimensions. Whenever a force or a torque is applied to an object, its motion and pose is described by Newton's laws and the extended Euler's Laws of motion.
You may assume the cube to have a uniform mass distribution and that each force vector originates at its center of mass. Modelling the state for an object such as a cube is straightforward and involves only the most basic form of motion laws.
- Clone this repo and
cdintocube_sim. This is the Python package with all the necessary scripts. - To view the demo, run
3d_cube_anim.pywith Python3. - Once you have completed implementing
simulator.pyand uncommented the neccessary lines in3d_cube_anim.py, run3d_cube_anim.pyagain.
- If you're going to use an integrator, initialize it accordingly in the constructor for
MySolver. - The solver's state maintained at each iteration consists of the state vector and its first derivative,
the array of force vectors and an iteration number. The state vector is modelled as a 6x1 vector
and
. Each force vector is modelled as
.
- Each successive call to
next_itershould update the state. Don't return the state in this method, useget_xfor that. Here you should consider the force vectorself.forces[i]as input to the system and obtain a response for it in terms of the state defined above. - The getters should return the state and its derivative.
- The static method
get_rot_mat(x, y)is used to obtain the rotation matrix which maps X's pose to that of Y. Complete this method in order to map the cube's final pose in the last iteration to that of a randomly generated observing camera. - [BONUS] See if you can vectorize your solution. Vectorization refers to performing mathematical operations on entire vector arrays without the explicit use of iteration. Not only will this result in faster execution times but will also make your solution concise with higher code density.
- Complete the interfaces in
simulator.pyand modifyrunin3d_cube_anim.py. - There are 5 test cases, each being random and reproducible based on the seed value. The entire state vector over
all iterations will be stored in
data. This as well as the obtained rotation matrixcamRotMatwill be exported to a csv file as a single flattened array. - An automated script will run your code and grade based on the values in each csv thus generated. This will be compared to the solution values for that seed (within a threshold of course).
- Submit a zip containing only the modified package
cube_sim. The zip should bear your name and SRN (FullName_PES1UG19XXXXX).
The package is contained in action_tutorial.
The objective of this assignment is to understand how actions work in ROS.
As seen from the above illustration, the package serves to replicate the behavior of actions in ROS using the example of a simple
counter. There are 2 main services GoalService and ResultService alongside a single pub-sub on /feedback_topic. The client sends a
goal request to the server containing the value to be counted to, assuming that the count starts from 0. To
this, the server responds back with an acknowledgement and begins the process of counting. A timer based callback is then setup on the server to increment the counter at intervals of 1 second.
To initiate feedback from the server, the client sends another result request to the server and waits for a response to the same (this is sent when the counter's final value is reached).
Once this service call is handled on the server, it begins to publish "feedback" on /feedback_topic, which is the current value of the
counter at that instant of time. The client having subscribed to this feedback topic, listens to it and logs the data on it.
Once the counter's end value is reached, the server responses to the result request sent earlier. Both client and server log the final
values of the counter and continue to spin.
- Clone this repo, copy the
action_tutorialfolder into your workspace/src and build usingcatkin_make. - Add
source ~/<path_to_your_ws>/devel/setup.bashto the end of your~/.bashrc. - Start
roscorein a new terminal. - In a new terminal, run
rosrun action_tutorial counter_action_server.py. - In another terminal, run
rosrun action_tutorial counter_action_client.py <counter_end_value>.
- A starting value to the counter instead of 0 (default).
- A rate (in Hz) to the timer based callback for incrementing.
- [BONUS] The server should decline
GoalServicein cases where the start value exceeds the end of the counter at the time of making the request from the client's side.
- Follow the TODOs mentioned inside
counter_action_client.py,counter_action_server.pyandCounterGoal.srv. - Upon completing each task mentioned under a TODO, please delete the corresponding TODO comment.
- An automated script will grade your code depending on the functionality achieved so please test your code before submitting.
- Submit a zip of the modified package folder
action_tutorial. The zip should bear your name and SRN (Firstname_PES1UG19ECXXX).
- Ubuntu 18 or Ubuntu 20 (VM of the same alternatively if not possible to install)
- 8GB (or above) pendrive for Ubuntu Live USB (for installing Ubuntu itself)
- 16GB (or above) pendrive for Ubuntu
- ROS Melodic (Ubuntu 18) or ROS Noetic (Ubuntu 20)
- Gazebo 11
- Tutorial for installing Ubuntu 20 on pendrive
- Tutorial for dual booting Ubuntu with Windows (TAs are not responsible in case of any data loss or OS wipe). Please follow instructions carefully if you are going this route.
- Installation of ROS Melodic for Ubuntu 18
- Installation of ROS Noetic for Ubuntu 20
- Installation of Gazebo for Ubuntu 18/20
- Official ROS wiki. Contains a conceptual overview as well as step by step tutorials to help you get a feel for ROS and its capabilities.


