This is the firmware for a device that can communicate (bi-directional) to an RS232 device over Wi-Fi using a ESP8266 Node MCU 12E device and a NulSom Inc. Ultra Compact RS232 to TTL Converter with Male DB9 (3.3V to 5V).
I built this to communicate to an LED sign I bought over ten years ago that still works great but has a traditional DB9 serial port using RS232 communications. This port requires a strict protocol to work. I did not want to have to get the serial cable out as well as a USB adapter every time I wanted to change the sign so I built this device which allows me to program it remotely over Wi-Fi.
I tried wiring the ESP8266 directly in several ways but could not get it to communicate. I bought a RS232 to TTL converter from NulSom and this did the trick. This device will should work with any RS232 device.
The firmware dumps messages to a software based serial device using pins D1 and D2. I connect a standard USB to TTL Serial cable (4-pin) and monitor using some basic serial ort software or the Arduino IDE. On my Mac, I can use the terminal window with the following command
screen /dev/tty.usbserial-1430 9600
where /dev/tty.usbserial-1430 is the name of my USB to TTL Serial cable. This cable can be purchased from Adafruit or possibly on Amazon.
USB to TTL Serial Cable from Adafruit
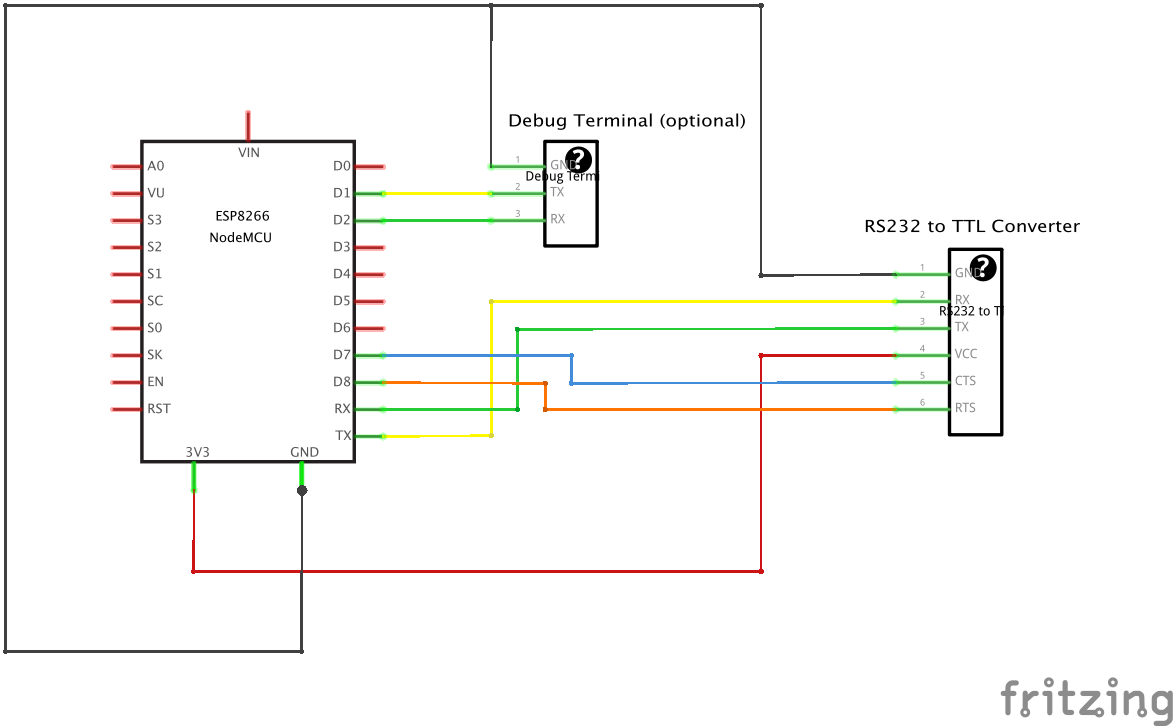
NOTE I show the RTS and CTS wires connected but they were uneccessary in my application (and not connected in my final device). If communications with your device does not work you can try connecting them, otherwise leave them disconnected if your device works without them.
- HiLetgo 1PC ESP8266 NodeMCU CP2102 ESP-12E Internet WiFi Development Board https://www.amazon.com/gp/product/B010O1G1ES
- NulSom Inc. Ultra Compact RS232 to TTL Converter with Male DB9 (3.3V to 5V) https://www.amazon.com/gp/product/B00OPU2QJ4/
- If your device software is capable of communicating directly over an Ethernet port, simply configure the IP address of the device on your network and the port number (defaults to 3001).
- If your software only knows how to communicate over a COM port then you will need to download a Virtual COM port driver. I use the NetBurner driver which is free. This can be downloaded from https://www.netburner.com/download/virtual-comm-port-driver-windows-xp-10/
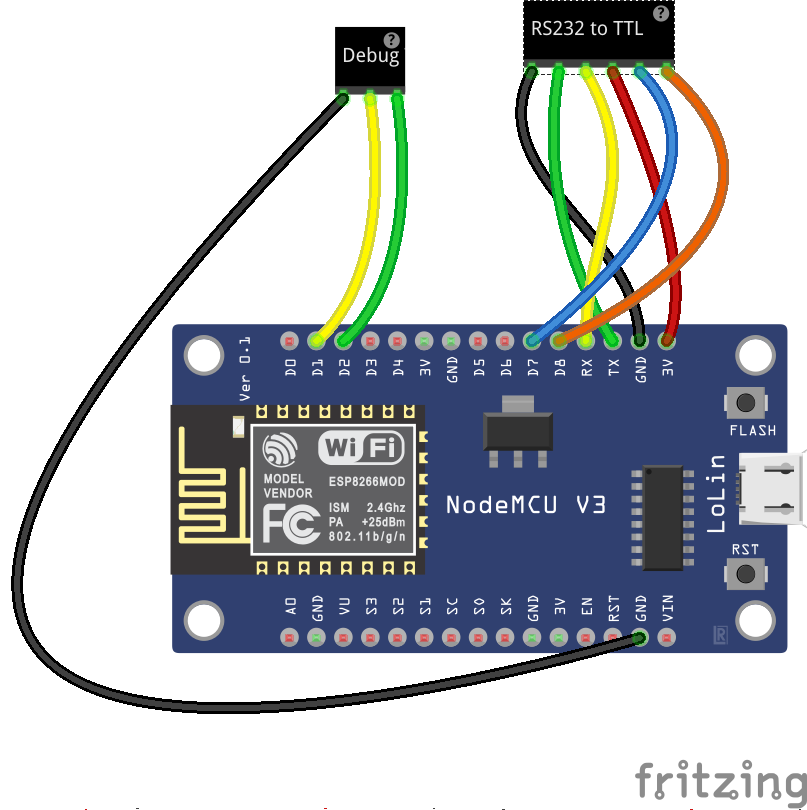
The images below show how to connect the RS232 to TTL Converter to the ESP8266.
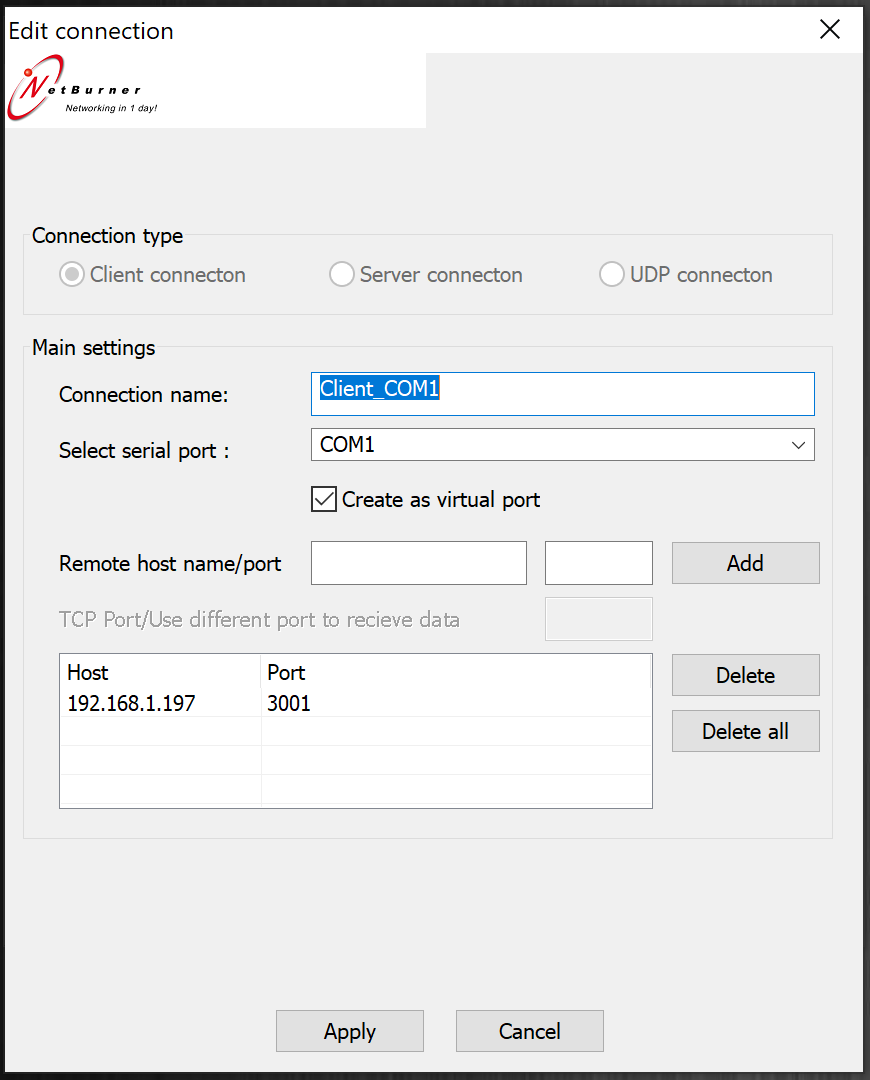
Follow the instructions for the Virtual COM port driver from NetBurner. My settings for the device I built are shown below.
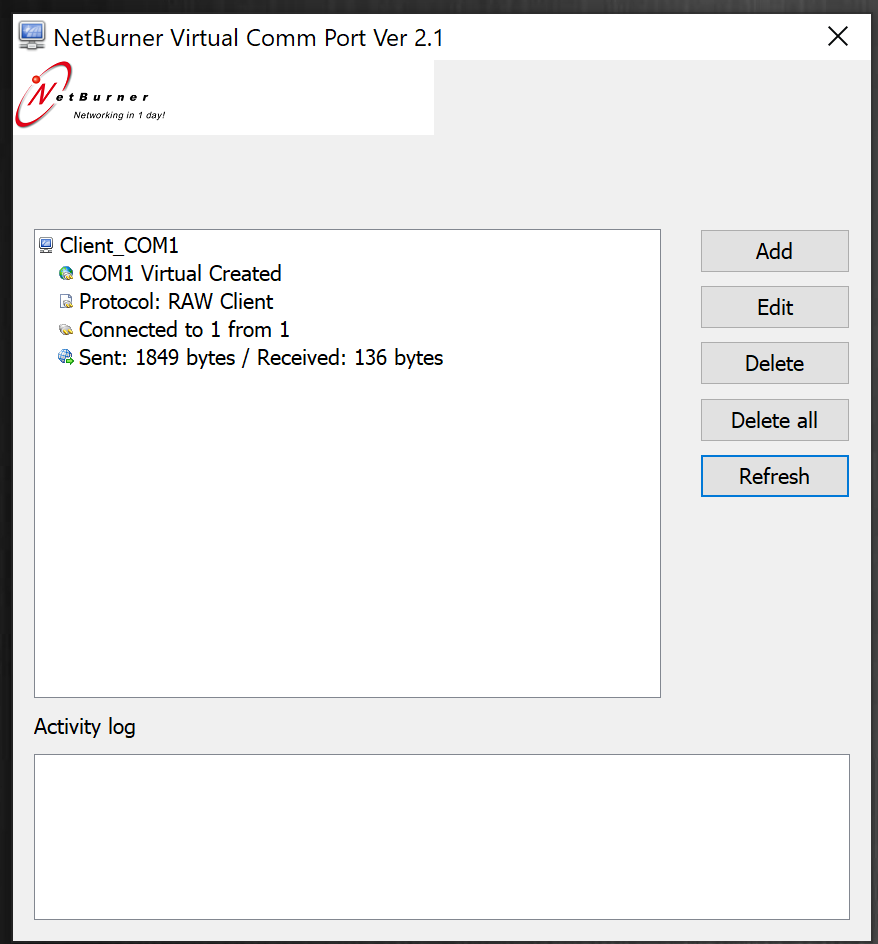
The image below shows the port after it has been created.
This image shows the properties for the defined virtual port.
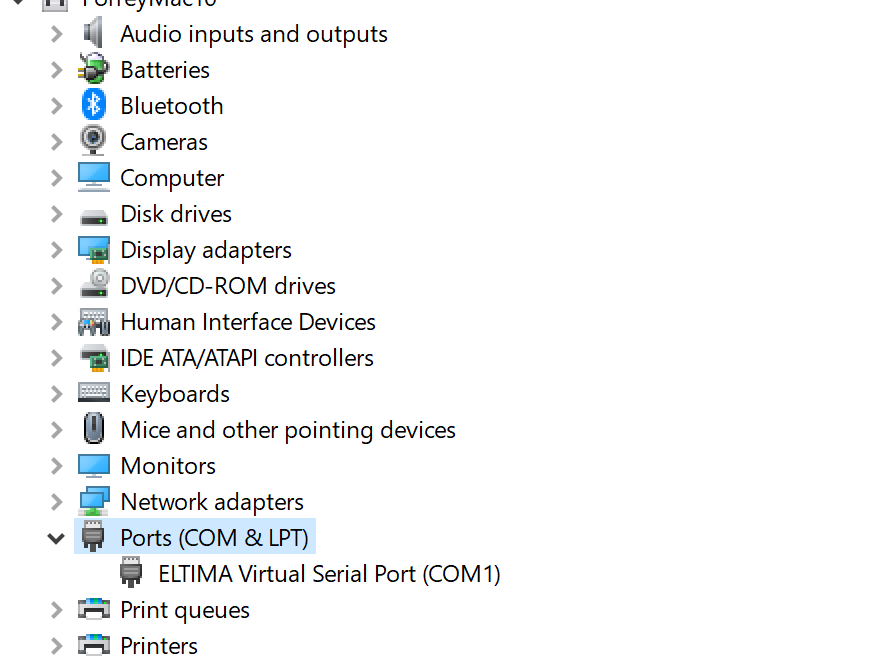
This image shows the COM port in the Devices manager under Windows 10.