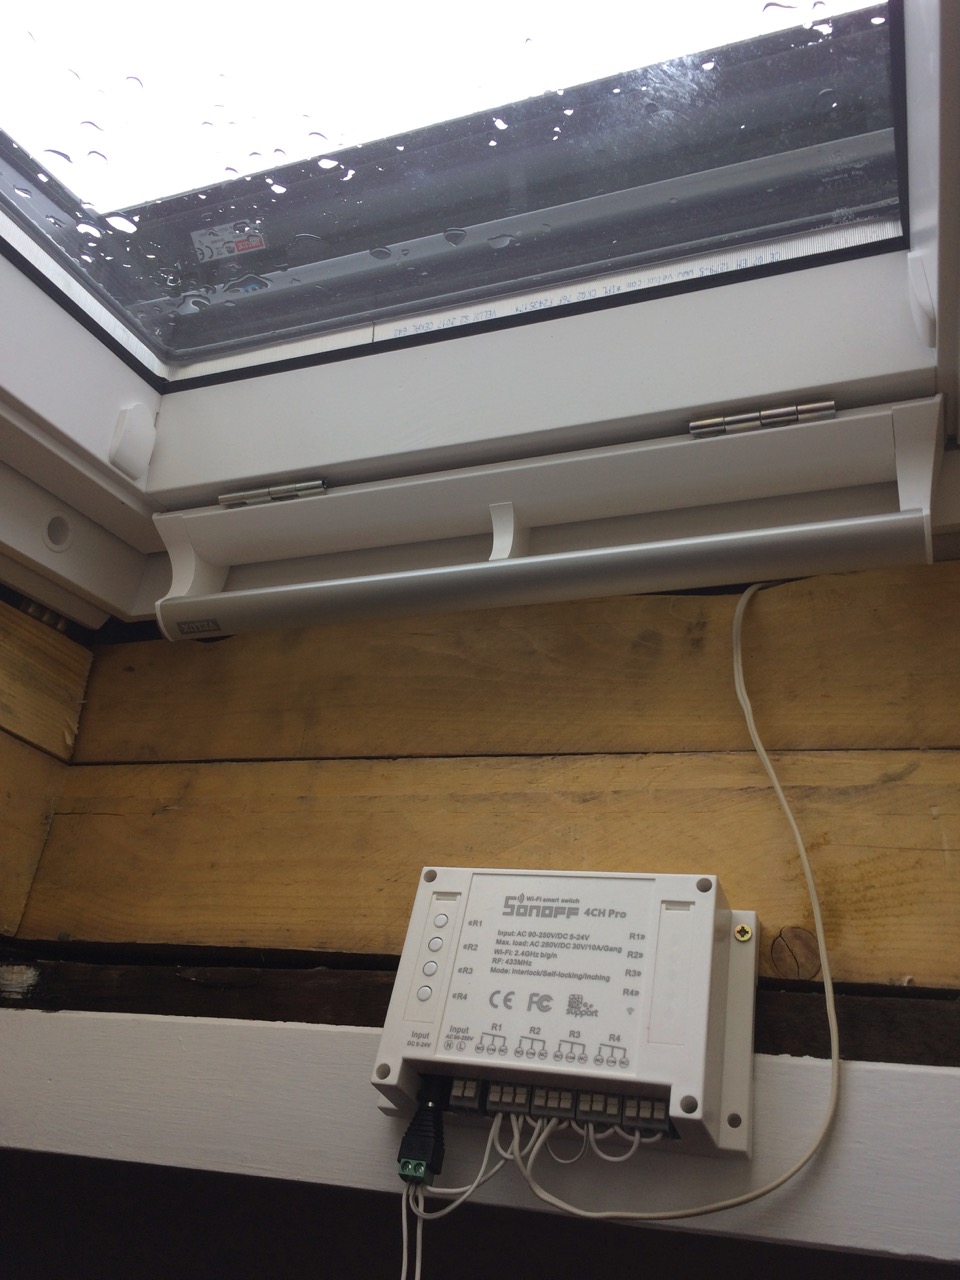
I'm getting my roof repaired and my Velux windows renovated and I opted to get some electric rolling shutters (ref: SML) to replace my indoor rolling blinds. I didn't need to get them solar powered as they are both close to a power outlet.
I was looking into integration into my Home Assistant setup and found out that it requires:
- a Velux KUX 110 per window (80€). They include a power supply and a radio remote. This is the module that powers and control the motor.
- a Velux KLF 200 (200€). This can control up to 5 individual windows via a touch screen or an API. Talks via radio to the KUX 110. It has a Home Assistant component.
The IO homecontrol it uses seems to define proprietary and the radio protocol hasn't been reverse engineered yet.
But then I found out that the motor control is trivial (article in french but schematics should be understandable by anyone). The blinds simply have two wires, if +24V is provided, the blinds will go up, stopping by themselves once they reach the top (the end stop is integrated) and -24V will makes them go down, once again they stop by themselves. 0V will obviously make them stop.
Paying ~360€ for my two windows for this seemed to be quite excessive.
Here is how I managed to control the blinds on two windows independently using some much cheaper hardware; 40€ total.
This might also work with similar rolling shutters/blinds from other manufacturers that uses the same principle.
This piece of hardware, the Sonoff 4CH Pro is ideal for this: It provides 4 relays, can be powered with 24V and has Wifi thanks to the ESP8266. It also has holes to solder a header to re-flash the chip and use a firmware more compatible with Home assistant, but more on that later.
Unlike other Sonoff devices, the relays are not tied to AC. As it can be powered by the same voltage we need to power the motors, it'll need only one power supply for this purpose.
The four relays means that I can control two motors in two different directions.
It can be DIN-rail mounted and it also has mounting holes. It has 4 buttons to control the relays manually and has an optional RF remote available.
The power supply is not provided and I used a 24V 6A PSU. Apparently only 1A is needed per shutter motor so a 3A PSU should be more than enough to power 2 motors and the electronics.
Price:
- Sonoff 4CH Pro: 25€
- PSU: 15€
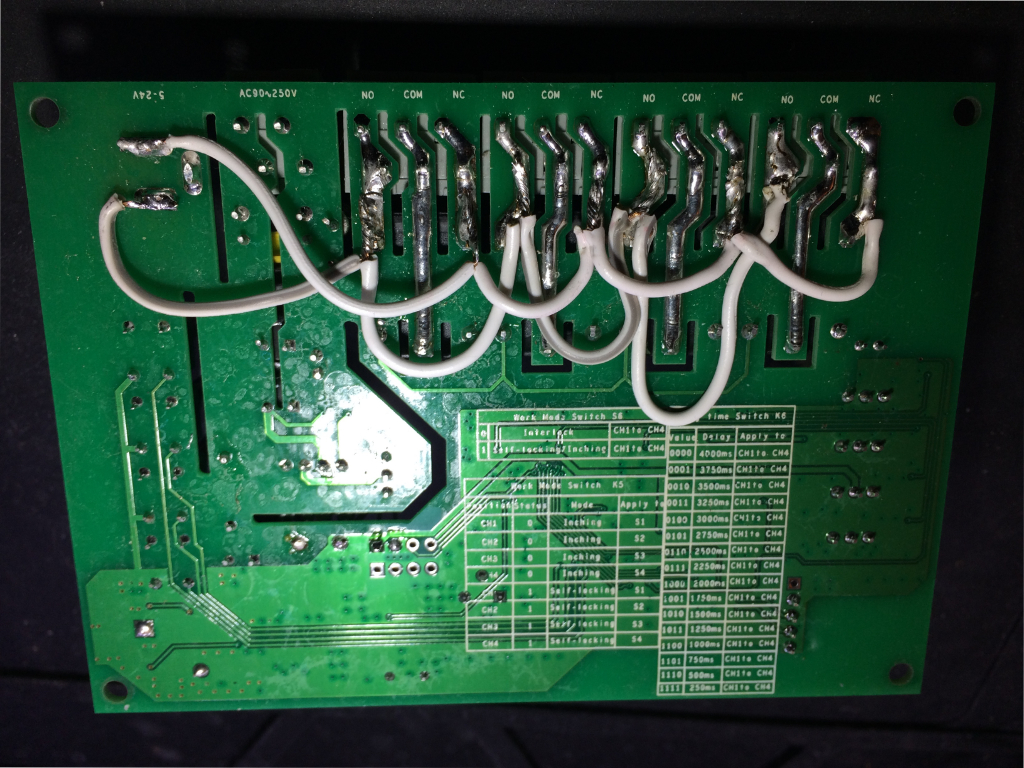
The cabling is fairly simple. For all four relays, each of them has their NO (Normally Open) connector provided with the 24V from the power supply. All NC (Normally Closed) are tied to ground and the motors uses the COM (Common) holes. If the motor goes the opposite direction of what is requested, just invert the cables.
For my usage, I've internally soldered some cables to chain the NO and NC terminals together and tie them to the power supply input.
The exterior is unmodified so I've also sealed the AC inputs to make sure nothing gets plugged in there by mistake.
If relay 1 is activated, the motor will get 24V and the blind will go up. If relay 2 is activated, it'll get -24V and go down. If both relay 1 and 2 are activated or off, the motor will get 0V and do nothing.
So far, so good, but it still needs to be integrated into Home Assistant. For that we'll use Tasmota.
Tasmota is an alternative and open source firmware for those SonOff devices that provides, among many other features a way to control the relays via MQTT.
Before upload, edit sonoff/user_config.h
- Add your Wifi credential to
STA_SSID1andSTA_PASS1. - Add the IP or host name of your Home Assistant server to
MQTT_HOST. Don't forget to enable Home Assistant's MQTT broker or add one before hand.
Follow the instructions on Tasmota project page to upload the firmware. Don't forget to look at he 4CH pro specific page of the documentation.
This was the hardest part of this experiment for me, and I've been working with ESP8266 for a while. It took me a much longer time than expected to manage the successfully upload the firmware, probably due to an inadequate USB-UART adapter. The timing to put the chip into programming mode also seemed very difficult to get right for some reason.
Once the device is using Tasmota. You'll have some configuration to make, open the web interfacel; it'll be advertised via Bonjour.
- Configuration
- Configure Module
- Set Module type to
23 Sonoff 4CH Pro
- Set Module type to
- Configure MQTT
- Set Topic to
velux
- Set Topic to
- Configure Module
It'll restart and should be available to Home Assistant.
mqtt: # add this if you didn't already have a configured MQTT broker

cover:
  - platform: mqtt
    name: "Velux Mezzanine"
    command_topic: "cmnd/velux/Backlog"
    payload_open: "power2 off; power1 on; delay 1500; power1 off"
    payload_close: "power1 off; power2 on; delay 320; power2 off"
    payload_stop: "power1 off; power2 off"
    retain: true
    qos: 1
Replace power1 and power2 by power3 and power4 respectively for the second window.
And that's it for Home assistant, the configuration is fairly straight forward.
You might need to adjust the delay depending on the length of your shutters. The delay is defined in tenths of a second.
After restarting Home Assistant you should see the cover controls in the UI.
automation:
- id: close_covers_at_night
  alias: Close covers at night
  trigger:
    platform: sun
    event: sunset
  action:
    service: cover.close_cover
    entity_id: group.all_covers
- id: open_covers_during_the_day
  alias: Open covers during the day
  trigger:
    platform: sun
    event: sunrise
  action:
    service: cover.open_cover
entity_id: group.all_coversActivate sleep to reduce idle power consumption (cuts it by half):
You can use the MQTT tool inside Home Assistant to send this to the device:
- topic: cmnd/velux/Sleep
- payload: 50


