
Self-Supervised Motion Understanding
- Free software: Apache Software License 2.0
Assuming you have the prepared HDF5 data in the /home/raphael/datasets/objectron folder, you can start pre-training with the following command:
python selfsupmotion/main.py --data=/home/raphael/datasets/objectron --output=output --config=examples/local/config-pretrain-8gb.yaml
During pre-training, the accuracy on category prediction is used as a proxy for the model quality.
To evaluate on the zero-shot pose estimation task, you must first generate the embeddings using the main program.
python selfsupmotion/main.py    --data=/home/raphael/datasets/objectron \
                                --output=output/pretrain_224 \
                                --config=examples/local/config-pretrain-8gb.yaml
                                --embeddings
                                --embeddings-ckpt=output/pretrain_224/last_model.ckpt
This will generate embeddings for all images in the training and validation set. Care must be taken to use the same split as in training, or else you will get leaky results.
Once the embeddings are generated, the evaluation script can be launched.
python selfsupmotion/zero_shot_pose.py output/pretrain_224 --subset_size=5000 --cpu
3D IoU @ 50% precision will be reported for each individual category in objectron.
(remember to activate the virtual env if you want to use one) Add new dependencies (if needed) to setup.py.
pip install -e .
git init
(this will run flake8 before any commit)
cd .git/hooks/ && ln -s ../../config/hooks/pre-commit . && cd -
git add .
git commit -m 'first commit'
Go on github and follow the instructions to create a new project. When done, do not add any file, and follow the instructions to link your local git to the remote project, which should look like this:
git remote add origin git@github.com:plstcharles/selfsupmotion.git
git push -u origin master
A travis configuration file (.travis.yml) is already in your repository (so, no need to
create it). This will run flake8 and run the tests under tests.
To enable it server-side, just go to https://travis-ci.com/account/repositories and click
Manage repositories on GitHub. Give the permission to run on the git repository you just created.
Note, the link for public project may be https://travis-ci.org/account/repositories .
Go to https://codecov.io/ and enable codecov for your repository. If the github repository is a private one, you will need to get a secret token for your project and add it to github. (see https://docs.codecov.io/docs/about-the-codecov-bash-uploader#section-upload-token)
Just run (from the root folder):
pytest
Note that the code should already compile at this point.
Running examples can be found under the examples folder.
In particular, you will find examples for:
- local machine (e.g., your laptop).
- a slurm cluster.
For both these cases, there is the possibility to run with or without Orion. (Orion is a hyper-parameter search tool - see https://github.com/Epistimio/orion - that is already configured in this project)
For example, to run on your local machine without Orion:
cd examples/local
sh run.sh
This will run a simple MLP on a simple toy task: sum 5 float numbers. You should see an almost perfect loss of 0 after a few epochs.
Note you have two new folders now:
- output: contains the models and a summary of the results.
- mlruns: produced by mlflow, contains all the data for visualization.
You can run mlflow from this folder (
examples/local) by runningmlflow ui.
(NOTE: this example also apply to Compute Canada - use the folders
slurm_cc and slurm_cc_orion instead of slurm_mila and slurm_mila_orion.)
First, bring you project on the Mila cluster (assuming you didn't create your project directly there). To do so, simply login on the Mila cluster and git clone your project:
git clone git@github.com:plstcharles/selfsupmotion.git
Then activate your virtual env, and install the dependencies:
cd selfsupmotion
pip install -e .
To run with SLURM, just:
cd examples/slurm_mila
sh run.sh
Check the log to see that you got an almost perfect loss (i.e., 0).
You can track down the GPU time (and other resources) of your jobs by
associating a tag to the job (when using sbatch).
To associate a tag to a job, replace my_tag with a proper tag,
and uncomment the line (i.e., remove one #) from the line:
##SBATCH --wckey=my_tag
This line is inside the file examples/slurm_mila/to_submit.sh.
To get a sumary for a particular tag, just run:
sacct --allusers --wckeys=my_tag --format=JobID,JobName,Start,Elapsed -X -P --delimiter=','
(again, remember to change my_tag into the real tag name)
It can be useful to monitor and profile how you utilise your GPU (usage, memory, etc.). For the time being, you can only monitor your profiling in real-time from the Mila cluster, i.e. while your experiments are running. To monitor your GPU, you need to setup port-forwarding on the host your experiments are running on. This can be done in the following way:
Once you have launched your job on the mila cluster, open the log for your current experiment:
head logs/selfsupmotion__<your_slurm_job_id>.err
You should see printed in the first few lines the hostname of your machine, e.g.,
INFO:selfsupmotion.utils.logging_utils:Experiment info:
hostname: leto35
git code hash: a51bfc5447d188bd6d31fac3afbd5757650ef524
data folder: ../data
data folder (abs): /network/tmp1/bronzimi/20191105_cookiecutter/selfsupmotion/examples/data
In a separate shell on your local computer, run the following command:
ssh -L 19999:<hostname>.server.mila.quebec:19999 <username>@login.server.mila.quebec -p 2222
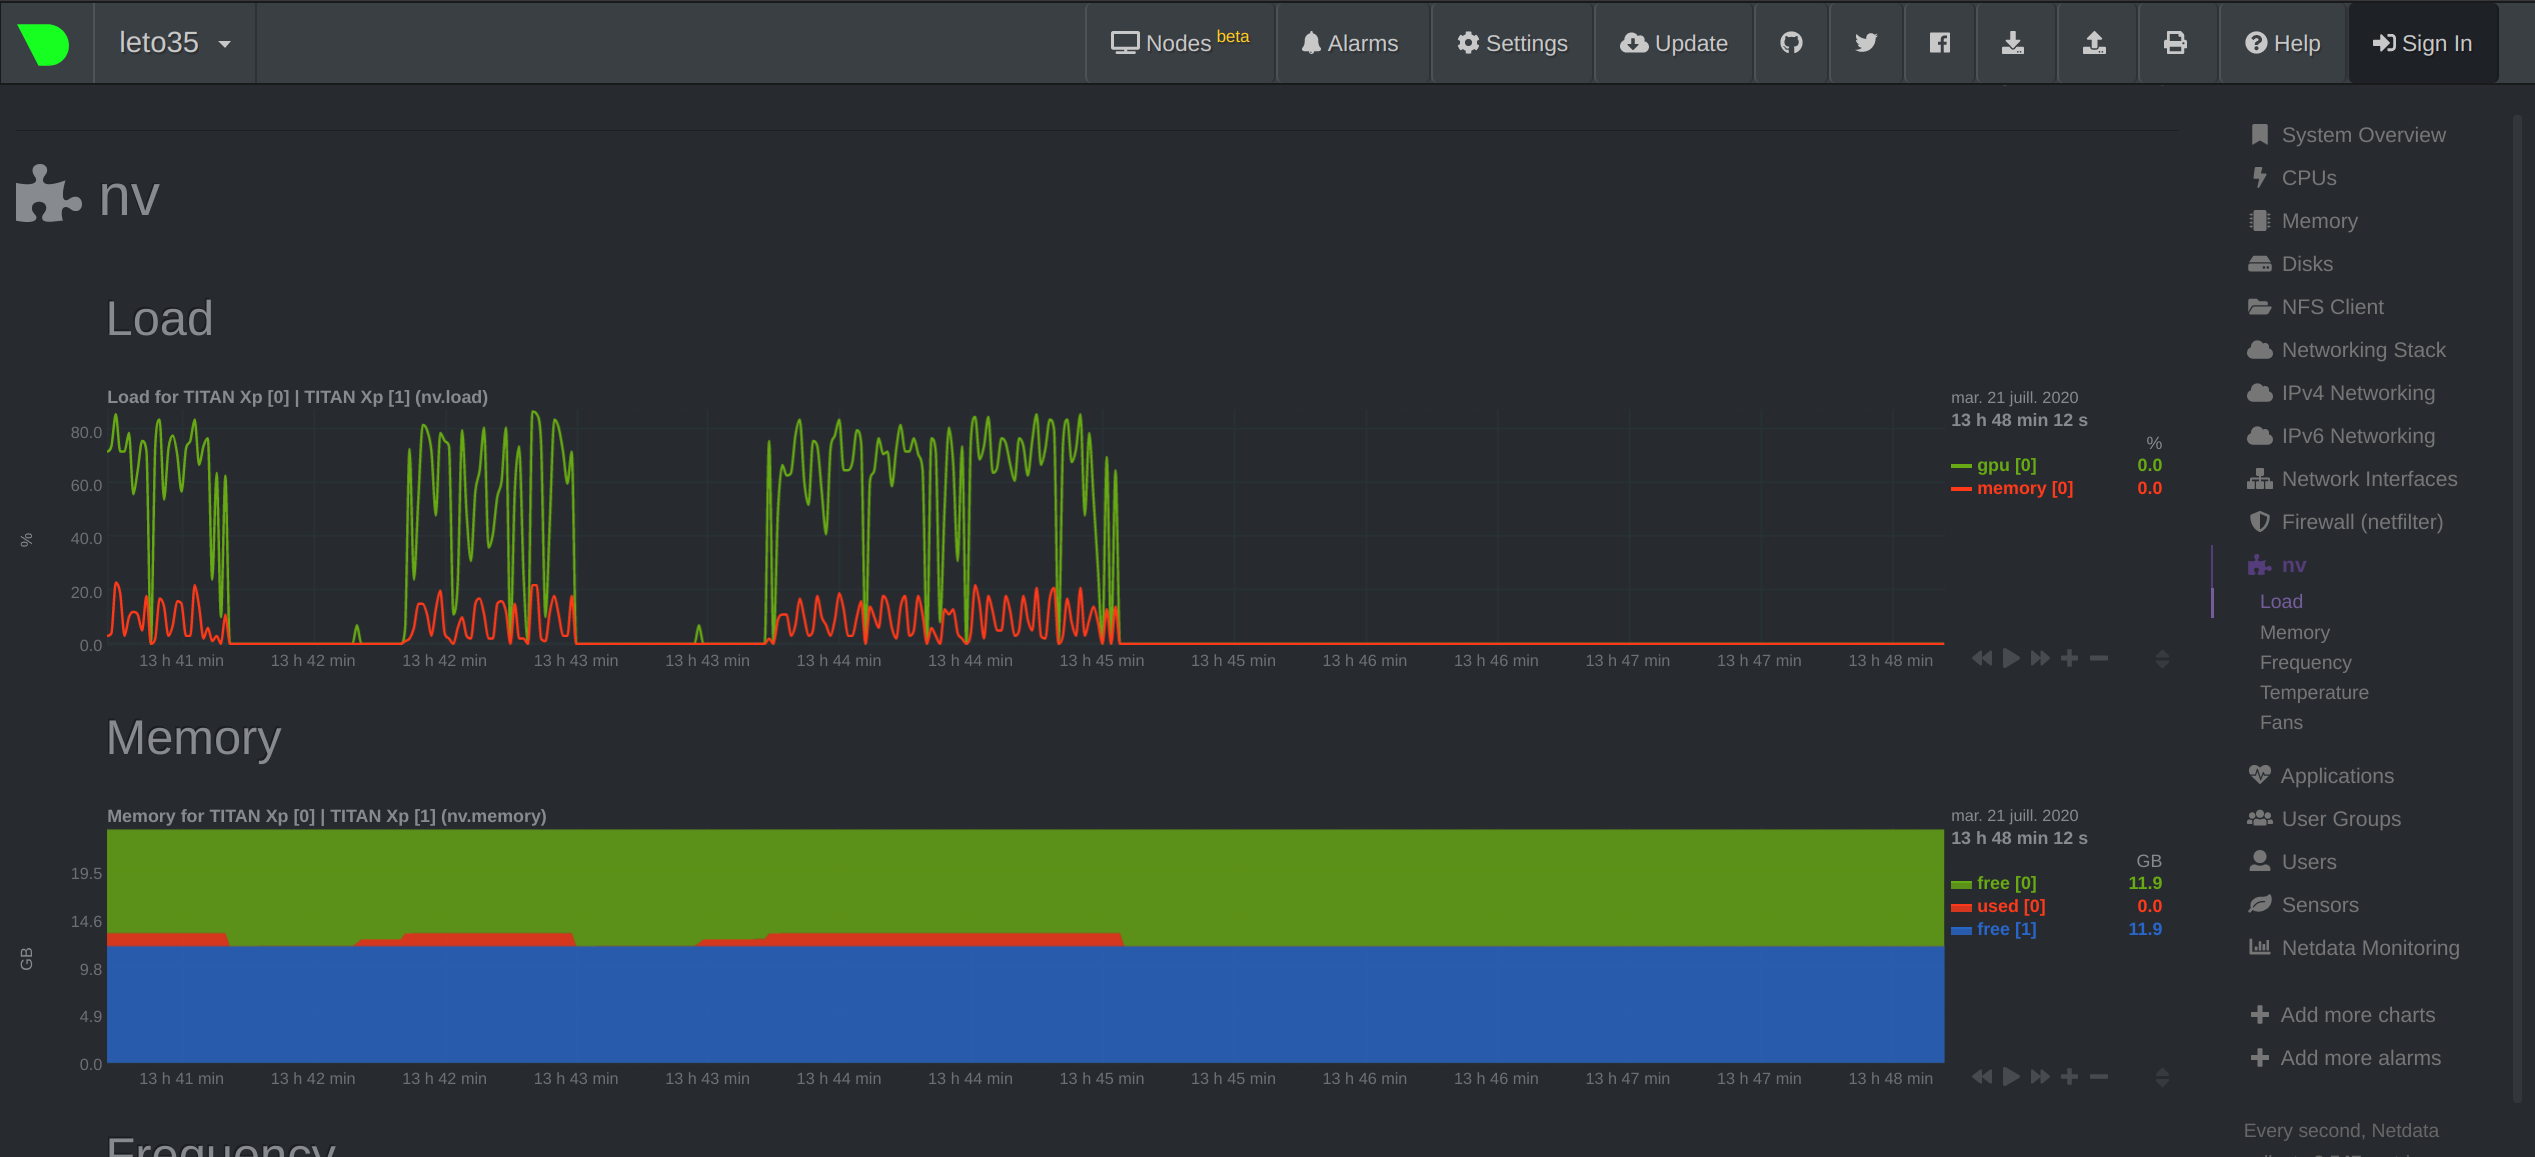
where <username> is your user name on the Mila cluster and <hostname> is the name of the machine your job is currenty running on (leto35 in our example). You can then navigate your local browser to http://localhost:19999/ to view the ressources being used on the cluster and monitor your job. You should see something like this:
This example will run orion for 2 trials (see the orion config file).
To do so, go into examples/slurm_mila_orion.
Here you can find the orion config file (orion_config.yaml), as well as the config
file (config.yaml) for your project (that contains the hyper-parameters).
In general, you will want to run Orion in parallel over N slurm jobs.
To do so, simply run sh run.sh N times.
When Orion has completed the trials, you will find the orion db file and the mlruns folder (i.e., the folder containing the mlflow results).
You will also find the output of your experiments in orion_working_dir, which
will contain a folder for every trial.
Inside these folders, you can find the models (the best one and the last one), the config file with
the hyper-parameters for this trial, and the log file.
You can check orion status with the following commands:
(to be run from examples/slurm_mila_orion)
export ORION_DB_ADDRESS='orion_db.pkl'
export ORION_DB_TYPE='pickleddb'
orion status
orion info --name my_exp
To automatically generate docs for your project, cd to the docs folder then run:
make html
To view the docs locally, open docs/_build/html/index.html in your browser.
- TODO