- Opens and closes the chicken door in the morning and evening. A status LED (green/red) indicates the door status.
- Monitors the drinkable water level, with a status LED (green/red) indicating the water level.
- Logs information and sends commands via the serial monitor, USB, and optionally the HC-05 bluetooth module.
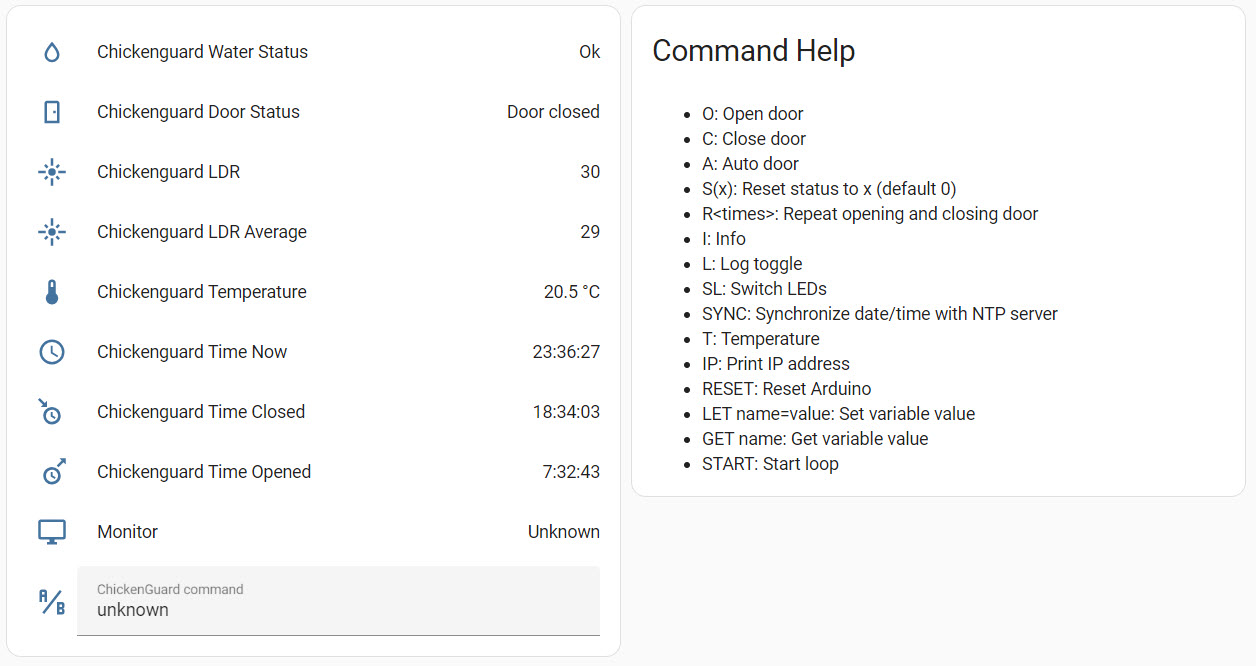
- Connects to the internet to log information and send commands via MQTT, which can be set up in Home Assistant.
- Allows the addition of a clock module DS3231 to prevent the door from opening before a certain time. The clock adjusts for summer/winter time and periodically syncs with internet time if available.
- Even without a clock module, setting date/time is possible, especially when connected to the internet, ensuring synchronization at each startup and regular intervals.
A light sensor determines when the door opens and closes, but it won't open before a specified time, particularly during summertime when predators may be active early in the morning. Even without a clock module, setting date/time is possible, especially when connected to the internet, ensuring synchronization at each startup and regular intervals. A light sensor determines when the door opens and closes, but it won't open before a specified time, particularly during summertime when predators may be active early in the morning. Even without the clock module, the system can still operate based on time using the Arduino timer, especially when connected to the internet. In the absence of an internet connection, the current time must be provided each time the Arduino resets.
The system uses a light sensor, and a 3-way switch at the light detector allows for different modes, including immediate door closure or opening based on the LDR connection.
Two LEDs indicate whether the door is (about to) open or close and also show error status. A blinking pattern of the red LED signifies an error, which can be reset by switching the switch between immediate close and open within 5 seconds.
Upon powering on, the system waits for commands for the first minute, and commands can be entered anytime thereafter. There are manual commands to open and close the door, and the system determines whether to keep it closed or open based on the light conditions.
The trap door's design, similar to a medieval castle door, employs an elastic on the outside to assist in opening the door initially. Make sure the door is not closed and there is enough light during the initial setup to allow for proper system configuration.
In normal operation, commands can still be given, and logging can be adjusted using the 'L' command.
The 'H' command provides a help screen with all available commands.
Note that by default, the Arduino resets when the monitor is started (Ctrl Shift M), causing a loss of variables. This can be addressed by using a capacitor between the reset pin and ground. A second reason why a capacitor is used is to ensure that a reset is performed when power is applied. This is necessary for the Ethernet shield I have. Newer versions do not require this reset, but I have an older version that needs a reset at every start.
Ensure the capacitor is disconnected when uploading a new sketch. Otherwise you get an error that it could not upload. I use a small switch to do that.
In addition to controlling the door, the system monitors the water level with two water level switches indicating if the water is close to empty or completely empty. When the LED is green, the water level is okay. When it blinks green/red, the water is almost empty, and when it blinks red, the water level is completely empty.
When SERIAL1 is defined, communication can be done via Serial1, enabling connection with a Bluetooth HC-05 module.
If EEPROMModule is defined, some data is written to EEPROM to prevent data loss upon restart.
If EthernetModule is defined and the Arduino is connected to Ethernet, two extra modules become available: MQTTModule for sending MQTT messages to/from the Arduino and NTPModule for synchronizing date/time with internet time.
When MQTT is enabled, the system can be monitored via Home Assistant, adding a convenient touch to this chicken guard.
