Udacity Data Engineering Nano degree project
A music streaming company, Sparkify, has decided that it is time to introduce more automation and monitoring to their data warehouse ETL pipelines and come to the conclusion that the best tool to achieve this is Apache Airflow.
They have decided to bring you into the project and expect you to create high grade data pipelines that are dynamic and built from reusable tasks, can be monitored, and allow easy backfills. They have also noted that the data quality plays a big part when analyses are executed on top the data warehouse and want to run tests against their datasets after the ETL steps have been executed to catch any discrepancies in the datasets.
The source data resides in S3 and needs to be processed in Sparkify's data warehouse in Amazon Redshift. The source datasets consist of JSON logs that tell about user activity in the application and JSON metadata about the songs the users listen to.
This project will introduce you to the core concepts of Apache Airflow. To complete the project, you will need to create your own custom operators to perform tasks such as staging the data, filling the data warehouse, and running checks on the data as the final step.
We have provided you with a project template that takes care of all the imports and provides four empty operators that need to be implemented into functional pieces of a data pipeline. The template also contains a set of tasks that need to be linked to achieve a coherent and sensible data flow within the pipeline.
You'll be provided with a helpers class that contains all the SQL transformations. Thus, you won't need to write the ETL yourselves, but you'll need to execute it with your custom operators. Example DAG

Here, we'll use Airflow's UI to configure your AWS credentials and connection to Redshift.
-
To go to the Airflow UI:
- You can use the Project Workspace here and click on the blue Access Airflow button in the bottom right.
- If you'd prefer to run Airflow locally, open http://localhost:8080 in Google Chrome (other browsers occasionally have issues rendering the Airflow UI).
-
Click on the Admin tab and select Connections.
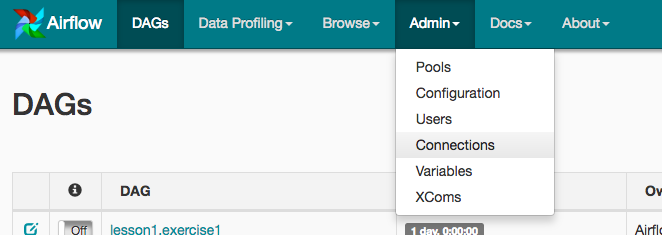
-
Under Connections, select Create.
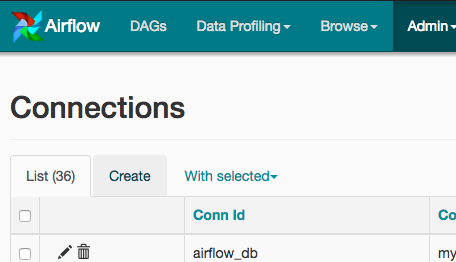
-
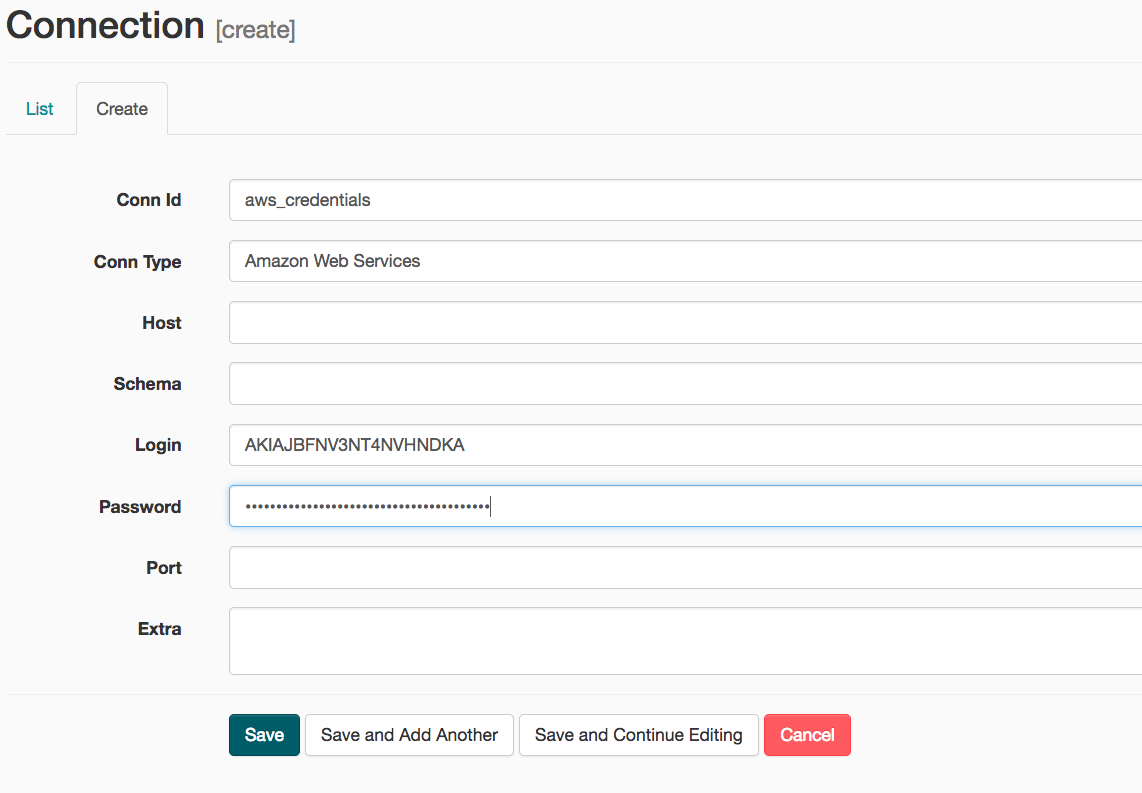
On the create connection page, enter the following values:
- Conn Id: Enter
aws_credentials. - Conn Type: Enter
Amazon Web Services. - Login: Enter your Access key ID from the IAM User credentials you downloaded earlier.
- Password: Enter your Secret access key from the IAM User credentials you downloaded earlier.
- Conn Id: Enter
-
Once you've entered these values, select Save and Add Another.
-
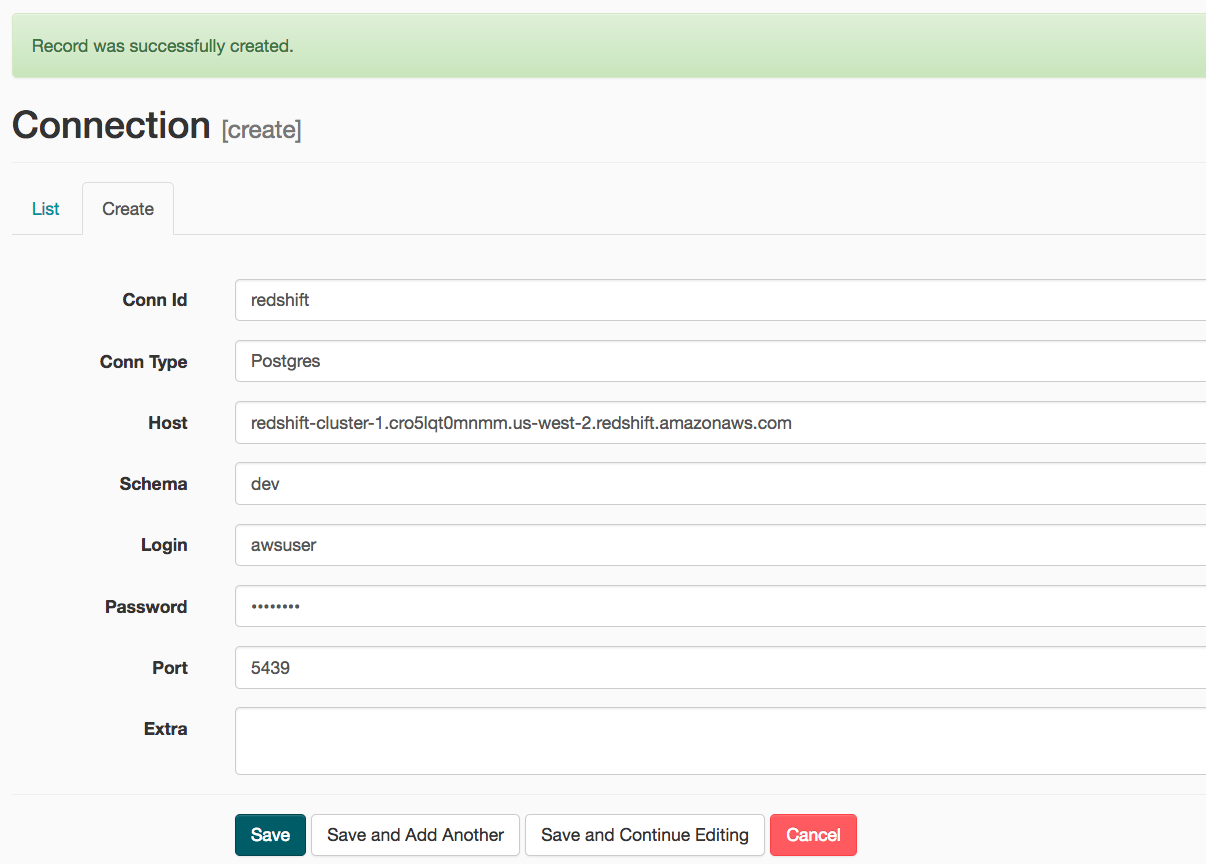
On the next create connection page, enter the following values:
- Conn Id: Enter
redshift. - Conn Type: Enter
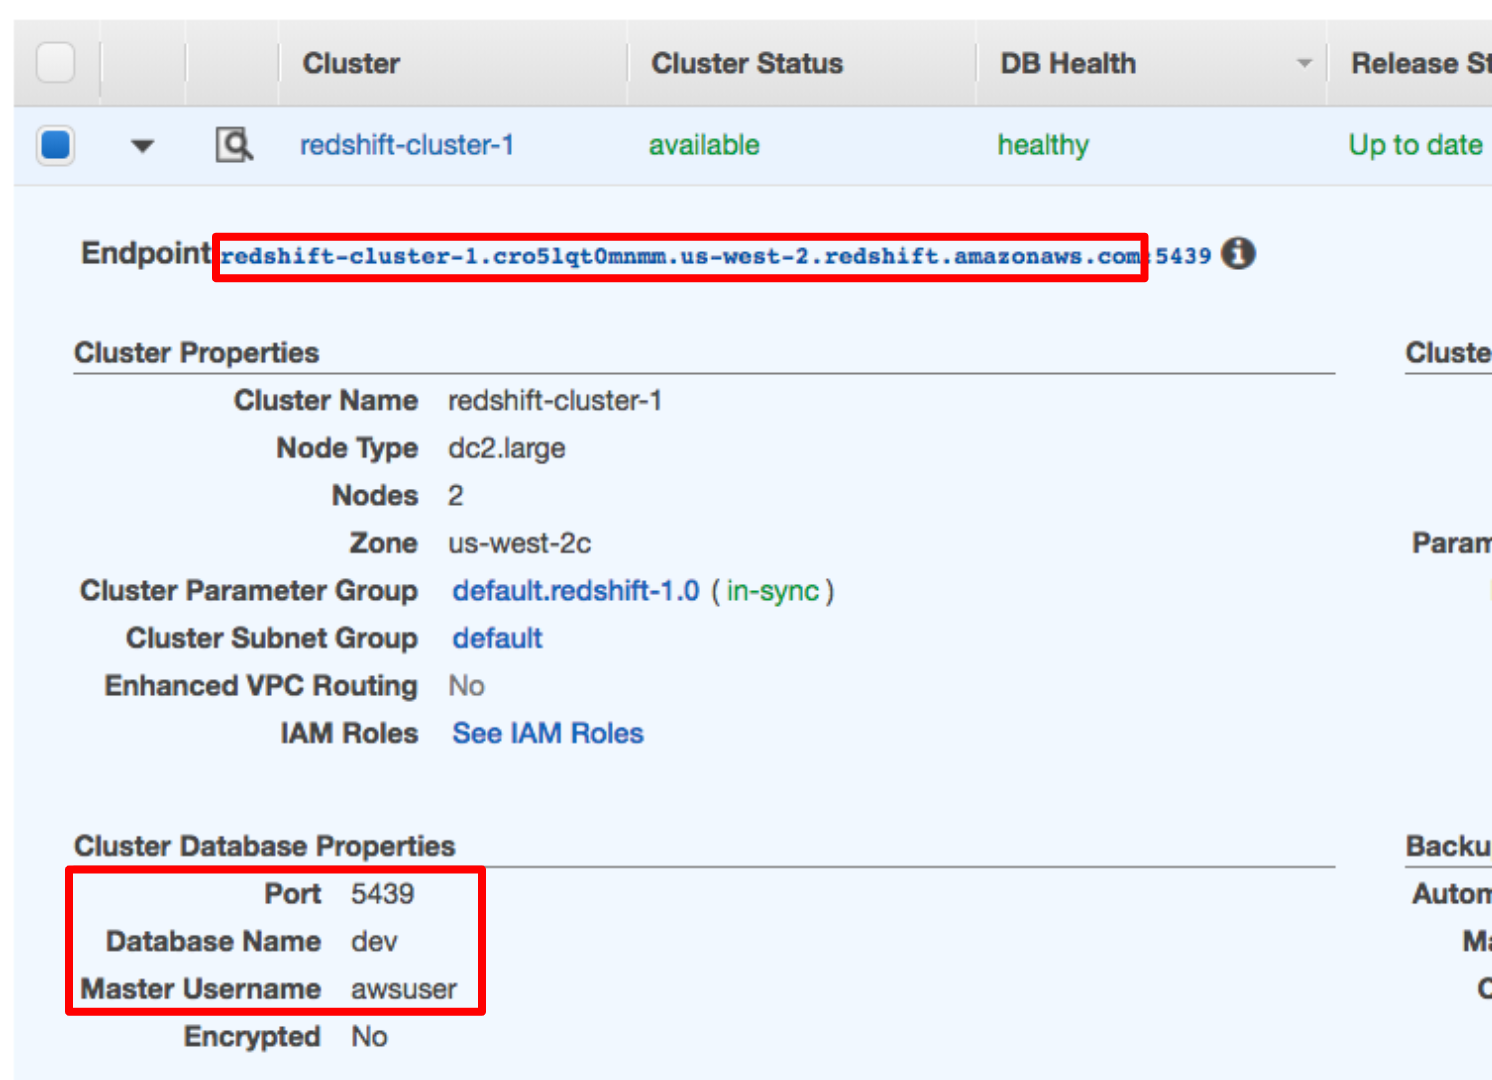
Postgres. - Host: Enter the endpoint of your Redshift cluster, excluding the port at the end. You can find this by selecting your cluster in the Clusters page of the Amazon Redshift console. See where this is located in the screenshot below. IMPORTANT: Make sure to NOT include the port at the end of the Redshift endpoint string.
- Schema: Enter
dev. This is the Redshift database you want to connect to. - Login: Enter
awsuser. - Password: Enter the password you created when launching your Redshift cluster.
- Port: Enter
5439.
Once you've entered these values, select Save.
- Conn Id: Enter


Awesome! You're now all configured to run Airflow with Redshift. WARNING: Remember to DELETE your cluster each time you are finished working to avoid large, unexpected costs.
For this project, you'll be working with two datasets. Here are the s3 links for each:
- Log data: s3://udacity-dend/log_data
- Song data: s3://udacity-dend/song_data
To get started with the project:
Go to the workspace on the next page, where you'll find the project template. You can work on your project and submit your work through this workspace.

Alternatively, you can download the project template package and put the contents of the package in their respective folders in your local Airflow installation.

The project template package contains three major components for the project:
    The dag template has all the imports and task templates in place, but the task dependencies have not been set
    The operators folder with operator templates
    A helper class for the SQL transformations

With these template files, you should be able see the new DAG in the Airflow UI. The graph view should look like this:

You should be able to execute the DAG successfully, but if you check the logs, you will see only operator not implemented messages.
In the DAG, add default parameters according to these guidelines
The DAG does not have dependencies on past runs
On failure, the task are retried 3 times
Retries happen every 5 minutes
Catchup is turned off
Do not email on retry
In addition, configure the task dependencies so that after the dependencies are set, the graph view follows the flow shown in the image below.

To complete the project, you need to build four different operators that will stage the data, transform the data, and run checks on data quality.
You can reuse the code from Project 2, but remember to utilize Airflow's built-in functionalities as connections and hooks as much as possible and let Airflow do all the heavy-lifting when it is possible.
All of the operators and task instances will run SQL statements against the Redshift database. However, using parameters wisely will allow you to build flexible, reusable, and configurable operators you can later apply to many kinds of data pipelines with Redshift and with other databases.
The stage operator is expected to be able to load any JSON formatted files from S3 to Amazon Redshift. The operator creates and runs a SQL COPY statement based on the parameters provided. The operator's parameters should specify where in S3 the file is loaded and what is the target table.
The parameters should be used to distinguish between JSON file. Another important requirement of the stage operator is containing a templated field that allows it to load timestamped files from S3 based on the execution time and run backfills. Fact and Dimension Operators
With dimension and fact operators, you can utilize the provided SQL helper class to run data transformations. Most of the logic is within the SQL transformations and the operator is expected to take as input a SQL statement and target database on which to run the query against. You can also define a target table that will contain the results of the transformation.
Dimension loads are often done with the truncate-insert pattern where the target table is emptied before the load. Thus, you could also have a parameter that allows switching between insert modes when loading dimensions. Fact tables are usually so massive that they should only allow append type functionality.
The final operator to create is the data quality operator, which is used to run checks on the data itself. The operator's main functionality is to receive one or more SQL based test cases along with the expected results and execute the tests. For each the test, the test result and expected result needs to be checked and if there is no match, the operator should raise an exception and the task should retry and fail eventually.
For example one test could be a SQL statement that checks if certain column contains NULL values by counting all the rows that have NULL in the column. We do not want to have any NULLs so expected result would be 0 and the test would compare the SQL statement's outcome to the expected result.
After you have updated the DAG, you will need to run /opt/airflow/start.sh command to start the Airflow web server. Once the Airflow web server is ready, you can access the Airflow UI by clicking on the blue Access Airflow button.
Before you start on your first exercise, please note the following instruction.
After you have updated the DAG, you will need to run /opt/airflow/start.sh command to start the Airflow webserver. See the screenshot below for the Exercise 1 Workspace.
Wait for the Airflow web server to be ready (see screenshot below).
Access the Airflow UI by clicking on the blue "Access Airflow" button.
This should be able to access the Airflow UI without any delay.
Please note: Because the files located in the s3 bucket 'udacity-dend' are very large, Airflow can take up to 10 minutes to make the connection.