BetaTester is a simple tool to help you automatically test the UI / UX of your web application on different browsers and devices without having to write brittle front-end tests. It uses LLMs to plan and select actions and Playwright to execute those actions.
As you develop and change your web application, you can specify BetaTester to continuously test high level flows like "Sign up", "Login", "Add to cart", etc. Failures can indicate either a bug in the UI or potentially non-intuitive UX, which you can investigate further using the application or the Playwright trace it automatically generates.
If you don't want to keep using LLMs for every test, BetaTester generates a scrape spec from an LLM run that can be run deterministically.
- Install the package
pip install betatester- If you have not run Playwright before, you will need to install the browser dependencies. This only needs to be done once per system
playwright install --with-deps chromium`- Make sure to retrieve an your OpenAI API key if you have not already done so.
Run the test using LLMs. See the docstring here for more information on the avaiable parameters.
from betatester import ScrapeAiExecutor
from betatester.file.local import LocalFileClient

file_client = LocalFileClient("./app-data/")

scrape_executor = ScrapeAiExecutor(
    url="https://google.com",
    high_level_goal="Find images of cats",
    openai_api_key="...",
    file_client=file_client,
)
scrape_spec = await scrape_executor.run()
Run the test using a scrape spec (with no LLM calls) generated from a previous LLM run. See the docstring here for more information on the avaiable parameters.
from betatester import ScrapeSpecExecutor

scrape_spec_executor = ScrapeSpecExecutor(
    scrape_spec=scrape_spec,
)
await scrape_spec_executor.run()- Install the package
pip install betatester[cli]- If you have not run Playwright before, you will need to install the browser dependencies. This only needs to be done once per system
playwright install --with-deps chromium`- Make sure to retrieve an your OpenAI API key if you have not already done so and set it as an environment variable
OPENAI_API_KEY.
Run the test using LLMs. Use betatester start_ai --help for more information on the avaiable parameters.
betatester start_ai --url "https://google.com" --high-level-goal "Find images of cats" > "/path/to/scrape_spec.json"Run the test using a scrape spec (with no LLM calls) generated from a previous LLM run. Use betatester start_spec --help for more information on the avaiable parameters.
betatester start_spec --scrape-spec-path "/path/to/scrape_spec.json"Note: The provided render.yaml does not have a persistent disk attached, which means if the service is restarted and you are using the local file provider the output assets for a given test will be lost. If you want to persist this data, you will need to upgrade the instance type and attach a persistent disk to the service.
-
Set Environment Variables
- Required:
OPENAI_API_KEY- Your OpenAI API key
- Required:
-
Start the application
docker compose -f docker-compose.prod.yaml up --build
The application is served on http://localhost:8080
-
Set Environment Variables
- Required:
OPENAI_API_KEY- Your OpenAI API key
- Required:
-
Start the backend
docker compose -f docker-compose.dev.yaml up --build
The backend is served on http://localhost:8080
- Install frontend packages (this only needs to be done once)
cd frontend; npm install
- Start the frontend
cd frontend; npm run start
The frontend is served on http://localhost:3000
- Create a test by clicking the
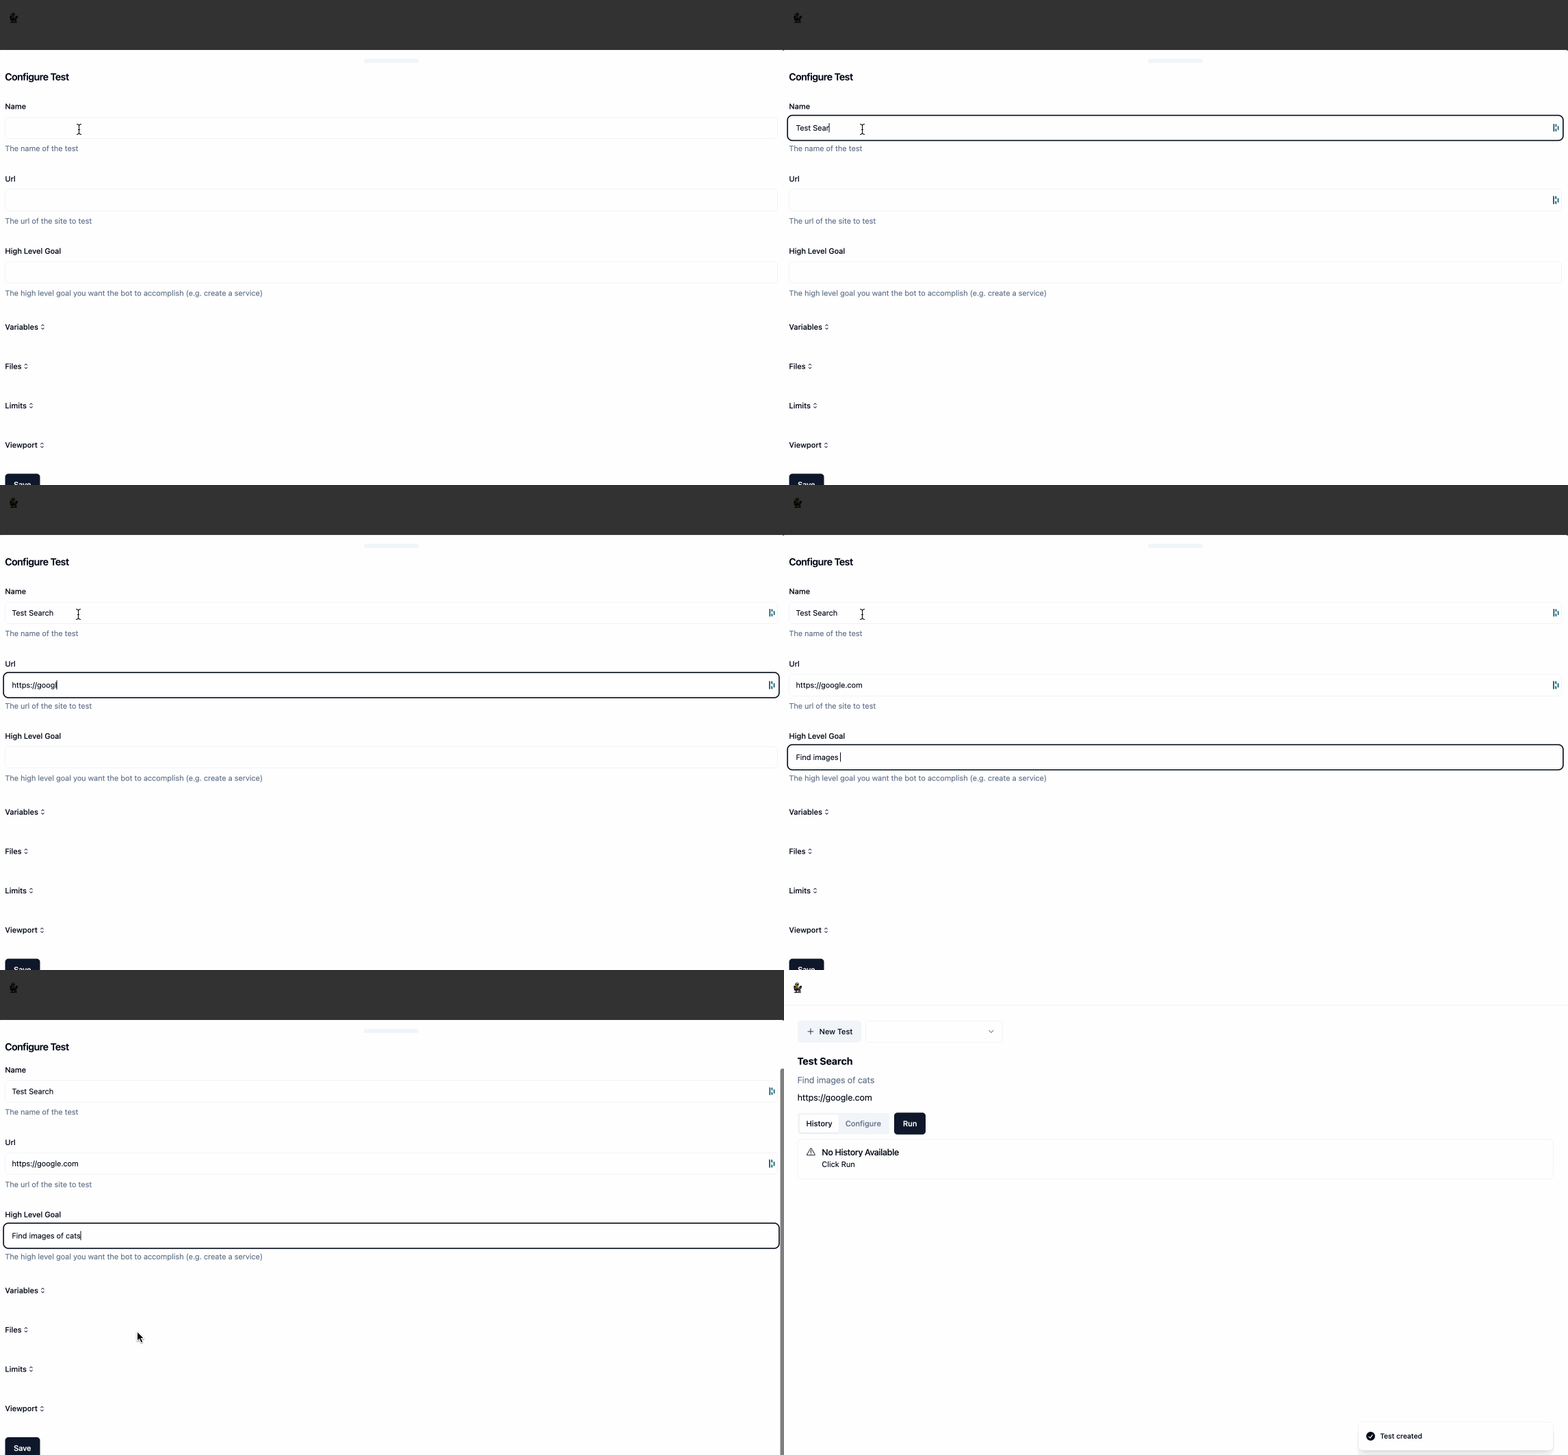
New Testbutton. As part of creating the test, you wiwll need to provide:
NameUrl- The url of the page you want to test.High Level Goal- A high level goal that the bot will try to achieve. For example, if you are testing a sign up flow, you can specify "Sign up" as the high level goal.- [Optional]
Variables- These are variables that can be used by the bot during the test. For example, if you have ausernameandpasswordfield, you can specify these as variables and the bot will automatically fill them in for you. - [Optional]
Files- These are files that can be used by the bot during the test. For example, if you have a file upload field, you can specify a file and the bot will automatically upload it for you. - [Optional]
Limits- Various settings that will ensure the bot does not infinitely loop or run for too long. - [Optional]
Viewport- The viewport that the bot will use to test your application.
- Once the test is created, you can run it by clicking the
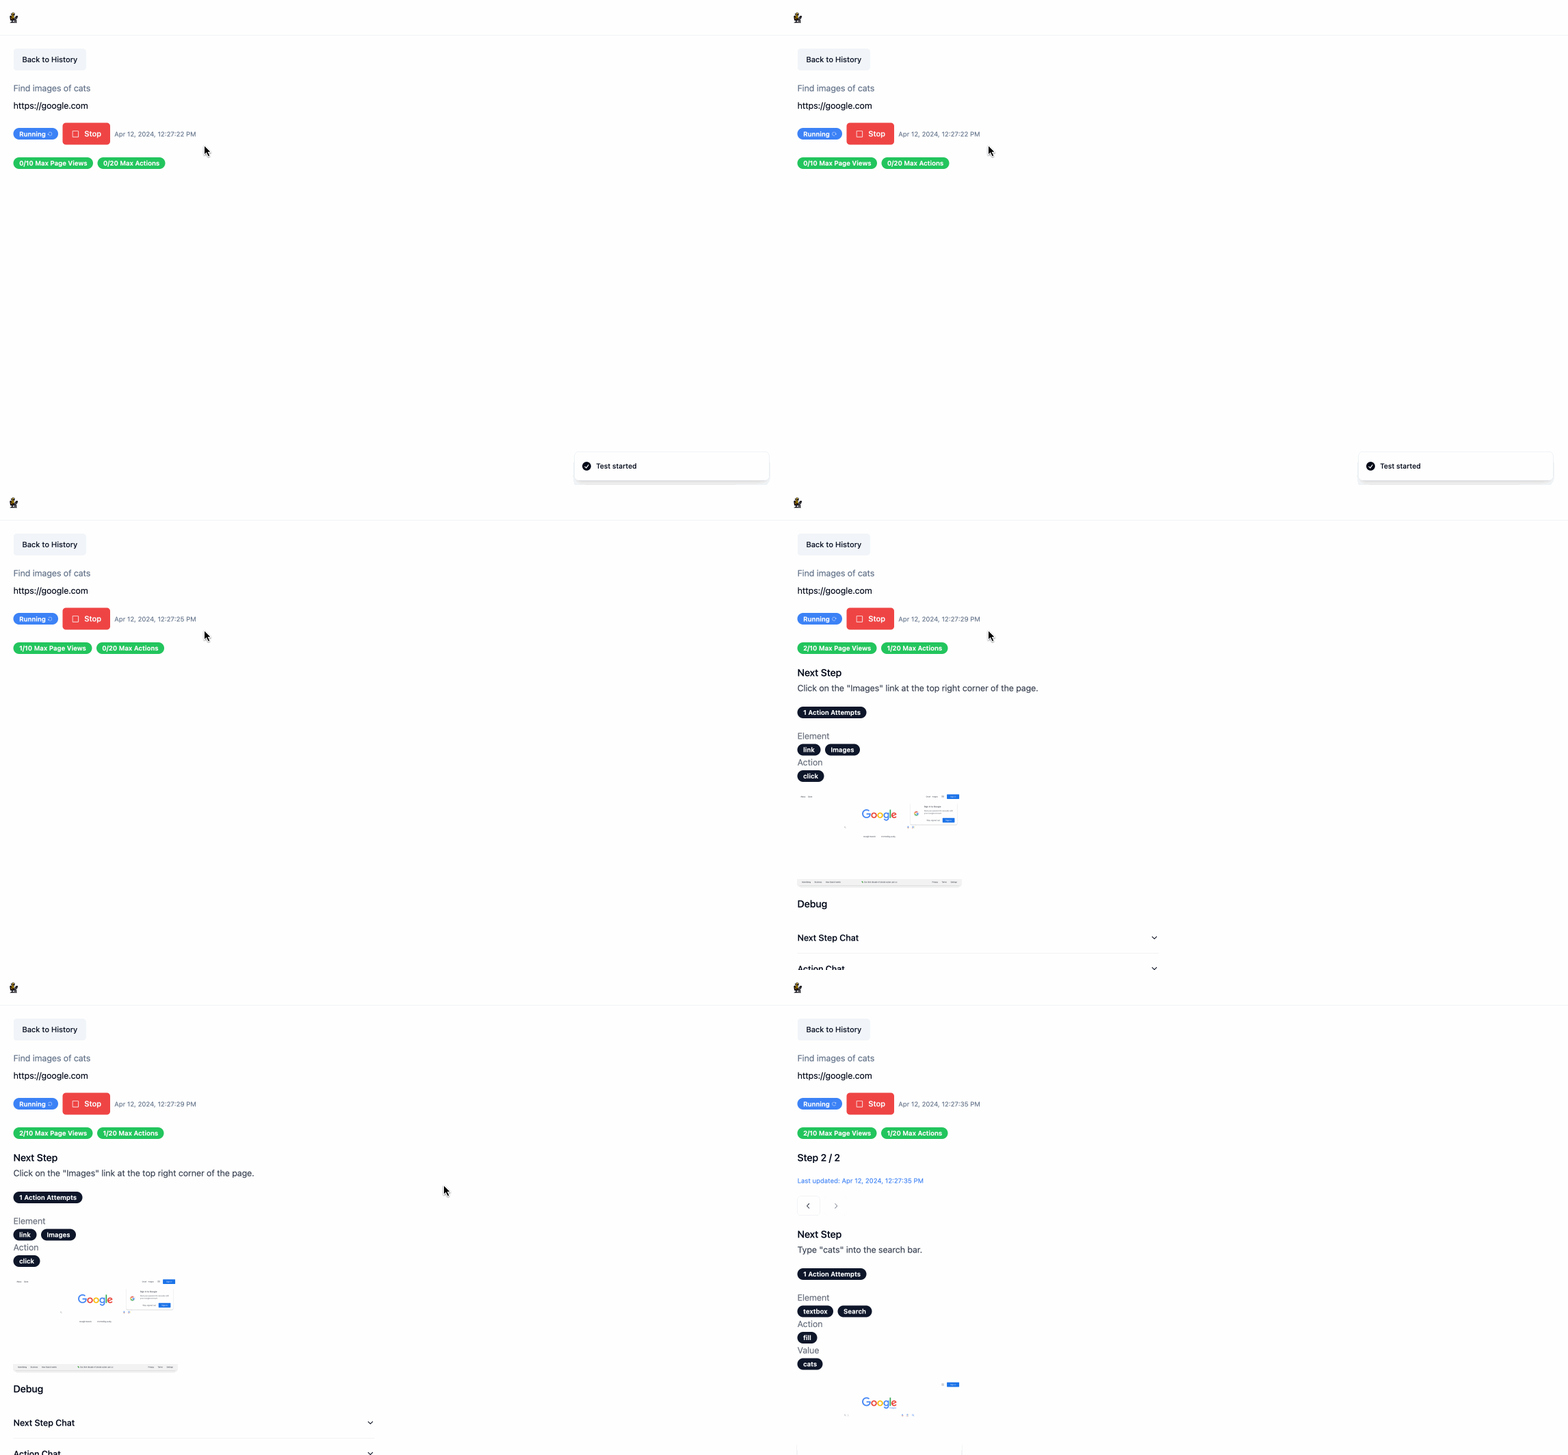
Runbutton. This will redirect you to the the/scrapepage where you can see the LLM working in real time to run the test. You can stop this process at any time by clickingStop.
BetaTester provides a REST API for interacting with the application. The API is served on http://localhost:8080. You can view the api docs at http://localhost:8080/docs when running the application locally.
import httpx

response = httpx.post(
    "http://localhost:8080/api/v1/config/upsert",
    json={
        "name": "Test Search",
        "url": "https://google.com",
        "high_level_goal": "Find images of cats",
    }
)
config_id = response.json()["config_id"]
print(config_id)import httpx
response = httpx.post(
f"http://localhost:8080/api/v1/scraper/start/{config_id}",
)
run_id = response.json()["scrape_id"]
print(run_id)import httpx
from time import sleep
while True:
response = httpx.get(
f"http://localhost:8080/api/v1/scraper/status/{config_id}/{run_id}"
)
status = response.json()["status"]
print(status)
if status != "running":
break
else:
sleep(5)
print(response.json())BetaTester provides a file extension that allows you to store your files in the storage provider of your choice. To use the file extension, you will need to provide the following environment variables:
- FILE_CLIENT_TYPE: The file client you are using, currently only
localis supported - FILE_CLIENT_CONFIG: A string that contains the configuration for your file client. The format of this object is specific to the provider you are using.
- For
localthe format is a json obejct with the following keys:- save_path: The path to the directory where you want to store your files
- For
You can add other file proviers by:
- Adding a new class that inherits from FileClient. See local.py for an example.
- Updating __init__.py to return your new class when the
FILE_CLIENT_TYPEenvironment variable is set to the name of your new class. - Updating the FileCLientType enum to include your new client type
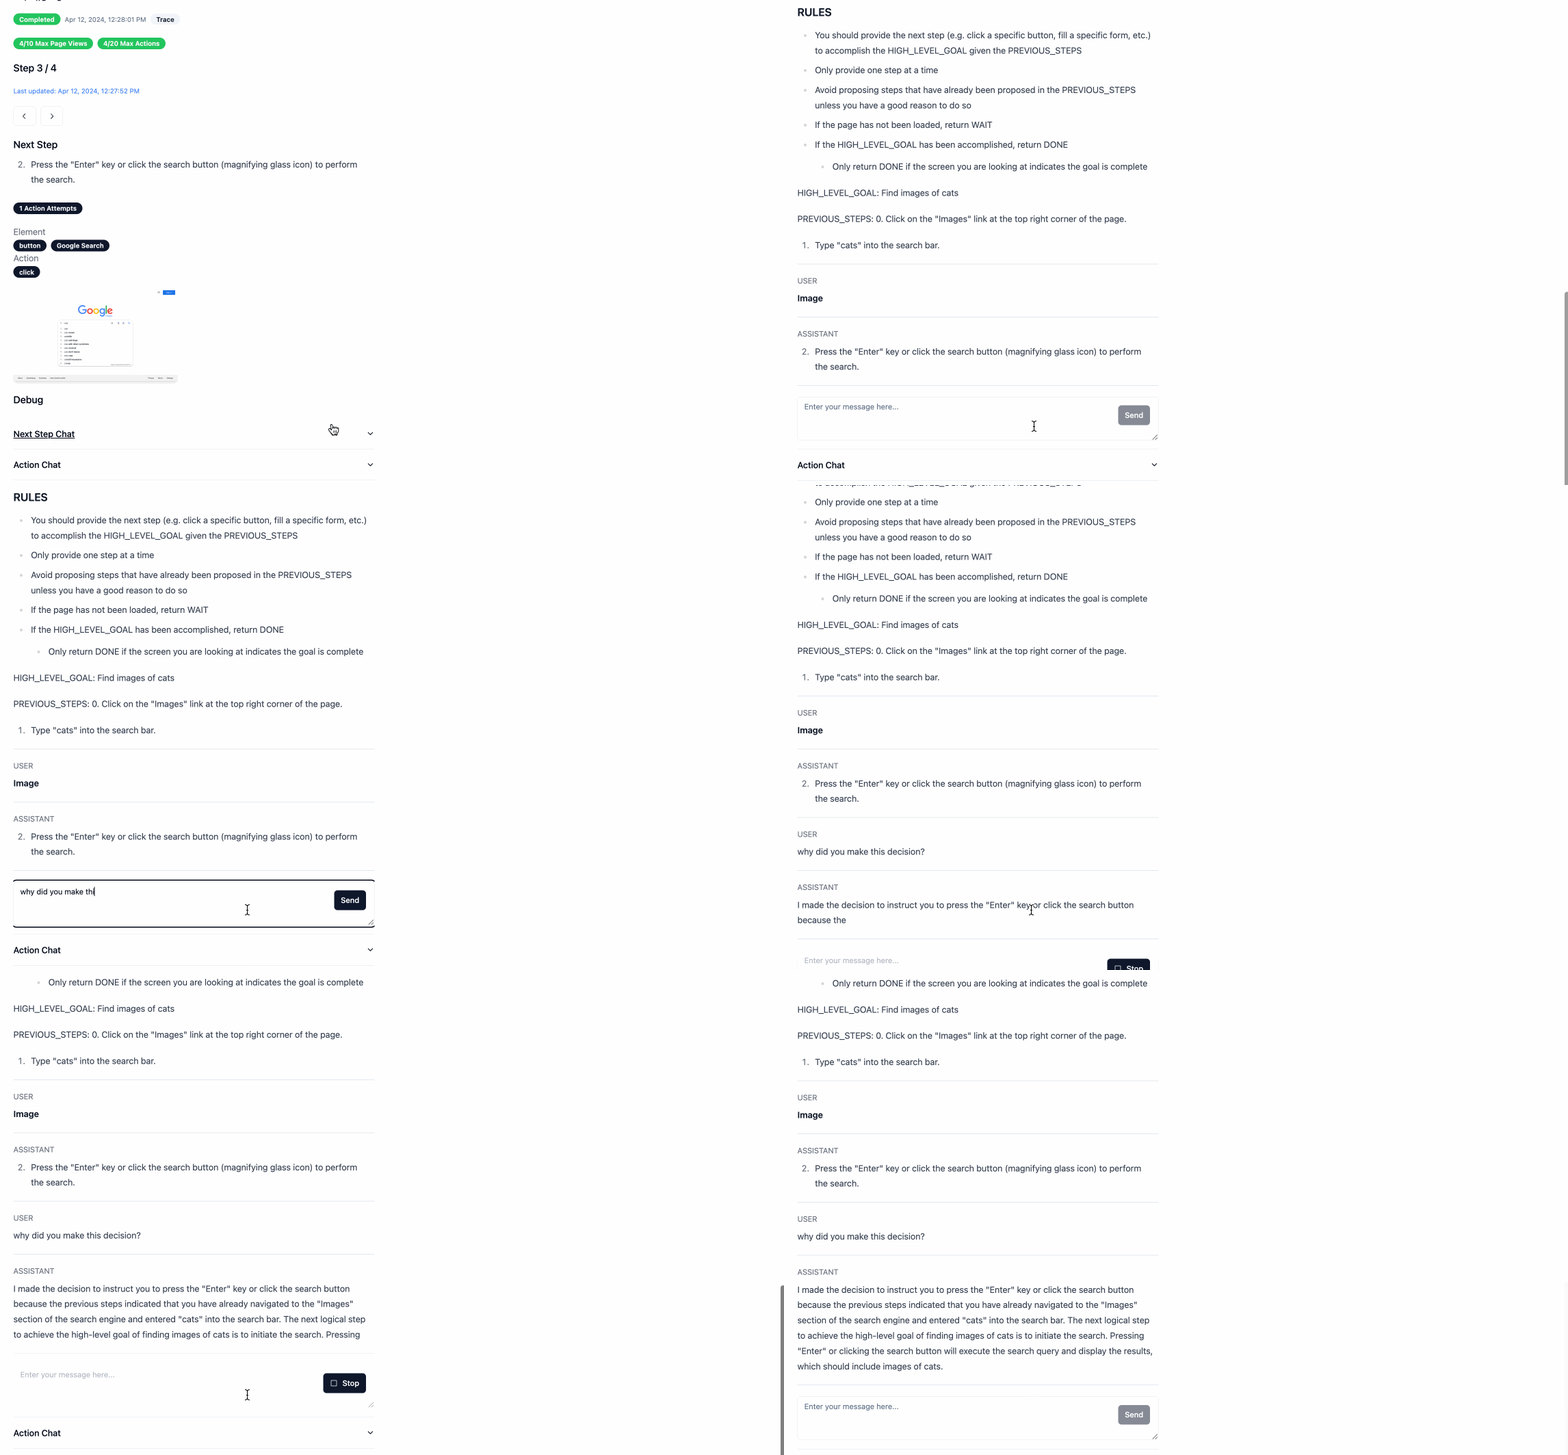
BetaTester will display the prompts used to run the test in the /scrape view. You can also continue the chat to understand why the bot made a particular decision.


