GitHub Actions is a continuous integration and continuous delivery (CI/CD) platform that allows you to automate your build, test, and deployment pipeline. You can create workflows that build and test every pull request to your repository, or deploy merged pull requests to production.
A workflow is a configurable automated process that will run one or more jobs. Workflows are defined by a YAML file checked in to your repository and will run when triggered by an event in your repository, or they can be triggered manually, or at a defined schedule.
During this UseCase we're going to:
- Use Github Actions to build different pipelines.
- Create a test pipeline using Terratest.
- Deploy IaC using Terraform.
-
Clone this repo in GitHub and create you own repository.
-
The first thing you’ll need to do before your GitHub Actions can run is to add your credentials to the repository. To do this you will need to follow these steps:
- Navigate to your repository and select the Settings tab.
- Once there you should see on the left a Secrets section third from the bottom of the list, click on that.
- Click on the New repository secret button.
- Add the next secrets:
user_id
api_fingerprint
token
-
The token secret is a personal github token.
-
We want to use a S3-Compatible Backend , read the documentation carefully. You need an OCI object storage bucket called "terraform-backend".
-
Create a "Customer Secret keys" also named as "Amazon S3 Compatibility API keys". A Customer Secret key consists of an Access Key/Secret key pair.
-
Add also the Custome Secret Keys variables to the previus ones:
access_key_id
secret_access_key
- We are going to deploy an ATP database, include the admin password:
adb_password
-
The pipeline configuration is defined in the directory .github/workflows, in this case we have created three different workdlows: plan.yaml, unit.yaml and apply.yaml
-
Add your api_private_key to the file user.pem in the key directory
-
Add your ssh public and ssh private keys in the key directory, they will be used to connect to the bastion.
-
Rename the file terraform.tfvars.template to terraform.tfvars and add the value of your tenancy_ocid
-
Define the values desired in the coa_demo.auto.tfvars ( mandatory required ssh public key and ssh private key file´s names and your compartment_ocid)
-
Go to settings of your repo, and active the use of workflows.(Settings-> Actions-> General-> Allow all actions and reusable workflows)
-
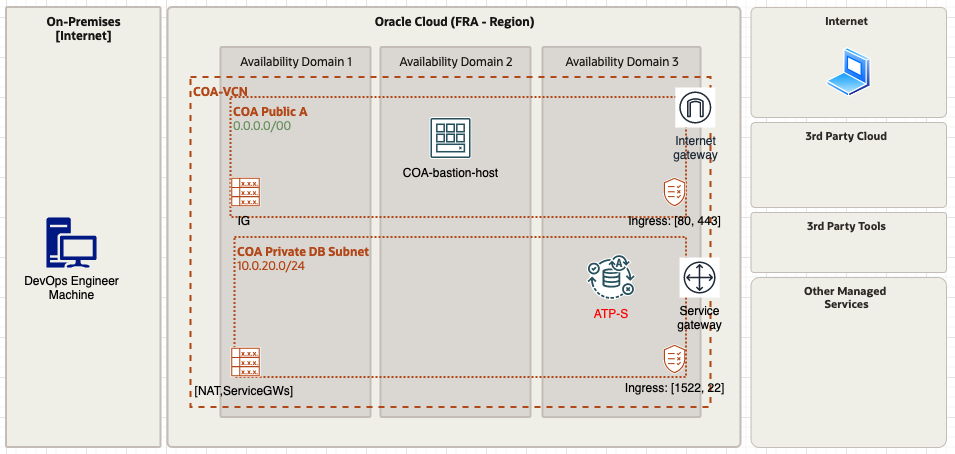
The terraform code included in this demo will deploy the next resources:
-
Create a new branch, make changes in the repo files and publish the changes to the new branch.
-
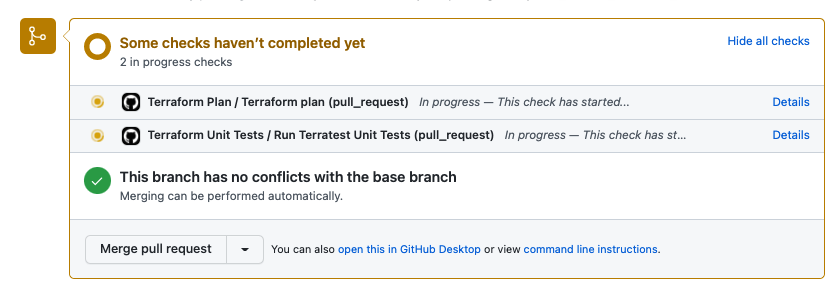
Open a "merge pull request" and check how the first two pipelines run:


-
This action will start the pipeline test and plan:
-
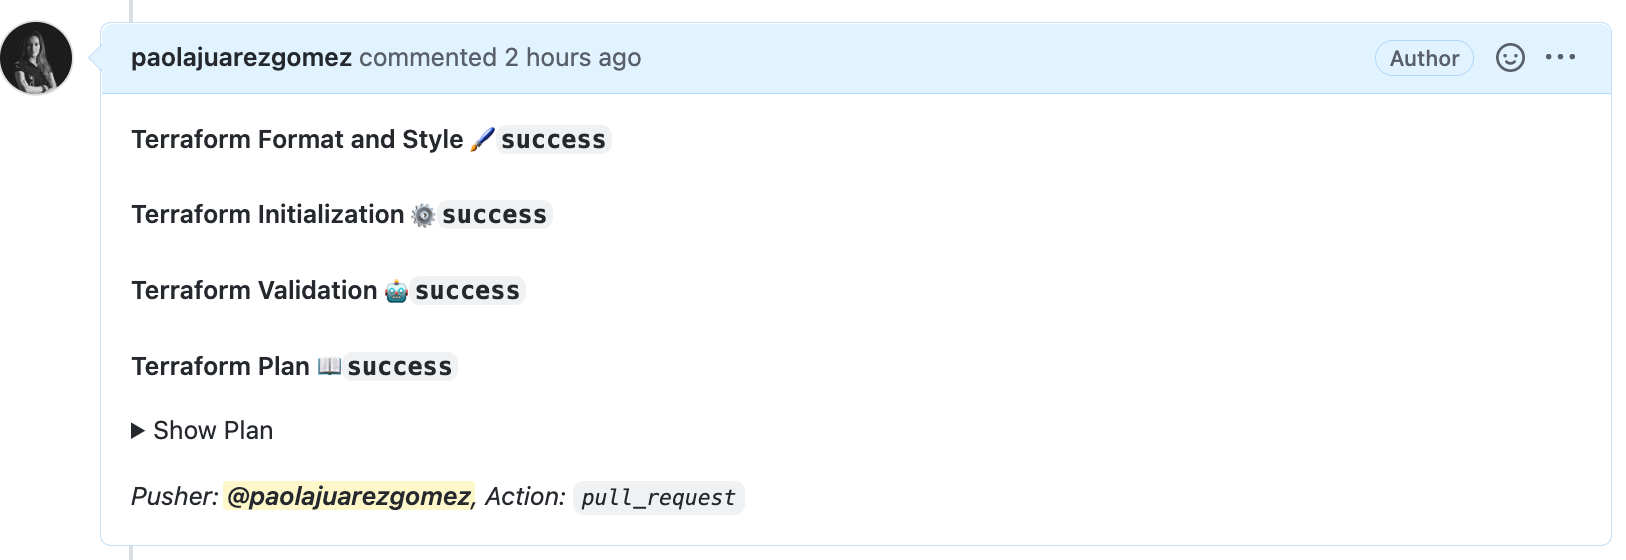
When the plan pipeline ends you can se the actions/github-script@v6 outcome, this allow you to review the plan outcome before approve the merge.


-
This is the outcome of actions/github-script@v6 for the test pipeline.

-
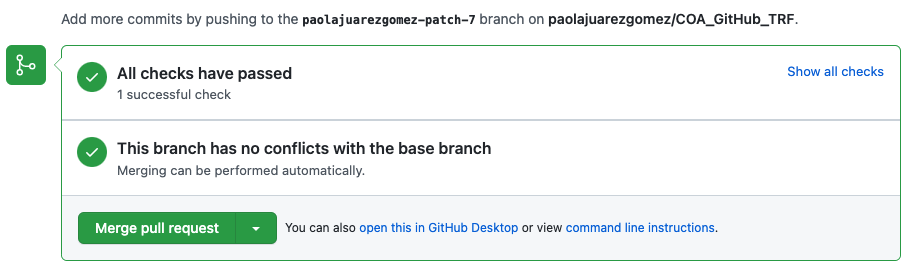
When you approve the merge, the apply pipeline will be automatically launched.
-
Check that now you can see the database and the rest of the resoruces provisioned in your compartment.

-
After the provisioning, the outcome of the apply step is showed in the merge request page.(Pull requests -> closed -> pull request created )

-
If we review tab "actions" , we can check the 3 different pipelines:

-
Remove manually (using OCI Console) all the resources created in this demo.


If you need help, ask us in the slack channel #iac-enablement