The goal of this jumpstart app is to provide a simple way to get started with Angular 2+ while also showing several key Angular features. The sample relies on the Angular CLI to build the application.
Looking for expert onsite Angular/TypeScript training? We've trained the biggest (and smallest :-)) companies around the world for over 15 years. For more information visit https://codewithdan.com.
- TypeScript version that relies on classes and modules
- Modules are loaded with System.js
- Defining routes including child routes and lazy loaded routes
- Using Custom Components including custom input and output properties
- Using Custom Directives
- Using Custom Pipes
- Defining Properties and Using Events in Components/Directives
- Using the Http object for Ajax calls along with RxJS observables
- Working with Utility and Service classes (such as for sorting and Ajax calls)
- Using Angular databinding Syntax [], () and [()]
- Using template-driven and reactive forms functionality for capturing and validating data
- Optional: Webpack functionality is available for module loading and more (see below for details)
- Optional: Ahead-of-Time (AOT) functionality is available for a production build of the project (see below for details)
-
Install the latest LTS version of Node.js from https://nodejs.org. IMPORTANT: The server uses ES2015 features AND the Angular CLI so you need a current version of Node.js.
-
Run
npm installto install app dependencies -
Run
ng build --watchto build and bundle the code -
Run
npm startin a separate terminal window to build the TypeScript, watch for changes and launch the web server -
Go to http://localhost:8080 in your browser
Simply clone the project or download and extract the .zip to get started.
Once the app is running you can play around with editing customers after you login. Use any email address and any password that's at least 6 characters long (with 1 digit).
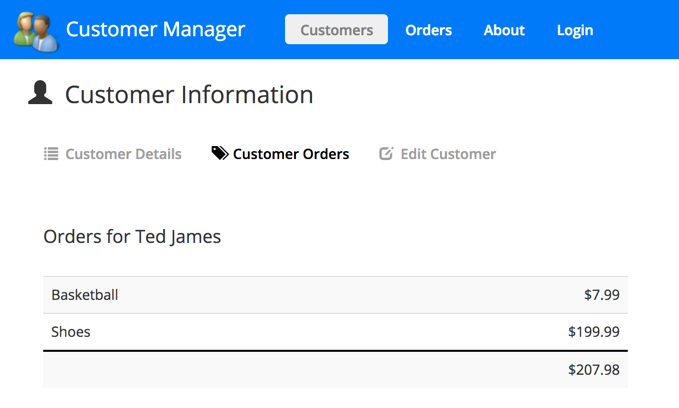
Here are a few screenshots from the app:
-
Install the latest version of Deno from https://deno.land
-
Run
npm installto install the Angular dependencies -
Run
ng buildto build and bundle the code -
cdinto./denoand run the following command:deno run --allow-net --allow-read --unstable server.ts -
Go to http://localhost:8080 in your browser
This application includes Angular Playground (http://www.angularplayground.it) which provides a great way to isolate components in a sandbox rather than loading the entire application to see a given component. To run the playground run the following command:
npm run playground
Then open a browser and visit http://localhost:4201 and follow the directions there (or visit their website for more information).
- Install Docker Desktop from https://www.docker.com/get-started
- Start Docker and enable Kubernetes in the Docker Desktop preferences/settings
- Run
docker-compose buildto create the images - Run
kubectl apply -f .k8sto start Kubernetes - Visit
http://localhost - Stop Kubernetes using
kubectl delete -f .k8s
If you'd like to use the Skaffold tool to run the project in Kubernetes, install it, and run the following command:
skaffold dev
To generate the skaffold.yaml file that's included in the project the following command was run and the image context paths it defines were modified:
skaffold init -k '.k8s/*.yml' \
  -a '{"builder":"Docker","payload":{"path":".docker/nginx.dev.dockerfile"},"image":"nginx-angular-jumpstart"}' \
  -a '{"builder":"Docker","payload":{"path":".docker/node.dockerfile"},"image":"node-service-jumpstart"}'
If you wanted to generate the initial Kubernetes manifest files from an existing docker-compose.yml file you can use the following command. It uses the Kompose tool behind the scenes to create the YAML files
skaffold init --compose-file docker-compose.yml \
  -a '{"builder":"Docker","payload":{"path":".docker/nginx.dev.dockerfile"},"image":"nginx-angular-jumpstart"}' \
  -a '{"builder":"Docker","payload":{"path":".docker/node.dockerfile"},"image":"node-service-jumpstart"}'
Check out my post on Getting Started with Azure Static Web Apps.
Dan Wahlin
Twitter: @DanWahlin
Resources mentioned:
- https://github.com/danwahlin/angular-jumpstart
- https://kubernetes.io/docs/reference/generated/kubectl/kubectl-commands
- https://kubernetes.io/docs/reference/generated/kubernetes-api/v1.13/#-strong-api-overview-strong-
- https://kubernetes.io/docs/reference/kubectl/cheatsheet/
-
Container Orchestration Options (Docker Swarm, Kubernetes)
-
Using Docker Compose
docker-compose build docker-compose up docker-compose down -
Docker Stacks --> Docker Desktop --> Kubernetes
docker stack deploy -c docker-compose.yml angular-jumpstart docker stack ls docker stack rm angular-jumpstart -
Deploying Containers to Kubernetes
kompose convert -h
kompose convert -f docker-compose.yml -o ./[your-folder-goes-here]
Tweak the generated YAML. Then once ready run:
kubectl apply -f [your-folder-name]
My Kubernetes for Developers video courses on Pluralsight.com:


