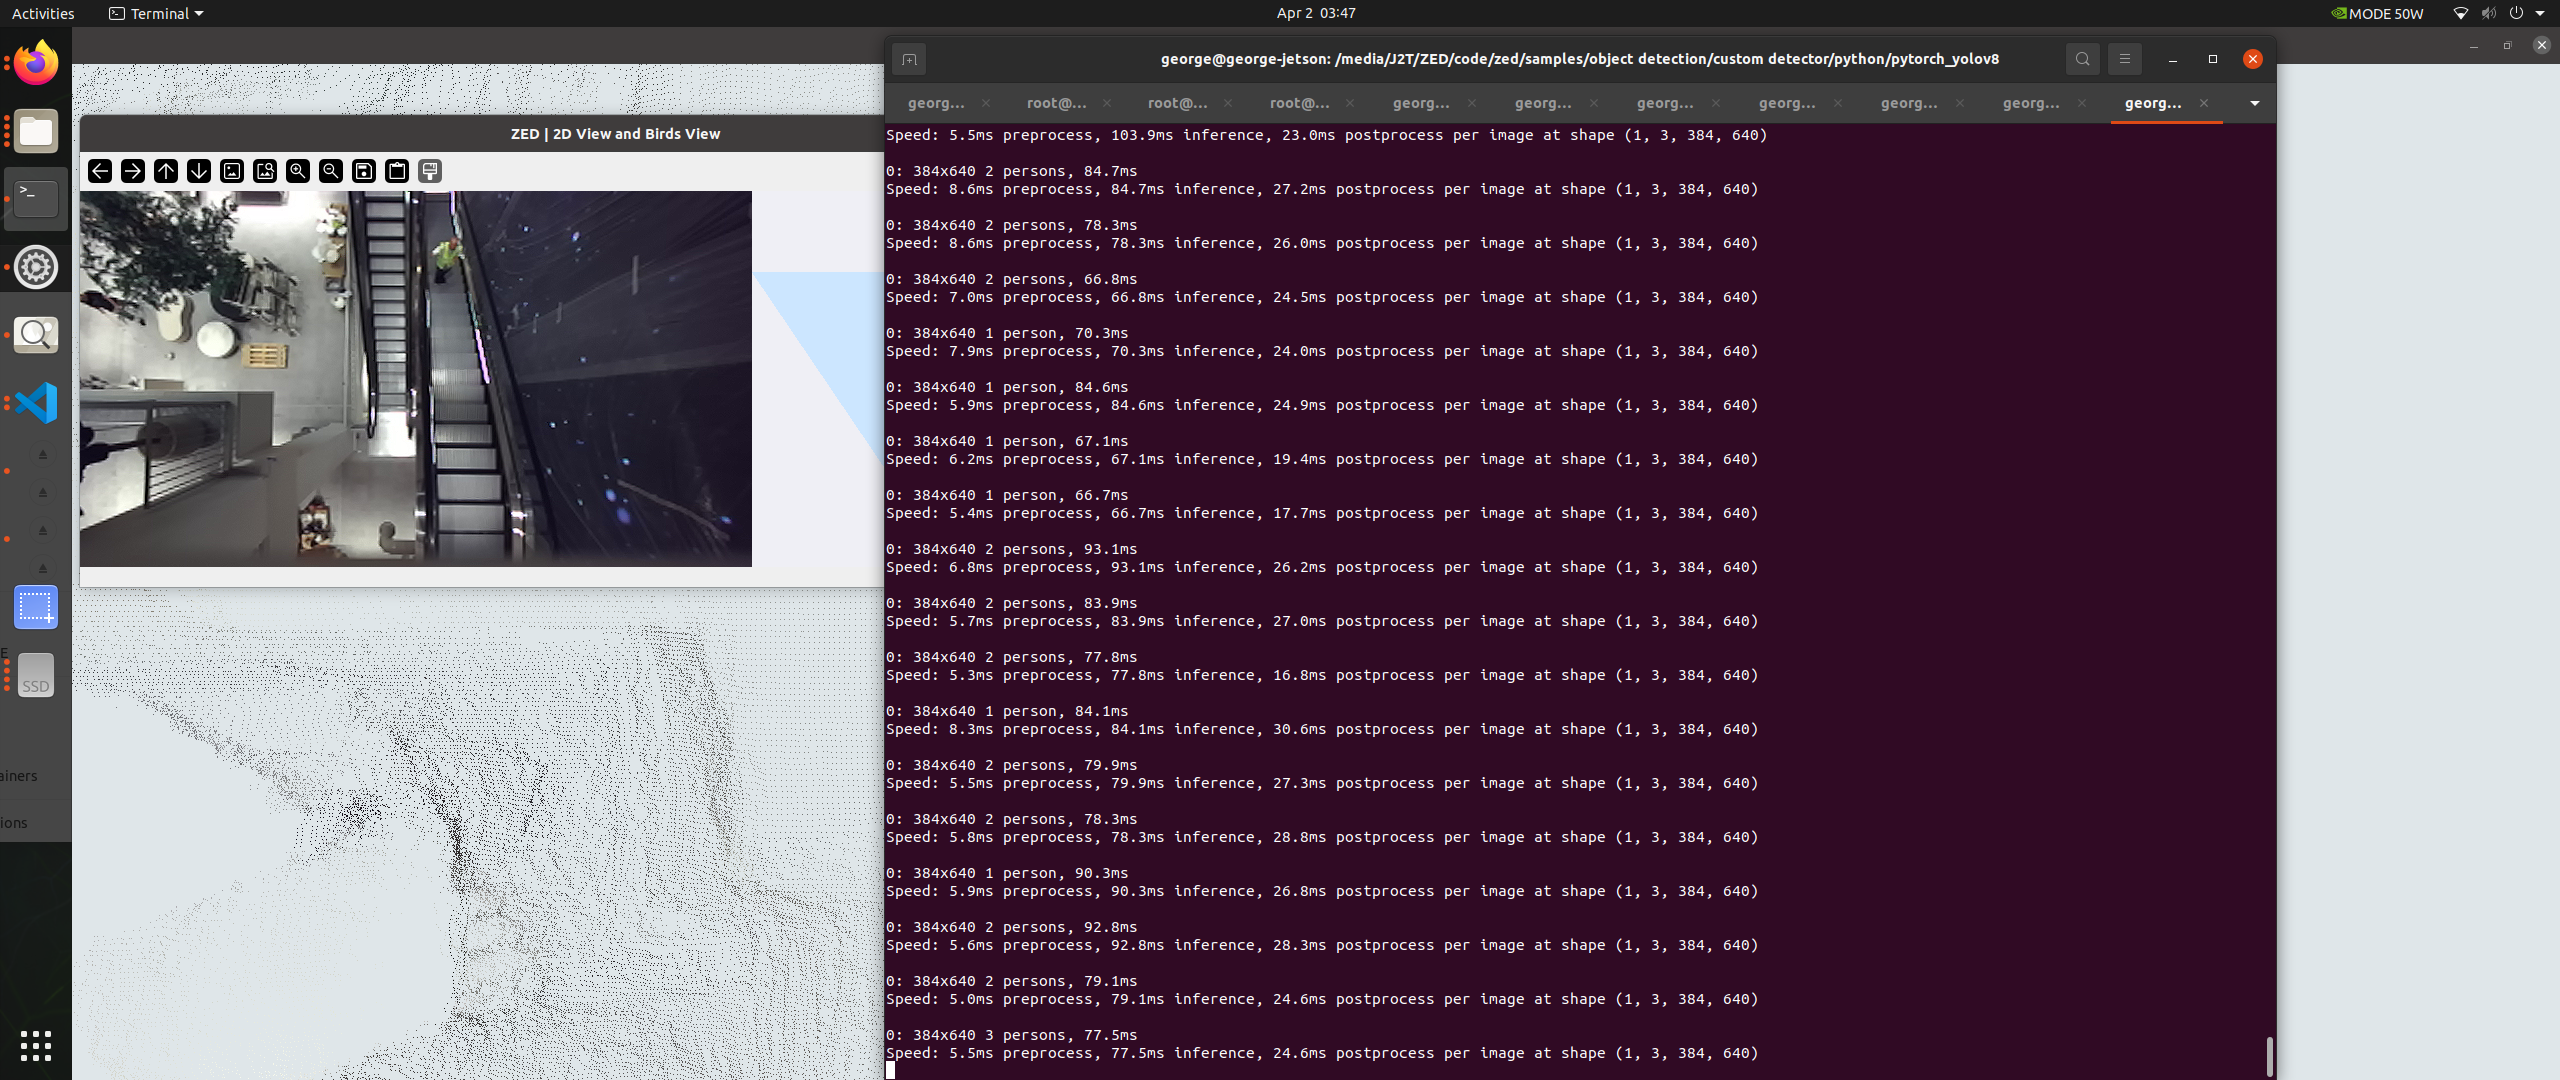
SparkFun-NVIDIA-AI-Innovation-Challenge People Tracking on Escalators code submission.
All the following guides have been developed on the following setup:
model: Jetson AGX Orin Developer Kit - Jetpack 5.1.2 [L4T 35.4.1]
NV Power Mode[3]: MODE_50W
Serial Number: [XXX Show with: jetson_release -s XXX]
Hardware:
 - P-Number: p3701-0005
 - Module: NVIDIA Jetson AGX Orin (64GB ram)
Platform:
 - Distribution: Ubuntu 20.04 focal
 - Release: 5.10.120-tegra
jtop:
 - Version: 4.2.6
 - Service: Inactive
Libraries:
 - CUDA: 11.4.315
 - cuDNN: 8.6.0.166
 - TensorRT: 8.5.2.2
 - VPI: 2.3.9
 - Vulkan: 1.3.204
 - OpenCV: 4.5.4 - with CUDA: NO
This repo is mainly aimed as a set of independent guides to novice to intermediate developers. It assumes familiarity with command line basics, Python basics and Computer Vision basics.
The following guides are available:
- How to setup an M.2 drive on NVIDIA Jetson
- How to setup ZED camera python bindings
- How to setup ZED camera realtime 3D point cloud processing on NVIDIA Jetson (WIP)
- How to setup CUDA accelerated YOLOv8 on NVIDIA Jetson
- How to prototype using the NVIDIA Generative AI on NVIDIA Jetson
- How to create a custom YOLOv8 dataset and model using Generative AI models on NVIDIA Jetson
- Showcase: tracking people on escalators to drive beautiful real-time generative graphics in retail spaces
To keep things tidy let's start by creating and activating a virtual environment first:
- start by creating a virtual environment: e.g.
virtualenv env_jetson(name yours as preferred. ifvirtualenvisn't availablepip install virtualenvironmentfirst ) - activate the virtual environment:
source env_jetson/bin/activate
This is optional, however recommended if you would like to try the many awesome NVIDIA Jetson Generative AI Lab Docker images which can take up considerable space.
Your M.2 drive may include a radiator plate which is recommended.
Here is a generic guide for setting up the drive:
- place the first adhesive tape layer to the enclosure
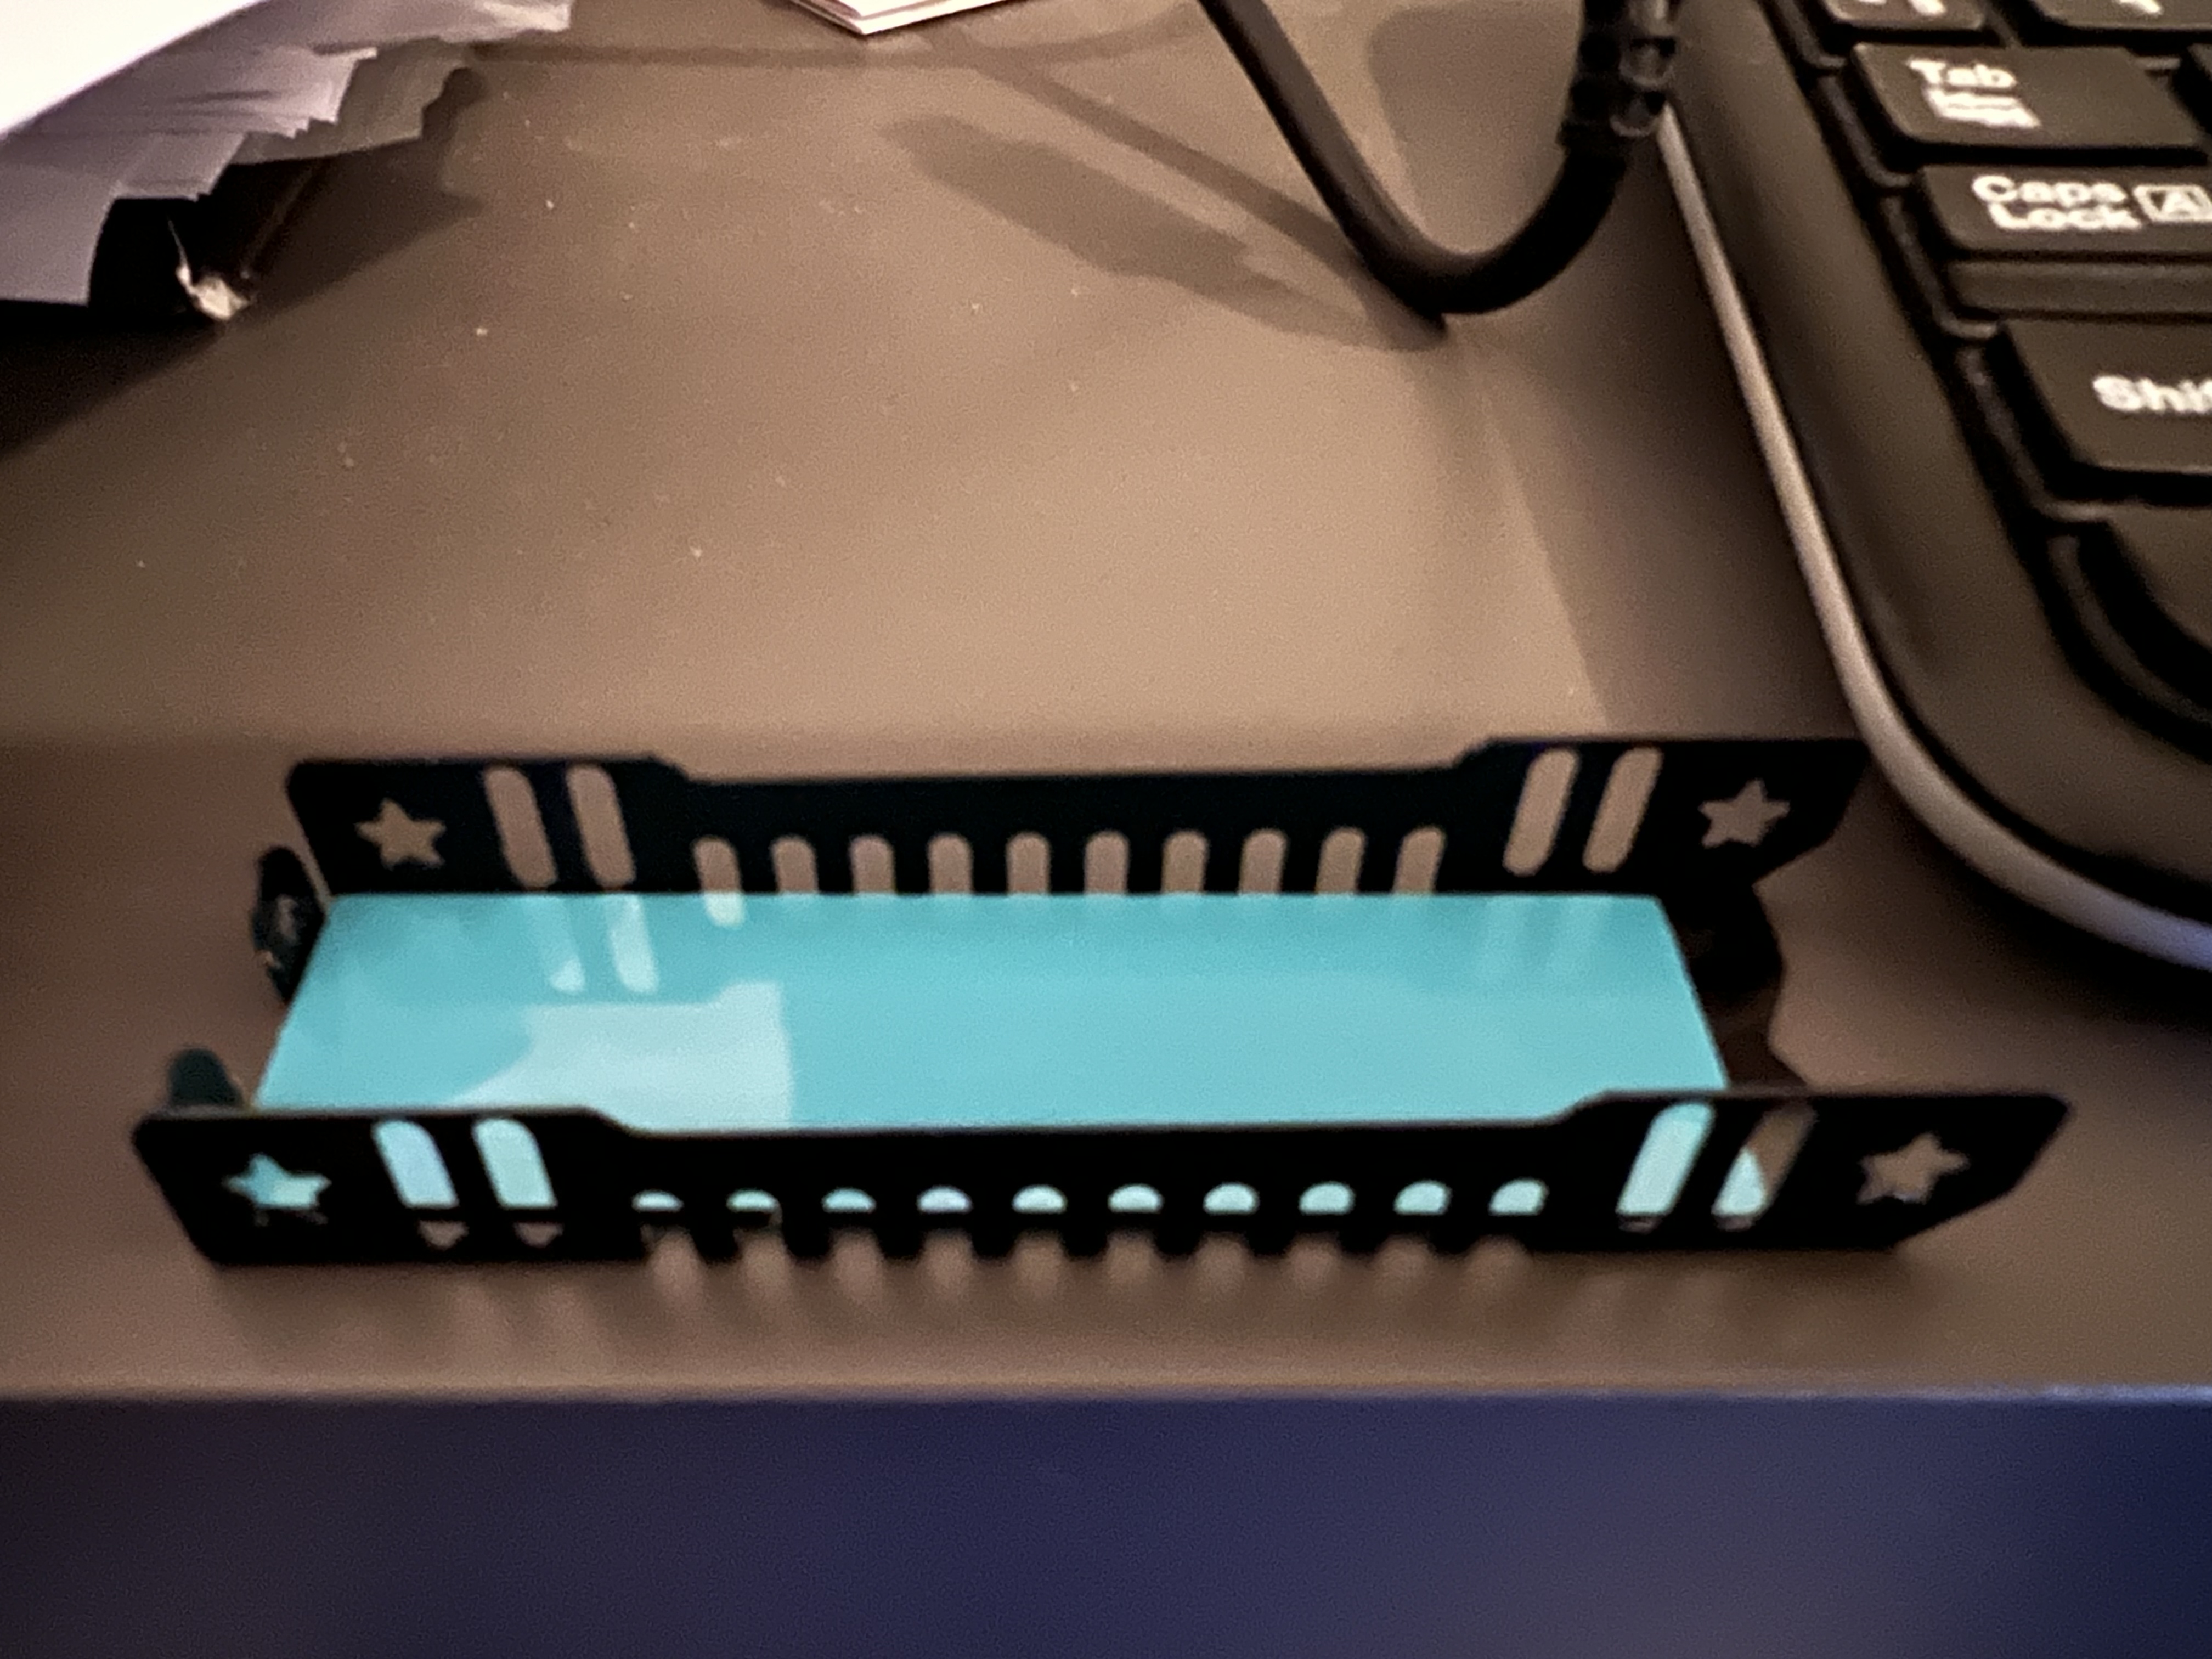
- place the M.2 drive on top of the adhesive layer
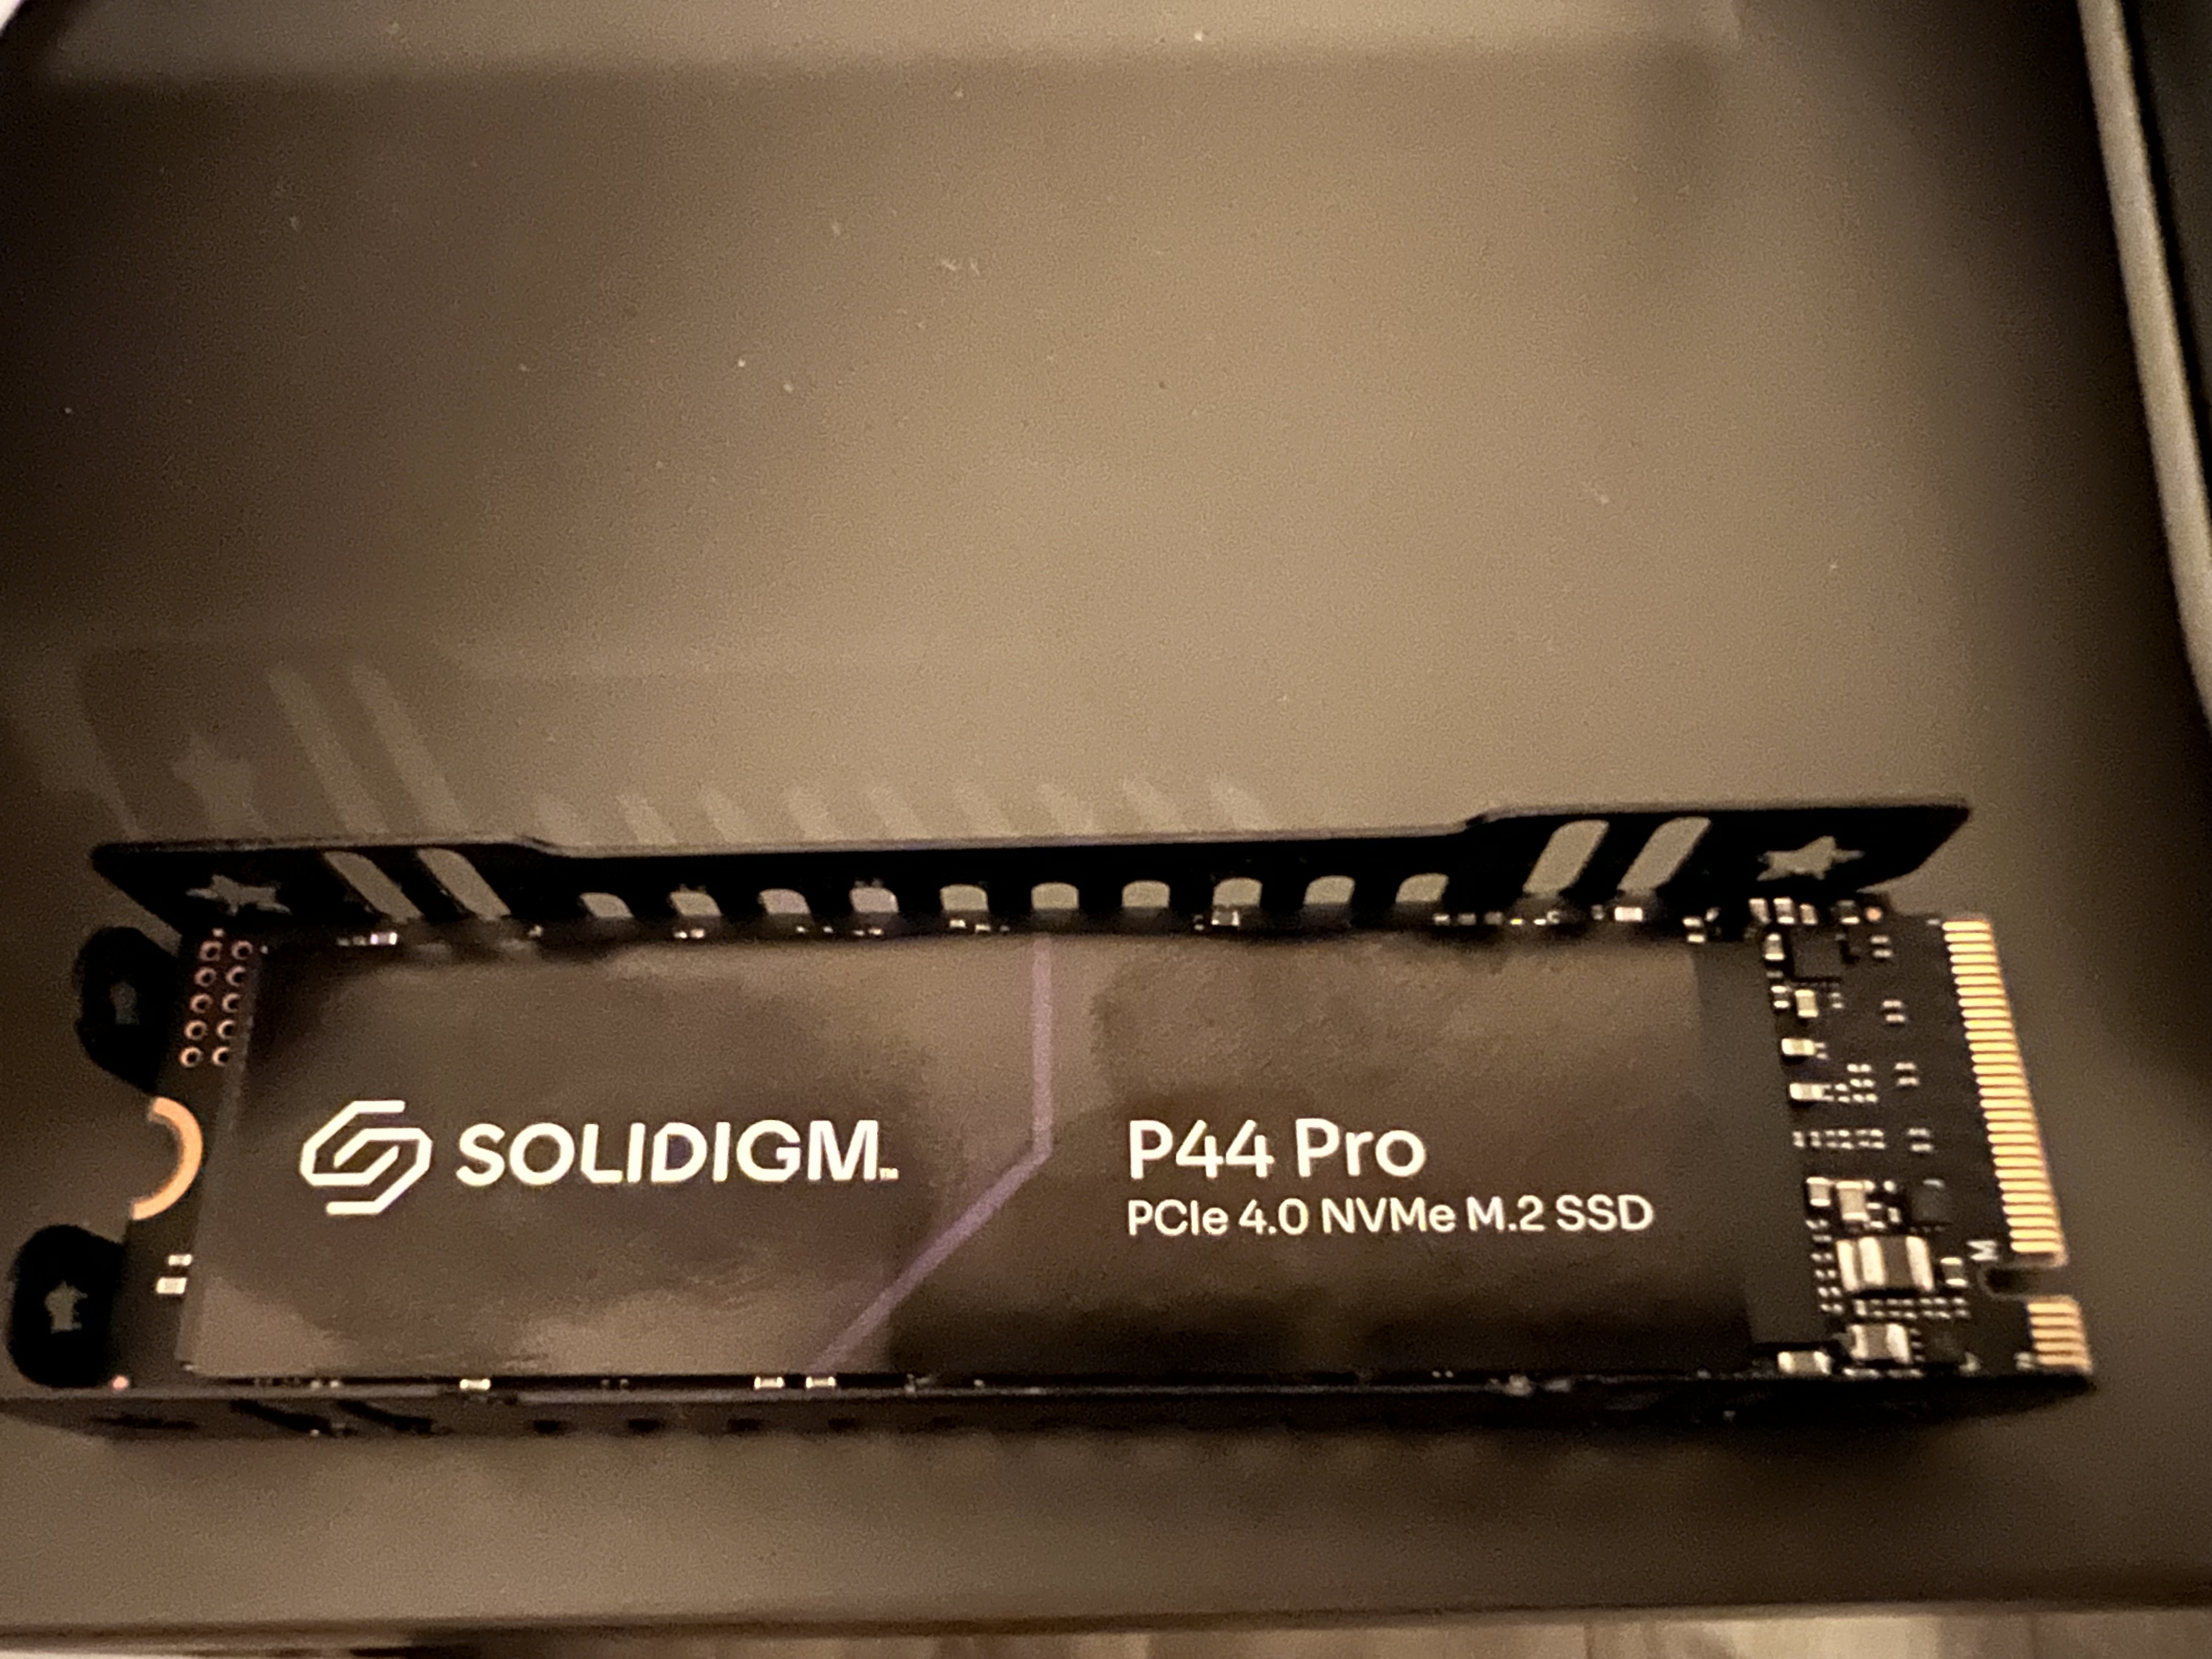
- place the second adhesive layer on top of the M.2 drive
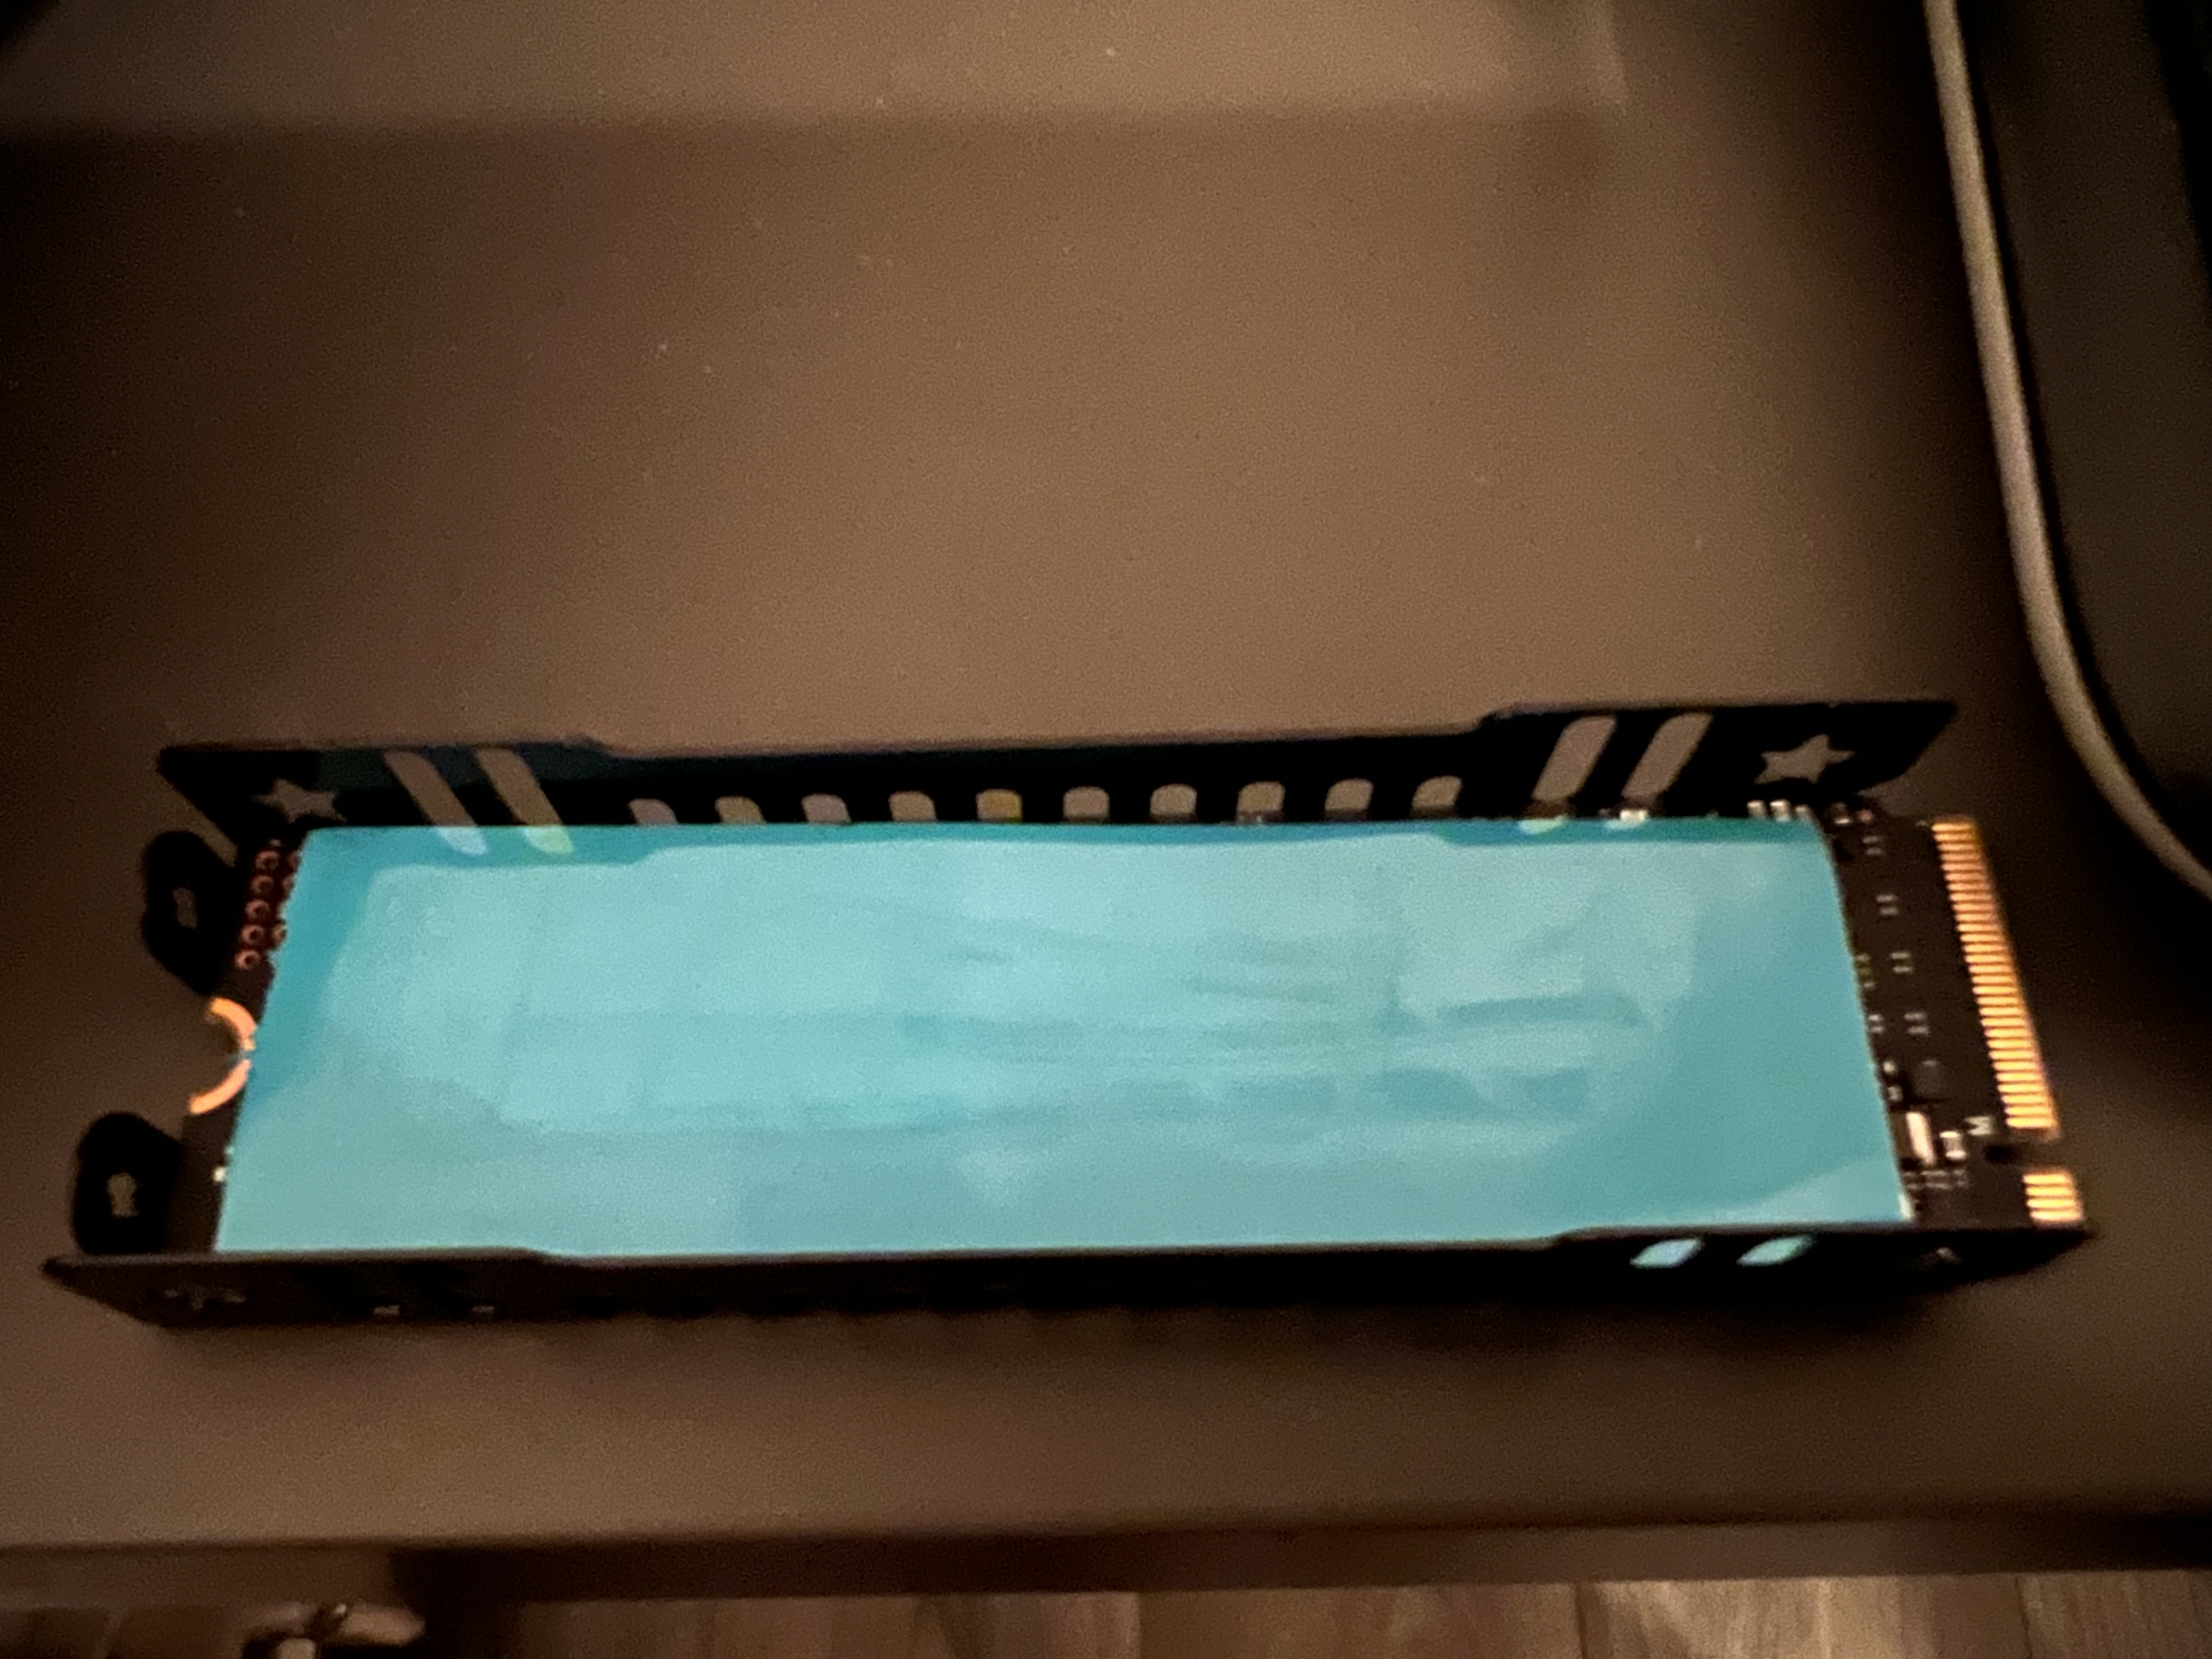
- place the radiator on top of the second adhesive layer
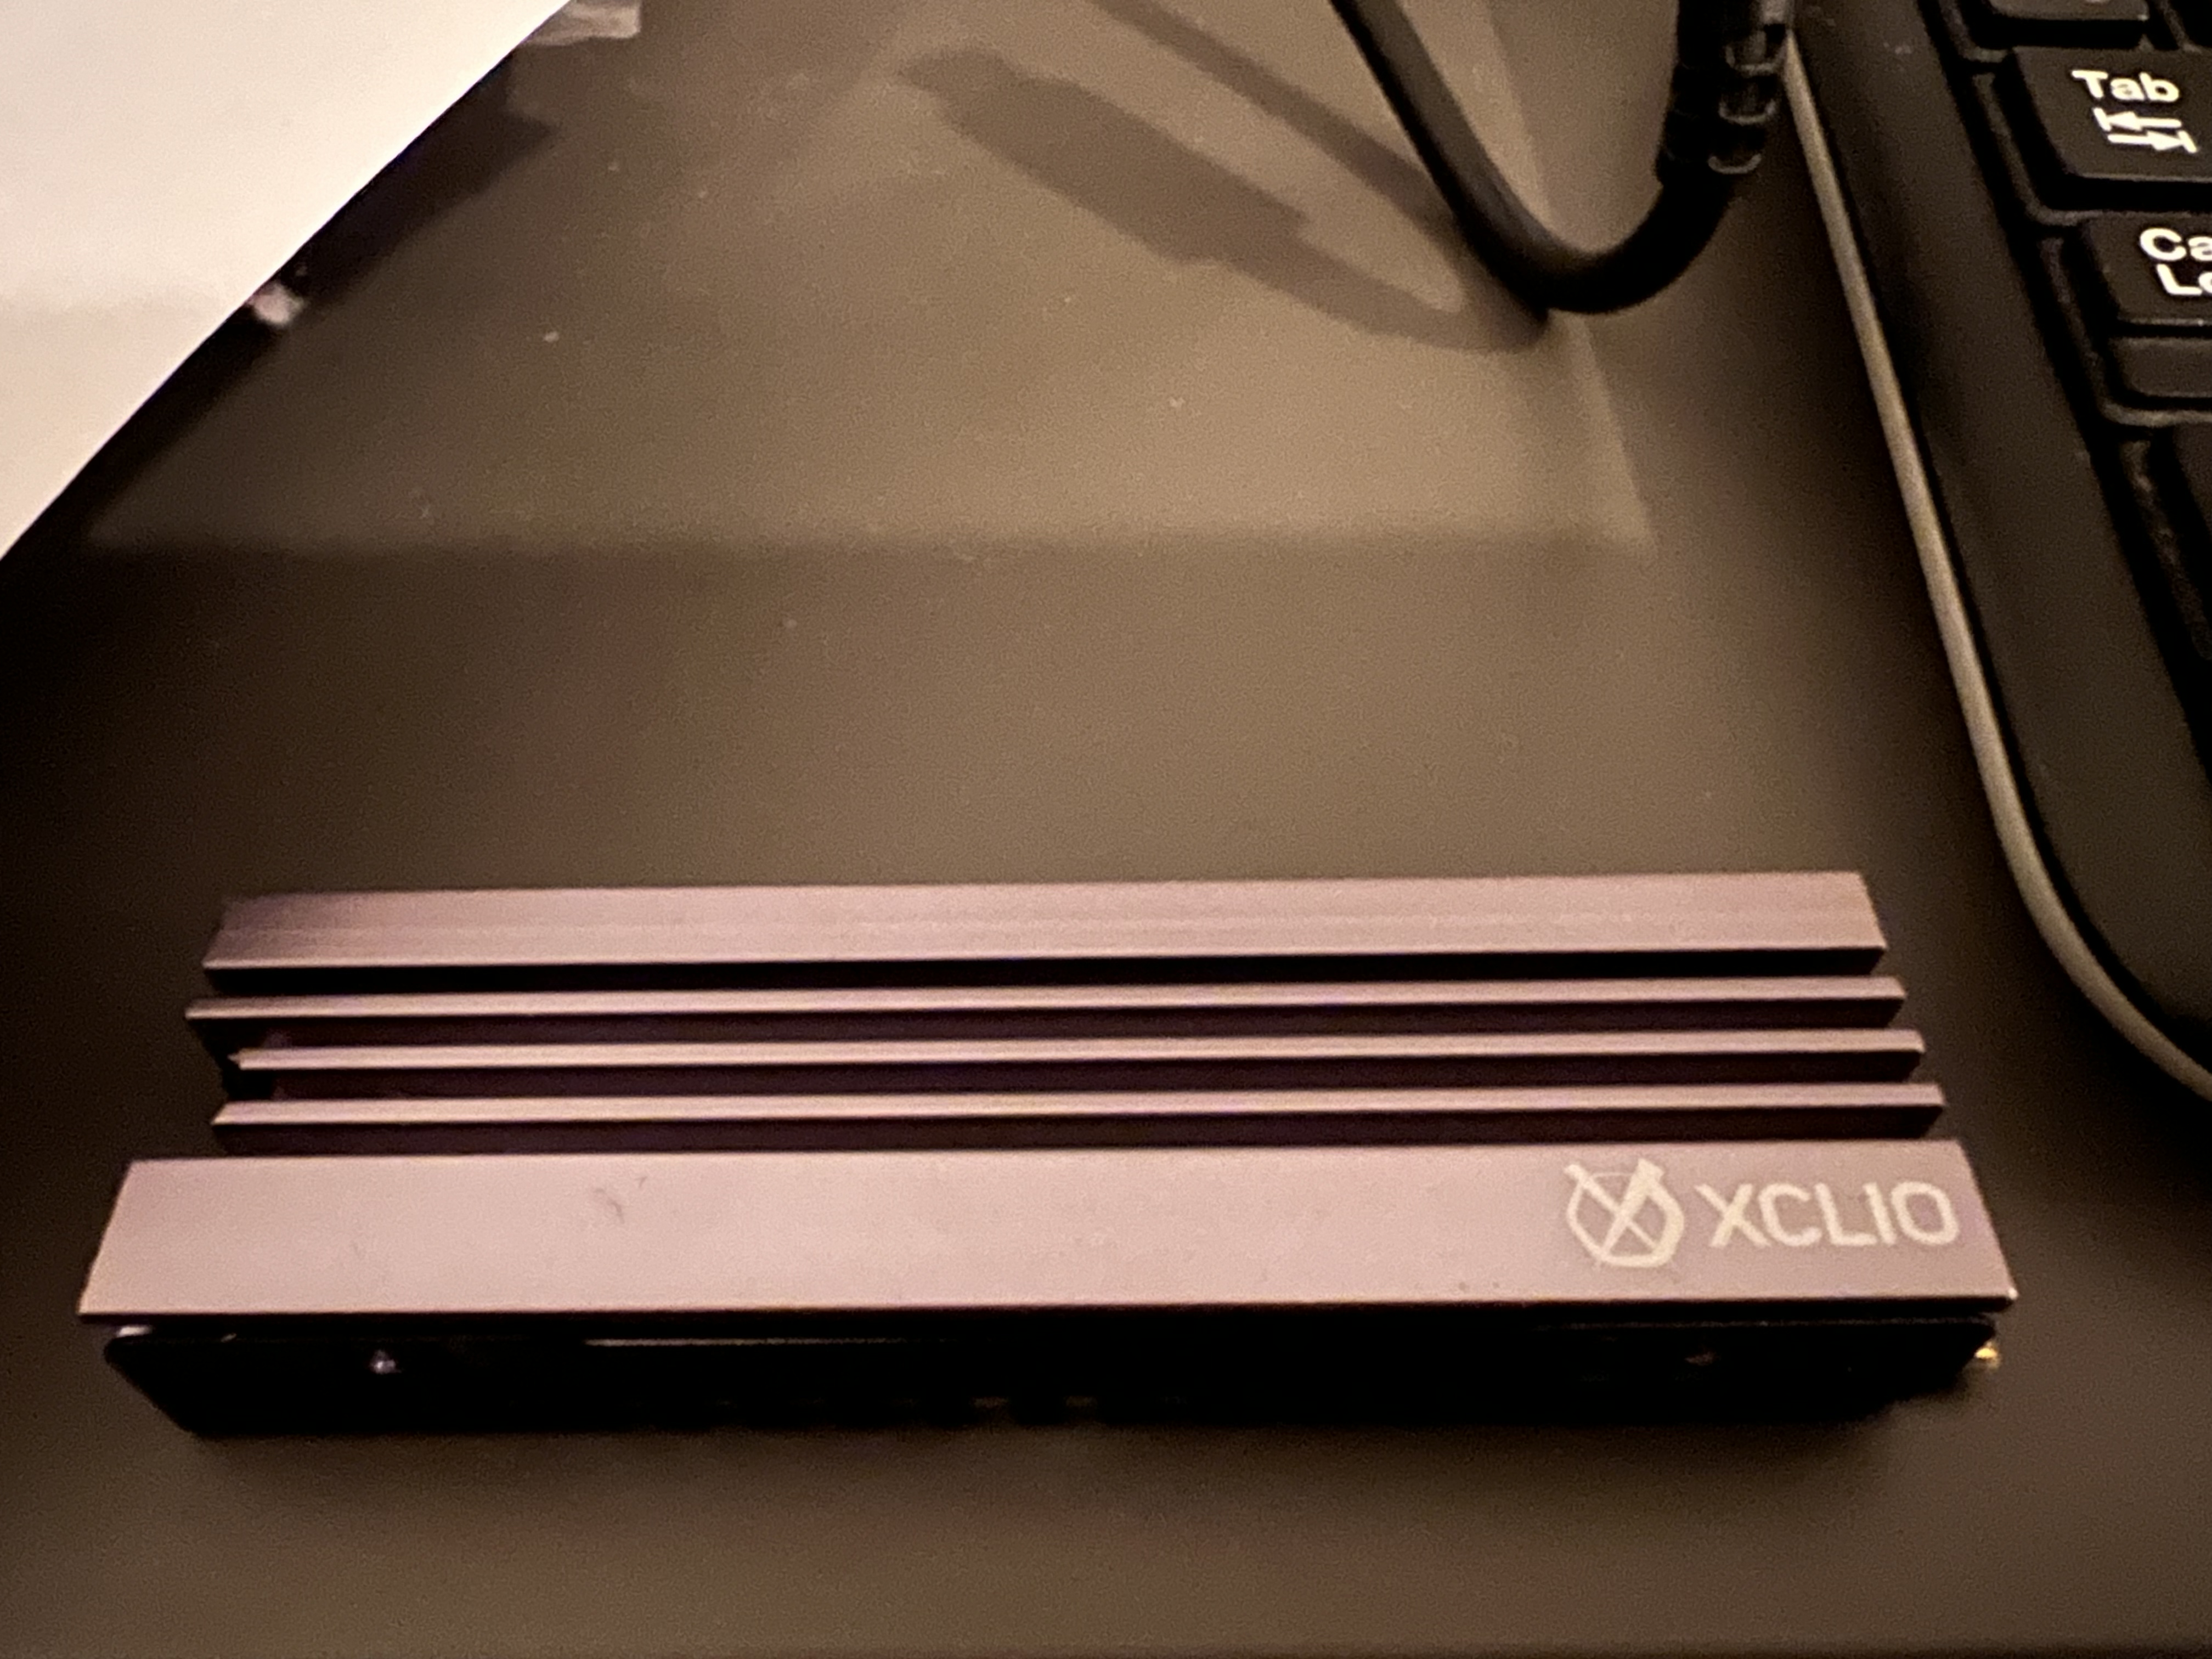
- insert the M2. drive into one of the two M.2 slots available. (making note of the end with the
pins) then gently lower it and screw the drive in place.
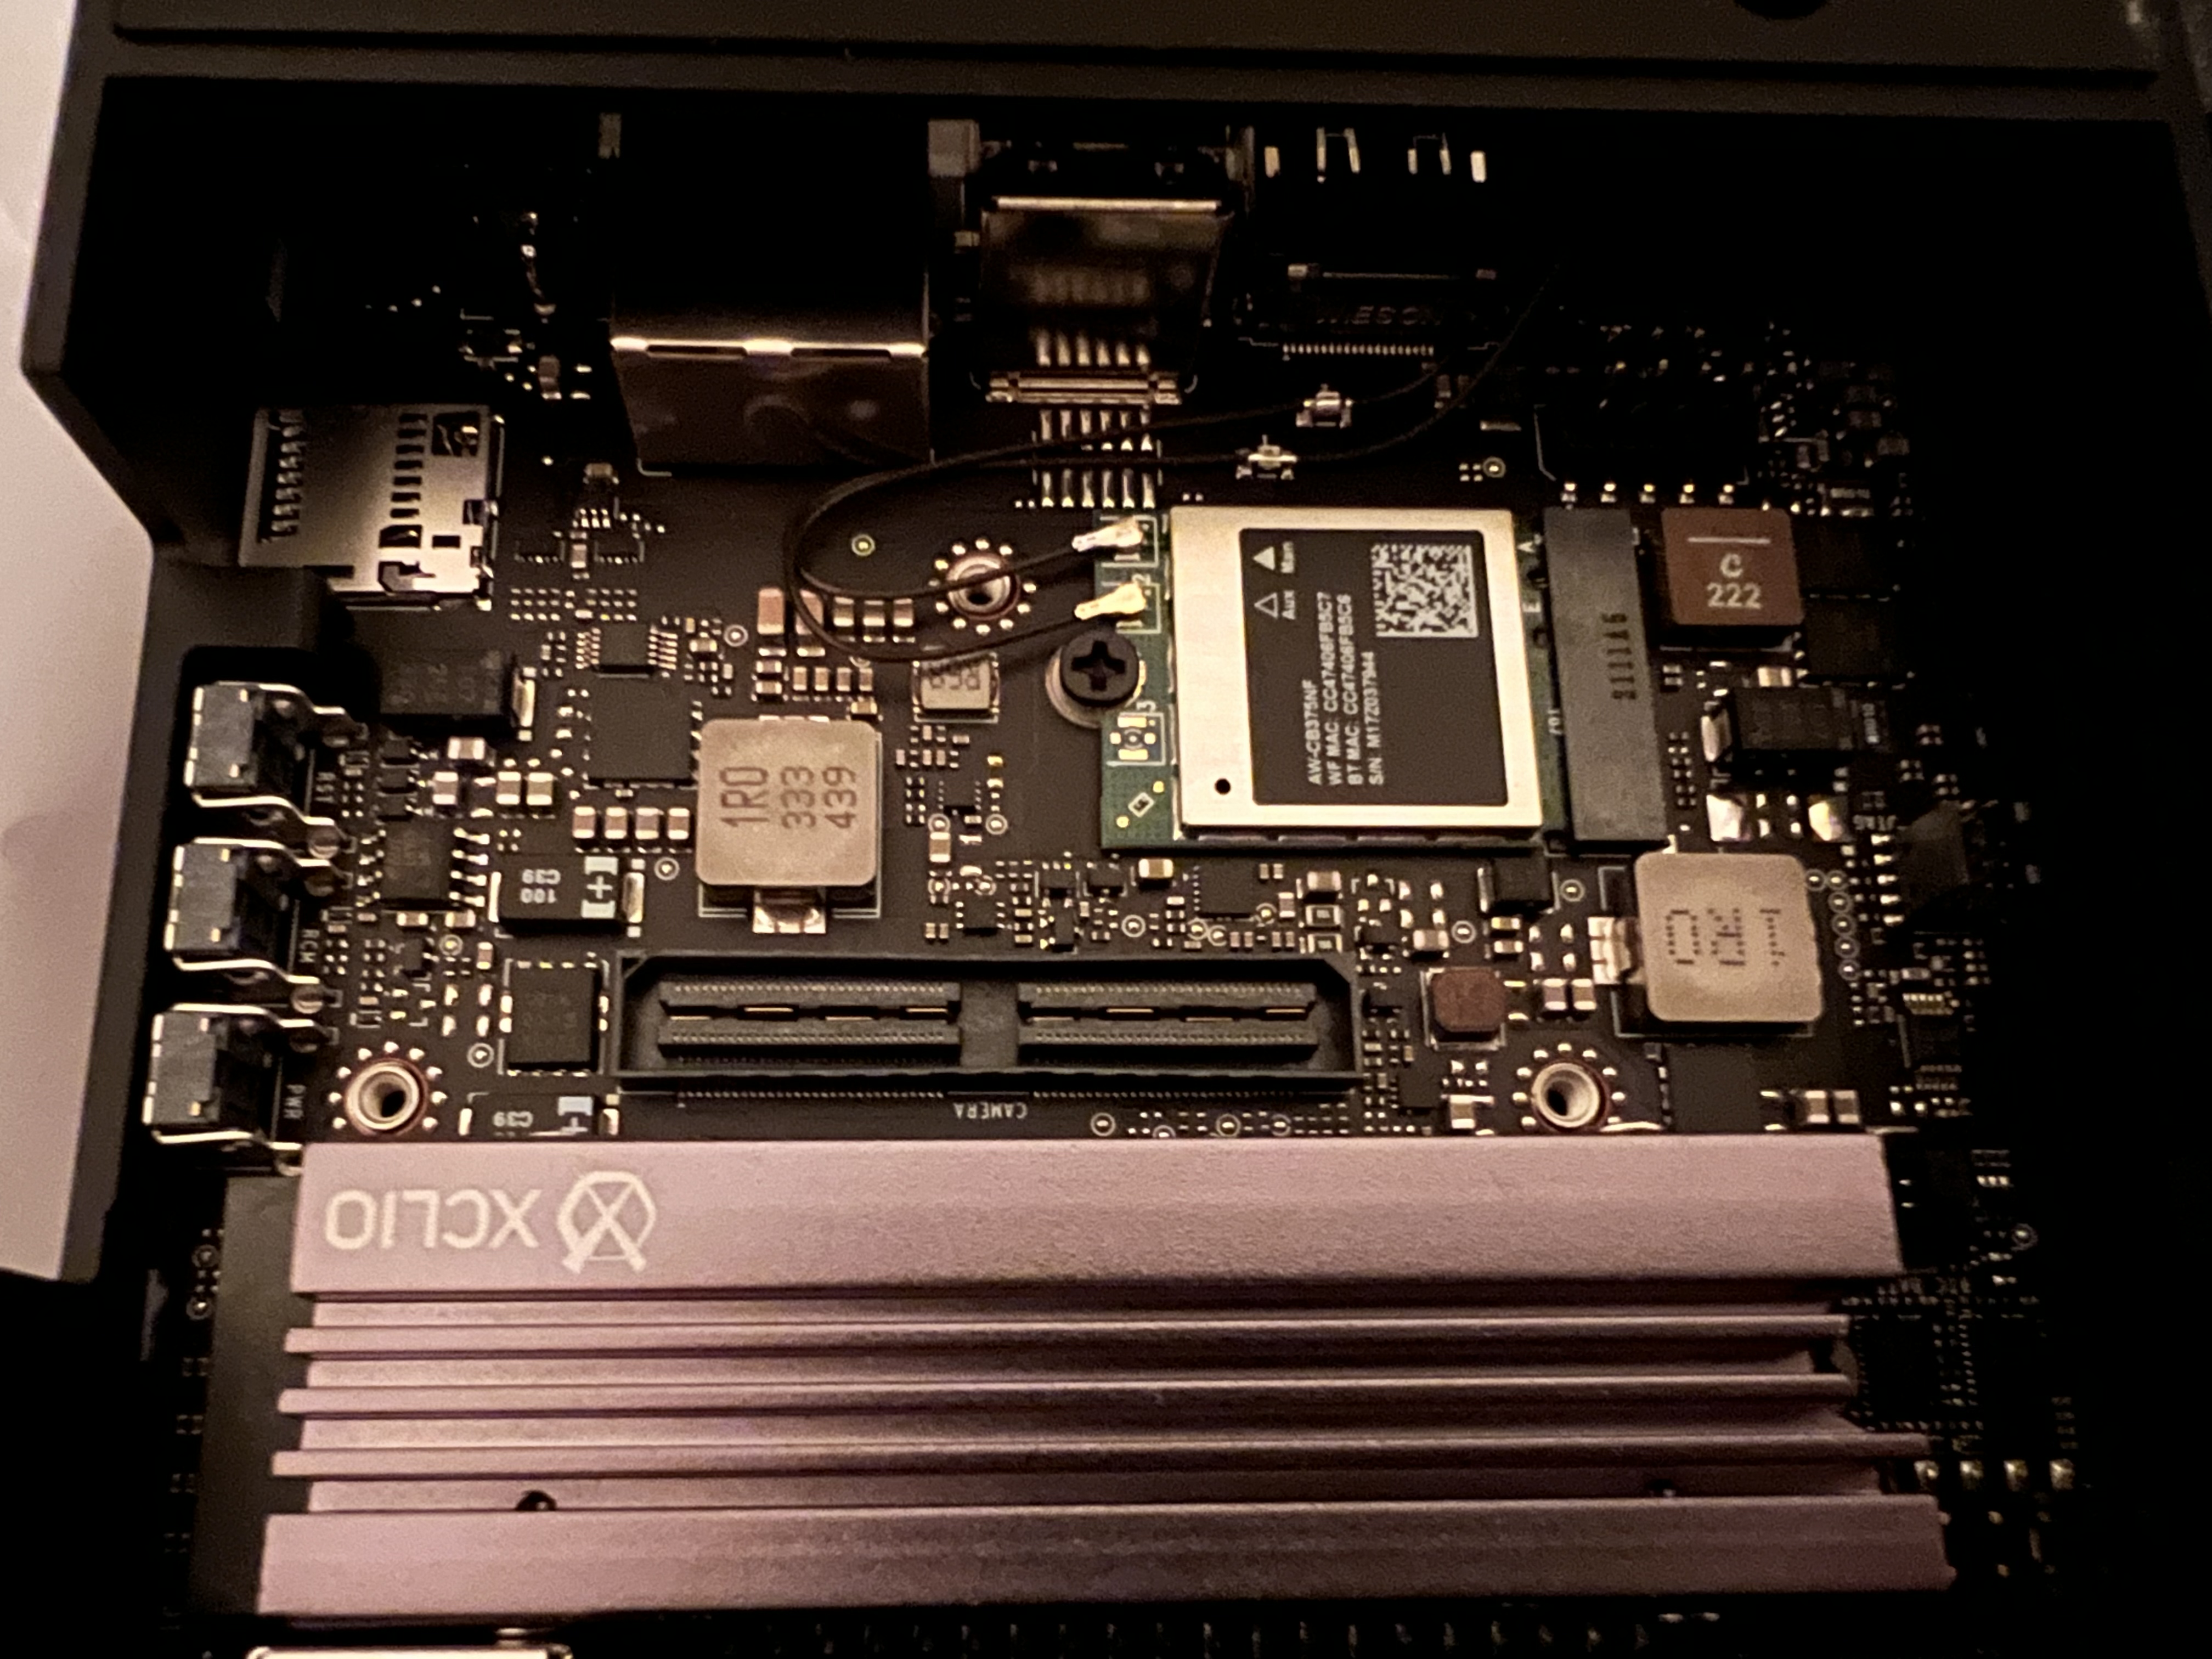
(Don't forget to Mount at system startup)
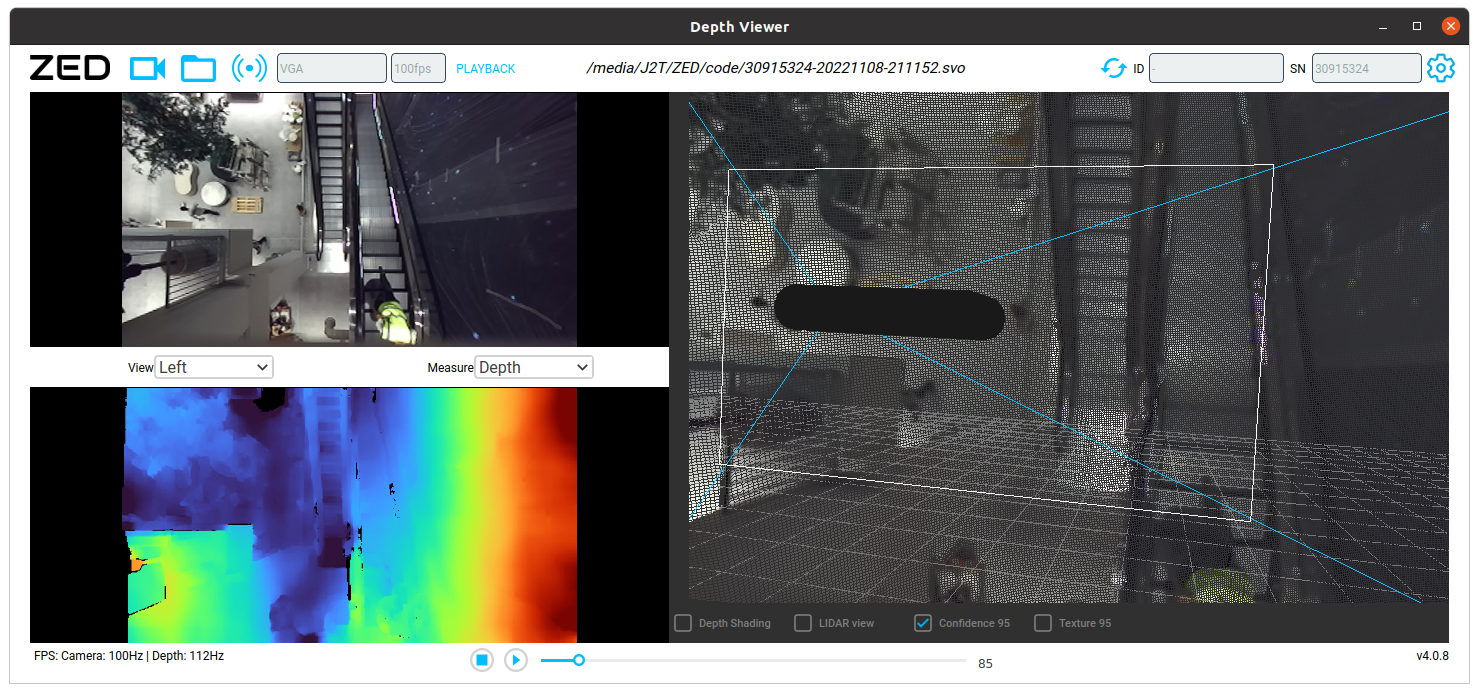
This tutorial is mostly useful that have a ZED camera or would like to use the ZED sdk with a pre-recorded file (.svo extension). (For those that used other types of depth sensors the .svo would have a rough equivalent with Kinect Studio recordings, .oni OpenNI files, Intel RealSense .bag files, etc.).
In general when working with cameras it's a good idea to have recordings so prototyping can happen without being blocked by access to hardware or resource to move in front of the camera often.
Remember to activate virtual environment prior to running the installer if you don't the pyzed module installed globally
The latest version of the ZED SDK (at the time of this writing 4.0) is available here including for Jetson:
- ZED SDK for JetPack 5.1.2 (L4T 35.4) 4.0.8 (Jetson Xavier, Orin AGX/NX/Nano, CUDA 11.4)
- ZED SDK for JetPack 5.1.1 (L4T 35.3) 4.0.8 (Jetson Xavier, Orin AGX/NX/Nano, CUDA 11.4)
- ZED SDK for JetPack 5.1 (L4T 35.2) 4.0.8 (Jetson Xavier, Orin AGX/NX 16GB, CUDA 11.4)
- ZED SDK for JetPack 5.0 (L4T 35.1) 4.0.8 (Jetson Xavier, Orin AGX, CUDA 11.4)
- ZED SDK for JetPack 4.6.X (L4T 32.7) 4.0.8 (Jetson Nano, TX2/TX2 NX, CUDA 10.2)
Before installation:
To install:
- download the relevant .run file for your Jetson
- navigate to the folder containing it: e.g.
cd ~/Downloads - make the file executable: e.g.
chmod +x ZED_SDK_Tegra_L4T35.4_v4.0.8.zstd.run - run the installer: e.g. `./ZED_SDK_Tegra_L4T35.4_v4.0.8.zstd.run
- verify/accept the install paths for the required modules (e.g. ZED Hub module, AI module, samples, Python library):
- ZED samples are very useful to get started. This can be installed on the M.2 drive to save a bit of space
- the Python library is required for the xamples to follow
To verify:
- notice several commands are now available, such as:
ZED_Explorer- handy to view ZED cam live streams and record (.svo files)ZED_Depth_Viewer- handy to explore/review recordingsZEDfu- sensor fusion for 3D reconstruction (as pointclouds or meshes) with .ply exporter
- double check camera bindings (and list the camera(s) if any is connected via USB):
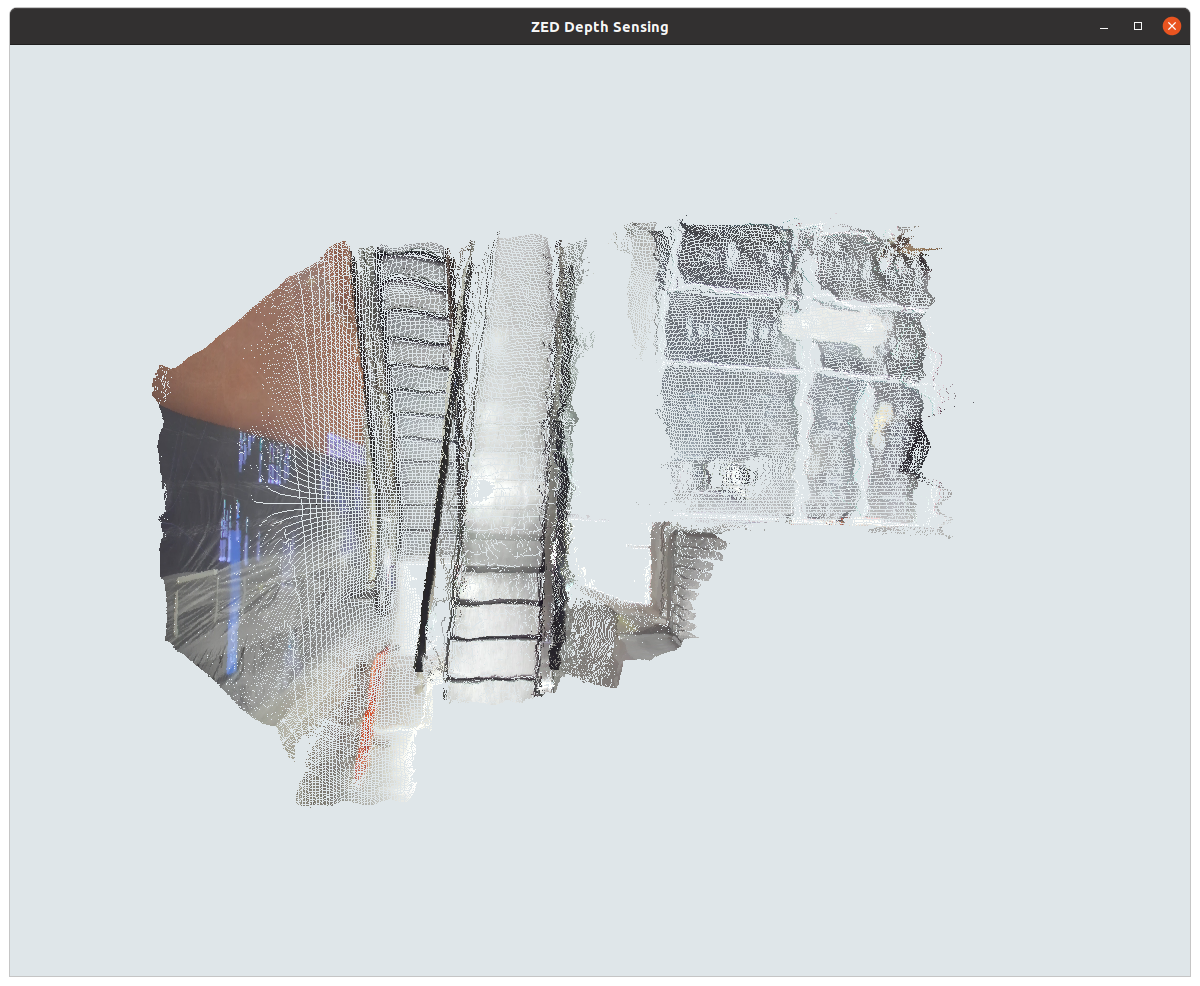
python -c "import pyzed.sl as sl;print(f'cameras={sl.Camera.get_device_list()}')" - run a python sample:
#install OpenGL Python bindings
pip install PyOpenGL
#temporarily access a python sample folder
pushd samples/depth\ sensing/depth\ sensing/python
#run the sample
python depth_sensing.py
We looked at how to setup ZED cam on Jetson and how to test the streams.
The zed-open3d-pointcloud folder in this repo contains a few helper scripts. It also includes a short test ZED recording. If you haven't cloned the repo, you can do now to run this section.
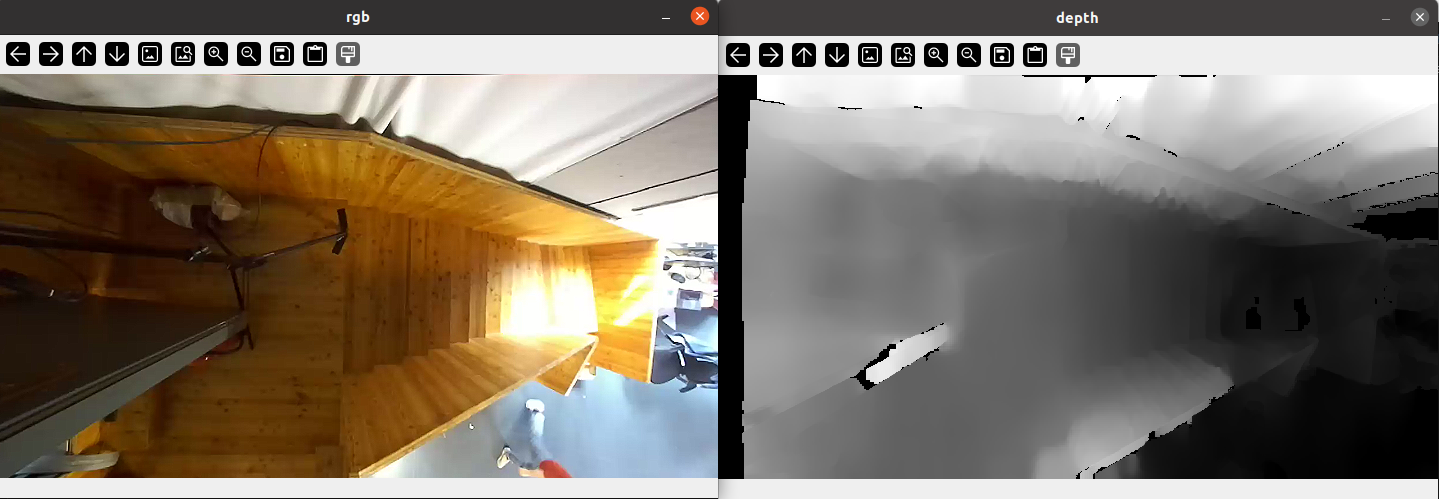
zed_utils.py includes a wrapper ZED class that makes it to grab frames (RGB/depth) and point cloud data.
The ZED constructor cam open:
- a live camera, by passing the camera's serial number as a string
- recording (.svo) file
To follow along, a short recording is available in the same folder (rec.svo). To run: python zed_utils.py rec.svo
Open3D can be installed directly via pip however it will be the CPU version.
To make most of the Jetson and it's GPU capabilities I've compiled Open3D from source with CUDA support and made it available in releases
To setup:
- download the prebuild wheels from this repo's releases(if you haven't already):
wget https://github.com/orgicus/sparkfun-nvidia-ai-innovation-challenge-2324/releases/download/required_jetson_wheels/wheels.zip - unzip wheels.zip to the wheels folder and enter it:
mkdir wheels
unzip wheels.zip -d wheels
cd wheels- install the wheels. (if you only plan to follow the YOLO part ignore Open3D and vice versa). full install example:
pip install open3d-0.18.0+74df0a388-cp38-cp38-manylinux_2_31_aarch64.whlImportant To avoid "cannot allocate memory in static TLS block" errors (due to unified memory layout) Open3D was compiled as a shared library which needs to be preloaded prior to running Python. (libOpen3D.so is part of the .zip):
e.g. LD_PRELOAD=/path/to/libOpen3D.so python
(Optionally you can run export LD_PRELOAD=/path/to/libOpen3D.so once (or set this to run at startup should you need that))
To test installation: open3d example geometry/point_cloud_bounding_box (after LD_PRELOAD=/path/to/libOpen3D.so)
Open3D offers many useful point cloud processing algorithms and tools.
In this tutorial we'll look at processing pointclouds from ZED cam and using Open3D DBSCAN clustering
in zed-open3d-pointcloud you'll find point_cloud_utils.py which provides a PointCloudProcessor class.
The most important parts it handles:
- holds Open3D PointCloud structures for the raw and (to be) cropped point cloud
- keeps track of a transformation matrix (ass well as individual translation and Euler rotation): this can be useful when working with multiple cameras/point clouds that need to be merged into a single global coordinate space
- wraps the
cluster_dbscanexposing both clusters and their axis aligned bounding boxes
Additionally, point_cloud_zed.py provides ZEDPointCloudProcessor (which extends the above with ZED specifics and more)
The converting a ZED RGB pointcloud is a two step process:
- extract point coordinates
"""
        zed's get_data() returns a numpy array of shape (H, W, 4), dtype=np.float32
        o3d expects a numpy array of shape (H*W,3), dtype=np.float64

        [...,:3] returns a view of the data without the last component (e.g. (H, H, 3))
        nan_to_num cleans up the data bit: replaces nan values (copy=False means in place)
        """
        zed_xyzrgba = self.zed.point_cloud_np
        zed_xyz = zed_xyzrgba[..., :3]
        points_xyz = np.nan_to_num(zed_xyz, copy=False, nan=-1.0).reshape(self.num_pts, 3).astype(np.float64)
        self.point_cloud_o3d.points = o3d.utility.Vector3dVector(points_xyz)
- extract RGB data
"""
zed's 4 channel contains RGBA information (4 bytes [r,g,b,a]) encoded a single 32bit float
1. we flatten zed's 2D 4CH numpy array to a 1D 4CH numpy array : `zed_xyzrgba.reshape(self.num_pts, 4)`
2. we grab the last channel (RGBA at index 3) `[:, 3]`
3. we convert nan to zeros (`np.nan_to_num` with default args), with copy=True (to keep the array C-contiguous)
4. we use `np.frombuffer` to convert each float32 to 4 bytes (np.uint8) which we reshape from flat [r0,g0,b0,a0,...] to [[r0,g0,b0,a0],...]
5. we grab the first 3 channels: r,g,b and ignore alpha
6. finally we convert to o3d's point cloud color format shape=(num_pixels, 3), dtype=np.float64 by casting and dividing
"""

zed_rgba = np.nan_to_num(zed_xyzrgba.reshape(self.num_pts, 4)[:, 3], copy=True)
        rgba_bytes = np.frombuffer(zed_rgba, dtype=np.uint8).reshape(self.num_pts, 4)
        points_rgb  = rgba_bytes[..., :3].astype(np.float64) / 255.0
        self.point_cloud_o3d.colors = o3d.utility.Vector3dVector(points_rgb)
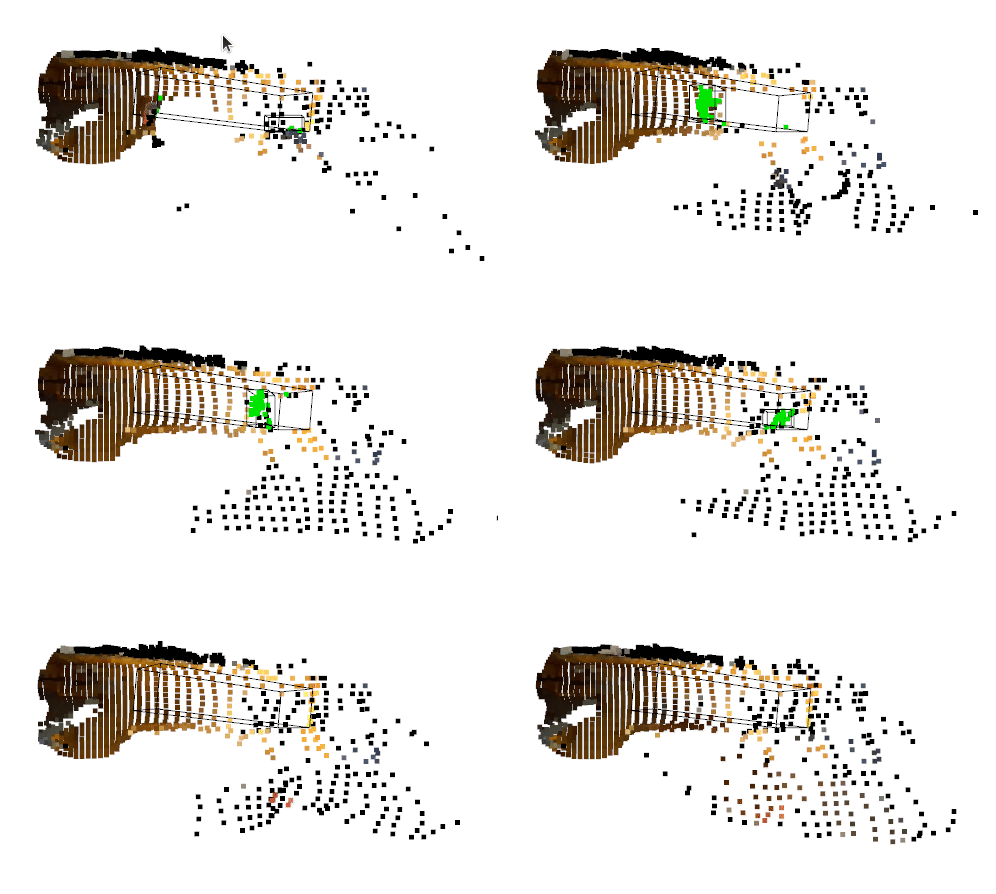
Passing the .svo recording to the script will run a basic demo rendering a bounding box around a person clustered from the cropped pointcloud inside a box.
python point_cloud_zed.py rec.svo will run a short demo.
On the powerful Jetson Orin AGX (with opencv previews closed) the demo can run around 50-60 fps!
(One might ask if this works, why the need for an ML model (generative or otherwise) ? In this specific scenario, due to the 10x10m LED wall content changes, computing the depth map (and pointcloud) can lead to unexpected results. For example, the LED wall appears to bend towards a person when they are close to the wall which results in false positives when processing the cropped point cloud:
zed_pointcloud_led_wall_bending_480p.mov
Training a model of a person (regardless of LED wall content/etc.) is a more flexible approach which captures this edge case.)
Jetson compatible CUDA accelerated torch and vision wheels are required for CUDA accelerated YOLO (otherwise the CPU version of torch will be installed even if torch-2.0.0+nv23.05-cp38-cp38-linux_aarch64.whl or similar is installed ). To save time and easet setup I have compiled torch and vision from source and the prebuild wheels are available in this repo's releases
- download the prebuild wheels from this repo's releases(if you haven't already):
wget https://github.com/orgicus/sparkfun-nvidia-ai-innovation-challenge-2324/releases/download/required_jetson_wheels/wheels.zip - unzip wheels.zip to the wheels folder and enter it:
mkdir wheels
unzip wheels.zip -d wheels
cd wheels- install the wheels. (if you only plan to follow the YOLO part ignore Open3D and vice versa). full install example:
pip install torch/torch-2.0.1-cp38-cp38-linux_aarch64.whl
pip install vision/torchvision-0.15.2a0+fa99a53-cp38-cp38-linux_aarch64.whl
Note: torchvision 0.15 is not the latest version torchvision, however it is the one compatible with torch 2.0
How you can simply run pip install ultralytics and use the excellent documentation on how to
Optionally you can also follow the ZED SDK Object Detection Custom Detector YOLOv8 guide
Dusty Franklin has provided awesome step by step guides on installing each one.
We're going to look at a Vision Transformers.
For example, if you follow the EfficientViT it should be possible to infer from a video (live or pre-recorded).
Strobe warning: segmentation colour change per element per frame which can appear as strobbing.
efficientvit-sam.mp4
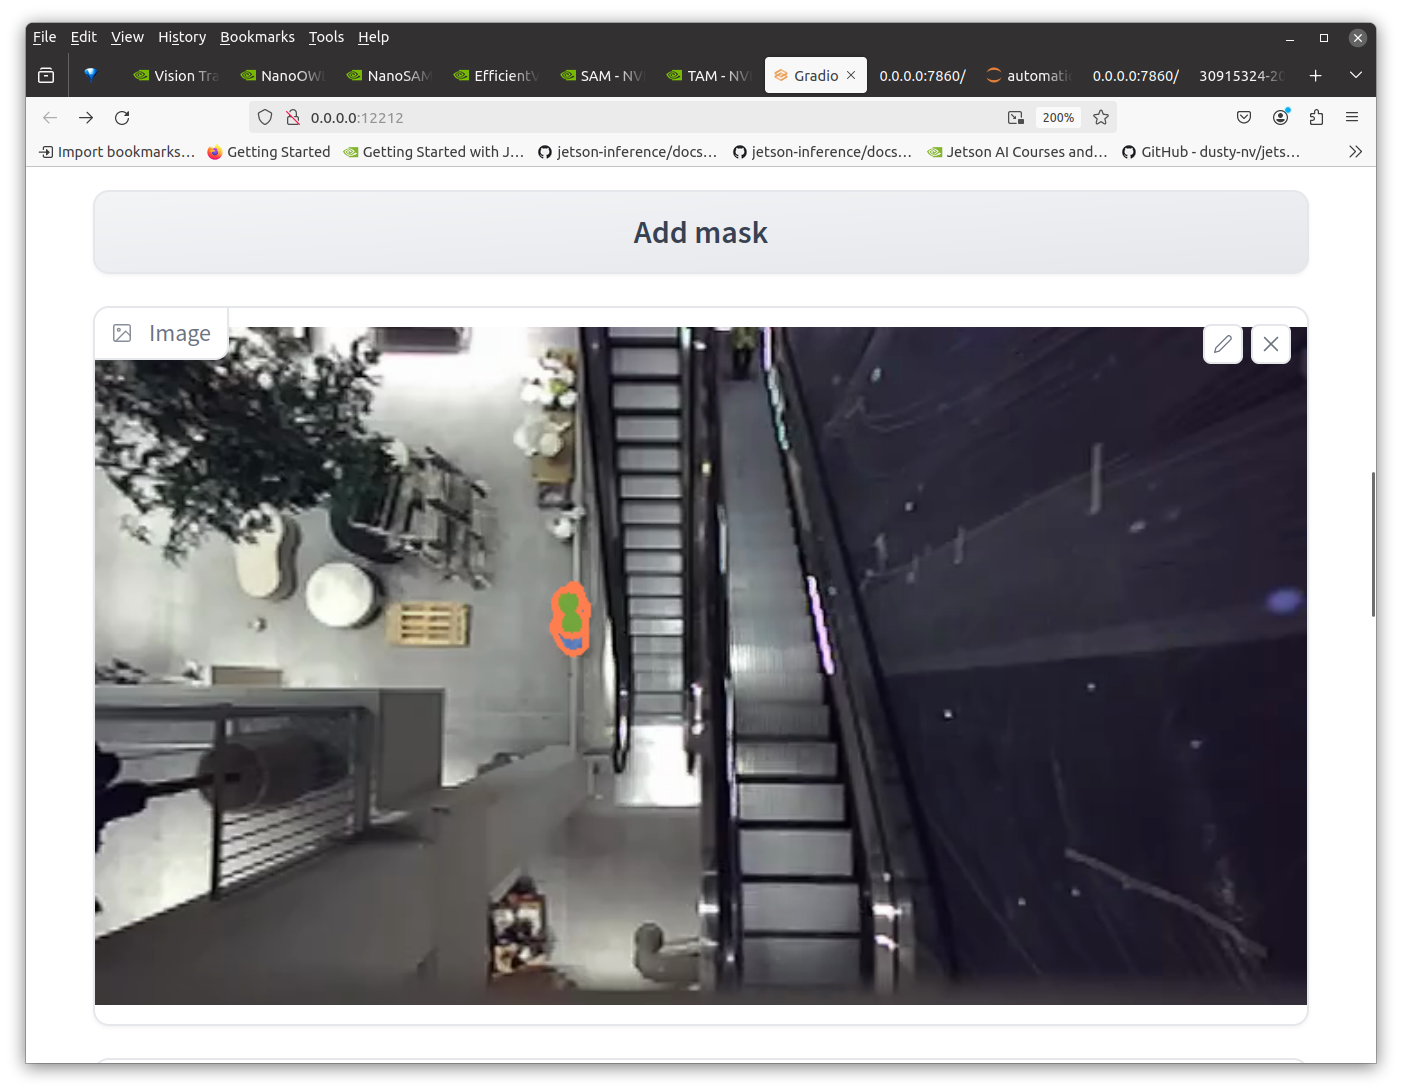
A better idea is to use the TAM model. It allows cliking on a part of an image to segment, then track.
Here are few examples adding a track/mask pe person:
TAM_1.mp4
TAM_2.mp4
TAM_3.mp4
It's amazing these run on such small form factor hardware, however the slow framerate and reliance on initial user input isn't ideal for a responsive installation.
The technique still can be very useful to save videos of masks as binary images (black background / white foreground) which can act as either a segmentation dataset, or using basic OpenCV techniques a less resource intensive object detection dataset.
Here's an example script:
# import libraries
import os
import cv2
import numpy as np
import argparse
# setup args parser
parser = argparse.ArgumentParser()
parser.add_argument("-u","--unmasked_path", required=True, help="path to unmasked sequence first frame, e.g. /path/to/svo_export/frame000000.png")
parser.add_argument("-m","--masked_path", required=True, help="path to masked sequence first frame")
parser.add_argument("-o","--output_path", required=True, help="path to output folder")
args = parser.parse_args()

parent_folder_name = args.unmasked_path.split(os.path.sep)[-2].split('.')[0]
# prepare YOLOv8 format images and labels folder
img_path = os.path.join(args.output_path, "images")
lbl_path = os.path.join(args.output_path, "labels")
# check folders exist, if not make them
if not os.path.exists(args.output_path):
    os.mkdir(args.output_path)
if not os.path.exists(img_path):
    os.mkdir(img_path)
if not os.path.exists(lbl_path):
    os.mkdir(lbl_path)

# c
cap_unmasked = cv2.VideoCapture(args.unmasked_path, cv2.CAP_IMAGES)
cap_masked   = cv2.VideoCapture(args.masked_path  , cv2.CAP_IMAGES)

kernel = np.ones((5,5),np.uint8)

img_w = None
img_h = None

while True:
    read_unmasked, frame_unmasked = cap_unmasked.read()
    read_masked, frame_masked = cap_masked.read()
    if read_masked and read_unmasked:
        # wait for valid frames first
        if img_w == None and img_h == None:
            img_h, img_w, _ = frame_masked.shape
        # in some cases basic threshold will do, in others thresholding by saturation (e.g.  segmentation visualisation colours (using cv2.inRange)) makes more sense
        _, thresh = cv2.threshold(frame_masked[:,:,0] * 10, 30, 255, cv2.THRESH_BINARY)
        # morphological filters to cleanup binary threshold
        thresh = cv2.dilate(thresh, kernel, iterations = 1)
        thresh = cv2.erode(thresh, kernel, iterations = 1)
        thresh = cv2.morphologyEx(thresh, cv2.MORPH_OPEN, kernel)
        # get external conoutrs
        contours, hierarchy = cv2.findContours(thresh, cv2.RETR_EXTERNAL, cv2.CHAIN_APPROX_SIMPLE)
        label_txt = ""
        for cnt in contours:
            # get bounding box
            x, y, w, h = cv2.boundingRect(cnt)
            # write label in YOLO format
            # [object-class-id] [center-x] [center-y] [width] [height] -> cx, cy, w, h are normalised to image dimensions
            label_txt += f"0 {(x + w // 2) / img_w} {(y + h // 2) / img_h} {w / img_w} {h / img_h}\n"
            # preview bounding boxe
            cv2.rectangle(thresh,(x,y),(x+w,y+h),(255,255,255),2)

        if len(contours) > 0:
            frame_count = int(cap_masked.get(cv2.CAP_PROP_POS_FRAMES))
            cv2.imwrite(os.path.join(img_path, f"{parent_folder_name}_{frame_count:06d}.jpg"), frame_unmasked)
            with open(os.path.join(lbl_path, f"{parent_folder_name}_{frame_count:06d}.txt"), "w") as f:
                f.write(label_txt)

        cv2.imshow("masked", thresh)
        cv2.imshow("unmasked", frame_unmasked)
    else:
        print('last frame')
        break

    key = cv2.waitKey(10)
    if key == 27:
        break
It expects three paths:
-u- the path to unmasked sequence first frame (original RGB sequence)-m- the path to masked sequence first frame (binary mask sequence (TAM processed output))-o- the path to output folder
To easily follow along with the tutorial such a converted dataset of 15K+ images (with augmentation) is available on Roboflow
You can now download the dataset as YoloV8 model and start training.
To train you can adjust the path to where you downloaded/unzipped the dataset to run: yolo detect train data=path/to/people-escalators-left.v2i.yolov8\data.yaml model=yolov8x-oiv7.pt epochs=100 imgsz=640
Alternatively you can grab a pretrained model on the above dataset from releases.
Feel free to experiment with other lighter YOLOv8 base models (e.g. yolov8s, yolov8n).
While yolov8x-oiv7 is heavier it can still achieve 15-30fps.
Here you can see model performing on a test set video and a new video from a new camera:
yolov8-model-test.mp4
yolov8-model-infererenceT.mp4
The above is using YOLOv8 tracking:
yolo track model=/path/to/yolov8x-oiv7-escalators-people-detector.pt source=/path/to/video.mp4 conf=0.8 iou=0.5 imgsz=320 showWhere the conf and iou thresholds need to be adjusted depending on the source.
In some cases it might be worth masking out areas where it's ulikely people would. (e.g. in case of escalators, anything outside of escalators ideally would be ignored).
(For mode details see on this also check out Learn OpenCV YOLOv8 Object Tracking and Counting with OpenCV)
Showcase: tracking people on escalators to drive beautiful real-time generative graphics in retail spaces
There is a larger commercial project called Infinite Dreams. The full project uses 4 ZED cameras and RTX GPU. I contributed the Computer Vision consulting while variable.io wrote beautiful custom generative graphics and simulations. The position of people on escalators tracked by ZED cameras acts as an input into the cloth simulation driving the realtime graphics/simulation.
The above is a tutorial/guide using NVIDIA Jetson a single ZED camera. It demonstrates it's perfectly feasible to run the project on such device (making better use of space and especially energy).
Thank you Daniel, Martin, Joanne, Adam, Ed and the full team at Hirsch & Mann for the opportunity.
Thank you Marcin and Damien for your patience and making such beautiful work.
Here is a brief making of:
Full project credits:
variable.io - generative artwork
Marcin Ignac: design and generative art
Damien Seguin: software lead
Hirsch & Mann - commission
Daniel Hirschman: strategy and direction
Joanne Harik: concept & experience design, content production
George Profenza: camera tracking
Hardware:
Leyard LED Technology
LED TEK LED Installation
Documentation:
Jonathan Taylor / Cloud9 photography
Judging criteria
-
Project Documentation The above shows how the project was, it includes images, screenshots, and/or a video demonstration of the solution working as intended. While there are sections thay may need intermediate knowledge, a beginner should be to complete at least one of the 6 tutorials presented (making use of available scripts, an opensourced 15K+ object detection dataset, pretrained model, etc.)
-
Complete BOM The Hackster.io project includes details on the hardware, software and/or tools used.
-
Code & Contribution Working code with comments is provided as well as snippets in the README to get start/explore ideas of processing data from NVIDIA Jetson TAM.
-
Creativity The project idea (tracking people on escalators to drive generative graphics in a retail environment) is not original, however, there are several creative ideas at play:
- using Jetson for real-time point cloud processing
- given the project expects real-time tracking and TAM is a heavy model the creative approach is use TAM as an input to automate annotation to train a lighter object detection model (YOLOv8) which can achieve faster frame rates (even with the heaviest version of the model).
- in addition to the dataset and model Jetson precompiled wheels for PyTorch / TorchVision / Open3D are provided to save everybody time in not just reproducing the above but hopefully prototyping and getting their own projects running faster.
While LED lighting based challenges are introduced, overall the goal of top down people tracking also has the challenge of handling the fast changes in scales and also shape distortions towards the edges of images.
The object detection model can hopefully be applied to other top-down people tracking challenges (such as barrier based people counting of construction site safety using camera on crane to ensure no people are in its drop path). This can also aid in motion capture where most models handle frontal, side or 3/4 views, but rarely (if at all) can handle top-down ceiling mounted cameras. Once talent can reliably be tracked top-down, pose estimation models for such tight angles can be fine tuned.
