AIEIO is an emotion detector built by high schoolers using YOLO
Install YOLO and get familiar with how it works.
Look under aicamp/scripts/etl, and you’ll find the following scripts that help collect, label, format, and split data.
-
- bing_images_api.py allows you to download images from the Bing Image API. You will need a Bing API subscription key that goes on line 28. To use the program, first run the function save_url(). Once the urls are saved, then run the function download_list()
- open_cv_camera.py is a script that opens your computer camera to take pictures of different emotions depending on what key you press. Make sure you have OpenCV installed to use this script.
- We also used a chrome extension to download images.
-
- After downloading some 10,000 images from bing and google and taking about 1,000 more with OpenCV, we had to label them. We used a website called Labelbox to label all of our web collected images.
- For our OpenCV pictures, we ran a face detector script to put a box around the faces and the images were saved in a folder titled with their corresponding emotions.
-
Then we had to format the labeled data to a format that the YOLO neural network understands. This means we needed a text file with 5 numbers: 1. the class ID as in what emotion 2. the x coordinate of the center of the box 3. the y coordinate of the center of the box 4. the width of the label box 5. the height of the label box
The last four numbers are proportions over the dimensions of the entire image, as in they are numbers from 0 to 1.
-
get_labelbox_data.py allows you to download all of the images you labeled into one folder. We did this to organize our data better because we did not end up labeling all of the images we downloaded.
-
bnding_box_yolo_format.py turns the information from Labelbox, as in all of the boxes that you made when you labeled the data, into the five numbers that YOLO understands. If you are not building an emotion detector, make sure you pay attention to the class ID’s on lines 99 to 108. To use the program you first need to export the information from Labelbox as a csv and then when you run the program, keep in mind that it takes three argument variables: the script_name as in bnding_box_yolo_format.py, the path where the csv is stored, and the path of where all of the images are stored.
-
-
Then we had to split our data into train and test data.
- make_path.py splits the data. We trained our model with 80% of our data. You can change that on line 35. The specific data we used for our tiny YOLO model is under aicamp/yolo_training/clem-tinyv1 and is called clem_train.txt (training data) and clem_valid.txt (test data). For our regular YOLO model look for the same files under aicamp/yolo_training/clemv1.
-
Before you train your model, make sure you change your configuration files (.cfg), your .names, and .data files. Follow these two tutorials to train: training tutorial on medium & training tutorial on github (more detailed).
-
We were first training in google colab, but then we switched to aws as we got more data. If you do train in colab, make sure you run the make_path.py in colab rather than in terminal. And make sure you change your runtime type to GPU, and make sure you mount your google drive.
-
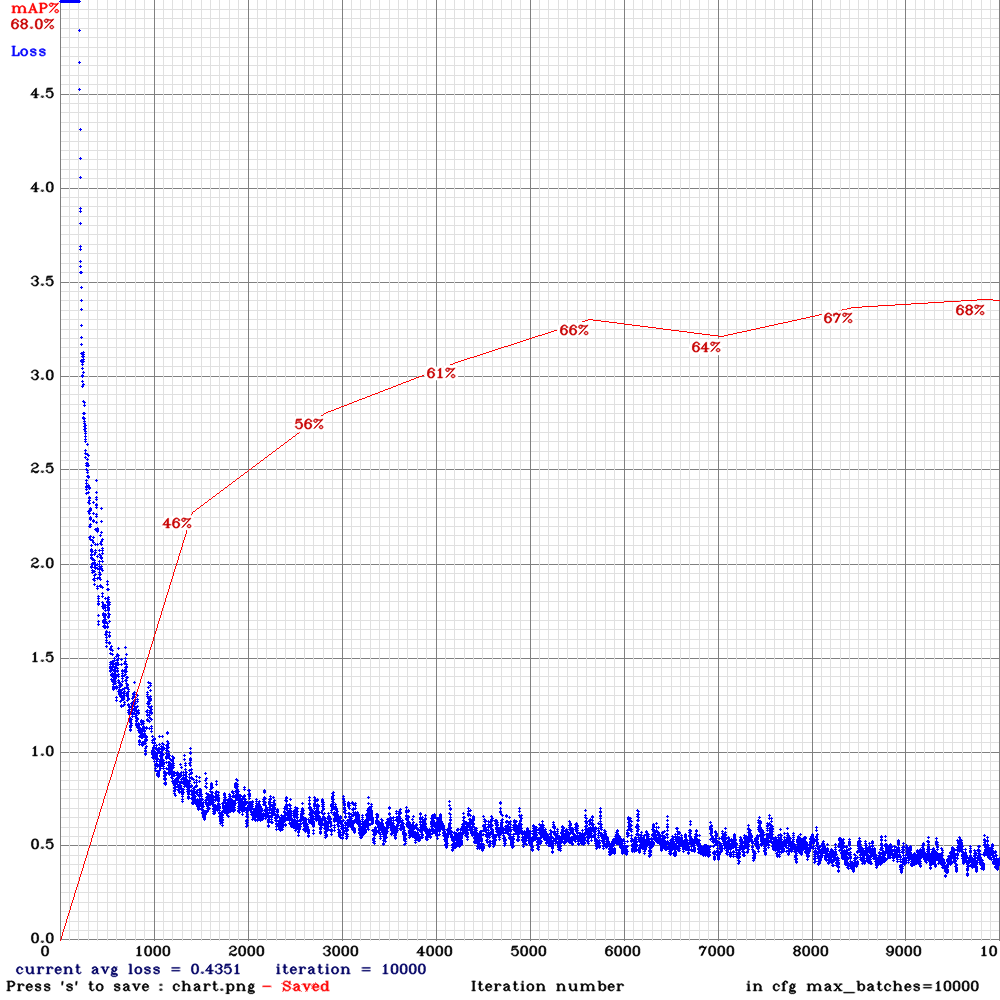
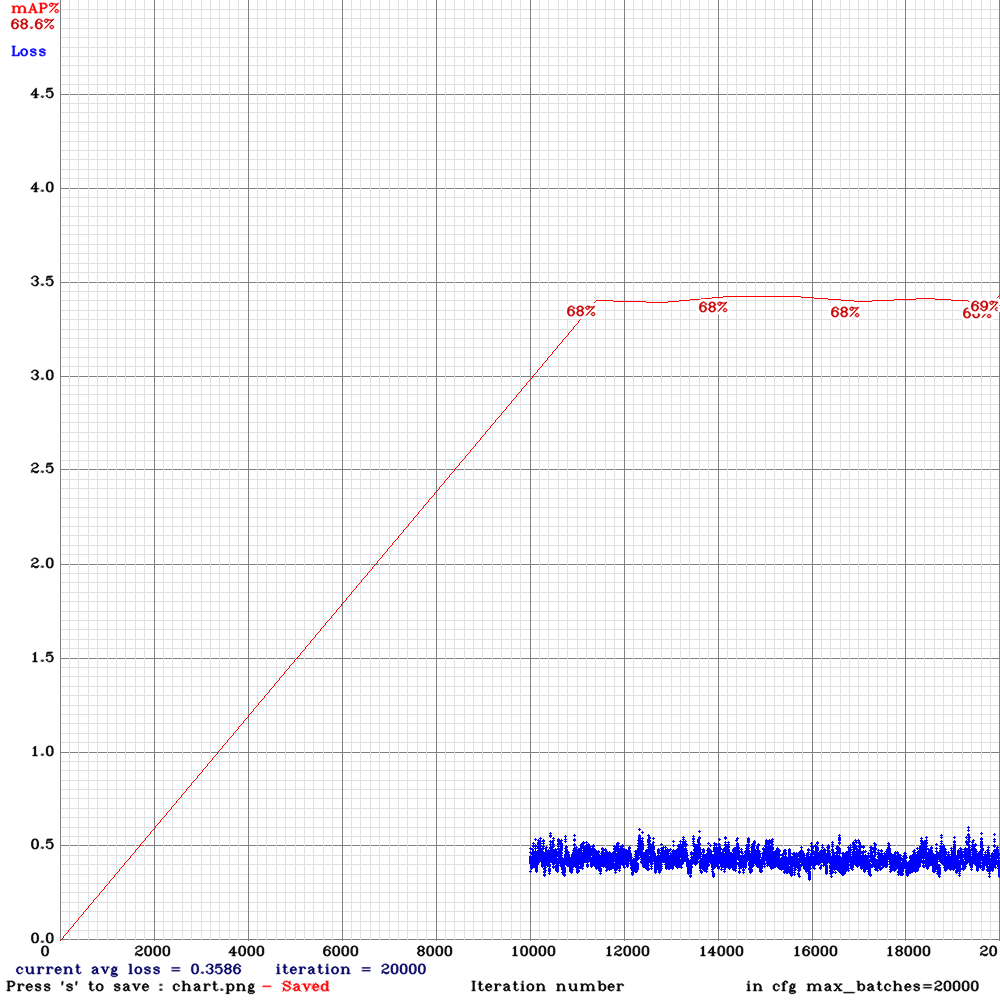
The specific files that we used for training five emotions for our tiny YOLO model are listed under aicamp/yolo_training/clem-tinyv1. Look at clem-tiny.data, cletm-yolov3-tiny.cfg, & clem.names. For our regular model look under aicamp/yolo_training/clemv1 and you’ll se we used clem.data, clem.names, and clem-yolov3.cfg. You can also see the graphs of the loss our training produced, which are the two pngs.
-
Look under aicamp/scripts/model.
-
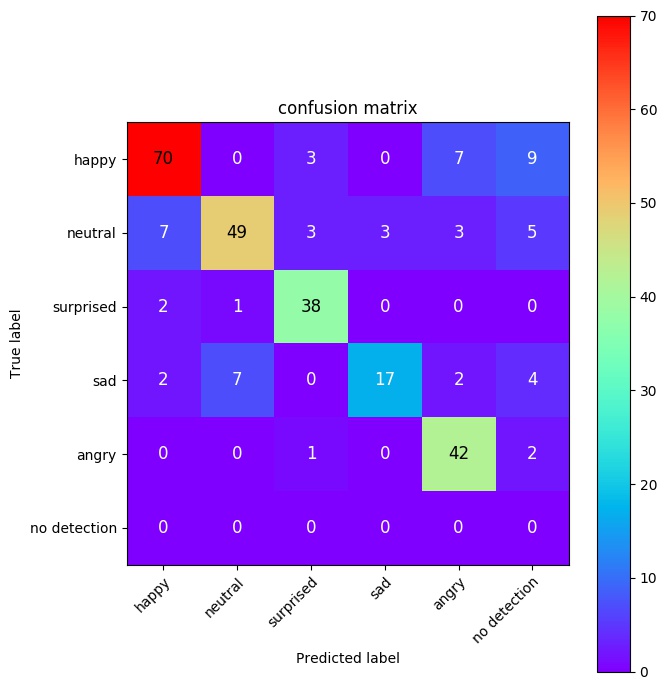
model_testing.py will count how many of each emotion the your model detected. You need to make sure you also have ai.py because in line 4 of model_testing.py, two functions are imported from ai.py. In this program you can customize the confidence level (line 4) which changes the sensitivity of what your model predicts and you will need to customize your specific paths to your test csv and your weights (lines 21 and 22).
-
ai.py runs all of the images through the YOLO network. Whereas model_testing.py counts the number of images of each emotion by running functions from ai.py, ai.py is actually running the images through the YOLO network with the weights that your model has.
-
yolo_show.py runs the model on images, sets of images, or videos. It prints the emotion the model predicted and how confident the model is that the images shows the particular emotion.
- will add website stuff once they are done and i push them to github


