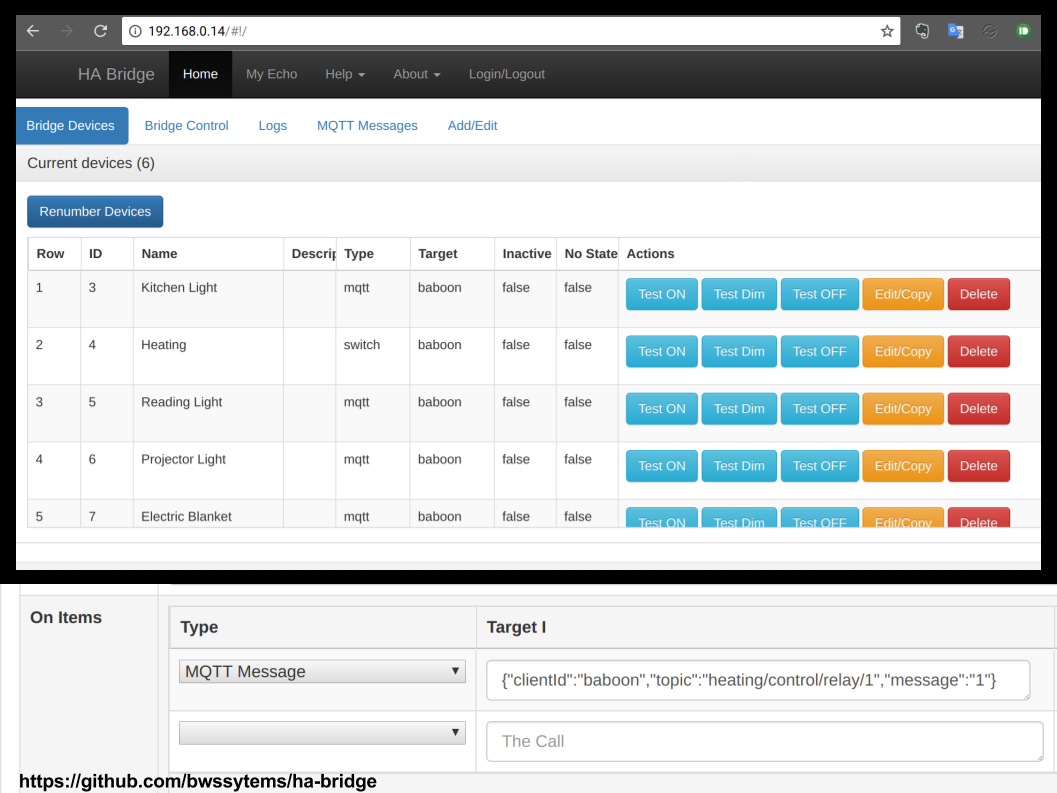
Here are install instructions to run ha-bridge on an emonPi (Raspberry Pi running emonSD based on Raspbian Jessie).
Home automation (HA) bridge emulates a Philips Hue light system and can control other systems such as a Vera, Harmony Hub, Nest, MiLight bulbs or any other system that has an http/https/tcp/udp interface.
Using ha-bridge Google Home or Amazon Echo can be used to control MQTT devices via voice. E.g WiFi MQTT Relay, LightWave RF plugs or Sonoff plugs (with MQTT FW).
The install instructions below are mostly coped from ha-bridge repo readme with a few changes to work on the emonPi with it's read-only root file-system.
Video Demo
Google Home Controlling MQTT Video Demo
Install ha-bridge on emonPi
Tested on emonSD-07Nov16
The emonPi runs a read-only file-system. The only folder which is mounted as RW is /home/pi/data/, we need to move ha-bridge config to this folder to allow ha-bridge to be able to save it's db and config when emonPi is in RO mode:
rpi-rw
cd home/pi/data
mkdir habridge
wget https://github.com/bwssytems/ha-bridge/releases/download/v4.5.0/ha-bridge-4.5.0.jar
Replace the above URL with latest version
Run for the first time
Since ha-bridge by default runs on port 80 we need to stop apache (serving emoncms) temporarily to allow us to run ha-bridge for the first time:
sudo service apache2 stop
Test run the ha-bridge
sudo java -jar ha-bridge-4.5.0.jar
Note you can also select which port to start the ha-bridge by using the command line option:
-Dserver.port=<port number>
eg:
java -jar -Dserver.port=8081 ha-bridge-W.X.Y.jar
Make ha-bridge run alongside Apache
Browse to the GUI web page and edit the port (under Bridge Control) to run on a different port, lets go for 8081 (since OpenHAB is running on 8080). Save the config
Now return to SSH terminal and stop java process (CTRL + C) then open port 8081
sudo ufw allow 8081/tcp
Now start ha-bridge java process and browser to port 8081
You should now be able to see ha-bridge web page..great! Now stop ha-bridge again (CTRL+C)
Enable the required Apache modules:
a2enmod proxy proxy_http headers
We now need to make ha-bridge run nicely alongside Apache (which is already using port 80). Edit apache config to create a reverse proxy to allow ha-bridge to run alongside apache on port 80. All /api calls will be passed to ha-config
sudo nano /etc/apache2/sites-enabled/000-default.conf
At the following lines below <VirtualHost *:80>
ProxyPass         /api  http://localhost:8081/api nocanon
        ProxyPassReverse  /api  http://localhost:8081/api
        ProxyRequests     Off
        AllowEncodedSlashes NoDecode

        # Local reverse proxy authorization override
        # Most unix distribution deny proxy by default (ie /etc/apache2/mods-enabled/proxy.conf in Ubuntu)
        <Proxy http://localhost:8081/api*>
                  Order deny,allow
                  Allow from all
        </Proxy>
Save and exit nano then start Apache:
sudo service apache2 start
Now the ha-bridge API should be able to run alongside Apache on port 80. Google Home requires ha-bridge to be on port 80.
Run ha-bridge as a sysem service
Start here to create the habridge.service unit file:
cd /etc/systemd/system
sudo nano habridge.service
Copy the text below into the editor nano, note the custom emonPi RW location for the config file.
[Unit]
Description=HA Bridge
Wants=network.target
After=network.target

[Service]
Type=simple
WorkingDirectory=/home/pi/data/habridge
ExecStart=/usr/bin/java -jar -Dconfig.file=/home/pi/data/habridge/data/habridge.config /home/pi/data/habridge/ha-bridge-4.5.0.jar

[Install]
WantedBy=multi-user.target
Save the file in the editor by hitting CTL-X and then saying Y to update and save.
Reload the system control config:
sudo systemctl daemon-reload
To start the bridge:
sudo systemctl start habridge.service
To start the service at boot, use the enable command:
sudo systemctl enable habridge.service
To look at the log, the output goes into the system log at `/var/log/syslog':
tail -f /var/log/syslog
Connect ha-bridge to emonPi MQTT server
Load the ha-bridge web interface (http://emonpi:8081) and navigate to Bridge Control in the MQTT section enter:
client ID: habridge
IP: localhost
user: emonpi
passsword: emonpimqtt2016
Then Save changes.
These are the default emonpi passwords.
Add MQTT devices to ha-bridge
Once ha-bridge has resrtarted and you refresh the web page, you should see a MQTT Messages tab appear in the top bar. You can also check the log via the web interface to check that MQTT has connected succesfully.
The MQTT messages tab will allow us to easily create MQTT tems in ha-bride.
Adding MQTT devices should be self explanatory.
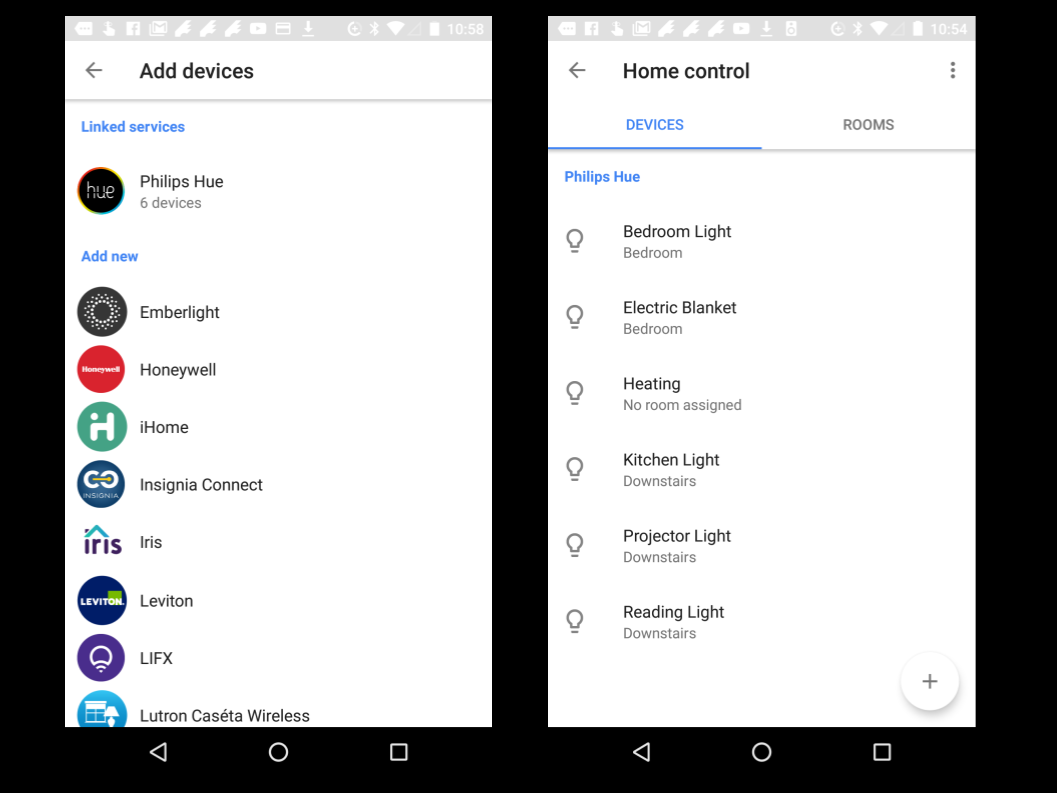
Connect Google Home to ha-bridge
Using the Google Home app choose Home Control from the menu the choose to add a Philips Hue device. The Google Home should now connect to the ha-bridge (that emulates Philips Hue) and the devices added to ha-bridge should now appear.

