Homework for Intro to React, React Components and React Components Styling topics.
The live page for this repository can be viewed at GitHub Pages.
- Make sure you have an LTS version of Node.js installed on your computer. Download and install if needed.
- Install the project's base dependencies with the
npm installcommand. - Start development mode by running the
npm startcommand. - Go to localhost:3000 in your browser. This page will automatically reload after saving changes to the project files.
React project template is used as a starting point for your application (more information about how to start-up with such a project may be found at the template repo description or here in a Readme file).
- The
goit-react-hw-01-componentsrepository is created. - The components of all the tasks are rendered on the same page, inside a common container - the
<App>root component. - When you submit your homework, there should be a link to the repository with the project source code.
- The repository header has a link to the live page on
GitHub pages. - When visiting the work page (GitHub pages) of the assignment, there are no errors or warnings in the console.
- Each component has a separate folder with a React component file and a styles file.
- The
propTypesare described for all components. - Everything that a component expects in the form of props is delivered to it when it is called.
- The names of the components are clear and descriptive.
- The JS code is clean and clear, using Prettier.
- The styling is done by CSS modules or Styled Components, therefore the classes in the resulting DOM will be different from the examples.
We need to create a Profile component with which we could display information about a social network user. The data about the user is in the file user.json.
The component must accept several props with information about the user:
username— user nametag— Social network tag without @location— city and countryavatar— link to imagestats— object with information about activity
The component must create a DOM element of the following structure:
<div class="profile">
  <div class="description">
    <img
      src="https://cdn-icons-png.flaticon.com/512/1077/1077012.png"
      alt="User avatar"
      class="avatar"
    />
    <p class="name">Petra Marica</p>
    <p class="tag">@pmarica</p>
    <p class="location">Salvador, Brasil</p>
  </div>

  <ul class="stats">
    <li>
      <span class="label">Followers</span>
      <span class="quantity">1000</span>
    </li>
    <li>
      <span class="label">Views</span>
      <span class="quantity">2000</span>
    </li>
    <li>
      <span class="label">Likes</span>
      <span class="quantity">3000</span>
    </li>
  </ul>
</div>import user from 'path/to/user.json;
<Profile
username={user.username}
tag={user.tag}
location={user.location}
avatar={user.avatar}
stats={user.stats}
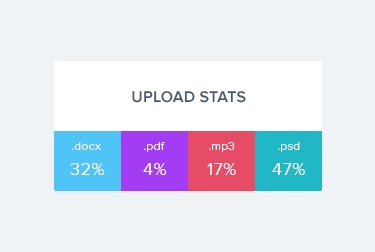
/>Create a component Statistics, which would display statistics on the transferred props. For example, uploads to the cloud by file type, webpage visits by users from different countries, financial expenses, etc. The data about statistics is stored in the data.json file.
The component must accept two props title and stats, in which the header and the statistics object are specified.
title- is optional, and if it is not provided, the<h2>header markup should not be rendered.stats- An array of objects containing information about a statistical item. It can have any number of elements.- You can skip the background color of the statistical item in the design, or create a function to generate a random color.
The component must create a DOM element of the following structure:
<section class="statistics">
  <h2 class="title">Upload stats</h2>

  <ul class="stat-list">
    <li class="item">
      <span class="label">.docx</span>
      <span class="percentage">4%</span>
    </li>
    <li class="item">
      <span class="label">.mp3</span>
      <span class="percentage">14%</span>
    </li>
    <li class="item">
      <span class="label">.pdf</span>
      <span class="percentage">41%</span>
    </li>
    <li class="item">
      <span class="label">.mp4</span>
      <span class="percentage">12%</span>
    </li>
  </ul>
</section>import data from '/path/to/data.json';
<Statistics title="Upload stats" stats={data} />
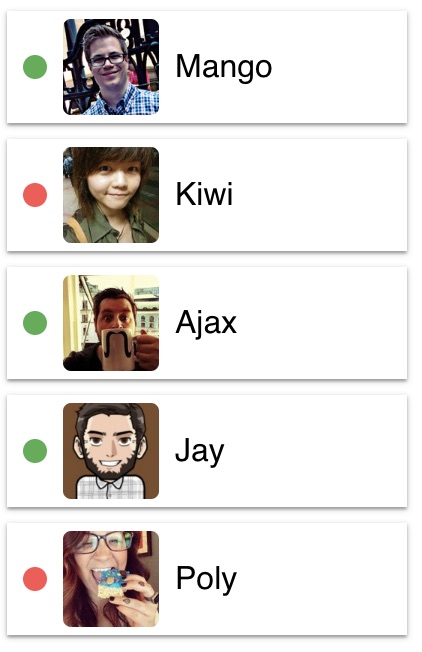
<Statistics stats={data} />We need to create a component FriendList with which we could display information about the user's friends. The information about friends is stored in the file friends.json.
The component must accept one prop friends (an array of friend objects).
The component must create a DOM of the following structure.
<ul class="friend-list">
  <!-- Any number of FriendListItem -->
</ul>The component must take several props:
avatar- link to the avatarname- friend's nameisOnline- boolean indicating the status of a friend, online or offline.
Depending on the props isOnline, the background color span.status should change. This can be done through a different CSS class or Styled Components.
The component must create a DOM of the following structure.
<li class="item">
  <span class="status"></span>
  <img class="avatar" src="" alt="User avatar" width="48" />
  <p class="name"></p>
</li>import friends from 'path/to/friends.json';
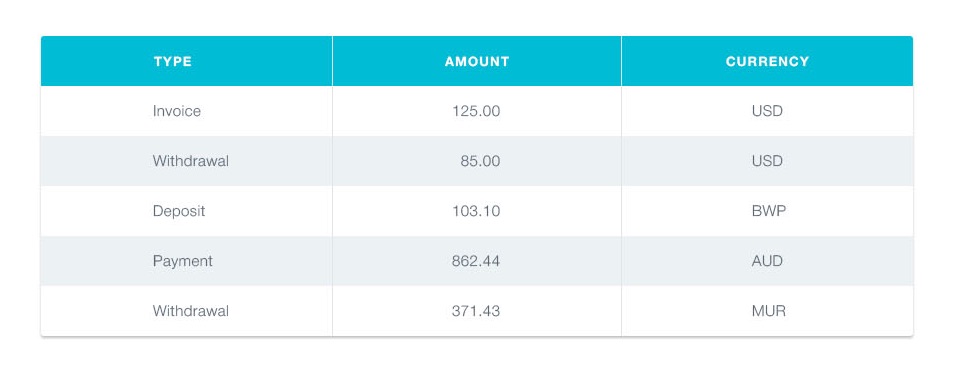
<FriendList friends={friends} />;A component of the transaction history must be created in the personal profile of the Internet Bank.
Data for the list is available in JSON format in the file transactions.json. This is an array of objects where each object describes a single transaction with the following properties:
id— unique transaction identifiertype— transaction typeamount- transaction amountcurrency- currency type
We need to create a component TransactionHistory that accepts one prop items (an array of transaction objects from transactions.json). The component creates a table layout. Each transaction is a table row. The example shows the markup of two transactions.
<table class="transaction-history">
  <thead>
    <tr>
      <th>Type</th>
      <th>Amount</th>
      <th>Currency</th>
    </tr>
  </thead>

  <tbody>
    <tr>
      <td>Invoice</td>
      <td>125</td>
      <td>USD</td>
    </tr>
    <tr>
      <td>Withdrawal</td>
      <td>85</td>
      <td>USD</td>
    </tr>
  </tbody>
</table>import transactions from 'path/to/transactions.json';
<TransactionHistory items={transactions} />;


