This application demonstrates how to configure resource server application security to accept JWT tokens issued by different authorization servers in an idiomatic Spring Security way.
- Any client access public resource without credentials.
- A client accesses protected API resource using OpenID Connect. Useful for scenarios where web browser is a client.
- Service client access protected API resource using JWT token issued by custom authorization server that does not support OIDC endpoints
- Client accesses an admin resource based on the role assignment for a specific JWT token. The roles are assigned via local lookup based on the subject claim.
For a sake of simplicity the application does not implement Web interface to demonstrate OpenID Connect login flow. Instead, the mock OIDC provider and a publicly available OIDC-compatible Web Client is used to obtain the token for testing the access.
To get a new test token follow these steps:
- Familiarize yourself with OIDC mock
- Navigate to OpenID Connect Playground
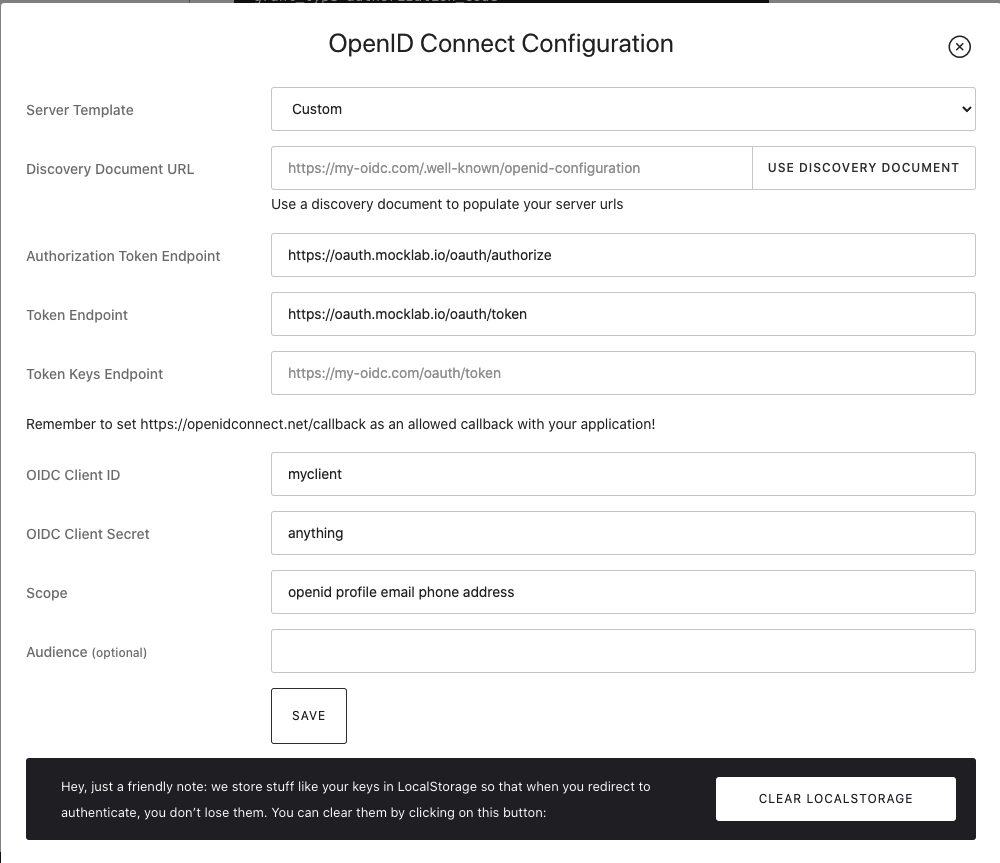
- Configure the playground with parameters specified in the OIDC Mock. You can
use any client ID and secret.
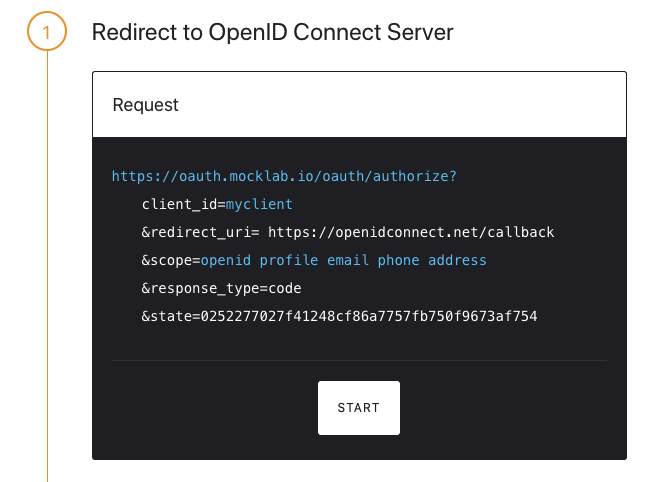
- Execute the first step to initiate an OIDC request to authorize the client
- When you get redirected to the login page of the mock OIDC provider fill in any email address and password. At this stage the mock OIDC provider with generate unique user id based on provided email and JWT token will have this id as as subject claim.
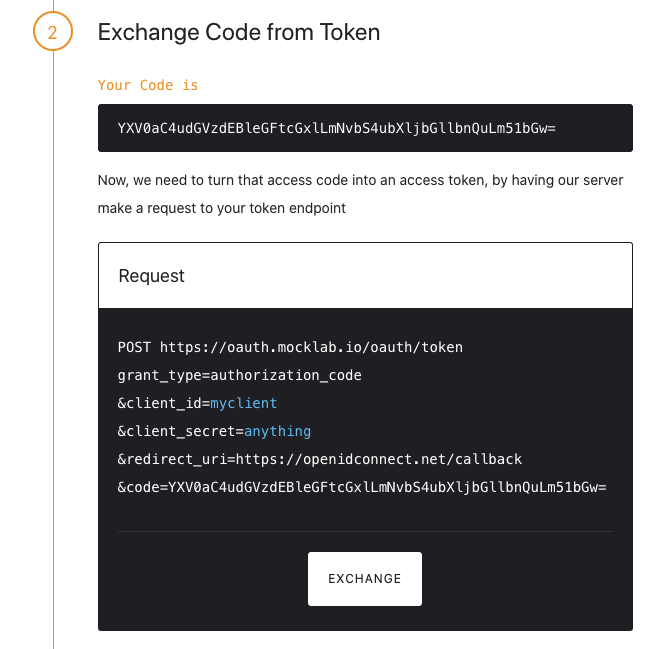
- Execute next step to exchange received code for the JWT token
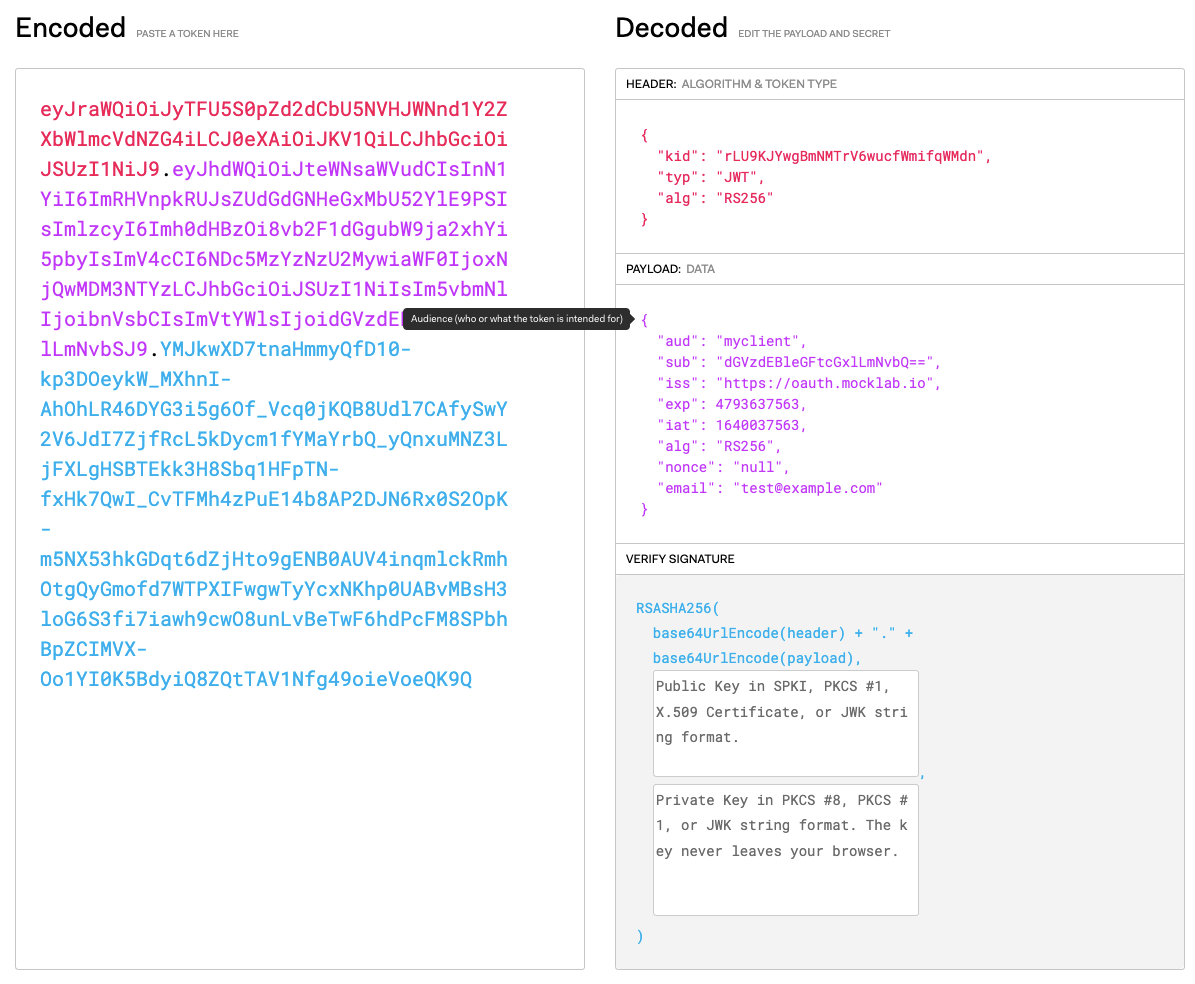
- Open the test token on jwt.io

- You now have properly signed test JWT token with subject field matching the
unique id of the user you logged in with at step 5 and with the issuer claim
matching the mock OIDC provider.


The custom Authorization Server is emulated by generating a JWT in the test code with a random symmetrical key and using the same key to configure JWTDecoder in the Spring Security. In the production scenarios most likely the JWTDecoder would be configured with the public key of the AS obtained via dedicated endpoint.