notation-hashicorp-vault
Hashicorp Vault signing plugin for Notation
Setup
- There are two binaries in the release:
key-helperandnotation-hc-vault. - Install the
notation-hc-vaultplugin to the notation path specified by notation plugin spec. On unix, the path is$XDG_CONFIG_HOME/notation/plugins/hc-vault/notation-hc-vault. key-helperis a standalone helper CLI used to configure Hashicorp Vault.
Install and Configure Hashicorp Vault Server
-
Create a Vault config file under your work directory. A minimal working example is shown below, more details about config can be found here:
$ cat > vault-server.hcl <<EOF
disable_mlock = true
ui            = true

listener "tcp" {
address     = "127.0.0.1:8200"
tls_disable = "true"
}

storage "raft" {
path = "/tmp/vault-data"
}
EOF
-
Start a prod server
vault server -config vault-server.hcl
-
At this point, open
127.0.0.1:8200in your browser to see the webpage of your Hashicorp Vault server. -
Initialize Vault (this is a one-time step, you do not need to do this step in the future). In this example, the root key is split into 3 key shares, and any two keys of the three will be sufficient to unseal Vault, see details.
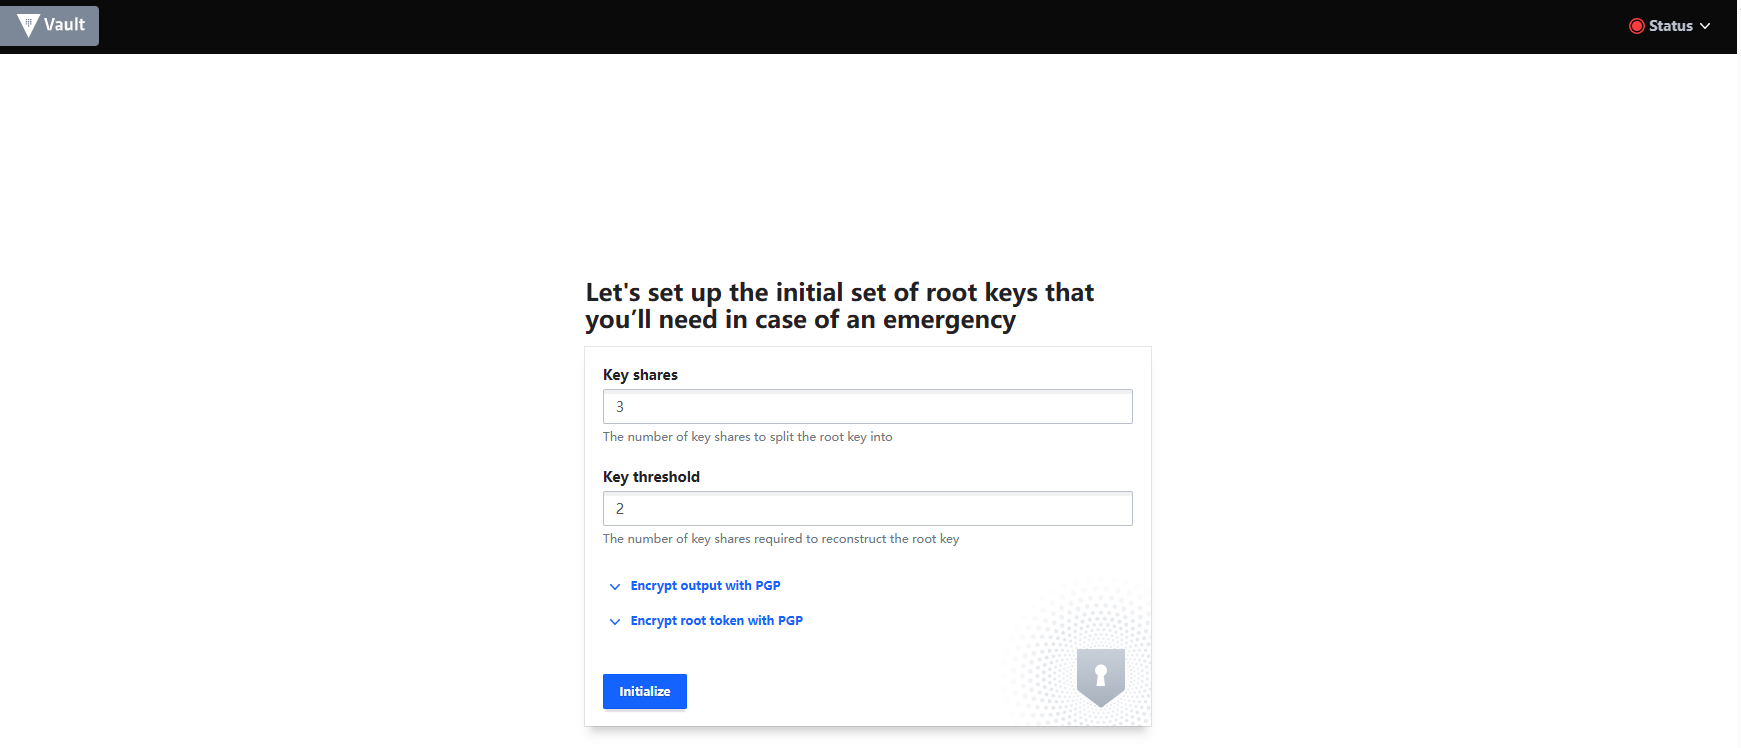
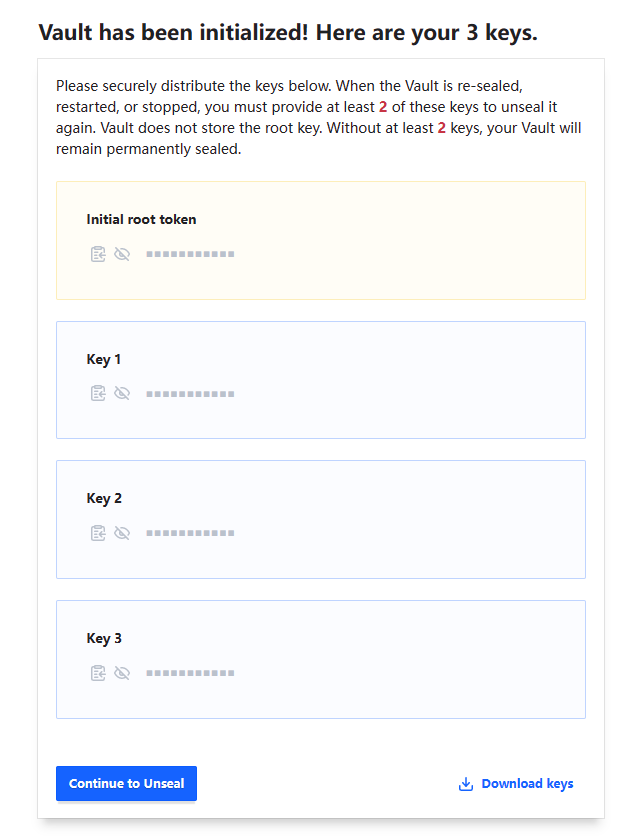
IMPORTANT Remember to hit the
Download Keysbutton before going forward. Both keys and the initial root token are downloaded. They are required to unseal Vault and sign in.Unseal Vault
Enter two of the three keys generated previously to unseal Vault.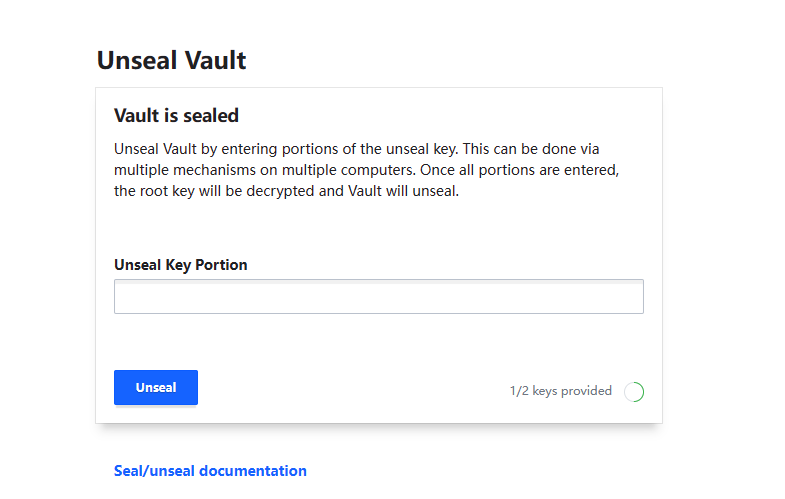
Sign in
For test purpose, enter the root token inToken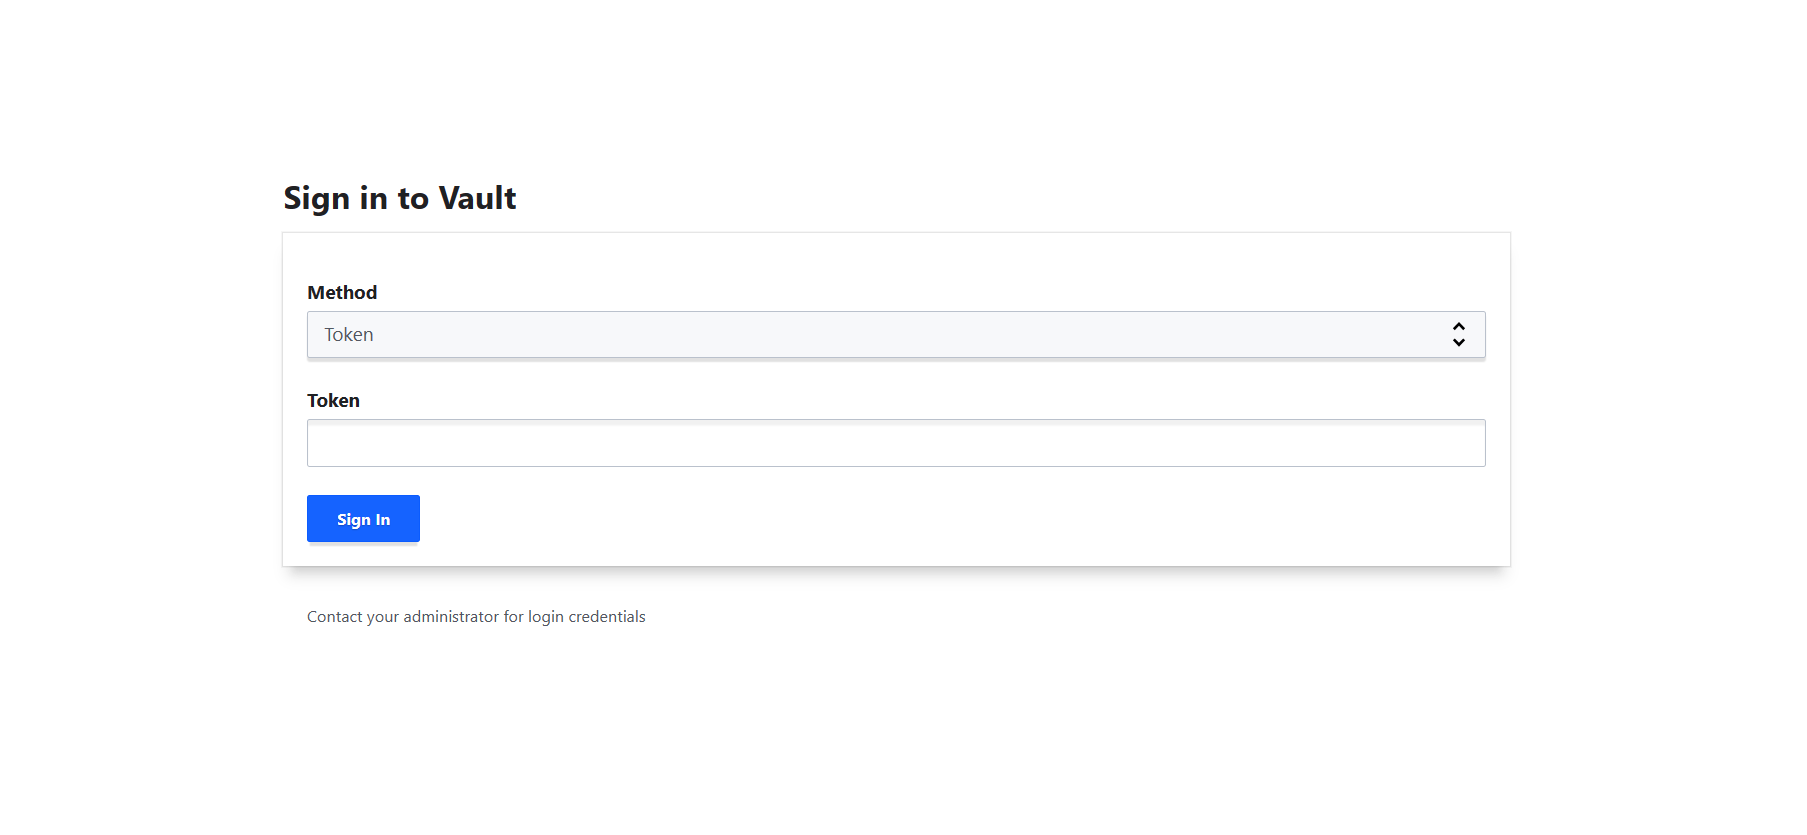
By now, the Hashicorp Vault production server is ready to be used.
Note: when Vault process is stopped/closed, Vault will be sealed again.
-
Configure Vault client to talk to your server:
export VAULT_ADDR='http://127.0.0.1:8200'
Set the
VAULT_TOKENenvironment variable value to the downloaded Root Token value.export VAULT_TOKEN="hvs.**************"
Note: Do not use the root token for production usage of Notation and Vault.
-
If this is your first time setting up Hashicorp vault, you need to enable the Transit Secrets Engine and the KV Secrets Engine. (You could do this in Vault's web UI as well.)
vault secrets enable transit
vault secrets enable -path=secret kv-v2
(Step 7 is a one-time setup, you do not need this step in the future.)


Generate Private Key and Certificate Chain
Now you have an empty Hashicorp Vault. Let's put something in it.
A user can bring their own private key and certificate. As a quick start, this tutorial is using openssl to generate a private key and a certificate chain of length 2.
- Generate CA root certificate
openssl genrsa -out ca.key 2048

openssl req -new -x509 -days 365 -key ca.key -subj "/O=Notation/CN=Notation Root CA" -out ca.crt -addext "keyUsage=critical,keyCertSign"
- Generate private key and leaf certificate
(
openssl genrsa -out leaf.key 2048

openssl req -newkey rsa:2048 -nodes -keyout leaf.key -subj "/CN=Notation.leaf" -out leaf.csr

openssl x509 -req -extfile <(printf "basicConstraints=critical,CA:FALSE\nkeyUsage=critical,digitalSignature") -days 365 -in leaf.csr -CA ca.crt -CAkey ca.key -CAcreateserial -out leaf.crt
leaf.keyis the private key used to sign) - Create the certificate chain in a pem file (CA certificate after leaf certificate)
cat leaf.crt ca.crt > certificate_chain.pem - Import the certificate chain and private key into the Hashicorp Vault using
key-helper./key-helper import --cert_path "{path-to}/certificate_chain.pem" --key_name "myNotationTestKey" --key_path "{path-to}/leaf.key"
leaf.keyis saved in the Transit Secrets Engine, andcertificate_chain.pemis saved in the KV Secrets Engine
Sign an artifact using Notation
Now we've done all the configurations. Let's sign an artifact using Notation. (If you haven't done so, download notation from here.)
./notation sign --id "myNotationTestKey" --plugin "hc-vault" <myRegistry>/<myRepo>@<digest>Note: the --id should be identical to your --key_name in the previous step.
Verify the artifact using Notation
- Configure trust store.
where
./notation cert add -t ca -s myStore "{path-to-ca-cert}/ca.crt"ca.crtis the CA root cert generated in the previous step. - Confgiure the trust policy.
cat <<EOF > ./trustpolicy.json
{
    "version": "1.0",
    "trustPolicies": [
        {
            "name": "hc-vault-policy",
            "registryScopes": [ "*" ],
            "signatureVerification": {
                "level" : "strict"
            },
            "trustStores": [ "ca:myStore" ],
            "trustedIdentities": [
                "*"
            ]
        }
    ]
}
EOF
./notation policy import ./trustpolicy.json
- Verify the artifact
./notation verify <myRegistry>/<myRepo>@<digest> -v