If you've ever wanted to generate a texture from C++ in UE5, here's one way to do it.
I've never packed up an Unreal plugin before, so maybe the plugin in the src folder just works for you if you copy it into your project folder, 🤷
- Add the
BP_DynamicTextureactor to your scene (it should be a cube with theMaterial_Dynamicalready set on it, andDynamicTexturecomponent already added) - Run the project and you should see a cube with a pattern like shown above
- Modify the
UDynamicTextureComponent::TickComponent()function to modify the texture in whatever way you want - Go back to Unreal, hit
CTRL-ALT-F11to trigger a hot rebuild (do NOT use build from within Visual Studio) - Repeat from 3 until you have what you want
If the plugin fails for whatever reason, here's how I went about doing this.
- navigate to the
Toolsmenu - select
New C++ Class - click
Show all classes - type
ActorComponent - name it whatever you like, I called mine
DynamicTexture
Unreal will do its thing, then should show you your files within Visual Studio
- you should see a file ending with
.Build.csnear your new source files (mine isDynamicTexturePlugin.Build.cs) - you should see existing dependencies such as
"CoreUObject", "Engine", "Slate", "SlateCore" - add
"RHI", "RenderCore"to the end, otherwise you'll get linker error
- copy the source from the repo into whatever files you've created
- DynamicTextureComponent.cpp
- DynamicTextureComponent.h
- pre-empting the next step, we need a blank texture
- create a texture the same size of what you're going to use via code, for me it's
1024x1024 - save it as a PNG and import it into Unreal (I called mine
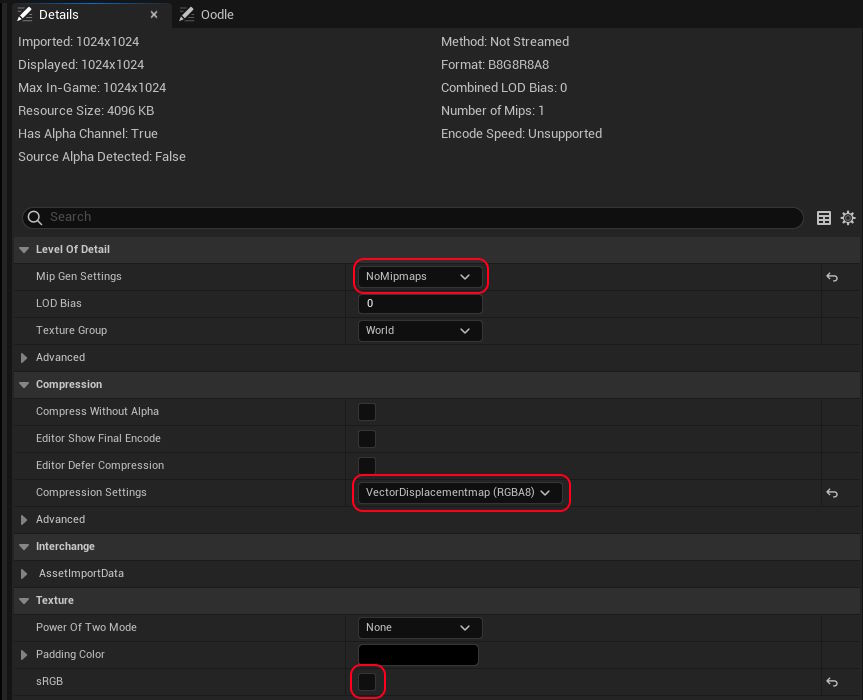
Texture_Blank1024) - double-click it to open it
- change
Mip Gen SettingstoNoMipmaps - change
Compression SettingstoVectorDisplacementMap (RGBA8)(which ironically results in aB8G8R8A8texture for us to use) - uncheck the
sRGBcheckbox
- right click on your content browser and click
New Material, I named mineMaterial_Dynamic - double-click it to open it
- left click the
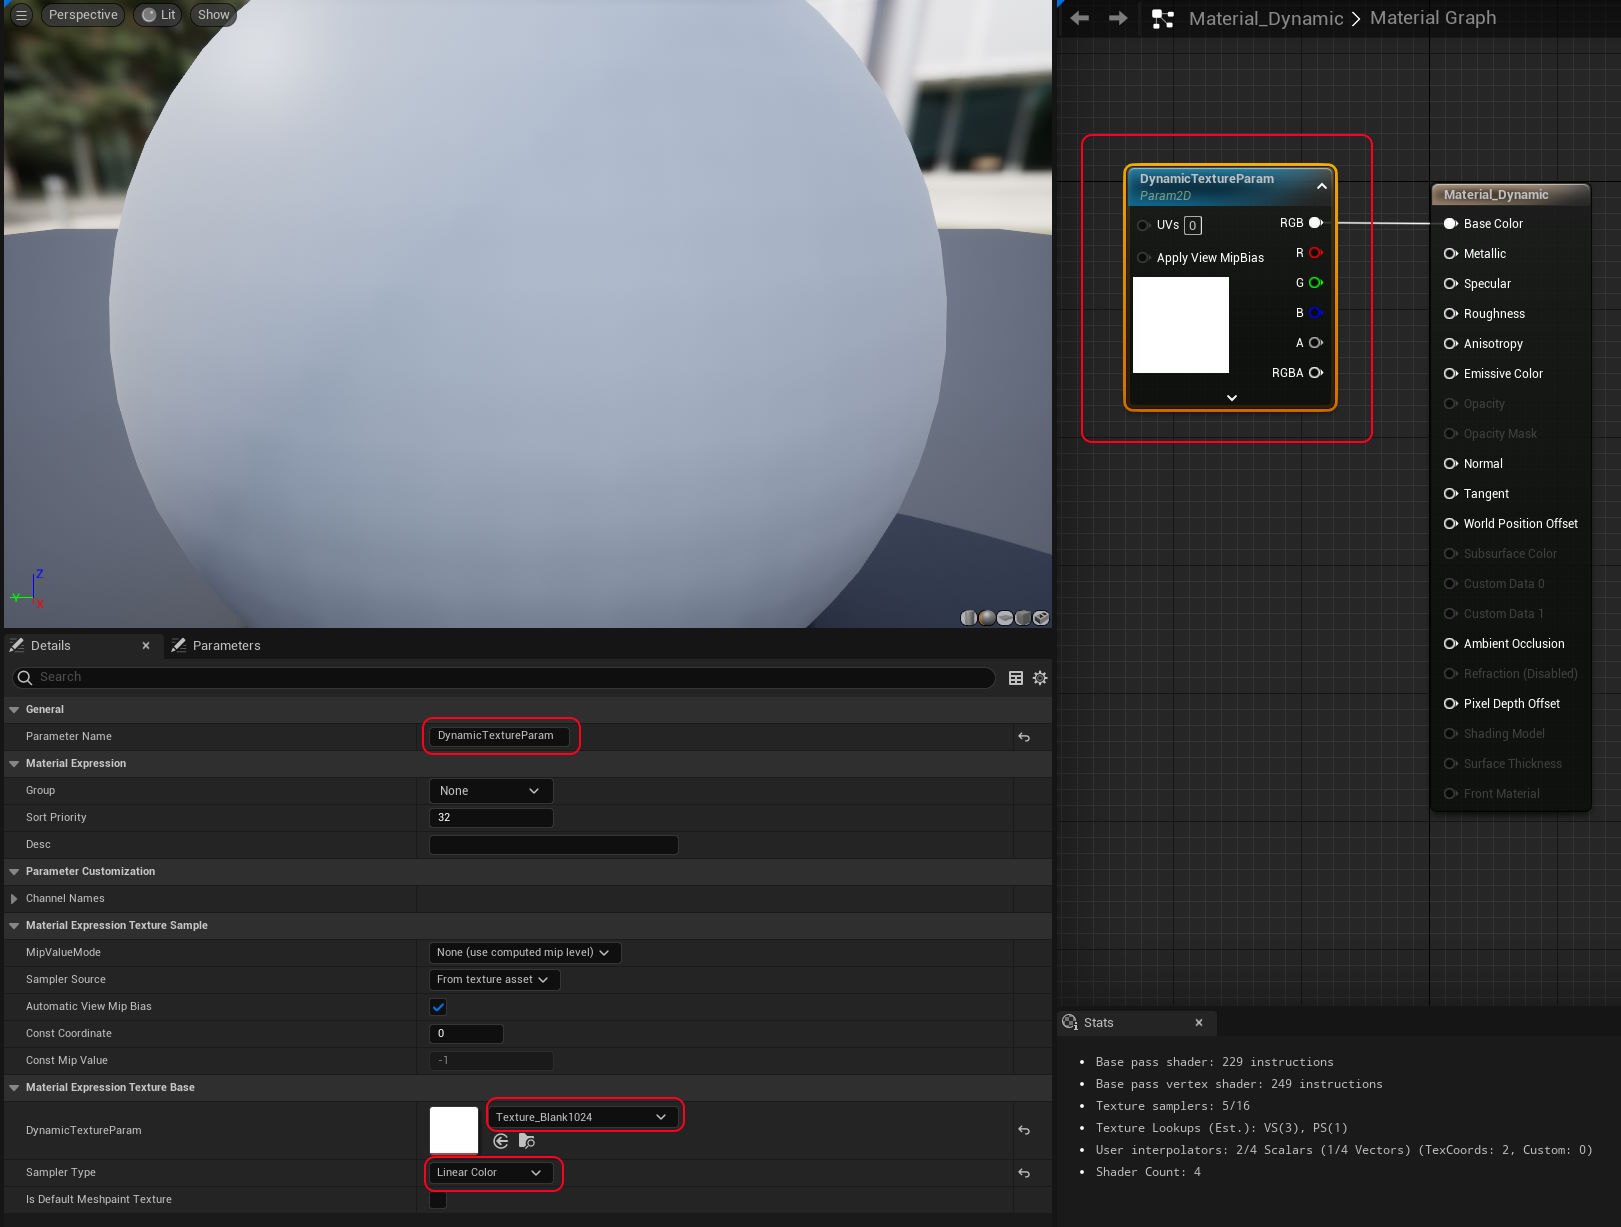
Base Colorpin and drag it off to the side, then release it - in the popup that appears, type
TextureSampleParameter2Dto create that node - it will be asking for the name of it, make sure to name it
DynamicTextureParam - with the node still selected, note the
Material Expression Texture Basesection of theDetailstab that should be visible somewhere - change the texture from
DefaultTextureto the texture you setup in the previous step (Texture_Blank1024for me) - change the
Sampler TypetoLinearColor(this would fail with the default texture, which is why we created our own first)
- right click on your content browser and click
Blueprint Class - show all classed
- selected
StaticMeshActor - I named mine
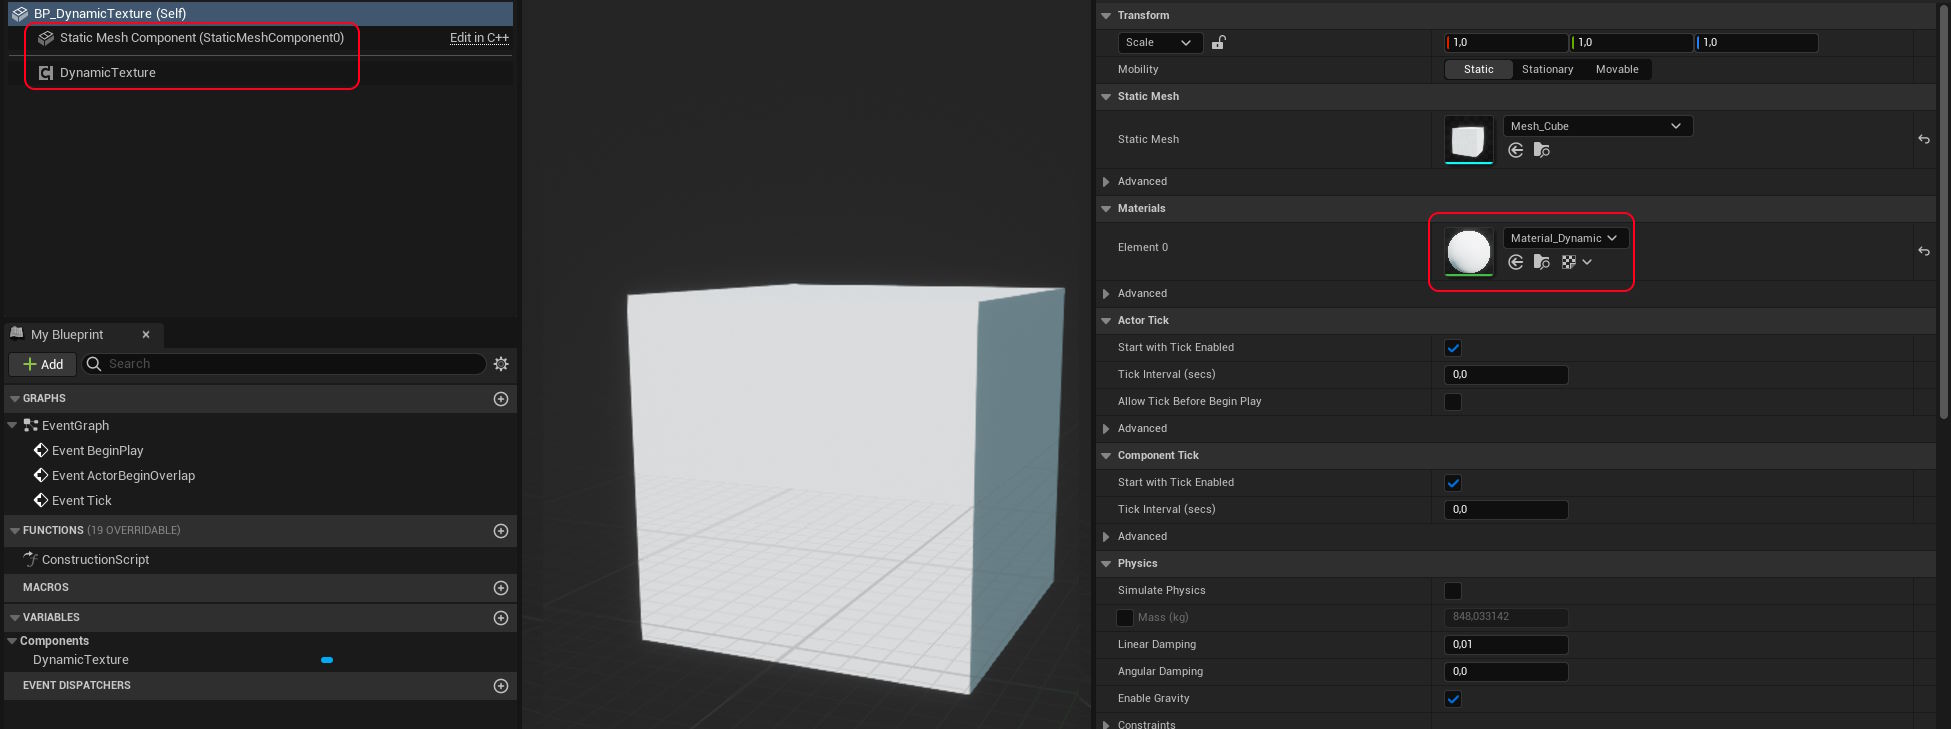
BP_DynamicTexture - double-click it to open it
- select the
StaticMeshComponentcomponent and select a mesh, any will do, a plane works - change the material it's using to be the material we created above (
Material_Dynamicfor me) - now add a new component, the component we created in the first step (
DynamicTextureComponentfor me)
Now you should finally be able to run your project and see a changing texture!


