This repository provides a code sample in .NET on how you might use a combination of Azure Functions, Cosmos DB, and EventHub to implement an event-driven medical insurance claims process. With minimal changes this could be modified to work for other insurance processes.
The scenario centers around a medical claims management solution. Members having coverage and making claims, providers who deliver services to the member and payers who provide the insurance coverage that pays providers for services to the members.
Claims submitted are submitted in a stream and loaded into the backing database for review and approval.
Business rules govern the automated or human approval of claims.
An AI powered co-pilot empowers agents with recommendations on how to process the claim.
The solution architecture is represented by this diagram:

- Backend (Function App, Console Apps, etc.)
- Visual Studio Code or Visual Studio 2022
- .NET 7 SDK
- Frontend (React web app)
- Visual Studio Code
- Ensure you have the latest version of NPM and node.js:
- Install NVM from https://github.com/coreybutler/nvm-windows
- Run nvm install latest
- Run nvm list (to see the versions of NPM/node.js available)
- Run nvm use latest (to use the latest available version)
To start the React web app:
- Navigate to the
ui/medical-claims-uifolder - Run npm install to restore the packages
- Run npm run dev
- Open localhost:3000 in a web browser
From the deploy/powershell folder, run the following command. This should provision all of the necessary infrastructure, deploy builds to the function apps, deploy the frontend, and deploy necessary artifacts to the Synapse workspace.
.\Unified-Deploy.ps1 -resourceGroup <resource-group-name> `
-subscription <subscription-id>For deployments that need to use an existing OpenAI service, run the following from the deploy/powershell. This will provision all of the necessary infrastruction except the Azure OpenAI service and will deploy the function apps, the frontend, and Synapse artifacts.
.\Unified-Deploy.ps1 -resourceGroup <resource-group-name> `
                     -subscription <subscription-id> `
                     -openAiName <openAi-service-name> `
                     -openAiRg <openAi-resource-group-name> `
-openAiDeployment <openAi-completions-deployment-name>The following flags can be used to enable/disable specific deployment steps in the Unified-Deploy.ps1 script.
| Parameter Name | Description |
|---|---|
| stepDeployBicep | Enables or disables the provisioning of resources in Azure via Bicep templates (located in ./infrastructure). Valid values are 0 (Disabled) and 1 (Enabled). See the deploy/powershell/Deploy-Bicep.ps1 script. |
| stepPublishFunctionApp | Enables or disables the publish and zip deployment of the CorePayments.FunctionApp project to the regional function apps present in the target resource group. Valid values are 0 (Disabled) and 1 (Enabled). See the deploy/infrastructure/Publish-FunctionApp.ps1 script. |
| stepDeployOpenAi | Enables or disables the provisioning of (or detection of an existing) Azure OpenAI service. If an explicit OpenAi resource group is not defined in the openAiRg parameter, the target resource group defaults to that passed in the resourceGroup parameter. Valid values are 0 (Disabled) and 1 (Enabled). See the deploy/infrastructure/Deploy-OpenAi.ps1 script. |
| stepPublishSite | Enables or disables the build and deployment of the static HTML site to the hosting storage account in the target resource group. Valid values are 0 (Disabled) and 1 (Enabled). See the deploy/infrastructure/Publish-Site.ps1 script. |
| stepSetupSynapse | Enables or disables the deployment of a Synapse artifacts to the target synapse workspace. Valid values are 0 (Disabled) and 1 (Enabled). See the deploy/infrastructure/Setup-Synapse.ps1 script. |
| stepLoginAzure | Enables or disables interactive Azure login. If disabled, the deployment assumes that the current Azure CLI session is valid. Valid values are 0 (Disabled). |
Example command:
cd deploy/powershell
./Unified-Deploy.ps1 -resourceGroup myRg `
                     -subscription 0000... `
                     -openAiName myOpenAi `
                     -openAiRg myOpenAiRg `
                     -openAiDeployment completions `
                     -stepLoginAzure 0 `
                     -stepDeployBicep 0 `
                     -stepPublishFunctionApp 1 `
-stepPublishSite 1-
After deployment is complete, go to the resource group for your deployment and open the Azure Storage Account prefixed with
web. This is the storage account hosting the static web app. -
Select the
Static websiteblade in the left-hand navigation pane and copy the site URL from thePrimary endpointfield in the detail view.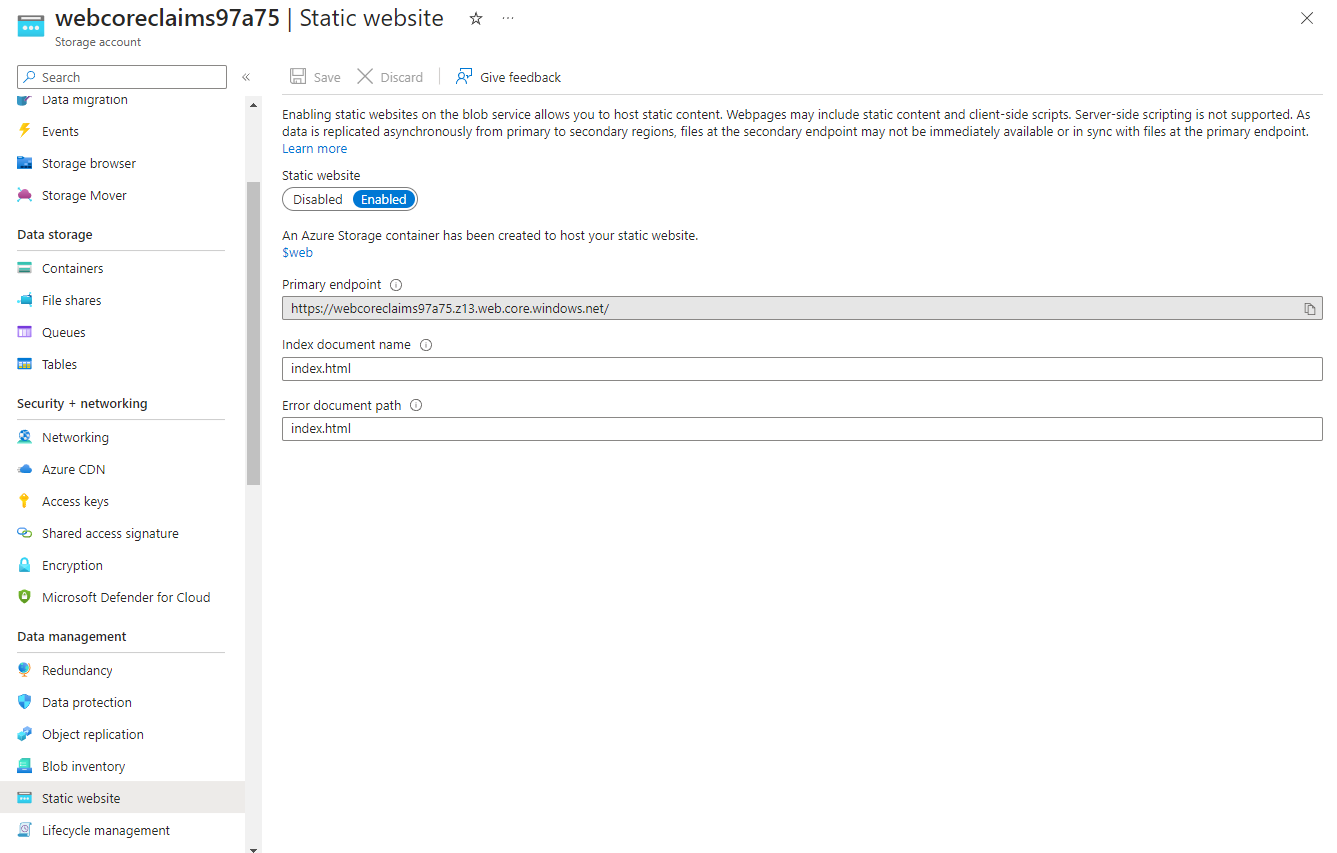
-
Browse to the URL copied in the previous step to access the web app.

Resources created:
- Resource group
- Azure Blob Storage (ADLS Gen2)
- Azure Cosmos DB account (1 database with 1000 RUs autoscale shared with 4 collections, and 3 containers with dedicated RUs) with Analytical Store enabled
- Azure Event Hub standard
- Azure Functions Consumption Plan
- Azure Application Insights
- Azure OpenAI
- Synapse Workspace (public access enabled)
This setup will provision the Ingestion pipeline and supporting components in the Synapse workspace created in the previous step.
Resources Created:
- Linked Services for:
- Azure Blob Storage
- Azure Cosmos DB
- Source/Sink datasets for the ingestion process
- Pipeline for ingesting Synthea output into Cosmos Db Containers
This will require logging into the azure portal, and accessing the Synapse workspace.
- Log into the Synapse workspace in Synapse Studio
- Locate the Initial-Ingestion pipeline in the Integrate section in the side menu
- Click the Add trigger -> Trigger now button to run the pipeline
The pipeline execution should take about 5 minutes to complete. You can monitor the progress of the pipeline by clicking on the Monitor section in the side menu and selecting the Pipeline runs tab.
You can run the sample application through the static website that was deployed as part of the setup process.
You can also work directly with the REST API by calling the Function App APIs from Azure Portal or your favorite tool.
Postman Exports are included in the
/postmanfolder
This console app will generate random claims and publish them to the EventHub topic the FunctionApp subscribes to which then will be injested into Cosmos
Claimcontainer where we will store all Claim and Claim line item events data. Take note of one of the ClaimId uuids output from this tool which has value over $500.Console app has 2 "RunMode" options configurable in settings.json under
./src/CoreClaims.Publisher: "OneTime" (default) and "Continous" as well as "BatchSize" (default - 10), "Verbose" (default - True) and "SleepTime" (default - 1000 ms).settings.json example:
{
  "GeneratorOptions": {
    "RunMode": "OneTime",
    "BatchSize": 10,
    "Verbose": true,
    "SleepTime": 1000
  },
  "CoreClaimsCosmosDB": {
    "accountEndpoint": "AccountEndpoint=https://*COSMOS_ACC_NAME*.documents.azure.com:443/;AccountKey=*COSMOS_ACC_KEY*;"
  },
  "CoreClaimsEventHub": {
    "fullyQualifiedNamespace": "Endpoint=sb://*YOUR_EH_NAME*.servicebus.windows.net/;SharedAccessKeyName=RootManageSharedAccessKey;SharedAccessKey=*EH_KEY*"
  }
}
cd ../src/CoreClaims.Publisher
dotnet runBrowse to the URL copied in the previous step to access the web app.
-
When a new claim is added:
- If the member this claim belongs to doesn't have a Coverage record that is active for the
filingDate, the claim should beRejected - If the
totalAmountvalue is less than 200.00 (configurable) it should beApproved - If the
totalAmountvalue is greater than 200.00, it should beAssigned - Finally, if your initial ingestion run has a large volume of claims, it's possible the ChangeFeed triggers are still catching up, and the status may be
Initial
- If the member this claim belongs to doesn't have a Coverage record that is active for the
-
When the claim is assigned to an adjudicator:
- Go to the Adjudicator page and select Acknowledge Claim Assignment and observe the flow of the claim through the system (change feed triggers, etc.). There should be claims assigned to both the Non-Manager and the Manager Adjudicators.
-
When the claim is acknowledged:
- The claim should be
Assignedto the Adjudicator - Selecting Deny Claim will finalize the claim as
Deniedand publish the final status of the claim to aClaimDeniedtopic on the event hub - Selecting Propose Claim without applying discounts on the Line Items, or changing them such that the difference between the total before and after is less than $500.00 (configurable) will trigger an automatic approval
- Selecting Propose Claim while applying discounts on the Line Items so the total before and after differs by more than $500.00 will trigger manager approval, updating the status to
ApprovalRequiredand assigning a new adjudicator manager to the claim. Since we are hard-coding the Non-Manager and Manager Adjudicators, you should be able to select the Manager tab and see the claim assigned to the Manager Adjudicator.
Note: If you propose a claim as an adjudicator manager, the claim will always be approved, regardless of the total discount amount.
- The claim should be
-
Reviewing the claim history:
- Select View History on a claim row to see the history of the claim
- All claims start in the
Initialstate, from here they can transition toDeniedif the member is uninsuredApprovedif the total is less than 200Assignedif the total is more than 200
- From
Assignedit transitions toAcknowledgedwhen the adjudicator acknowledges the claim - From
AcknowledgetoDeniedif the adjudicator declines the claimProposedif the adjudicator proposes some updates
- From
ProposedApprovedif the changes are under a configured thresholdApprovalRequiredif the changes are over a threshold
- From
ApprovalRequiredtoDeniedorProposed
-
Final claim state:
- Once a Claim reaches the
DeniedorApprovedstate, it will get published to another pair of EventHub topics for hypothetical downstream processing - Note that when a Claim gets to a final
Approvedstate, the associated Member document within theMembercontainer will get updated with increments of the following two attributes:approvedCount- the number of claims that have been approved for this memberapprovedTotal- the total amount of all claims that have been approved for this member
- Once a Claim reaches the
#Setting variables
SUFFIX=<your suffix>
CLAIM_ID=<Claim UUID from Publisher>
FUNCTION_KEY=<FunctionApp Authorization Key from Portal>

curl "https://fa-coreclaims-$SUFFIX.azurewebsites.net/api/claim/$CLAIM_ID" \
    --request GET \
    --header "x-functions-key: $FUNCTION_KEY"
then get history:
#Setting variables
SUFFIX=<your suffix>
CLAIM_ID=<Claim UUID from Publisher>
FUNCTION_KEY=<FunctionApp Authorization Key from Portal>

curl "https://fa-coreclaims-$SUFFIX.azurewebsites.net/api/claim/$CLAIM_ID/history" \
    --request GET \
    --header "x-functions-key: $FUNCTION_KEY"
Check the status of the claim response. At this point it should be one of a few values
- If the member this claim belongs to doesn't have a Coverage record that is active for the
filingDate, the claim should beRejected - If the
totalAmountvalue is less than 200.00 (configurable) it should beApproved - If the
totalAmountvalue is greater than 200.00, it should beAssigned - Finally, if your initial ingestion run has a large volume of claims, it's possible the ChangeFeed triggers are still catching up, and the status may be
Initial
Repeat these steps till you find a claim that has the status Assigned which will be assigned to random AdjudicatorId
For simulation of manual claims Adjudication process we first need to call Claim Ackowledgement API to trigger downstream processing logic. This is simulating an Adjudicator acknowledging the claim has been assigned to them in preparation for adjudication.
curl "https://fa-coreclaims-$SUFFIX.azurewebsites.net/api/claim/$CLAIM_ID/acknowledge" \
    --request POST \
    --header "x-functions-key: $FUNCTION_KEY" \
    --header "Content-Type: application/json" \
--data-raw '{}'This is simulating an Adjudicator making any adjustments to a claim (applying discounts), and proposing an update, or denying a claim.
Once it is acknowledged in a previous step - you can now execute this API to do a manual Adjudication based on following conditions for this API payload:
Here you have some choices
- Setting
claimStatustoDeniedwill finalize the claim asDeniedand publish the final status of the claim to aClaimDeniedtopic on the event hub - Setting
claimStatustoProposedwithout changing thelineItems, or changing them such that the difference between the total before and after is less than 500.00 (configurable) will trigger automatic approval - Setting
claimStatustoProposedwhile changing thelineItemsso the total before and after differs by more than 500.00 will trigger manager approval, updating the status toApprovalRequiredand assigning a new adjudicator to the claim. At which point you can call the endpoint again, acting as the manager approver. To simulate this type of processing - copylineItemsarray from GetClaimbyId output, paste/update in the payload for this API in addition to Status update with modifieddiscountline item values total over $500.
curl "https://fa-coreclaims-$SUFFIX.azurewebsites.net/api/claim/$CLAIM_ID" \
    --request PUT \
    --header "x-functions-key: $FUNCTION_KEY" \
    --header "Content-Type: application/json" \
    --data-raw '{
        "claimStatus": "Proposed",
        "comment": "<free text comment>",
        "lineItems": [
            ...
        ]
}'curl "https://fa-coreclaims-$SUFFIX.azurewebsites.net/api/claim/$CLAIM_ID/history" \
--request GET \
--header "x-functions-key: $FUNCTION_KEY"From the response you should be able to see the history of the various stages the claim has been too.
- All claims start in the
Initialstate, from here they can transition toDeniedif the member is uninsuredApprovedif the total is less than 200Assignedif the total is more than 200
- From
Assignedit transitions toAcknowledgedwhen the adjudicator acknowledges the claim - From
AcknowledgetoDeniedif the adjudicator declines the claimProposedif the adjudicator proposes some updates
- From
ProposedApprovedif the changes are under a configured thresholdApprovalRequiredif the changes are over a threshold
- From
ApprovalRequiredtoDeniedorProposed
Once a Claim reaches the Denied or Approved state, it will get published to another pair of EventHub topics for hypothetical downstream processing.
Note that when Claim get to final Approved state - member main document in Member container will get updated with increments of 2 additional attributes:
 "approvedCount": 6,
 "approvedTotal": 5851.93
which you can see by calling Read MemberId API ( see below reference APIs):
Functions support a set of additional Reference Read APIs:
- GetMemberById
#Setting additional variables
MEMBER_ID=<Member UUID>

curl "https://fa-coreclaims-$SUFFIX.azurewebsites.net/api/member/$MEMBER_ID" \
    --request GET \
--header "x-functions-key: $FUNCTION_KEY"- List Claims for MemberId
#Setting additional variables
MEMBER_ID=<Member UUID>

curl "https://fa-coreclaims-$SUFFIX.azurewebsites.net/api/member/$MEMBER_ID/claims?offset=0&limit=50" \
    --request GET \
--header "x-functions-key: $FUNCTION_KEY"- List Claims for AdjudicatorId
#Setting additional variables
ADJUDICATOR_ID=<Member UUID>

curl "https://fa-coreclaims-$SUFFIX.azurewebsites.net/api/adjudicator/$ADJUDICATOR_ID/claims?offset=0&limit=100" \
    --request GET \
--header "x-functions-key: $FUNCTION_KEY"- List Providers
curl "https://fa-coreclaims-$SUFFIX.azurewebsites.net/api/providers?offset=0&limit=50" \
    --request GET \
--header "x-functions-key: $FUNCTION_KEY"- List Payers
curl "https://fa-coreclaims-$SUFFIX.azurewebsites.net/api/payers?offset=0&limit=50" \
    --request GET \
--header "x-functions-key: $FUNCTION_KEY"CTRL + Cto stop Publisher app (if running in Continuous mode)- Delete the Resource Group to destroy all resources
If you find any errors or have suggestions for changes, please be part of this project!
- Create your branch:
git checkout -b my-new-feature - Add your changes:
git add . - Commit your changes:
git commit -m '<message>' - Push your branch to Github:
git push origin my-new-feature - Create a new Pull Request 😄