A bridge between a solar PV inverter and MQTT, written in Typescript and executed using node.js.
SolarPi reads the following values from the inverter:
- Inverter Status (status, temperature, error)
- PV Power (both strings and total)
- PV Voltage (both strings)
- PV Energy (today and total)
- Battery Charge/Discharge Power
- Battery State of Charge
- Grid Import/Export Power
- Load Power
- Grid Import/Export Energy (today and total)
- Load Energy (today and total)
- Battery Charge/Discharge Energy (today and total)
- Grid Voltage
- Command Status (indicating whether a command was accepted or not)
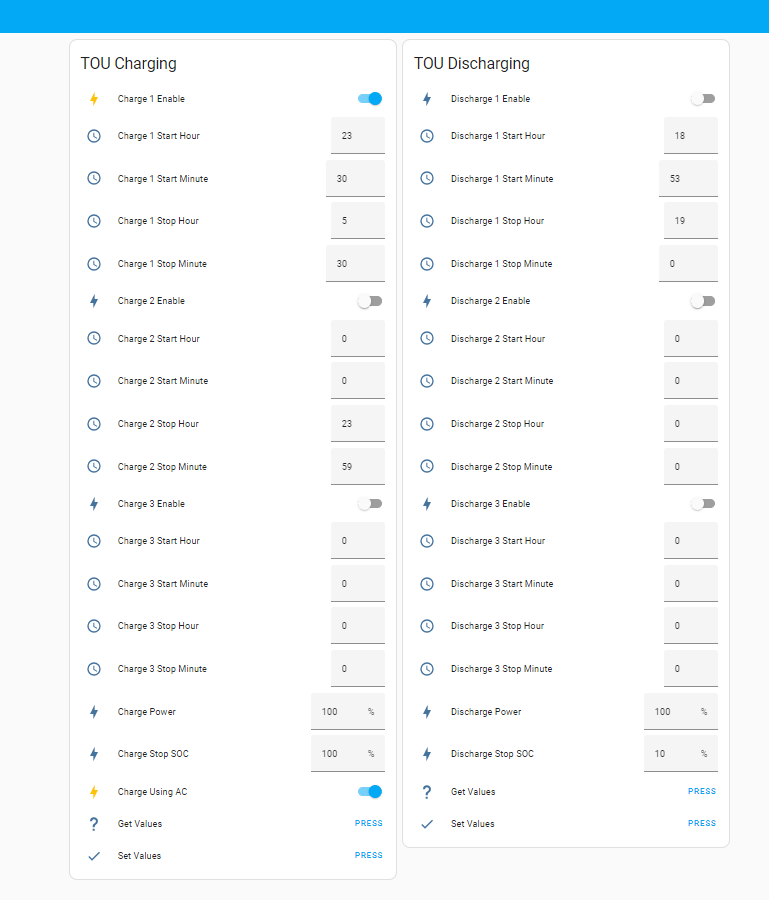
SolarPi reads and writes the following Time of Use (TOU) values:
- TOU Charging:
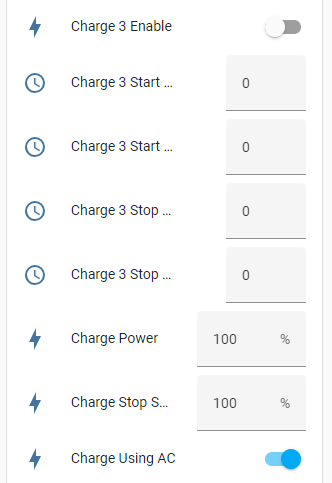
- Charging Power %
- Stop Charging SOC %
- AC Charging on/off
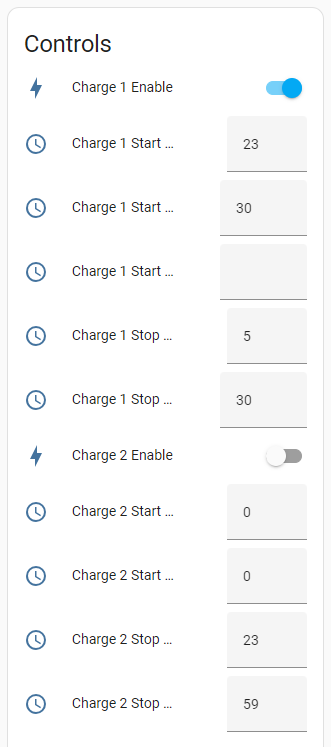
- Start Hour/Minute, Stop Hour/Minute and Enable on/off for three time periods
- TOU Discharging:
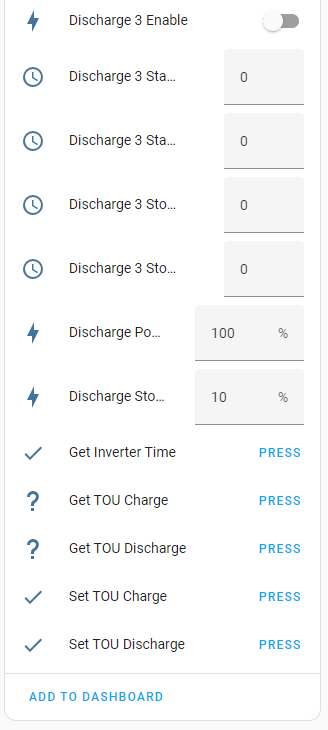
- Discharging Power %
- Stop Discharging SOC %
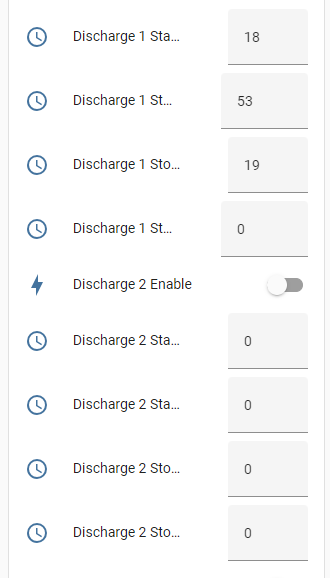
- Start Hour/Minute, Stop Hour/Minute and Enable on/off for three time periods
SolarPi creates and updates the following Device (SOLARPI Bridge), Control Entities and Sensor Entities automatically in Home Assistant:
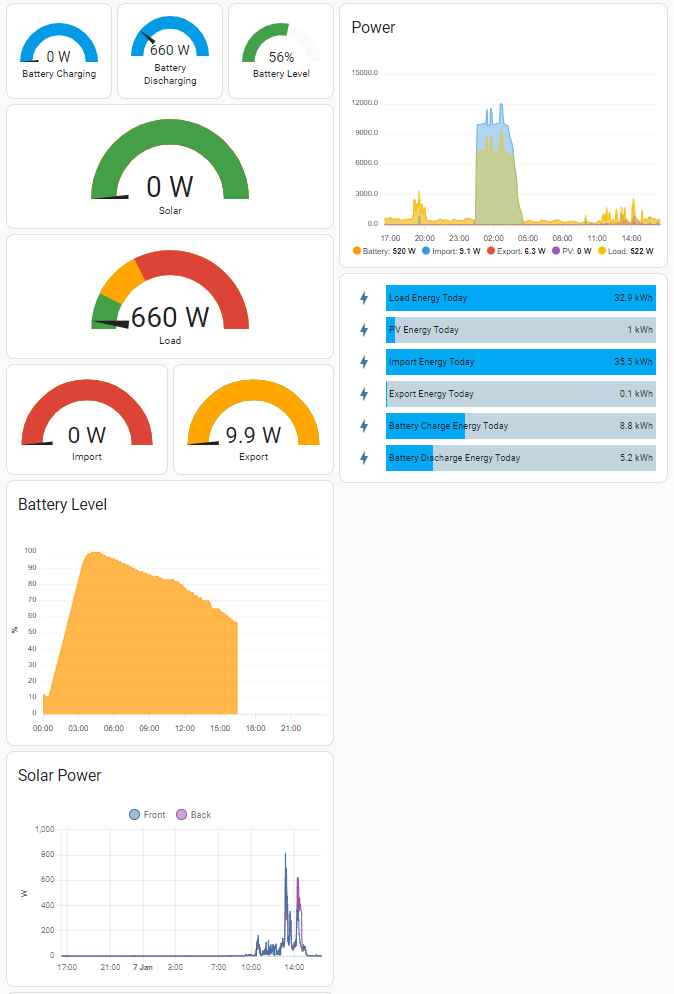
From these, Lovelace Dashboards such as the following can be created.
Home Assistant automations can be simply written to control when the battery is charged and how much it is charged - e.g. if the forecast for the next day is good, then only charge the battery 50% over night. I use an automation in Home Assistant to set the "Stop Charging SOC %" based on the next day' Solar Forecast.
I have built SolarPi to interface my Growatt SPH3000 with Home Assistant without relying on the Growatt web API or interferring with the Growatt Datalogger/WiFi dongle. That is to say the Growatt web dashboard and the Growatt ShinePhone app still work (as well as they ever did). My approach uses a standard serial port interface on the inverter in accordance with the Growatt Modbus Inverter RTU Protocol document v.1.20.
The RS485 port on the inverter must be available and not used by any other external device, i.e. there should be nothing plugged into it already!
I am running this code on a Raspberry Pi Zero W with an RS485-USB adapter (specifically this: https://amzn.eu/d/foIEFqZ, but others should work), I have the USB adapter plugged into the Pi using a micro-USB (male) to USB A (female) OTG adapter cable.
I have designed SolarPi so that the code is extensible to integrate other Growatt inverters and potentially other brands of inverter.
- First release
- Added simple script to backup the Growatt SPH settings to a text file (command line: node ./dist/backupGrowattSPH.js).
- Enabled control of Time Of Use Charging via MQTT
- Added bounds to entities published by MQTT (e.g. limiting hours to 0-23)
- Shorted names of entities published by MQTT so they can be more easily directly used in dashboards
- Added command to get the time from the inverter (does nothing more than create a button entity and trigger an MQTT message right now)
- Added USB device path configuration to options.json file to allow different USB adapters to be used without the need to edit the code
- Fixed PV2 voltage incorrectly reading PV2 power
- Added grid voltage sensor entity
- Added TOU dishcharge entities to allow forced discharge to the grid to be set
- Added Command Status entity that can be used to show whether the last command sent to the inverter was successful or not. This sensor entity is automatically discovered by Home Assistant and will show text such as "Command OK", the actual message sent via MQTT from SolarPi is a JSON object that contains text and a boolean error representation that could be used in automations. Having this Command Status entity is useful to detect when TOU Charge/Discharge periods overlap in a way the inverter rejects (you can't charge and discharge at the same time!). Also, if a command is not ok, then the actual values being used by the inverter are updated in Home Assistant. Also tidied up code including shortening of entity variables and MQTT value templates.
- Tested with Node.js version 20.9.0. See note below on updated Node.js versions. I'll update the installation instructions to use 20.9.0 at the next release.
These instructions should get you set up with a connection to the inverter and the code installed. When complete you need to start the code in the next section.
- Optionally add a plug to RS485 converter (if you are using the Amazon item above, this needs an RJ45 plug adding in order to physically connect to the inverter).
- The white and green wires (serial data lines) from the adapter need connecting to pins 4 and 5 of an RJ45 connector. These can be connected either way as the adapter will automatically detect polarity. If you find problems using pins 4 and 5, try pins 1 and 5 instead - they should be equivalent.
- The thin wire gauge makes crimping a connector on difficult - getting a good crimp is hard, so I recommend chopping off an old ethernet patch cable and joining the two together.
- Configure the inverter to use the RS485 port for monitoring (these are the steps for the SPH3000):
- Press and hold the OK key on the inverter for 3 seconds and release to enter the "Basic Parameter" menu
- Press OK to enter the "RS485 Setting" menu
- Press OK to enter the "Port" menu
- Use up/down arrows to select "VPP" as the "Port"
- Install RaspberryPi OS on Raspberry Pi.
- You may want to enable ssh access, set your username/password and setup WiFi before starting the OS.
- Update the OS installation (sudo apt update; sudo apt upgrade).
- Plug in the USB adapter and check that it has been recognised by running dmesg and looking for something like the following output:
[   33.890325] ftdi_sio 1-1:1.0: FTDI USB Serial Device converter detected
[   33.890766] usb 1-1: Detected FT232RL
[   34.332027] usb 1-1: FTDI USB Serial Device converter now attached to ttyUSB0
-
Note the USB device that the converter has created, in the above output text this is "ttyUSB0", it may be "ttyACM0" instead. You will need to put this device path in the config file (options.json) later.
-
Install node.js (I am using version 16.16.0).
- First get the binary package using a command line like this:
- Then unzip it:
- tar xvfJ node-v16.16.0-linux-armv6l.tar.xz
- Then install the files:
- sudo cp -R node-v16.16.0-linux-armv6l/* /usr/local
- Be sure to use the ARMv6 version if you are using a Raspberry Pi Zero
- Other versions of node.js should work, but I've not tested with them.
- This page: https://hassancorrigan.com/blog/install-nodejs-on-a-raspberry-pi-zero/ gives instructions for the above.
-
Download ZIP archive of this repository and unpack to a temporary folder (alternatively clone using Git).
-
Either run the install script or follow/adapt the manual steps below to install the SolarPi code.
-
Start solarpi for the first time
Run the install.sh script using the command line ". ./install.sh". I recommend you familiarise yourself with what the script does first (basically, it creates a solapi user, copies the contents of the folder to /opt/solarpi and installs a systemd service so that solarpi is automatically started on boot and can be controlled using systemctl).
Skip the manual steps below if you use this script.
Follow or adapt these if you don't use the install script.
- Add a new user to run solarpi:
- sudo adduser --system --group solarpi
- Make a folder to put the code in:
- sudo mkdir -p /opt/solarpi
- Copy the code and change the permissions so the new user can run it:
- sudo cp -r . /opt/solarpi/
- sudo chown -R solarpi:solarpi /opt/solarpi
- Change directory to the /opt/solarpi folder and install the node.js dependencies:
- cd /opt/solarpi
- sudo -u solarpi npm install
If you want solarpi to run automatically at boot do the following:
- Install the systemd service file and enable it:
- sudo cp solarpi.service /etc/systemd/system/
- sudo systemctl daemon-reload
- sudo systemctl enable solarpi
Edit the file /opt/solarpi/options.json to provide the following:
- The hostname or IP address of your Home Assistant's MQTT broker ("brokerUrl" in the options file)
- The username and password to access your MQTT broker (these are set in Home Assistant) ("username" and "password" in the options file). Note you can use an SSL secured connection to your MQTT broker with a URL such as mqtts://home-assistant.domain:8883
- Set the time in seconds between each poll for values from the inverter ("interval" in the options file)
- The Inverter Model can currently be set to either SPH3000 or SPH6000 but nothing else as no other models have been defined yet (feel free to adapt the code to support other models though!)
- Set the USB device path based on Installation Steps 5 and 6 above, prefixing the path with /dev (e.g. /dev/ttyUSB0) ("usbDevice" in the options file)
Now test solarpi installation at this point by running it:
- cd /opt/solarpi
- sudo -u solarpi npm start
- Press Control-C to exit at any time
If you've used the install script or followed the manual steps and installed the solarpi systemd service, you can either reboot or run the following to start the service after you've finished testing:
- sudo service solarpi start
Use the following to monitor the output of the service:
- journalctl -f -u solarpi
and then to stop the service (if you need to):
- sudo service solarpi stop
If you have used the install script or followed the complete set of manual steps, solarpi can be removed totally by following these steps:
- sudo systemctl stop solarpi
- sudo systemctl disable solarpi
- sudo rm /etc/systemd/system/solarpi.service
- sudo rm -rf /opt/solarpi
- sudo deluser solarpi
- sudo rm -rf /home/solarpi
If you make improvements, find bugs (in the code or this doc), let me know and, time permitting, I'll try to fix.
Earlier versions of SolarPi were developed for Node.js version 16.16.0. The version of Node.js that is now recommended on the https://nodejs.org site is 20.9.0 - version 20.x.x will be maintained to 2026 according to the Node.js schedule. I have updated my version by doing the following:
- Run: wget https://unofficial-builds.nodejs.org/download/release/v20.9.0/node-v20.9.0-linux-armv6l.tar.xz when logged in as my default user on the Raspberry Pi Zero that I use for SolarPi
- Run: tar xvfJ node-v20.9.0-linux-armv6l.tar.xz
- Stop SolarPi by running: sudo systemctl stop solarpi (also stop anything else that is using Node.js)
- Overwrite the old version by running: sudo cp -R node-v20.9.0-linux-armv6l/* /usr/local
- Reboot or start SolarPi manually (sudo systemctl start solarpi)
Rolling back to the previous version should be as simple as repeating the steps subtituting the relevant tar.xz file.
- Add some pictures of the hardware and connection to the inverter
- Validate config file
- Add robustness to install.sh script
- Local CSV logging of energy values
- Implement Inverter Time MQTT entities for reading (as sensors)
- Implement automatic time setting and configuration file item to enable (e.g. use localtime on Raspberry Pi to update inverter time)
Test with newer versions of Node.js
Feel free to use this code for your own purposes. If you test this with a Growatt SPH inverter, please let me know, also if you add support for other inverters, I will look to merging changes in. I can't promise to provide tonnes of support, but will try to help.
Whilst these instructions and code use published open interfaces and standards, you use the instructions and code at your discretion.
ISC License
Copyright 2023 David Brown
Permission to use, copy, modify, and/or distribute this software for any purpose with or without fee is hereby granted, provided that the above copyright notice and this permission notice appear in all copies.
THE SOFTWARE IS PROVIDED "AS IS" AND THE AUTHOR DISCLAIMS ALL WARRANTIES WITH REGARD TO THIS SOFTWARE INCLUDING ALL IMPLIED WARRANTIES OF MERCHANTABILITY AND FITNESS. IN NO EVENT SHALL THE AUTHOR BE LIABLE FOR ANY SPECIAL, DIRECT, INDIRECT, OR CONSEQUENTIAL DAMAGES OR ANY DAMAGES WHATSOEVER RESULTING FROM LOSS OF USE, DATA OR PROFITS, WHETHER IN AN ACTION OF CONTRACT, NEGLIGENCE OR OTHER TORTIOUS ACTION, ARISING OUT OF OR IN CONNECTION WITH THE USE OR PERFORMANCE OF THIS SOFTWARE.
