3D Printer Time-Lapse
All files and configuration used to generate the time-lapse videos of my 3D prints: https://youtube.com/@print_lapse
Equipment/software
Here's the equipment/sofware I use:
- An Artillery Sidewinder X2 3D printer
- A Raspberry Pi 4 Model B running OctoPrint
- A Nikon D3000 DLSR camera
- Ultimaker Cura for slicing
Setup
I based my setup on this YouTube tutorial: https://youtu.be/bP0CX42dy3Y
-
Install OctoPrint on the Raspberry Pi, and connect the Pi to your printer via USB
-
Install
pghoto2on the Pi -
Install
ffmpegon the Pi -
Install
node(version >= 18) on the Pi -
Plug in your DSLR via USB to the Pi
-
Turn on your DSLR and test
gphoto2by runninggphoto2 --capture-imageat the command line of the Pi. Your camera should take a picture! -
Install the GCODE System Commands OctoPrint plugin and configure a new GCODE command -
OCTO1- to rungphoto2 --capture-image -
Test the setup so far by navigating the Terminal tab in OctoPrint and send
OCTO1. Your camera should take another picture. -
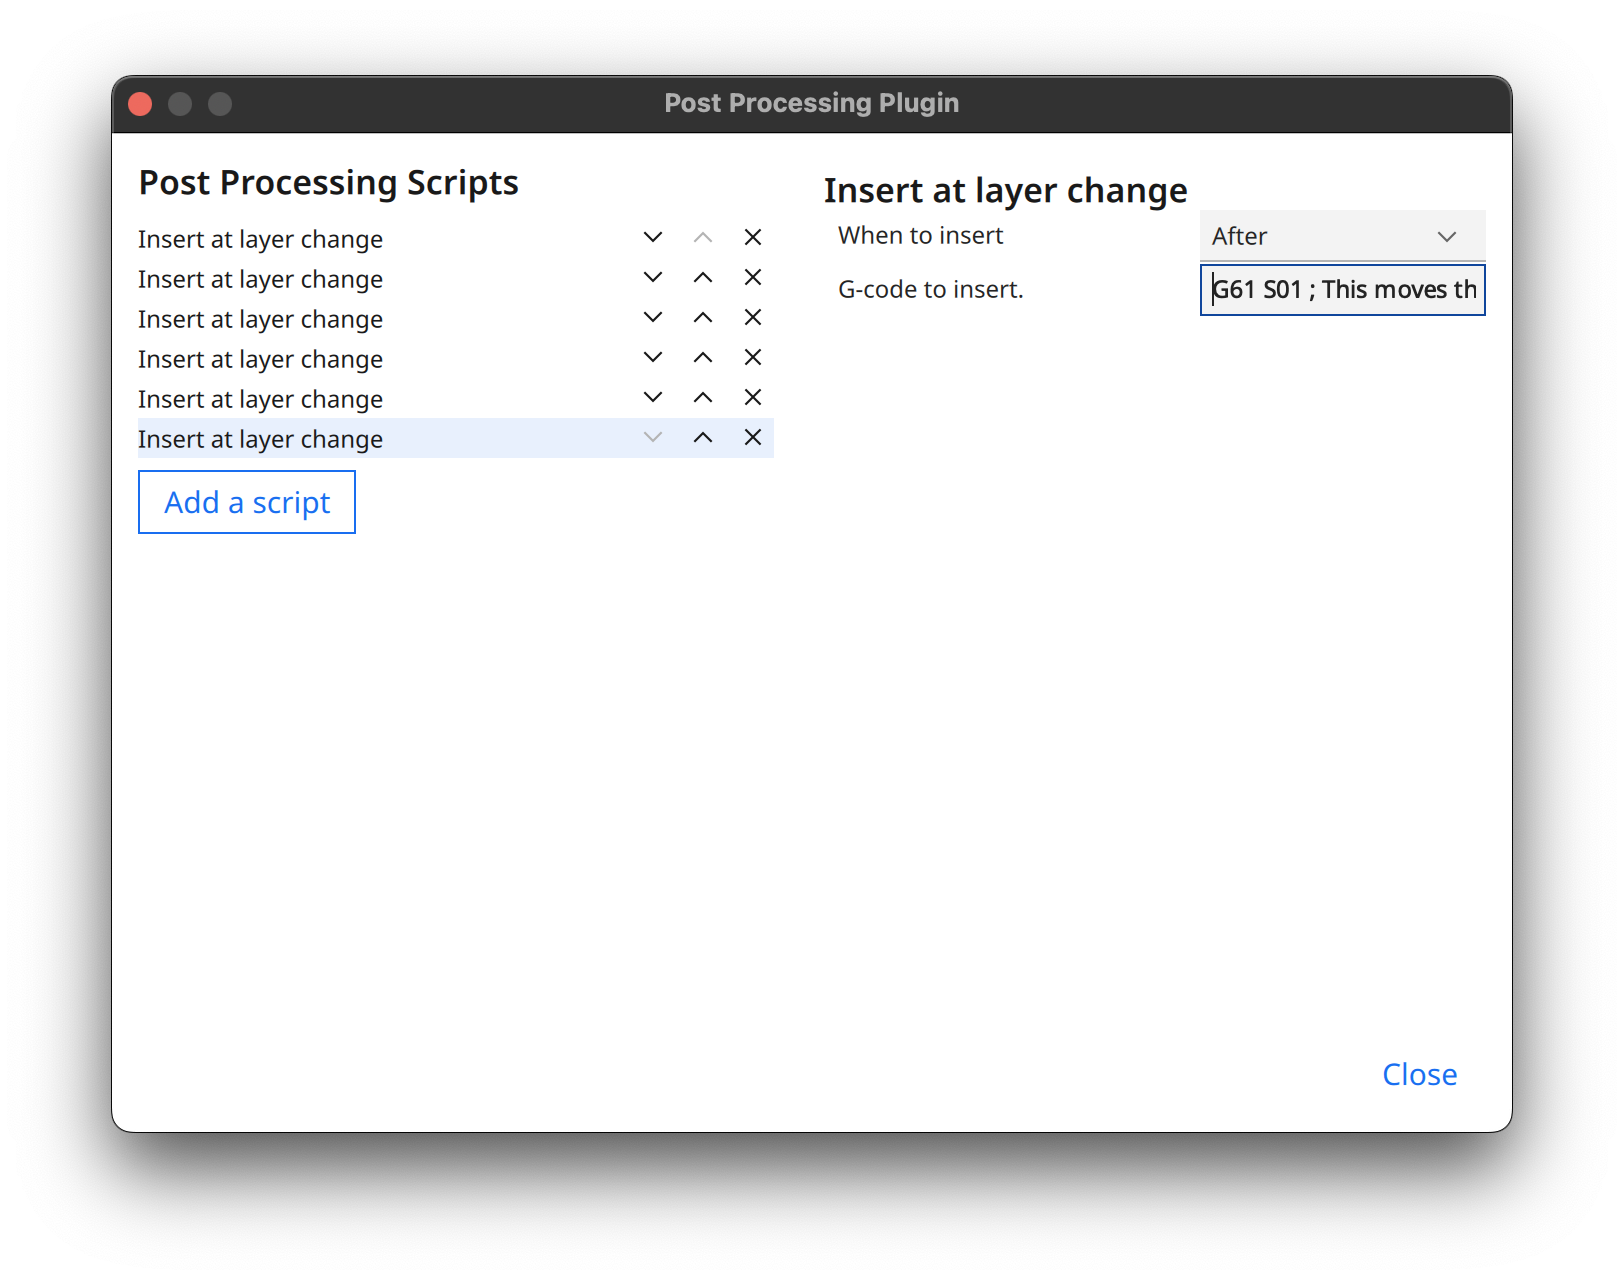
In Cura, navigate to Extensions > Post Processing > Modify GCode. Add a new "Insert at layer change" script for each of the lines below:
G60 S01    ; This stores the current location of the hot end to memory
G0 X0 Y300 ; This moves the hot end to X0 and Y300
M400       ; Wait for previous commands to finish before continuing
G4 P0500   ; This pauses the hotend for half a second
OCTO1      ; This tells OctoPrint to send a command to gphoto2 to take a picture
G61 S01    ; This moves the hot end back to the location that was stored in memory
The end result should be six separate post-processing scripts, each of which contains one of the lines from the GCode above: