Quilles is an IoT-based system designed to monitor battery health for electric vehicle (EV) charging stations. The project leverages an ESP32 microcontroller to gather environmental and battery data, which is then visualized using Node-RED. MQTT is used for real-time data transmission.
- Monitors ambient temperature, humidity, battery temperature, voltage, and current.
- Provides visual and audible alerts for non-ideal charging environments.
- Displays real-time data on an OLED screen.
- Integrates with Node-RED for dashboard visualization and data handling.
- ESP32: Microcontroller used for data collection and MQTT communication.
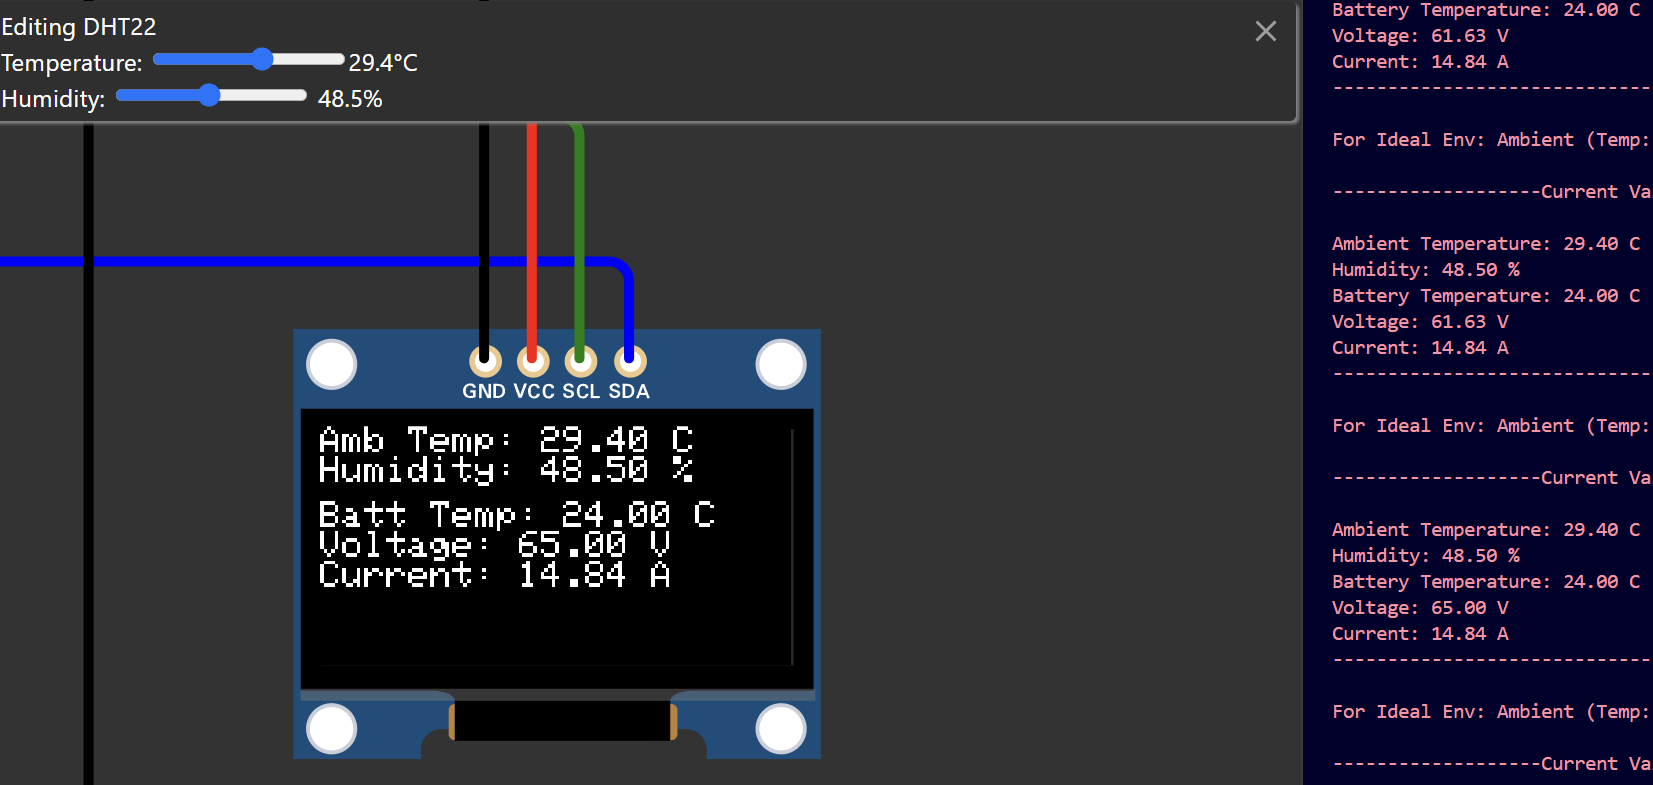
- DHT22: Sensor for measuring ambient temperature and humidity.
- NTC Thermistor: Measures battery temperature.
- Analog Sensors: Measure battery voltage and current.
- OLED Display: Shows real-time data and alerts.
- Relay, Buzzer, and LEDs: Provide alerts and control indicators.
- ESP32 Microcontroller
- DHT22 Sensor
- NTC Thermistor
- Analog Voltage and Current Sensors
- OLED Display (SSD1306)
- Relay Module
- Buzzer
- LEDs (Green, Yellow, Red)
- PlatformIO & Wokwi: For managing and simulating ESP32 code within vscode.
- Node-RED: For creating the dashboard and handling MQTT data.
- MQTT Broker: Use broker.emqx.io on port 1883.
- Arduino IDE: For writing and uploading code to the ESP32 if not using PlatformIO. (optional).
-
Clone the Repository
git clone https://github.com/nav9v/quilles-pulse.git
cd quilles-pulse
-
Install PlatformIO:
- Install PlatformIO as an extension in Visual Studio Code (VSCode) from the VSCode Marketplace.
-
Open the Project:
- Open VSCode.
- Go to
File>Open Folderand select thequilles-pulsefolder.
-
Configure PlatformIO:
- PlatformIO will automatically detect the
platformio.inifile in your project folder and configure the project.
- PlatformIO will automatically detect the
-
Simulate with Wokwi Extension:
- Install the Wokwi Simulator extension from the VSCode Marketplace.
- Open the
diagram.jsonfile in VSCode. It should display the circuit if the extension is installed properly. - Use the Wokwi Simulator to test and simulate your ESP32 code directly within VSCode.
-
Build the Project:
- After setting up the simulation, click on the Build Project button to compile the code.
- Click on the Play button to start the simulation.
-
Firmware code:
- It is in
src\main.cpp
- It is in
-
Install Node-RED:
- Follow the installation instructions here.
-
Import Flow:
- Open Node-RED in your web browser.
- Click on the menu (top right) and select
Import>Clipboard. - Paste the contents of
flow.jsonand clickImport.
-
Configure MQTT Nodes:
- Double-click on the MQTT nodes in the flow.
- Set the broker address to
broker.emqx.ioand port to1883. - Ensure the topics in the MQTT nodes match those used in the ESP32 code.
-
Customize Dashboard:
- Use Node-RED’s dashboard nodes to visualize the data.
- Ensure that Node-RED is connected to the MQTT broker.
- U can use any broker i have used (broker.emqx.io)
- Check ESP32 Display:
- Observe the OLED display for real-time data and alerts.
- Monitor Node-RED Dashboard:
- Verify that the dashboard reflects the data from the ESP32 and updates in real time.
- ESP32 Not Connecting to WiFi:
- Verify SSID and password.
- Ensure the ESP32 is within range of your WiFi network.
- Data Not Appearing in Node-RED:
- Check MQTT connection settings.
- Ensure the topics in Node-RED match those used in the ESP32 code.
- Dashboard Not Updating:
- Verify that the Node-RED flow is properly configured and connected.
Feel free to open issues or submit pull requests if you have improvements or fixes.
This project is licensed under the MIT License. See the LICENSE file for details.
-
Made by @iamnikitaa and @nav9v .
Below are some screenshots of the Quilles project in action:
-
Node-RED Dashboard:

Node-RED Flow:


-
Wokwi Simulation:

-
OLED Display: