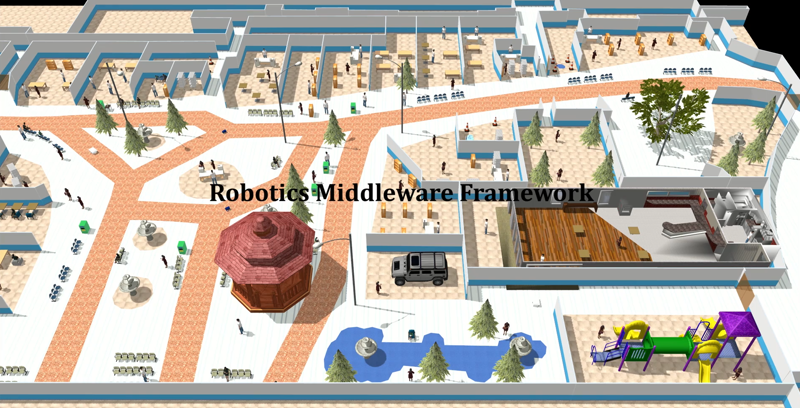
RMF Demos
![]()
![]()
The Robotics Middleware Framework (RMF) enables interoperability among heterogeneous robot fleets while managing robot traffic that share resources such as space, building infrastructure systems (lifts, doors, etc) and other automation systems within the same facility. RMF also handles task allocation and conflict resolution among its participants (de-conflicting traffic lanes and other resources). These capabilities are provided by various libraries in rmf_core.
This repository contains demonstrations of the above mentioned capabilities of RMF. It serves as a starting point for working and integrating with RMF.
(Click to watch video)
System Requirements
These demos were developed and tested on
Installation
Instructions can be found here.
FAQ
Answers to frequently asked questions can be found here.
Demo Worlds
Note: When running the demos on Ubuntu 18.04 (not officially supported), you are required to explicitly supply gazebo_version launch argument. Eg: ros2 launch demos office.launch.xml gazebo_version:=9
Office World
An indoor office environment for robots to navigate around. It includes a beverage dispensing station, controllable doors and laneways which are integrated into RMF.
source ~/rmf_demos_ws/install/setup.bash
ros2 launch demos office.launch.xml
To simulate a delivery
Select pantry and hardware_2 as Start and End waypoints. Ensure Pickup and Dropoff dispensers are set to coke_dispenser and coke_ingestor respectively. Finally, click the Send Delivery Request button in the RViz RMF Panel.
Alternatively, a launch file is configured to achieve the same result.
source ~/rmf_demos_ws/install/setup.bash
ros2 launch demos office_delivery.launch.xml
To request each of the TinyRobot to loop between two points,
Select desired Start and End waypoints using the RMF Panel and click the Send Loop Request button. Alternatively,
source ~/rmf_demos_ws/install/setup.bash
ros2 launch demos office_loop.launch.xml
Secure ROS 2 Office Demo
The office demo can be run in secure mode using the ROS 2 DDS-Security integration (SROS2) capabilities. This security features will provide encryption, authentication and access control to the whole ROS2 setup of RMF.
Because of the heavy development undergoing RMF, changes happen in a very fast manner. Therefore, the ROS 2 Access Control Policies declared in the office.policy.xml file are only guaranteed to work with the RMF release 1.1.X, so please set all the git repos of your RMF workspace to point to the tag 1.1.0. Alternatively you could update the policies yourself to any later version of RMF (PRs are welcome if you do so
There is a tmux based script that automates pane splitting and the execution of all the required commands to run the office demo. In order to run it this way just open a tmux terminal and run the script.
bash ./install/demos/share/demos/sros2/office_deploy.bash
Alongside, the following steps can be used to run all required commands individually.
To use ROS 2 to secure the office demo a few environmental variables need to be set. Adding them to a script would make it easier to source them in any shell where we need to run ROS 2 secured nodes.
echo 'export ROS_SECURITY_KEYSTORE=~/rmf_demos_ws/keystore
export ROS_SECURITY_ENABLE=true
export ROS_SECURITY_STRATEGY=Enforce
export ROS_DOMAIN_ID=42' > sros2_environment.sh
A few security artifacts like signed permission files, identity certificates and Certificate Authorities (CA) are needed to enable the DDS Security. They can be generated using the security tools from the ROS2 cli. Because of #242 and until its solution #238 is released it is recommended to generate the security artifacts before switching to cyclone_dds.
source sros2_environment.sh
mkdir keystore
ros2 security generate_artifacts -k keystore -p ./install/demos/share/demos/sros2/policies/office.policy.xml
It is recommended to use cyclone dds with the secure version of the demo, make sure it is properly installed, with security support and selected through the correspondent environment variable (here you can find instructions on how to do it). Adding this to the environment script makes it easier to source in any terminal that might need it,
echo 'export RMW_IMPLEMENTATION=rmw_cyclonedds_cpp' >> sros2_environment.shBecause SROS2 does not support ros2 launch yet all the different nodes will have to be launched individually. A yaml file with the parameters of all the nodes is provided. One terminal per execution is recommended for an easier debug of the system. Make sure you source ~/rmf_demos_ws/install/setup.bash in each of them before executing the different commands.
source sros2_environment.sh
ros2 run rmf_traffic_ros2 rmf_traffic_schedule --ros-args --params-file ./install/demos/share/demos/sros2/office.params.yaml --enclave /office/rmf_traffic_schedule_node
source sros2_environment.sh
ros2 run building_map_tools building_map_server ./install/rmf_demo_maps/share/rmf_demo_maps/office/office.building.yaml --ros-args --enclave /office/building_map_serversource sros2_environment.sh
ros2 run rmf_schedule_visualizer rviz2 -r 10 -m L1 --ros-args --params-file ./install/demos/share/demos/sros2/office.params.yaml --enclave /office/rviz2_nodesource sros2_environment.sh
ros2 run building_systems_visualizer building_systems_visualizer -m L1 --ros-args --params-file ./install/demos/share/demos/sros2/office.params.yaml --enclave /office/building_systems_visualizersource sros2_environment.sh
ros2 run fleet_state_visualizer fleet_state_visualizer -m L1 --ros-args --params-file ./install/demos/share/demos/sros2/office.params.yaml --enclave /office/fleet_state_visualizersource sros2_environment.sh
rviz2 -d ./install/demos/share/demos/include/office/office.rviz --ros-args --enclave /office/rviz2source sros2_environment.sh
ros2 run rmf_fleet_adapter door_supervisor --ros-args --enclave /office/door_supervisorGazebo needs the environment variables to locate files, and set up communications between the server and clients. They can be added to a script for an easier re-use.
echo 'export GAZEBO_MODEL_PATH=~/rmf_demos_ws/install/rmf_demo_maps/share/rmf_demo_maps/maps/office/models:~/rmf_demos_ws/install/rmf_demo_assets/share/rmf_demo_assets/models:/usr/share/gazebo-11/models
export GAZEBO_RESOURCE_PATH=~/rmf_demos_ws/install/rmf_demo_assets/share/rmf_demo_assets:/usr/share/gazebo-11
export GAZEBO_PLUGIN_PATH=~/rmf_demos_ws/install/rmf_gazebo_plugins/lib:~/rmf_demos_ws/install/building_gazebo_plugins/lib/
export GAZEBO_MODEL_DATABASE_URI=""' > gazebo_environment.sh
source sros2_environment.sh
source gazebo_environment.sh
gzserver --verbose -s libgazebo_ros_factory.so -s libgazebo_ros_init.so ./install/rmf_demo_maps/share/rmf_demo_maps/maps/office/office.world --ros-args --enclave /office/gzserverBecause of #151, the ros node created by plugins run on gzclient will be left out of the secured network. This should only affect the toggle_floors plugin that runs on gzclient and is intended for multilevel demos.
source gazebo_environment.sh
gzclient --verbose ./install/rmf_demo_maps/share/rmf_demo_maps/maps/office/office.world
source sros2_environment.sh
ros2 run rmf_fleet_adapter full_control --ros-args -r __node:=tinyRobot_fleet_adapter --params-file ./install/demos/share/demos/sros2/office.params.yaml --enclave /office/tinyRobot_fleet_adaptersource sros2_environment.sh
ros2 run rmf_fleet_adapter robot_state_aggregator --ros-args -r __node:=tinyRobot_state_aggregator --params-file ./install/demos/share/demos/sros2/office.params.yaml --enclave /office/tinyRobot_state_aggregatorThe system is now ready to attend simulated delivery requests as per usual but with all the guarantees of DDS-security!
Airport Terminal World
This demo world shows robot interaction on a much larger map, with a lot more lanes, destinations, robots and possible interactions between robots from different fleets, robots and infrastructure, as well as robots and users. In the illustrations below, from top to bottom we have how the world looks like in traffic_editor, the schedule visualizer in rviz, and the full simulation in gazebo,


Demo Scenario
To launch the world and the schedule visualizer,
source ~/rmf_demos_ws/install/setup.bash
ros2 launch demos airport_terminal.launch.xml
To spawn robots into the world and issue tasks to the same,
source ~/rmf_demos_ws/install/setup.bash
ros2 run demos airport_terminal_scenario.sh
This command spawns two DeliveryRobots and four TinyRobots in the map. Out of these one DeliveryRobot and two TinyRobots are issued loop request tasks. The other robots are idle and can be issued loop or delivery request tasks via the RMF Panel.
Alternatively, to spawn all the robots without issuing any task orders,
source ~/rmf_demos_ws/install/setup.bash
ros2 run demos airport_terminal_spawn_robots.sh
An delivery request may also be submitted via a launch file,
source ~/rmf_demos_ws/install/setup.bash
ros2 launch demos airport_terminal_delivery.launch.xml
Non-autonomous vehicles can also be integrated with RMF provided their positions can be localized in the world. This may be of value at facilities where space is shared by autonomous robots as well as manually operated vechiles such as forklifts or transporters. In this demo, we can introduce a vehicle (caddy) which can be driven around through keyboard/joystick teleop. In RMF nomenclature, this vehicle is classified as a read_only type, ie, RMF can only infer its position in the world but does not have control over its motion. Here, the goal is to have other controllable robots avoid this vechile's path by replanning their routes if needed. The model is fitted with a plugin which generates a prediction of the vehicle's path based on its current heading. It is configured to occupy the same lanes as the tinyRobot robots. Here, a read_only_fleet_adapter submits the prediction from the plugin to the RMF schedule.
To spawn the caddy into the world,
source ~/rmf_demos_ws/install/setup.bash
ros2 launch demos airport_terminal_caddy.launch.xml
Clinic World
This is a clinic world with two levels and two lifts for the robots. Two different robot fleets with different roles navigate across two levels by lifts. In the illustrations below, we have the view of level 1 in traffic_editor (top left), the schedule visualizer in rviz (right), and the full simulation in gazebo (bottom left).

Demo Scenario
To launch the world and the schedule visualizer,
source ~/rmf_demos_ws/install/setup.bash
ros2 launch demos clinic.launch.xml
To request different robots perform loop requests, a launch file has been configured,
source ~/rmf_demo_ws/install/setup.bash
ros2 launch demos clinic_loop.launch.xml
Robots taking lift:

Multi-fleet demo:

Hotel World
This is a hotel with a lobby and a guest level. The hotel has two lifts and two robot fleets. The tiny robots are supposed to guide the guests and the delivery robots are used to load and deliver cargo.
The hotel map is truncated due to the high memory usage. The full map can be accessed here.
Hotel floor plan in traffic_editor:

Full hotel floor plan in traffic_editor:

Demo Scenario
To launch the world and the schedule visualizer,
source ~/rmf_demos_ws/install/setup.bash
ros2 launch demos hotel.launch.xml
To simulate a loop request, select desired robot fleet, Start and End waypoints using the RMF Panel and click the Send Loop Request button.
Robot taking lift:
