⚠️ Please read this important announcement about future AutoPkgr development. ⚠️
![]()
AutoPkgr is a free Mac app that makes it easy to install and configure AutoPkg.
AutoPkg is an awesomely powerful tool for automating OS X software packaging and distribution, but it requires its users to be comfortable with command-line tools and methods. If you're not yet comfortable with the command-line, or if you just want to get AutoPkg set up from scratch quickly and reliably, AutoPkgr is for you.
To get started, download the latest release, install and configure AutoPkgr, search for and add the recipes you need, and (optionally) integrate AutoPkgr with your software distribution tool. If you need help, check out the Troubleshooting section.

- Features
- Installation
- Basic usage
- Searching for recipes
- Running individual recipes
- Creating/editing recipe overrides
- Customizing notifications
- Using a proxy
- Integrations
- Troubleshooting
- Uninstalling
- Credits
AutoPkgr makes these tasks a piece of cake:
- Installation of AutoPkg itself.
- Installation of Git, which AutoPkg uses.
- Discovery of and subscription to the repositories and recipes you need.
- Automatic scheduled checks of the recipes you choose.
- Email, Slack, or HipChat notifications when new software is packaged.
- Ability to easily create and edit AutoPkg recipe overrides.
- Easy access to common folders that AutoPkg admins need.
- Basic integration of AutoPkg with popular software distribution frameworks like Munki, Jamf Pro, HEAT LANrev, FileWave, and MacPatch.
AutoPkgr requires Mac OS X 10.8 or higher. If you plan on integrating with Munki, Jamf Pro, or other tools, additional requirements may apply. (See the Integrations section for details.)
Download the latest release, and drag the AutoPkgr app to your Applications folder. Then launch it.
-
Launch the AutoPkgr app.
-
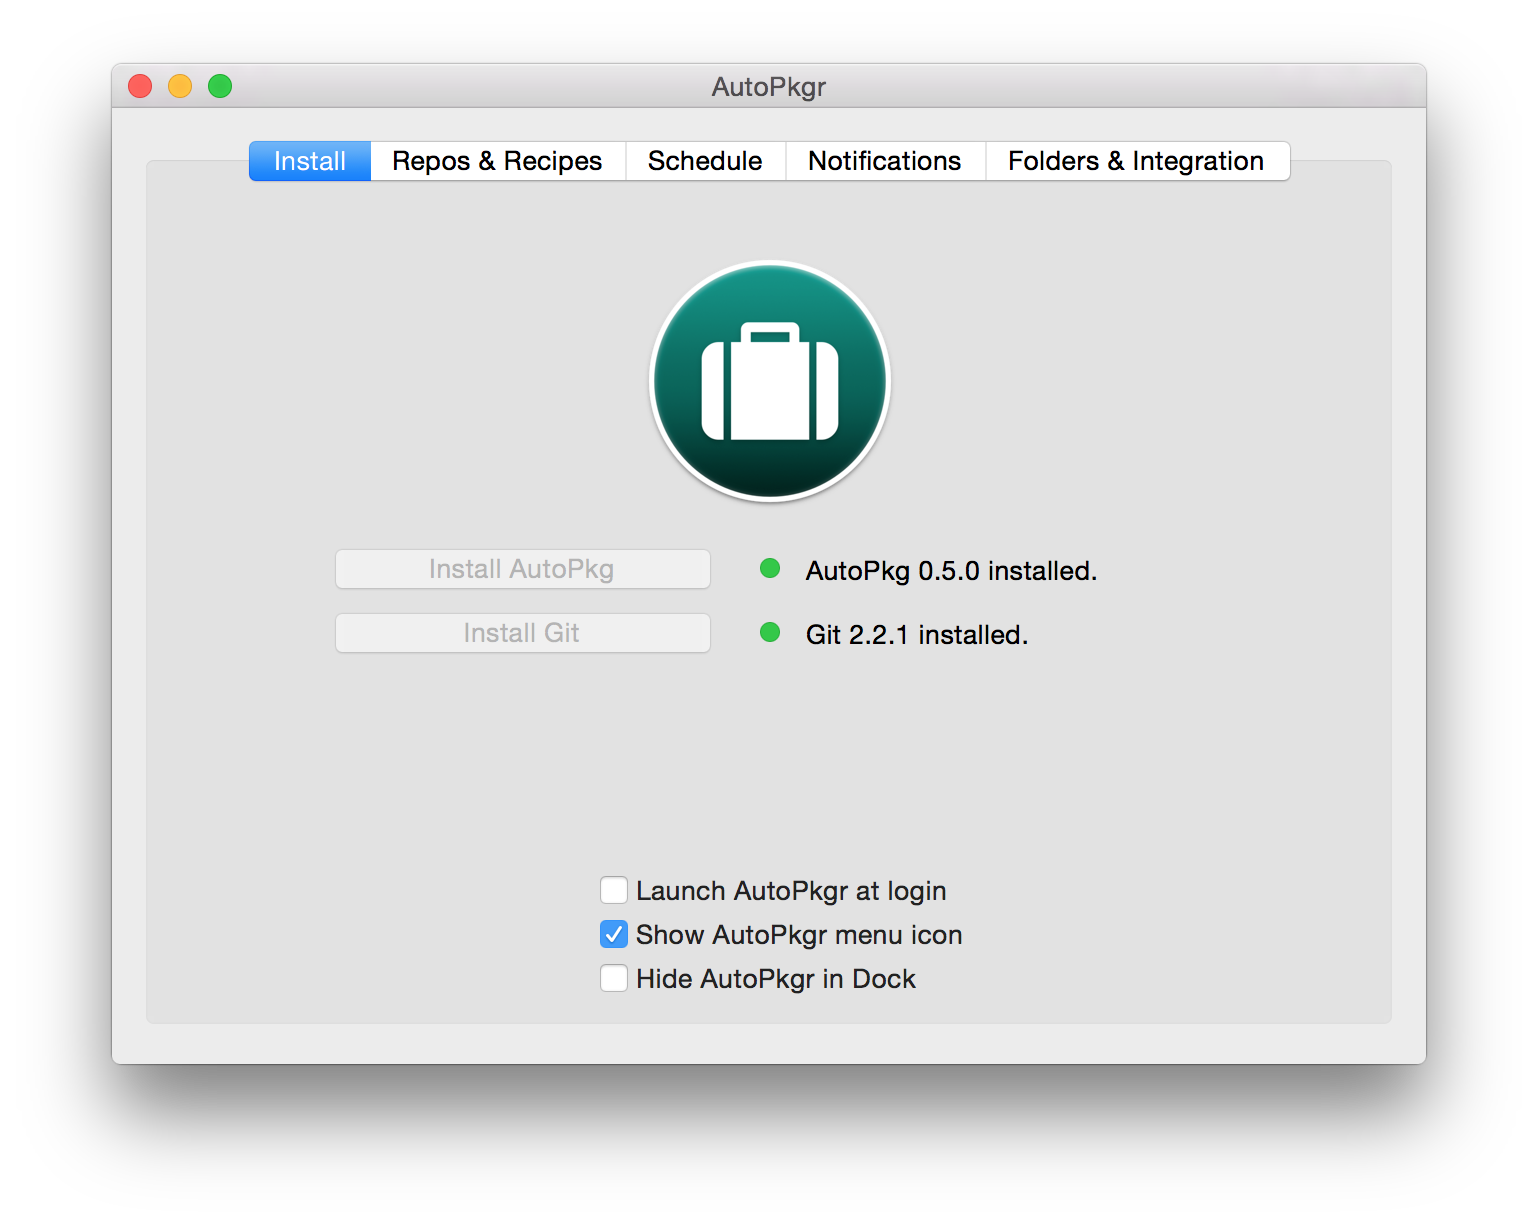
On first launch, you'll see the configuration window:
-
Click the button to Install AutoPkg if it's not already installed.
-
Click the button to Install Git if it's not already installed.
-
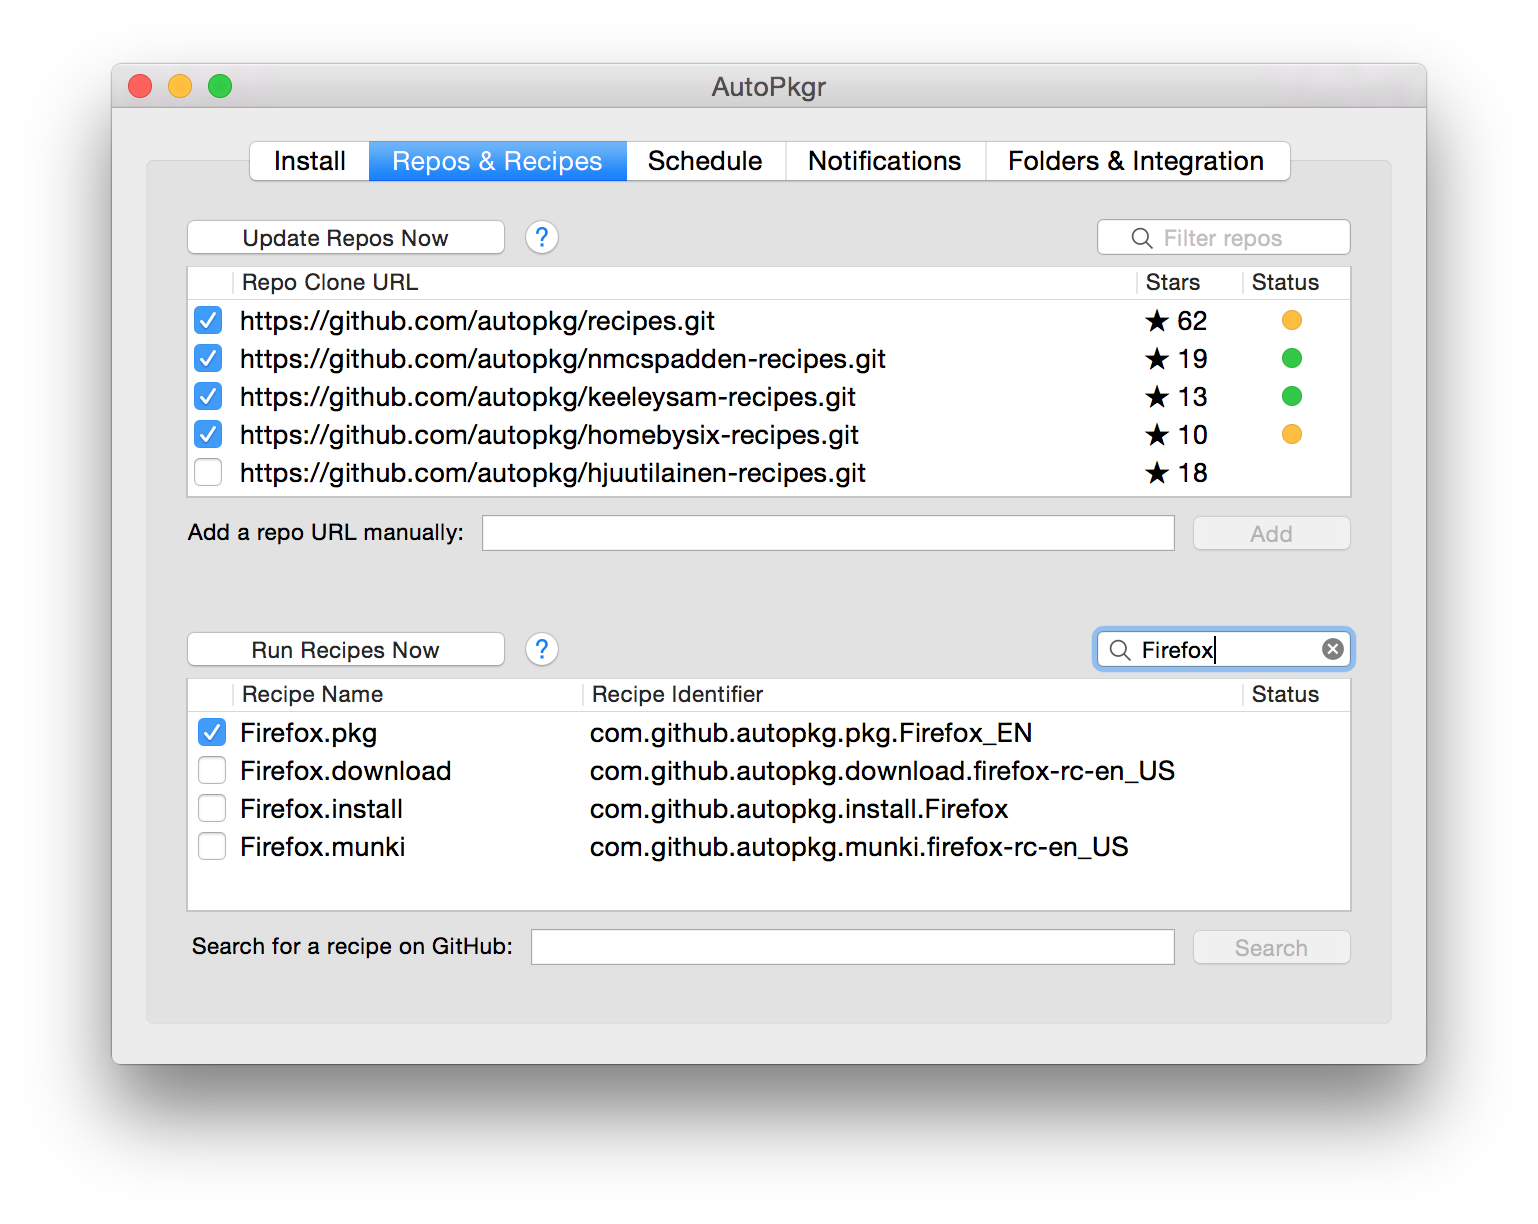
Switch to the Repos & Recipes tab.
-
Select the repositories you'd like to subscribe to. We recommend adding the "default" repo to get you started:

You can also add repositories manually using the "Add a repo URL manually" field.

-
Select any recipes you wish to include in scheduled recipe runs.
You can search for recipes using the "Search for a recipe on GitHub" field.
-
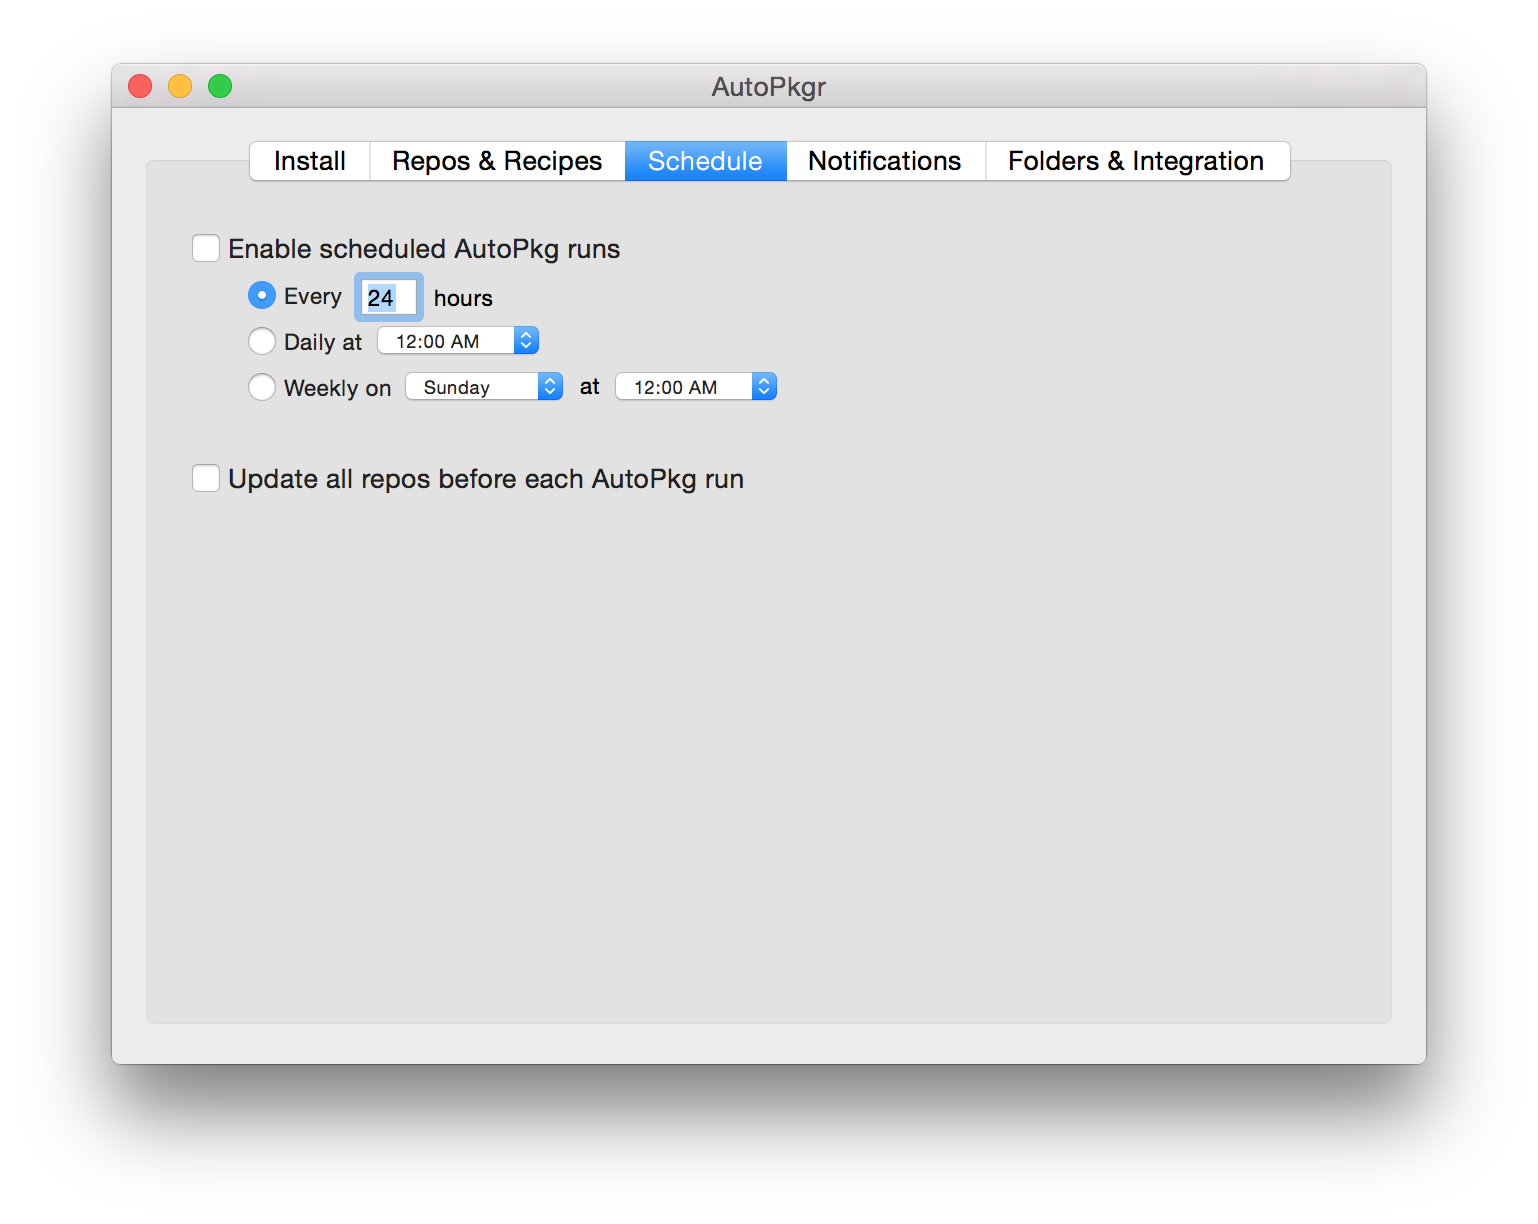
Switch to the Schedule tab.
-
Set the schedule for automatically running recipes. Many people like to set this for once per day.
⚠️ Selecting "Update all repos before each AutoPkg run" exposes you to some risk, and isn't generally recommended unless you unconditionally trust the contributors to the repos you subscribe to. -
Switch to the Notifications tab.

-
Configure email, Slack, or HipChat notifications as desired.


That's it! AutoPkgr will now check for the latest app updates you specified, and when an update is available you'll receive a notification.
Anytime you'd like to make changes to AutoPkgr's configuration, click on AutoPkgr's icon in the Dock, or click on the AutoPkgr icon in the menu bar ( ), and choose AutoPkgr Preferences...
You'll also find some useful shortcuts on the Folders & Integration tab, which will take you directly to several convenient AutoPkg folders. On that tab, you can also configure integration with Munki, Jamf Pro, and other software deployment systems (see below).

AutoPkgr can help you find recipes for the apps you want. In the Recipes & Repos tab, enter the name of the app into the "Search for a recipe on GitHub" field, and click Search.

From the list of results, select your desired recipe. If the repo is not already added (as shown by the green indicator), then click Add Repo.

Click Close to return to the recipe list. Then you should see the newly-added recipe in your available recipes list. Click the checkbox next to the recipe you want, and it will be included in future scheduled AutoPkg runs.

Don't see a recipe for an app you use? Use Recipe Robot or write one manually!
If you want to run a single recipe once, simply right-click on a recipe and choose Run This Recipe Only.

If any recipe you're running is a .munki recipe, AutoPkgr will also run the MakeCatalogs.munki recipe. (See the Integration with Munki section below for details on MakeCatalogs.munki.)
Recipe overrides allow you to tailor recipes' input variables to your organization's needs. For production use, it's generally recommended to include recipe overrides instead of actual recipes.
We've tried to simplify the process of creating and editing AutoPkg recipe overrides. Just right-click on a recipe in the list, and you'll see options for creating an override or editing an existing override.
To select which text editor to use when editing overrides, go to Folders & Integration > Configure AutoPkg > Recipe/Override Editor.
AutoPkgr does not currently provide a way to add trust information to existing recipe overrides, so we recommend manually using the update-trust-info verb in AutoPkg 1.0+ for that purpose. You can read more about recipe trust information on the AutoPkg wiki.
To avoid unwanted notifications, you can customize which AutoPkg events trigger a notification to be sent. To do this, go to the Notifications tab and click the Customize... button next to Choose which actions trigger notification.
You can choose to be notified on all events, or you can select a subset of events you care about and ignore the rest.
When you're done, click Close.
If your network uses a proxy, you may need to navigate to the Folders & Integration tab and click on the Configure AutoPkg button. Adjust the proxy settings as necessary.

AutoPkgr makes it as easy as possible to integrate with these software distribution systems:
💡 Note: Requires the Munki tools to be installed on the Mac running AutoPkgr.
To configure AutoPkgr to add updates directly into your Munki repository, follow these steps:
-
Click on the Folders & Integration tab.
-
If Munki tools are not already installed, click on the Install Munki tools button. Enter your password if prompted.
-
Click on the Configure Munki tools... button, click Choose, and browse to your munki_repo (which can be on a mounted volume).

-
Click Save and Close.

You'll also want to make sure you have .munki recipes selected for each app you want to import. Once the new versions of apps appear in your Munki repo, you can add them to the appropriate catalogs and manifests to deploy them.
When you select any .munki recipes selected, AutoPkgr will automatically add MakeCatalogs.munki to the end of your recipe list. MakeCatalogs is a special recipe that rebuilds your Munki catalogs after any items are imported.
Since the introduction of recipe trust information in AutoPkg 1.0, we recommend that you create an override of MakeCatalogs instead of running the recipe itself. To do this, follow these steps:
-
Filter the recipe list for
MakeCatalogs. -
Right-click on the recipe shown, and choose Create Override.
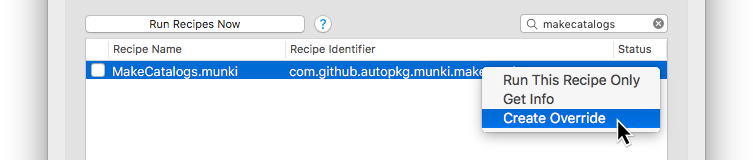

That's it! You only need to create that override once. And you do not need to check the box to include MakeCatalogs.munki in your schedule. It will be included automatically.
💡 Note: Requires Jamf Pro version 9 or newer.
(Jamf Pro was formerly known as JAMF Casper Suite.)
To configure AutoPkgr to create Self Service policies in Jamf Pro for new app updates, follow these steps:
-
Create a static computer group on your JSS called Testing. Add one or more test computers to the group.
-
Create an account on your JSS with Create, Read, and Update access to the following objects:
- Categories
- Computer Extension Attributes
- File Share Distribution Points (only needs Read access)
- Packages
- Policies
- Scripts
- Smart Computer Groups
- Static Computer Groups
-
Open AutoPkgr and go to the Folders & Integration tab.
-
Click the Install JSSImporter button. Enter your password if prompted.
⚠️ Note: On Macs with a fresh copy of Sierra, you may additionally need to run the following Terminal command to install the necessary components for JSSImporter:sudo easy_install pip && pip install -I --user pyopenssl -
Click on Configure JSSImporter.
-
Enter your JSS URL, API username, and API password. Then click Connect.
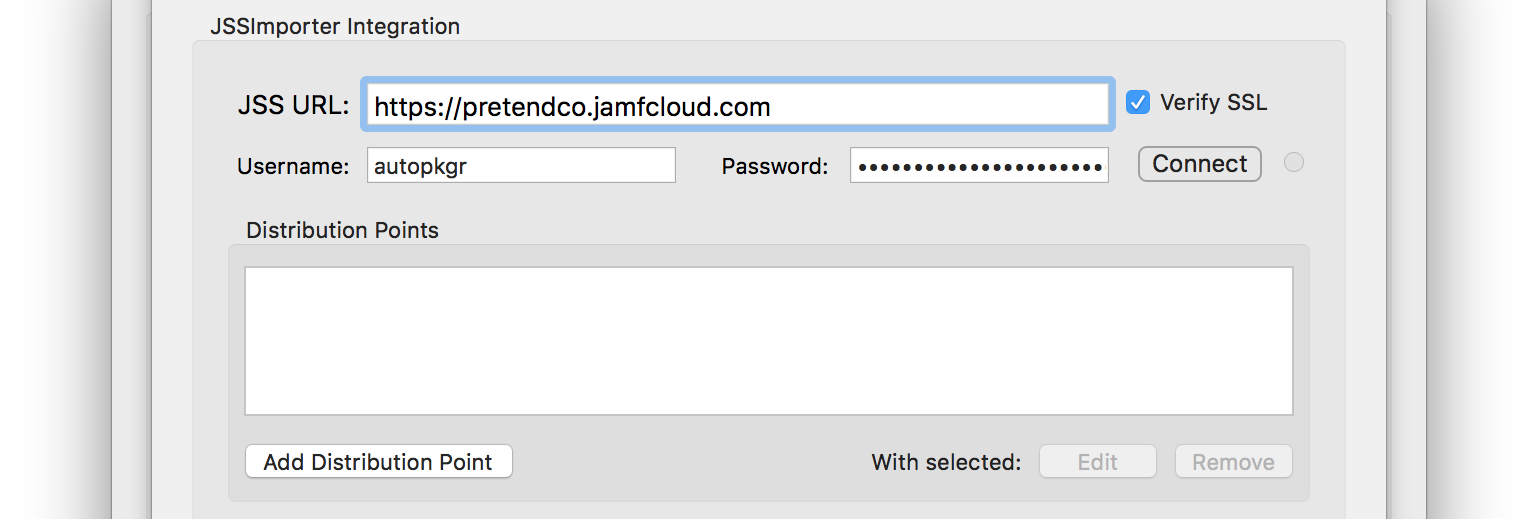
-
When prompted, enter the read/write password for each distribution point.
-
Click Save and Close.

You'll also want to make sure you have a few .jss recipes selected. AutoPkgr will automatically add the "official" jss-recipes repo so you'll have a few to choose from right away.
When a .jss recipe runs, the package is uploaded to your distribution points, a Self Service policy is created and scoped to a new smart group. As a result, computers in the Testing group with less than the latest version of the app should now be able to install the latest version through Self Service.
For detailed information on JSS recipe behavior, check out the README for jss-recipes, and for some examples of advanced workflows, see Auto Update Magic.
💡 Notes and requirements for LANrev integration:
- LANrev version 6.5 or newer is required.
- The LANrev Admin app should be installed in your Applications folder.
- Launch LANrev Admin and connect the app to your LANrev server.
- In order to run
.lanrevrecipes, your Mac needs to be logged in and the LANrev Admin app needs to be running.
To configure AutoPkgr to add updates directly into your LANrev server, follow these steps:
-
Click on the Folders & Integration tab.
-
Click on the Install LANrevImporter button. Enter your password when prompted.
-
Click on the Configure LANrevImporter... button. Select the Enable External SD Package Upload option if desired.
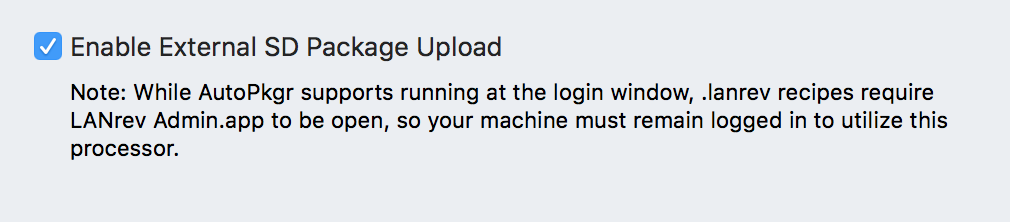
-
Click Save and Close.

You'll also want to make sure you have a few .lanrev recipes selected. There is no official repository for LANrev recipes yet, but if you add the seansgm-recipes repository, you'll see a few to get you started.
💡 Note: Requires you to have the default recipe repo added.

To configure AutoPkgr to add updates directly into your MacPatch server, follow these steps:
-
Click on the Folders & Integration tab.
-
Click on the Install MacPatchImporter button. Enter your password when prompted.
-
Click on the Configure MacPatchImporter... button. Enter the URL, username, and password for your MacPatch server.
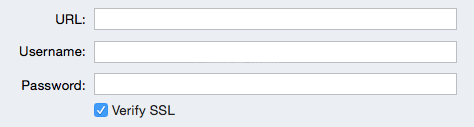
-
Click Save and Close.

💡 Notes and requirements for FileWave integration:
- AutoPkg version 0.5.0 or newer is required.
- FileWave version 10.0 or newer is required.
- The FileWave Admin app should be installed in your Applications folder.
To configure AutoPkgr to add updates directly into your FileWave server, follow these steps:
-
Click on the Folders & Integration tab.
-
Click on the Install FileWaveImporter button. Enter your password when prompted.
-
Click on the Configure FileWaveImporter... button.
-
Enter the hostname, port, username, and password for your FileWave server, and click Verify.
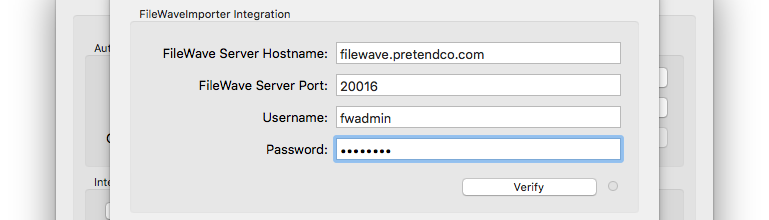
-
If verification succeeds, click Save and Close.

VirusTotalAnalyzer is a processor that automatically checks downloaded packages against the VirusTotal database. AutoPkgr makes using this processor dead simple:
- Click on the Folders & Integration tab.
- Click on the Install VirusTotalAnalyzer button.
- (Optional) Once it's finished installing, click on the Configure VirusTotalAnalyzer button and adjust settings as necessary. (e.g. enter your VirusTotal API key, if you have one)
Now all downloaded files will be checked against VirusTotal's database.
-
Missing parent recipes
If the recipe you're trying to run has a
⚠️ icon next to it, the most likely problem is that its parent recipe is missing.
Right-click on the recipe to view the identifier of the parent recipe.

You don't need to add the parent recipe itself to your list, but you do need to make sure that the repository that the parent recipe belongs to is checked in the repo list.
-
Missing or invalid recipe trust info
Since AutoPkg 1.0, you may be seeing warnings like this appear in your notifications:
WARNING: MakeCatalogs.munki is missing trust info and FAIL_RECIPES_WITHOUT_TRUST_INFO is not set. Proceeding...
In order to prevent these errors, we recommend two things:
- Create and use recipe overrides instead of the actual recipes themselves. See the Creating/editing recipe overrides section for instructions on how to do this.
- If these overrides were created before updating to AutoPkg 1.0, you'll need to use
autopkg update-trust-infoto add trust information to them. See this page on the AutoPkg wiki for details.
-
Out of date components
Quit and relaunch AutoPkgr to check for new versions of installed components, including AutoPkg, Git, and AutoPkgr itself. We recommend updating to the latest version of these tools as a first step when troubleshooting.
-
Temporarily broken recipes
Because software manufacturers frequently change their feeds, recipes that used to work sometimes stop working. Wait a day or so, then update your repos and try running the recipe again. Also see the troubleshooting steps here.
-
AutoPkg is already running
If you get an error that says "A scheduled AutoPkg run may be running in the background," try running this command in the Terminal:
ps ax | grep python | grep autopkgThis should reveal the process information for active AutoPkg runs. If it's appropriate to do so, you can then terminate the process(es) by using
killorkillall.


If you've eliminated the simple errors above, but AutoPkgr still doesn't do what you expect, the next step is to run your recipes directly using autopkg in Terminal. The following command has been helpful for us when troubleshooting. (Triple-click to select the entire line for copying.)
/usr/bin/python /usr/local/bin/autopkg run --recipe-list ~/Library/Application\ Support/AutoPkgr/recipe_list.txt --report-plist /tmp/autopkg-report.xml
If the issue repeats itself there, it's likely that the problem is with an AutoPkg recipe or repository, not with AutoPkgr. See if you can see which recipe is failing based on the output of the command above. (Information on troubleshooting individual AutoPkg recipes is available on the AutoPkg wiki.)
For problems with email notifications, try sending an email using the same SMTP settings in another email client app.
AutoPkgr outputs log information to the standard /var/log/system.log file.
If you've determined the issue is with AutoPkgr and not a specific recipe or repo, you may find it useful to enable AutoPkgr's verbose logging feature. To do that, click the AutoPkgr icon in the menu bar (). Then select Verbose Logs.
If you enable Verbose Logs for AutoPkgr, you may also want to enable the Verbose AutoPkg Run option. You can find this option in Folders & Integration > Configure AutoPkg.
Once you've set the verbosity as desired, you'll want to view the logs.
In OS X 10.9 through 10.11, it's as simple as entering "AutoPkgr" into the filter field of the Console app:

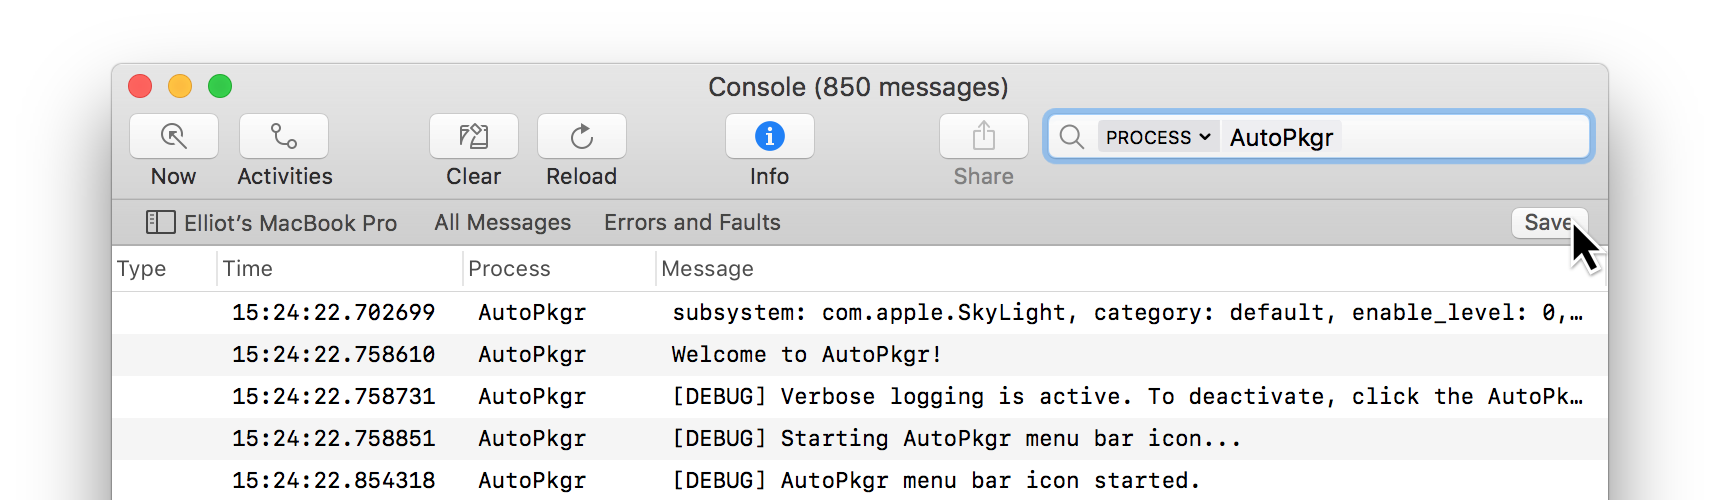
In macOS 10.12, we recommend filtering for the "AutoPkgr" process:

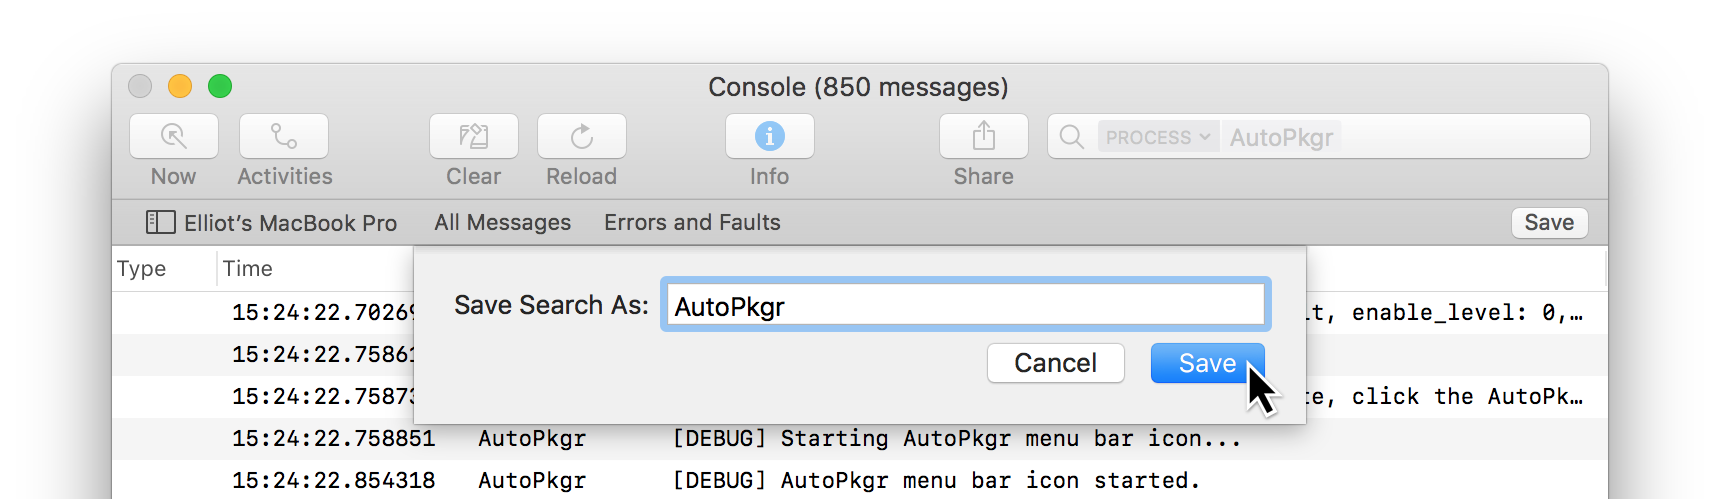
If you like, you can save this filter for future reference:
-
Click the Save button.
-
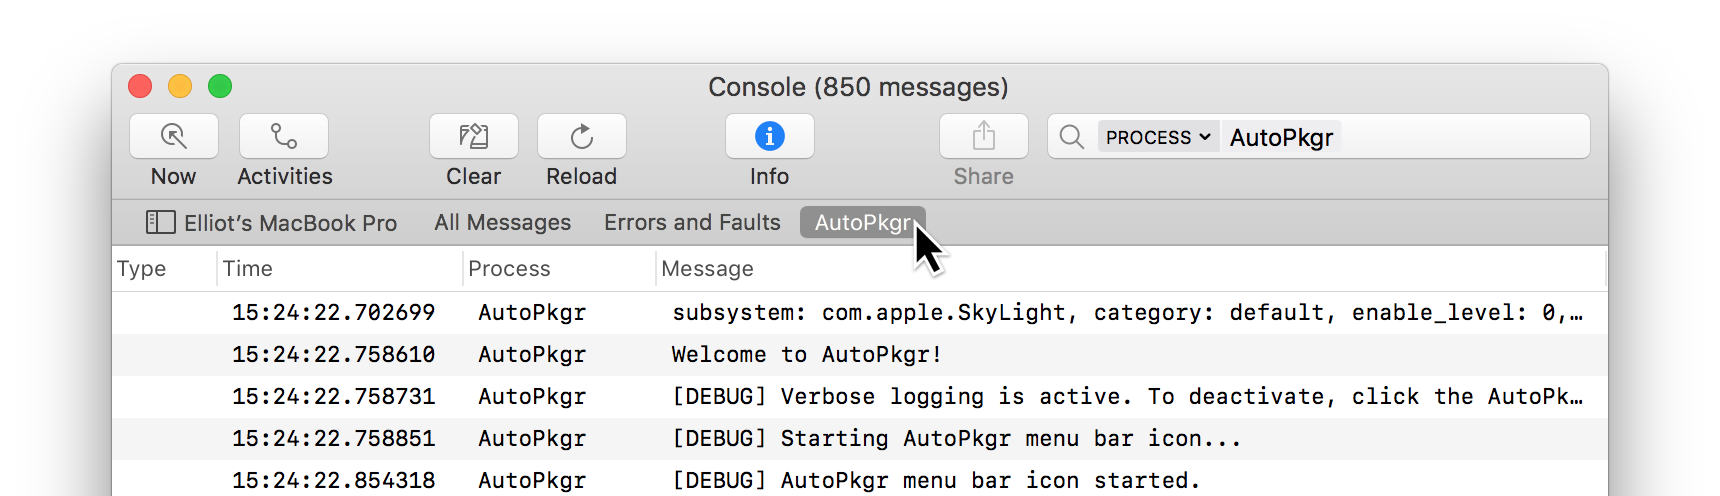
Type a name for the saved filter. Perhaps "AutoPkgr." Click Save.
-
From now on, simply click on the AutoPkgr saved search in the toolbar to see AutoPkgr's log events.


If you prefer to view the log output in Terminal instead of Console, you could use this command in OS X 10.9 through 10.11:
tail -f /var/log/system.log | grep "AutoPkgr"
Or this command in macOS 10.12:
log stream --style syslog --process "AutoPkgr" --type log
Make sure to run the above commands before you start AutoPkgr, because it will show you live output, not historical log entries.
If you're still stuck, you may want to post a message (and relevant sections of the Console logs, after removing any sensitive information) to our Google Group. And if it's a reproducible bug, please do submit an issue on GitHub. We do our best to investigate bug reports and release fixes.
We also welcome feature requests on GitHub! Some of our best features have come from community suggestions.
If you decide AutoPkgr isn't for you, we've made it easy to remove. Hold down the Option key while clicking the AutoPkgr icon in the menu bar (), then choose Uninstall.
This will remove the following files:
- /Library/LaunchDaemons/com.lindegroup.AutoPkgr.helper.plist
- /Library/LaunchDaemons/com.lindegroup.AutoPkgr.schedule.plist
- /Library/PrivilegedHelperTools/com.lindegroup.AutoPkgr.helper
The uninstall feature does not remove the following:
- AutoPkgr preferences, stored at ~/Library/Preferences/com.lindegroup.AutoPkgr.plist
- AutoPkgr's keychain, stored at ~/Library/Keychains/AutoPkgr.keychain-db
- Your recipe list(s), stored at ~/Library/Application Support/AutoPkgr/recipe_list.txt
- AutoPkg, stored in /Library/AutoPkg
- The AutoPkg cache, recipe repositories, and overrides, typically stored in ~/Library/AutoPkg
- Munki tools
- JSSImporter or other integration tools
After uninstalling, you can drag the AutoPkgr app from your Applications folder to the Trash.
AutoPkgr was created at the Linde Group in Emeryville, California. If you're a talented Mac admin looking for a job in the Bay Area, check out our job listings. We've got a wonderful team of people and fantastic clients.
James Barclay, Elliot Jordan, and Josh Senick originally created AutoPkgr in June 2014, and ongoing development is led by Eldon Ahrold, Elliot Jordan, and James Barclay.
Thanks to Guillaume Gete for helping with the French localization, and to Luis Giraldo for the Spanish localization.
Briefcase icon from FontAwesome.
![]()