Create workflows that enable you to use Continuous Integration (CI) for your projects.
Welcome to "GitHub Actions: Continuous Integration"! 👋
What is continuous integration?: Continuous integration can help you stick to your team’s quality standards by running tests and reporting the results on GitHub. CI tools run builds and tests, triggered by commits. The results post back to GitHub in the pull request. The goal is fewer issues in main and faster feedback as you work.

- Workflow: A workflow is a unit of automation from start to finish, including the definition of what triggers the automation, what environment or other aspects should be taken account during the automation, and what should happen as a result of the trigger.
- Job: A job is a section of the workflow, and is made up of one or more steps. In this section of our workflow, the template defines the steps that make up the
buildjob. - Step: A step represents one effect of the automation. A step could be defined as a GitHub Action, or another unit, like printing something to the console.
- Action: An action is a piece of automation written in a way that is compatible with workflows. Actions can be written by GitHub, by the open source community, or you can write them yourself!
To learn more, check out "Workflow syntax for GitHub Actions" in the GitHub Docs.
First, let's add a workflow to lint our Markdown files in this repository.
- Open a new browser tab, and work on the steps in your second tab while you read the instructions in this tab
- Go to the Actions tab.
- Search for "Simple workflow".
- Name your workflow
ci.yml. - Update the workflow to remove all steps other than the "checkout" step.
- Add the following step to your workflow:
   - name: Run markdown lint
     run: |
       npm install remark-cli remark-preset-lint-consistent
       npx remark . --use remark-preset-lint-consistent --frail
We expect this to create a error build. We'll fix this in the next step.
- Click Start commit, and choose to make a new branch named
ci. - Click Propose a new file.
- Click Create pull request.
- Wait about 20 seconds then refresh this page for the next step
Great job adding the templated workflow! 🎉
Adding that file to this branch is enough for GitHub Actions to begin running CI on your repository.
When a GitHub Actions workflow is running, you should see some checks in progress, like the screenshot below.
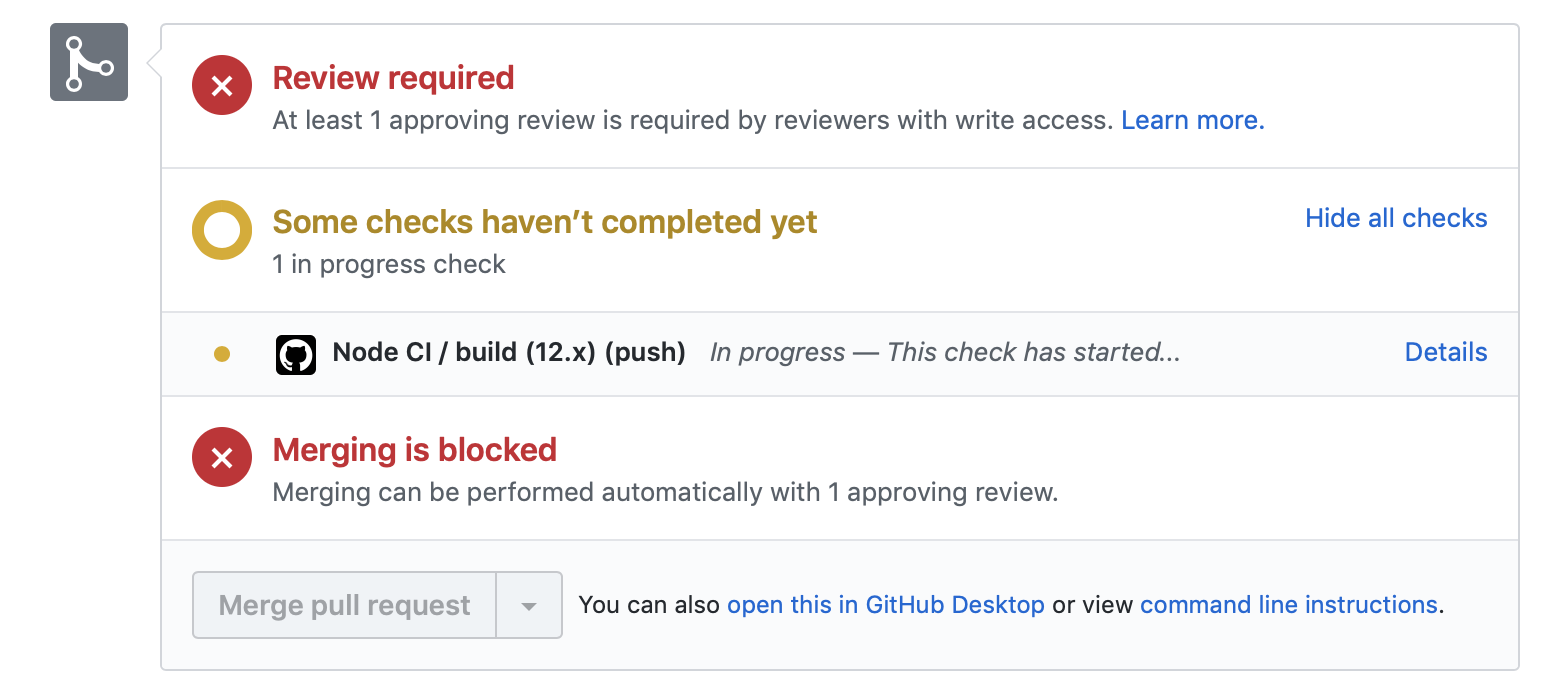
You can follow along as GitHub Actions runs your job by going to the Actions tab or by clicking on "Details" in the merge box below.
When the tests finish, you'll see a red X ❌ or a green check mark ✔️ in the merge box. At that point, you'll have access to logs for the build job and its associated steps.
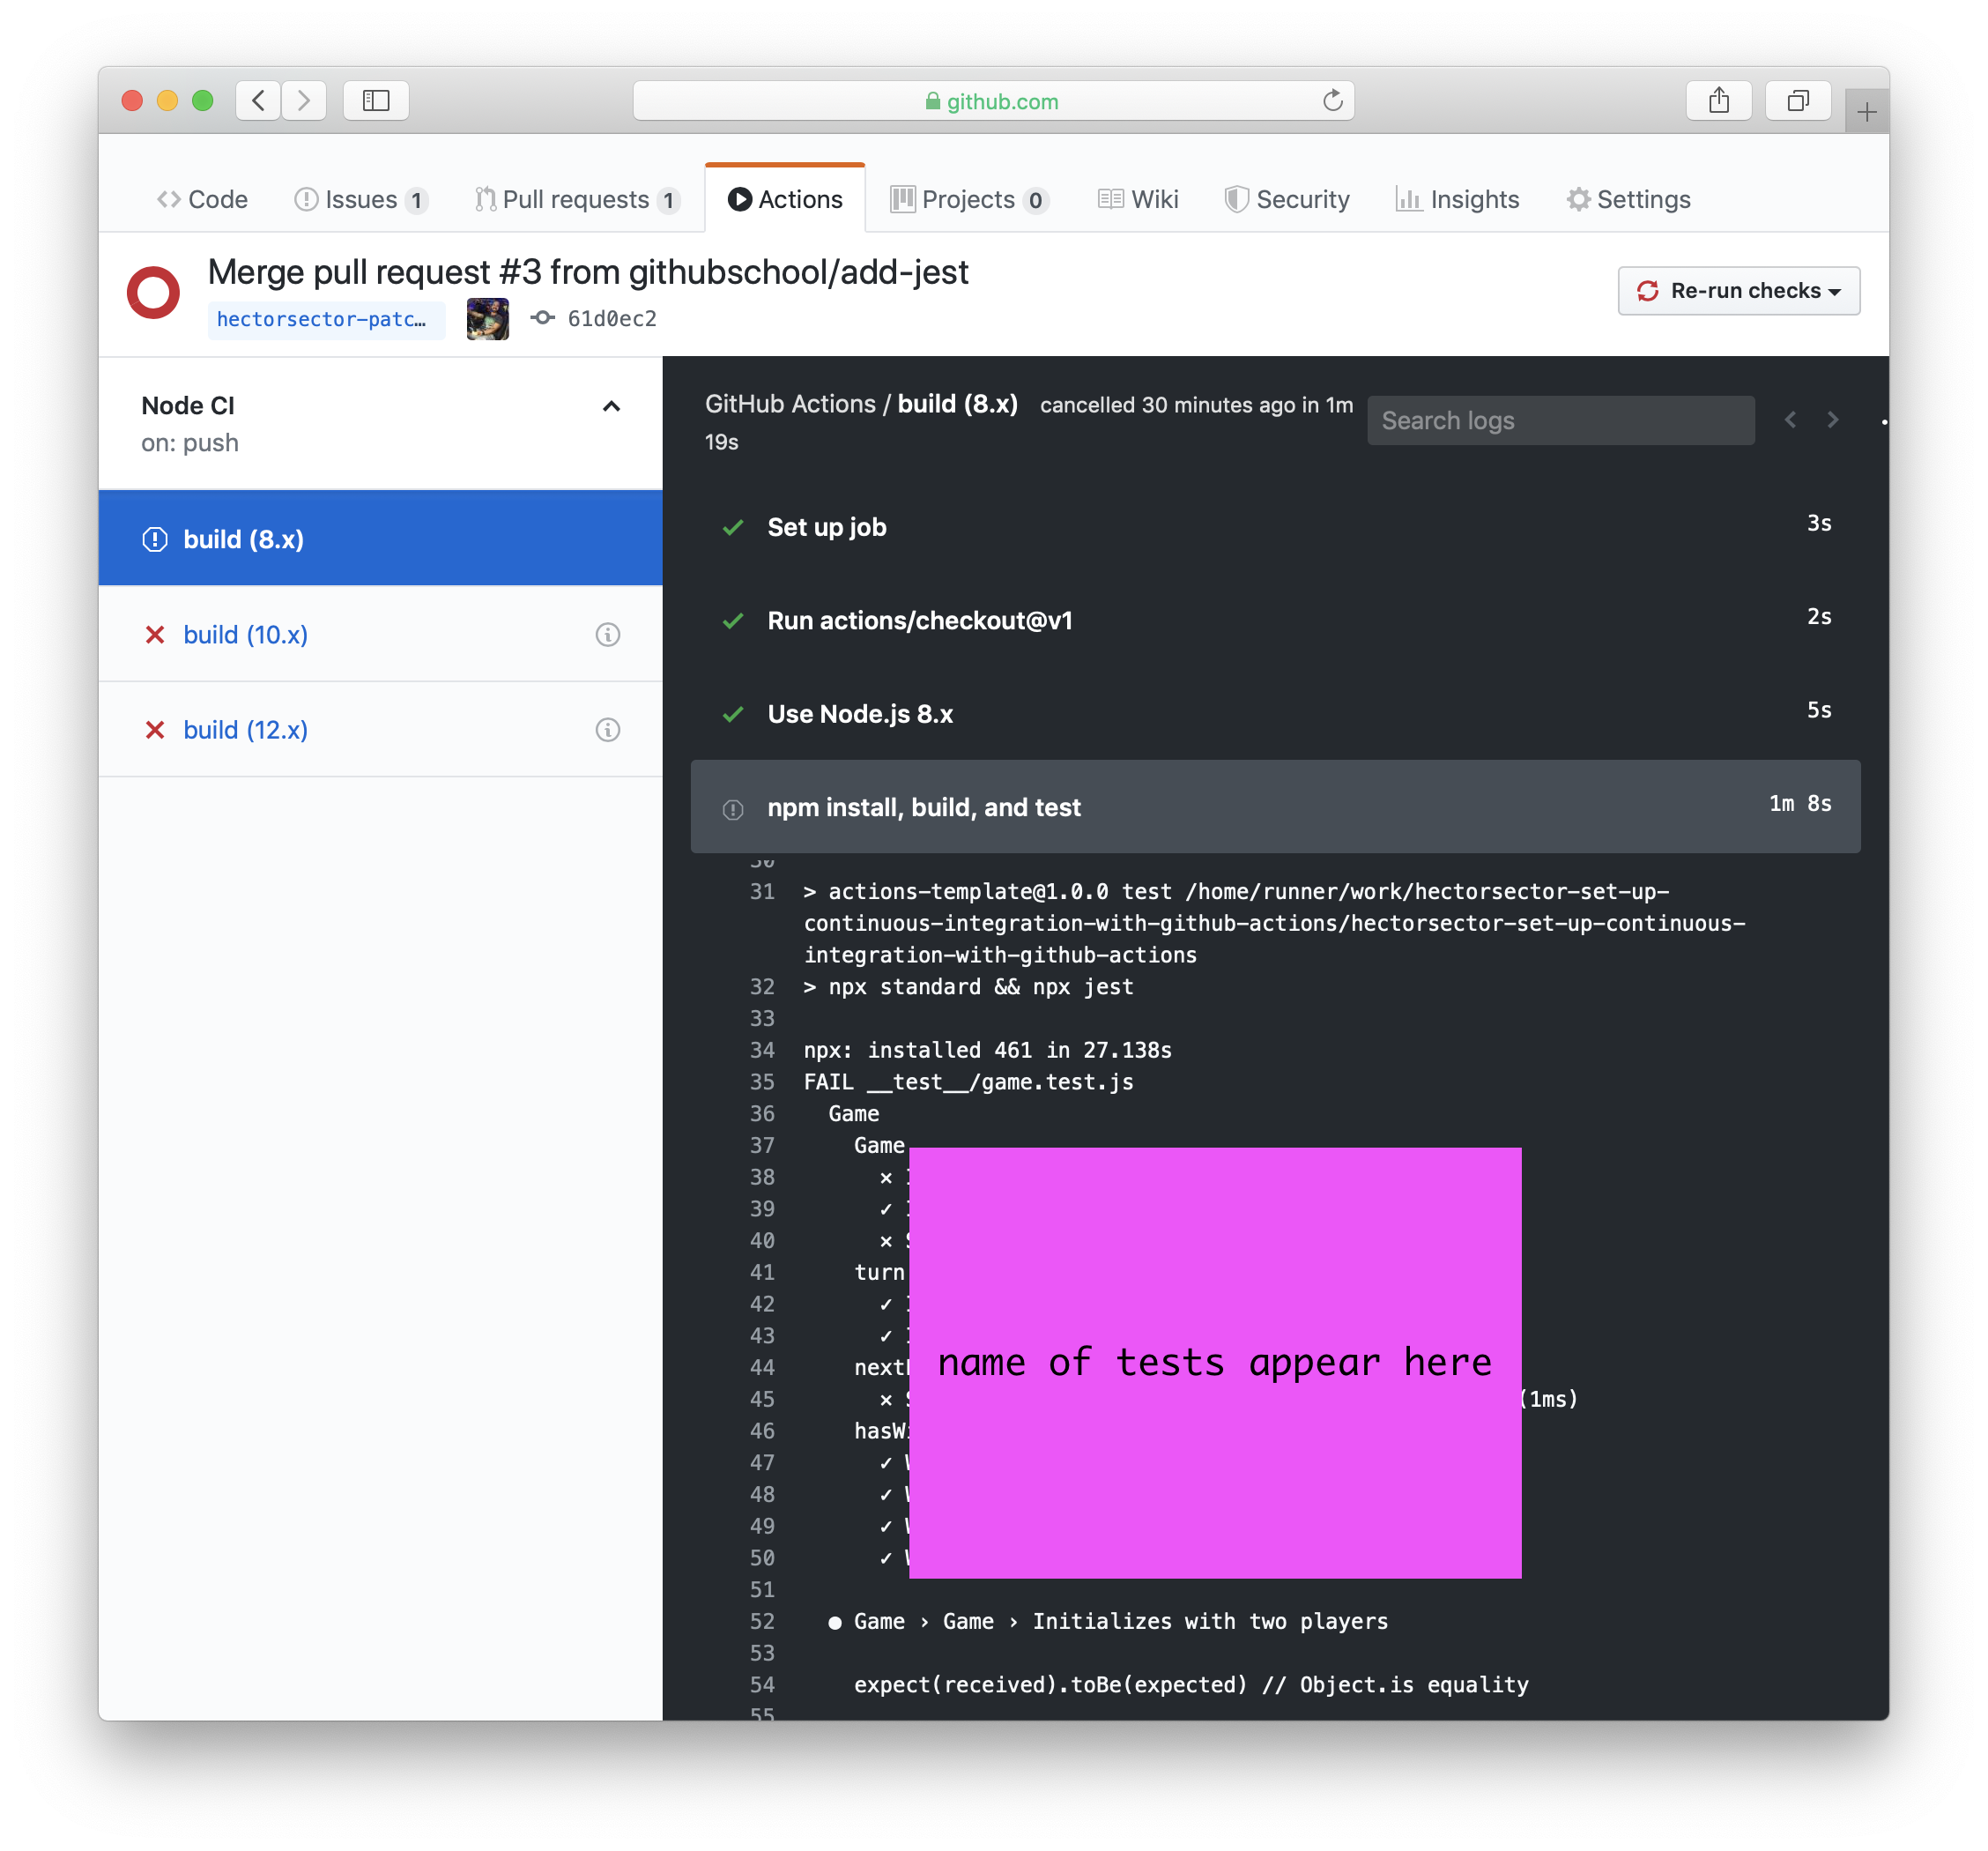
By looking at the logs, can you identify which tests failed? To find it, go to one of the failed builds and scrolling through the log. Look for a section that lists all the unit tests. We're looking for the name of the test with an "x".
If the checks don't appear or if the checks are stuck in progress, there's a few things you can do to try and trigger them:
- Refresh the page, it's possible the workflow ran and the page just hasn't been updated with that change.
- Try making a commit on this branch. Our workflow is triggered with a
pushevent, and committing to this branch will result in a newpush. - Edit the workflow file on GitHub and ensure there are no red lines indicating a syntax problem.
- Update the code in the
cibranch to get the test to pass. You need to look something like this:_underscore_
- Commit changes.
- Wait about 20 seconds then refresh this page for the next step.
The workflow has finished running! ✨
So what do we do when we need the work product of one job in another? We can use the built-in artifact storage to save artifacts created from one job to be used in another job within the same workflow.
To upload artifacts to the artifact storage, we can use an action built by GitHub: actions/upload-artifacts.
- Edit your workflow file.
- Add a step to your
buildjob that uses theupload-artifactsaction.build: runs-on: ubuntu-latest steps: - uses: actions/checkout@v2 - name: Run markdown lint run: | npm install remark-cli remark-preset-lint-consistent npx remark . --use remark-preset-lint-consistent --frail - uses: actions/upload-artifact@main with: name: remark-lint-report path: public/
- Commit your change to this branch.
- Wait about 20 seconds then refresh this page for the next step.
Similar to the upload action to send artifacts to the storage, you can use another action built by GitHub to download these previously uploaded artifacts from the build job: actions/download-artifact. To save you time, we'll skip that step for this course.
Great job uploading test reports! 🥳
Take a look at the merge box, you'll notice you can merge this even though the review process hasn't been met.
Protected branches ensure that collaborators on your repository cannot make irrevocable changes to branches. Enabling protected branches also allows you to enable other optional checks and requirements, like required status checks and required reviews.
- Go to Branches settings. You can navigate to that page manually by clicking on the right-most tab in the top of the repository called Settings and then clicking on Branches.
- Click on Add rule under "Branch protection rules".
- Type
mainin Branch name pattern. - Check Require pull request reviews before merging.
- Check Require status checks to pass before merging.
- Check all build and test jobs that you'd like to see in the newly visible gray box.
- Click Create.
- Once you turn on branch protection, Actions can no longer push directly to
main. You'll need to open the next step on your own.
Almost there! ❤️
You can now merge your pull request!
- Click Merge pull request.
- Delete the branch
ci(optional). - Once you turn on branch protection, Actions can no longer push directly to
main. You'll need to open the "finish" on your own.
Congratulations friend, you've completed this course!

Here's a recap of all the tasks you've accomplished in your repository:
- We created an Actions workflow to lint our Markdown files.
- You caught an issue in a file and fixed the issue before it could make it to
main. - You learned how to use build artifacts for test reports.
- You enabled branch protections to require the workflow to pass before merging.
- Get more ideas of what you can do with awesome actions.
- We'd love to hear what you thought of this course in our discussion board.
- Take another GitHub Skills course.
- Read the GitHub Getting Started docs.
- To find projects to contribute to, check out GitHub Explore.
Get help: Post in our discussion board • Review the GitHub status page
© 2022 GitHub • Code of Conduct • CC-BY-4.0 License