使用多线程,一个回复,一个去处理图片OCR
Quickly develop a bot
⚠️ In order to facilitate the implementation of this tutorial, a reverse proxy tool (ngrok) is used. This tool is only suitable for the development and testing phase and cannot be used in the production environment. Before using it, you need to confirm whether it complies with the company's network security policy.
This example shows how to use the Open Platform's bot function to have a bot receive user messages and make replies. You can extend the event processing functions of bot based on this example.
Runtime environment
Prep work
-
In Developer Console, click Create custom app, then click the app name to go to the app details page.
-
Go to Credentials & Basic Info to obtain the
App IDandApp Secret, and then go to Event Subscriptions to obtain theEncrypt KeyandVerification Token. -
Pull the latest code to local and enter the corresponding directory.
git clone https://github.com/larksuite/lark-samples.git cd lark-samples/robot_quick_start/python -
Edit environment variables
Edit the app credential data in the
.envfile to real data.APP_ID=cli_9fxxxx00b APP_SECRET=EX6xxxxOF APP_VERIFICATION_TOKEN=cq3xxxxxxkUS ENCRYPT_KEY=The above parameters can be viewed in Developer Console. Encrypt Key can be empty.
Running with Docker
Ensure that Docker has been installed before running. You can choose to run your code either with Docker or locally.
Mac/Linux
sh exec.sh
Windows
.\exec.ps1
Running Locally
-
Create and activate a new virtual environment.
Mac/Linux
python3 -m venv venv
. venv/bin/activate
Windows
python3 -m venv venv
venv\Scripts\activate
Once activated, the terminal will display the virtual environment's name.
(venv) **** python % -
Install dependencies
pip install -r requirements.txt -
Run
python3 server.py
Complete the configuration and experience the bot
The messages received by the bot are all in the format of callback event request. Using the POST request method, they are sent to the server for processing. Once the local server is started, the callback event can't make requests to the intranet. The public network request URL must be configured.
Configuration involves the following two steps: Use the tool to penetrate the intranet, and go to the Event Subscriptions page to configure the public network request URL.
- Use the tool to expose the public network access portal for the local server. ngrok is used as an example here. If the local has not been installed, you can access ngrok, and complete the installation according to the guide.
-
Use the following commands to obtain the public network URL
Note: Before using a reverse proxy tool (ngrok), you need to determine whether it complies with the company's network security policy.
Note: Need to get the token value in ngrok in advance.
ngrok authtoken <token> // <token> needs to be replaced
ngrok http 3000
-
Go to Features > Bot to enable Using Bot.
-
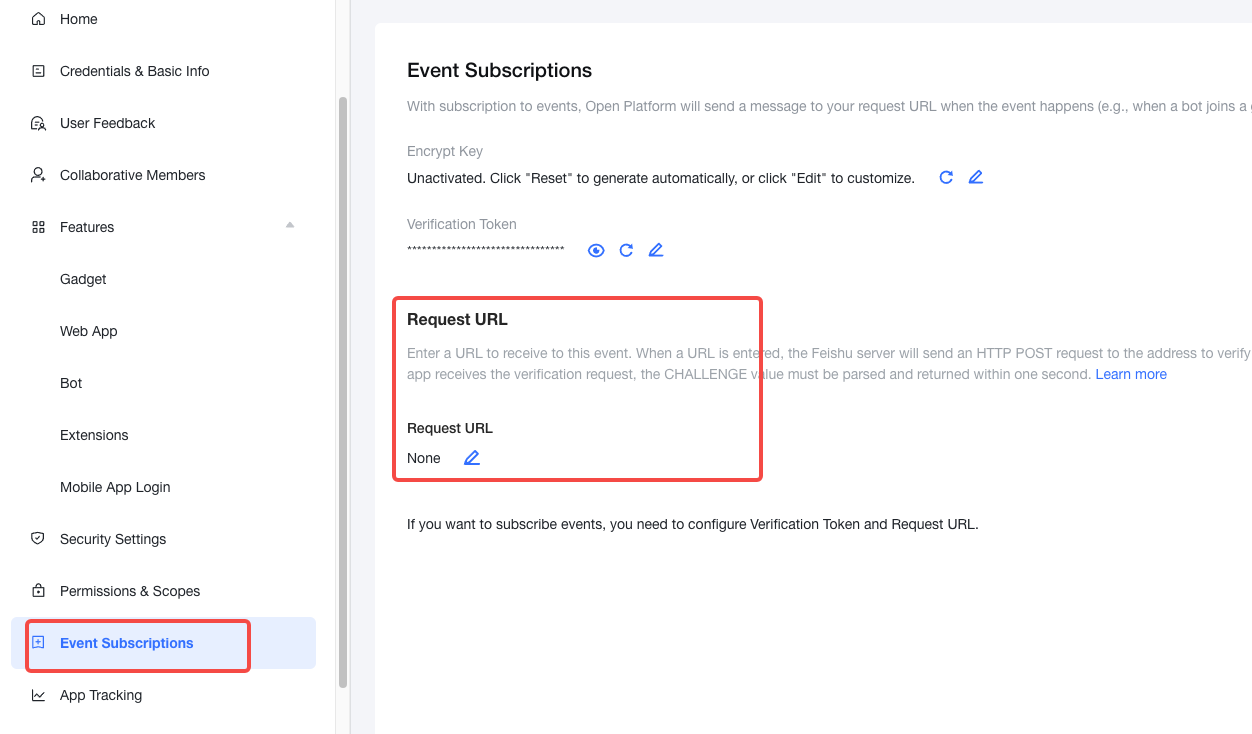
Go to the Event Subscriptions page to configure the Request URL. Use the tool to generate the domain and fill in the request URL, as shown in the figure below.
Note: Configuring the request URL and sending messages to the bot will both send requests to the backend server. During the request period, the server should be kept in enabled status.
-
Select the events listened to by the bot.
On the Event Subscriptions page, click Add event and select and subscribe to the
Message receivedevent. -
Add scopes to the bot
On the Permissions & Scopes page, search for the scopes you need, and add them to the bot.
-
Dependent scope list
- Read and send messages in private and group chats
- Read private messages sent to the bot
Note: The
Read private messages sent to the botscope is not displayed in Added events. You must switch to the Permissions & Scopes page to add it to your bot.
-
On the Version Management & Release page, click Create a version > Submit for release.
Note: The release involves scopes that need to be manually approved. You can use Test companies and users function to generate a test version and complete the test. Note: After release, you can check whether users are within the bot's availability range based on whether they can find the bot.
-
Open Feishu and search for the Bot name to begin experiencing the bot's auto replies.